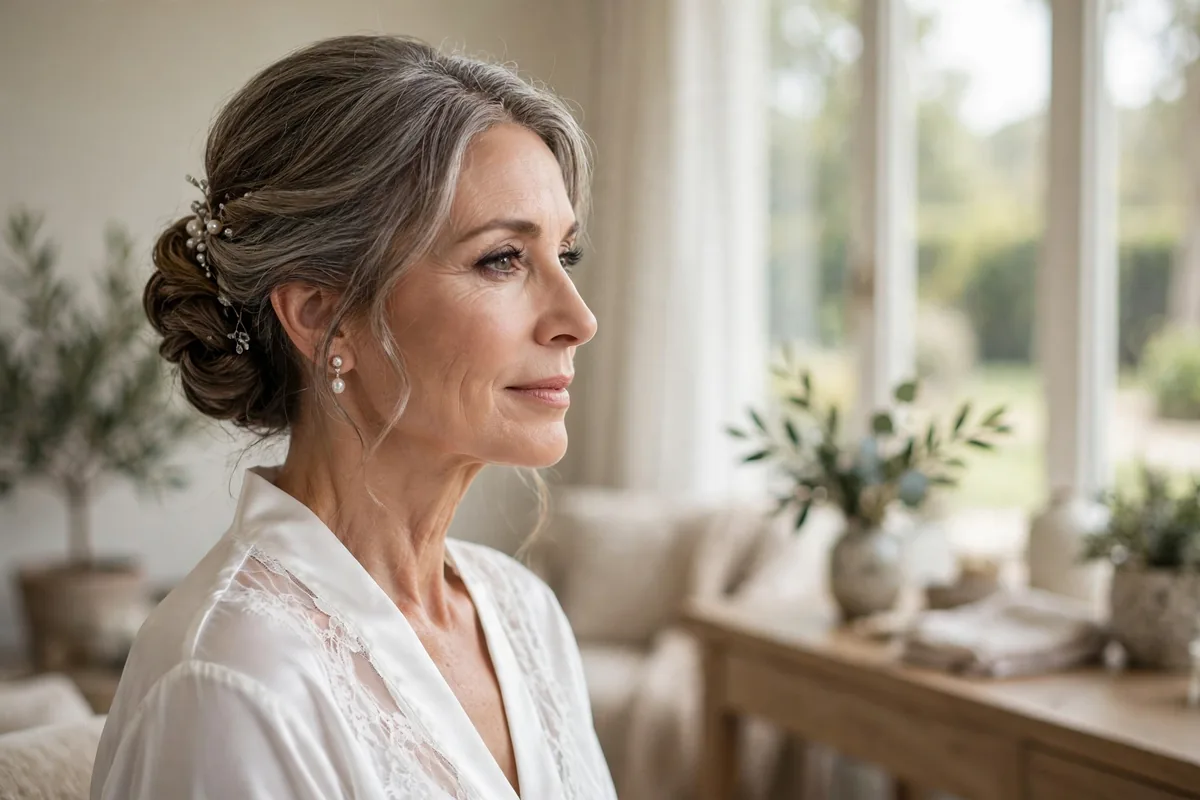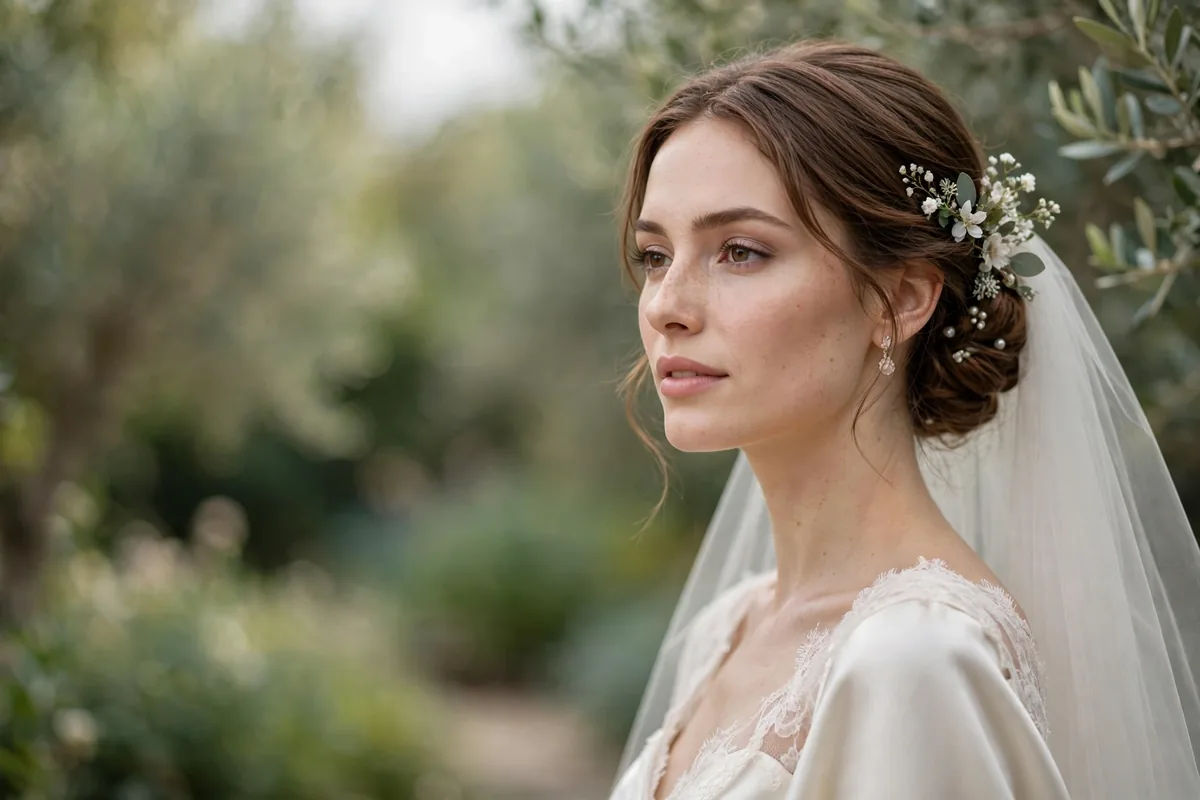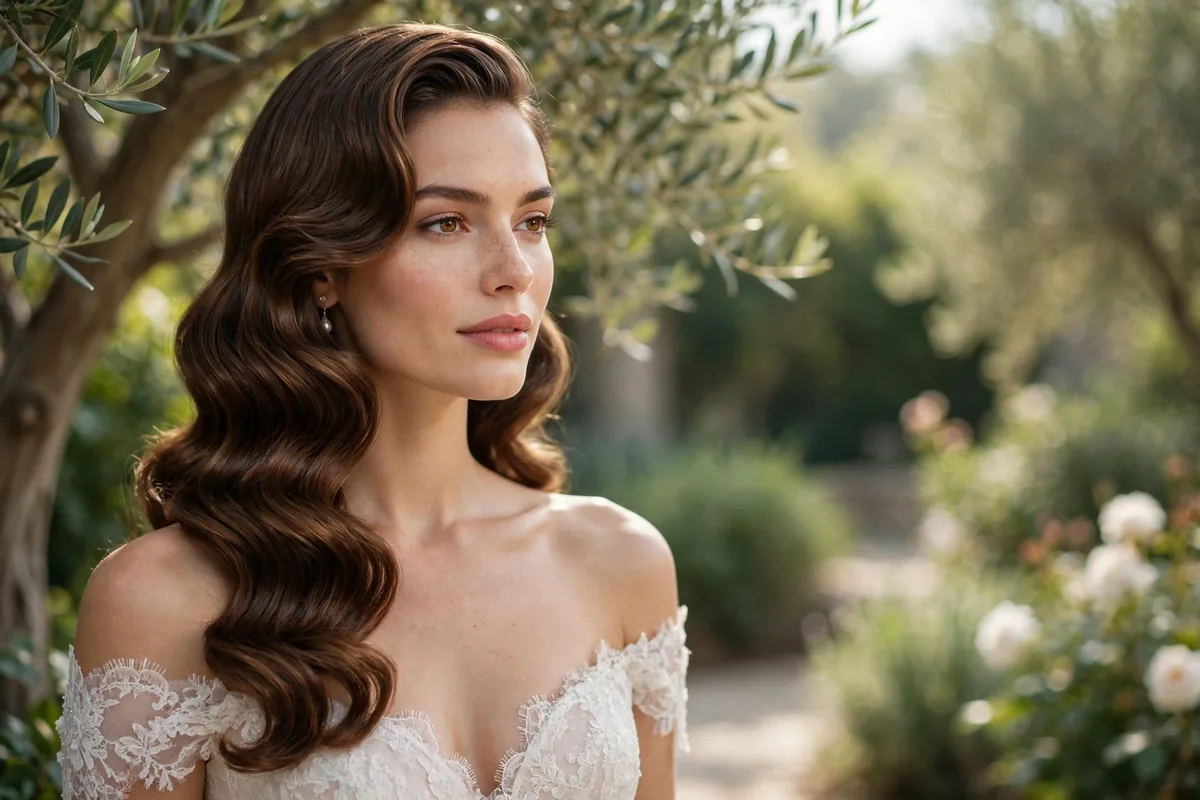
Nothing says bridal glamour like Hollywood waves — polished, timeless, and made to last.
Hollywood waves are the red-carpet hairstyle that never left: smooth, sculpted S-shaped waves with mirror shine, worn swept to one side like the screen sirens of the golden age. On a bride, they deliver instant old-Hollywood romance while photographing flawlessly from every angle. The look works with veils, tiaras, and statement earrings alike, and it suits every hair length from bob to waist-length.
What separates wedding-day waves from a pretty blowout is the setting. True Hollywood waves are built on a foundation — pin curls, rollers, or a disciplined curl-set pattern — then brushed into uniform waves and locked with the right products. This list covers twenty variations, each with the styling technique, the setting method, and the hold strategy that keeps the shape intact through vows, hugs, wind, and a full night of dancing.
Read through and save the styles that match your hair length, texture, and dress neckline, then bring them to your hair trial. Ask your stylist to test the hold method too — a style that looks perfect at noon but collapses by six is not a wedding style. Done right, these waves look as sculpted at midnight as they did walking down the aisle.
Classic Veronica Lake Wave
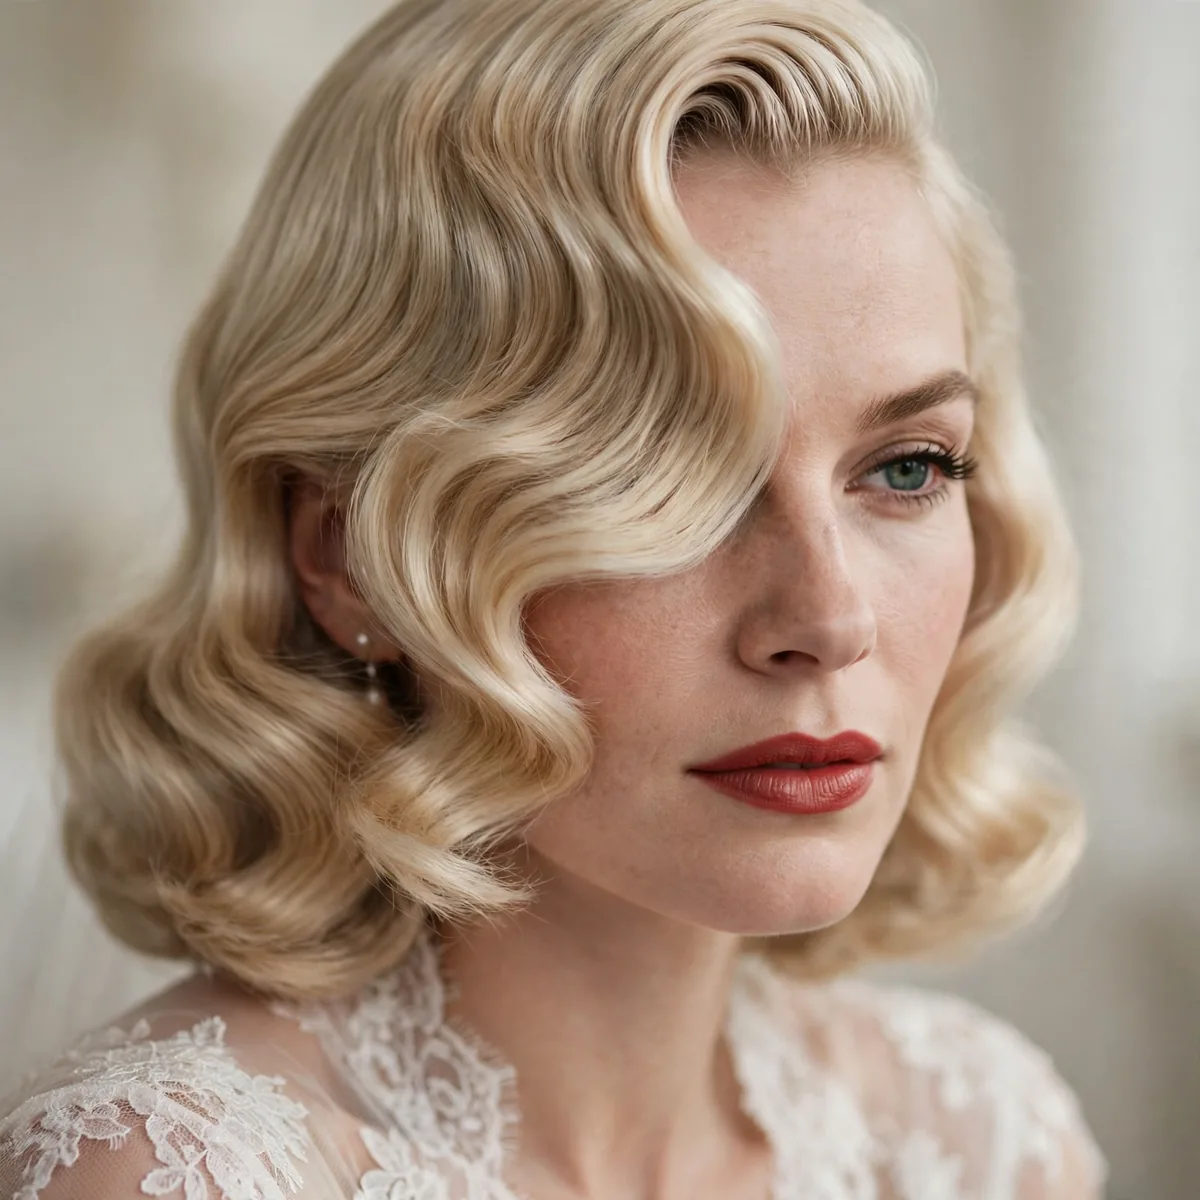
The Veronica Lake wave is the blueprint for all Hollywood glamour: a deep side part with a single sculpted wave cascading over one eye and tumbling past the shoulder. The shape is smooth and uniform, with each S-curve flowing into the next like poured silk. It is dramatic, mysterious, and impossibly elegant. On a bride, it turns the walk down the aisle into a movie entrance.
Build it on a pin-curl set: after blow-drying smooth, curl one-inch sections around a medium iron, then pin each curl to the scalp to cool completely. Once cool, remove pins and brush thoroughly with a boar-bristle brush until the curls merge into waves. Direct all the hair to one side and mold the signature wave over the forehead with a tail comb, securing hidden pins beneath.
This style demands length — at least past the shoulders — and works best on medium to thick hair that holds a set. Fine hair can wear it with added extensions for weight and hold. The deep side part flatters round and square faces by creating diagonal lines. Keep the makeup classic to match: red lip, winged liner, flawless skin.
Hold is everything here, so mist each section with firm-hold hairspray before curling and again after brushing. A pea-sized amount of smoothing serum on the ends adds the mirror shine. Tuck a mini hairspray and a few bobby pins in your clutch — if the face-framing wave loosens, re-mold it with your fingers and pin discreetly behind the ear.
Old Hollywood S-Wave
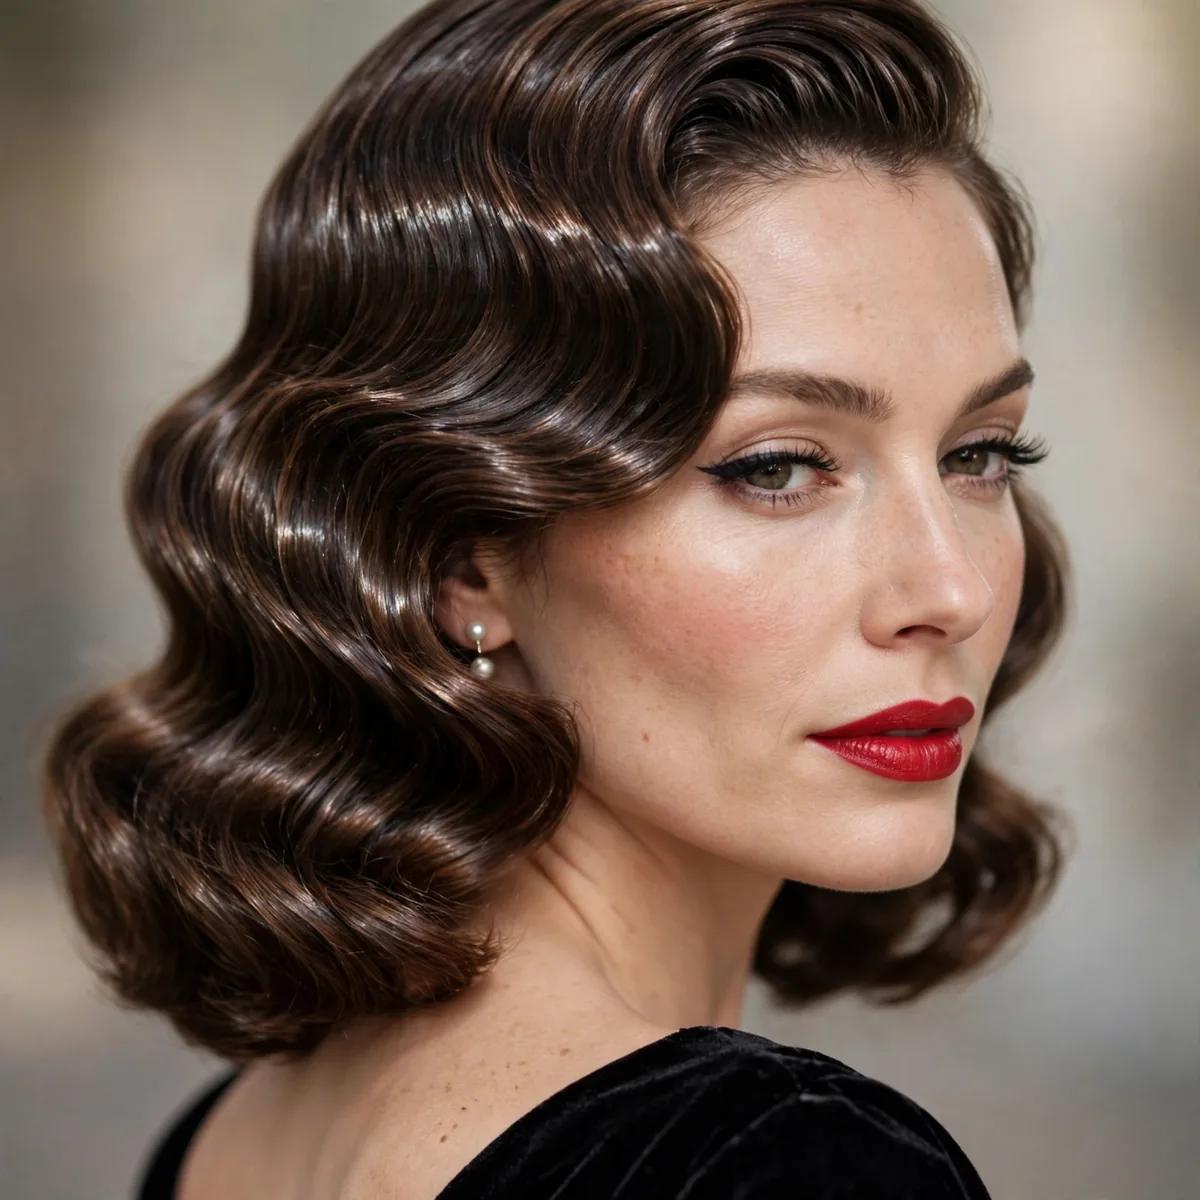
The S-wave is pure sculpture: continuous, uniform waves that ripple from roots to ends with not a single flyaway in sight. Created with a waving iron or the classic finger-wave technique, each curve is identical to the last, giving hair a liquid, almost metallic flow. It is the most formal of all the waves — red carpet at its most disciplined. Brides who love precision will adore this.
The modern method uses a deep waver or a large curling iron worked in alternating directions, then brushed smooth. The traditional method sets damp hair in finger waves with setting lotion and dries under a hooded dryer. Either way, the secret is tension: keep sections taut while shaping, then lock with a strong-hold setting spray. Finish by smoothing the surface with a shine spray.
S-waves suit medium-length to long hair best, as the pattern needs length to repeat. They are stunning on straight or wavy hair textures; very curly hair needs a full blowout first. The uniform pattern flatters oval and heart-shaped faces beautifully. This is the wave to choose if your dress is sleek and minimal — the hair becomes the statement.
Because the pattern is so precise, humidity is the enemy — an anti-humidity spray is mandatory, especially for outdoor ceremonies. Sleep is not a factor on the wedding day, but the morning set must be protected: keep hair pinned until the last possible moment. Carry a small brush for smoothing, not re-curling, since the set does the work.
Modern Soft Glam Wave
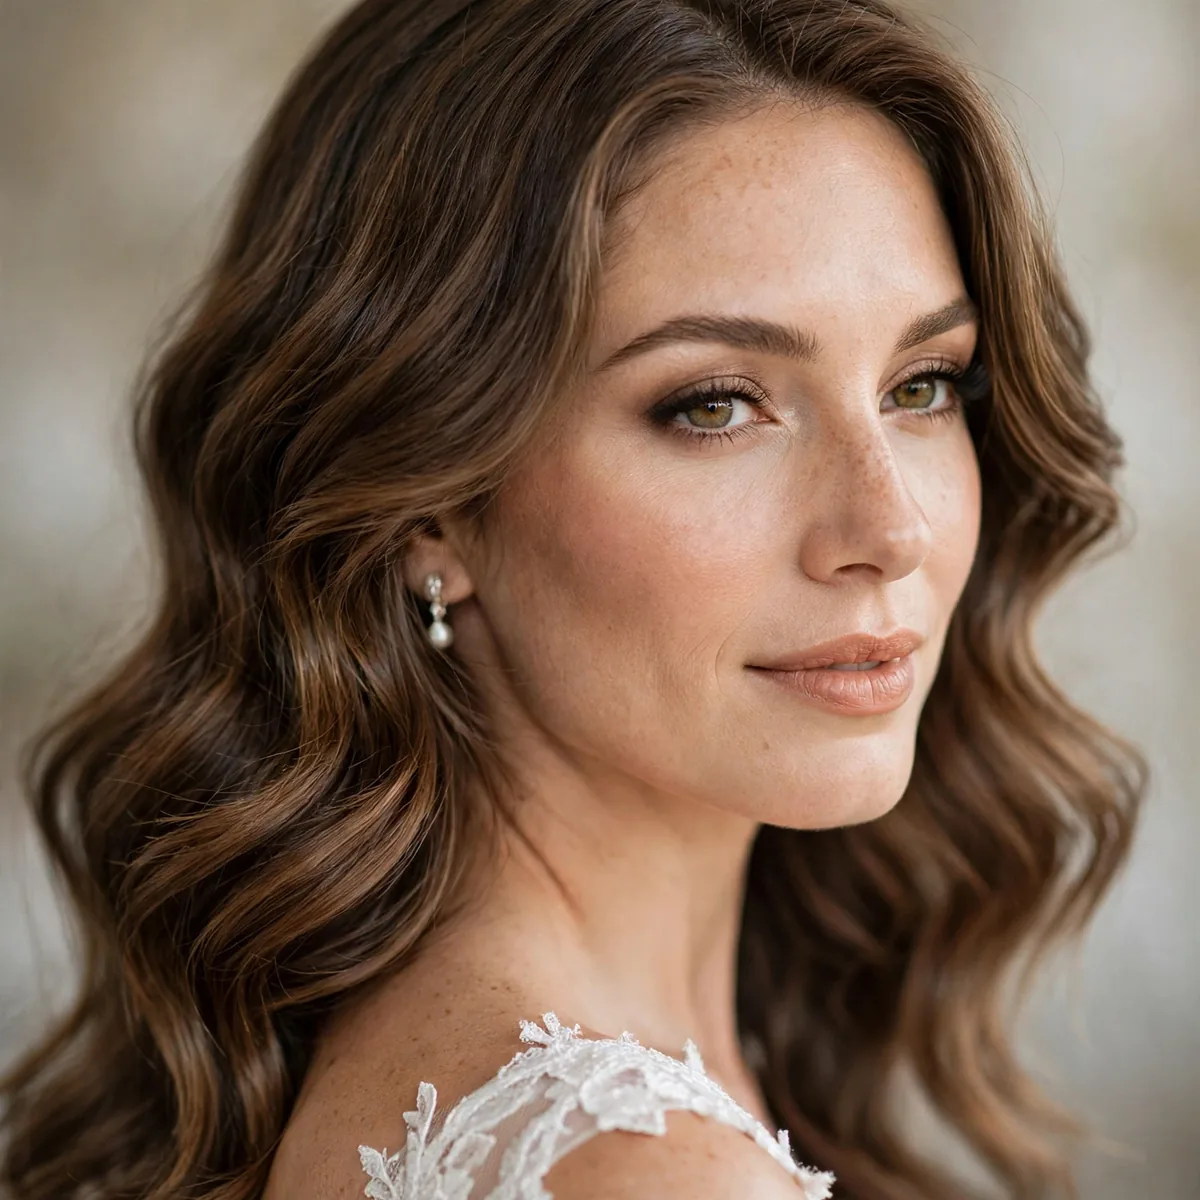
Modern Soft Glam is Hollywood waves relaxed for today: the same side-swept shape and shine, but with a looser, more touchable finish. Curls are set the classic way, then brushed out more thoroughly and broken up with fingers for movement. The result reads glamorous without stiffness — old Hollywood through a modern lens. It is the most requested bridal wave for a reason.
Curl two-inch sections away from the face with a one-and-a-quarter-inch iron, clipping each to cool. Once the whole head is set and cool, brush through with a paddle brush until the curls relax into waves, then use your fingers to arrange the front into a soft swoop. A light mist of flexible-hold spray keeps movement while preventing collapse. Shine serum on the ends finishes it.
This wave flatters literally everyone — it is the safe choice that never looks safe. It works on fine hair (the brushing creates fullness) and thick hair (the brushing tames volume). Round faces benefit from the deep side part; long faces from the softness around the cheeks. It pairs with any dress style, from ballgown to slip dress.
The relaxed finish means this wave survives the day better than stricter sets — a little movement just looks intentional. Refresh at the reception by flipping your head upside down, shaking gently, and re-smoothing the front swoop. A travel-size flexible spray in your clutch handles touch-ups without stiffness. This is the wave that still looks great in the last dance photos.
Deep Side-Part Glam
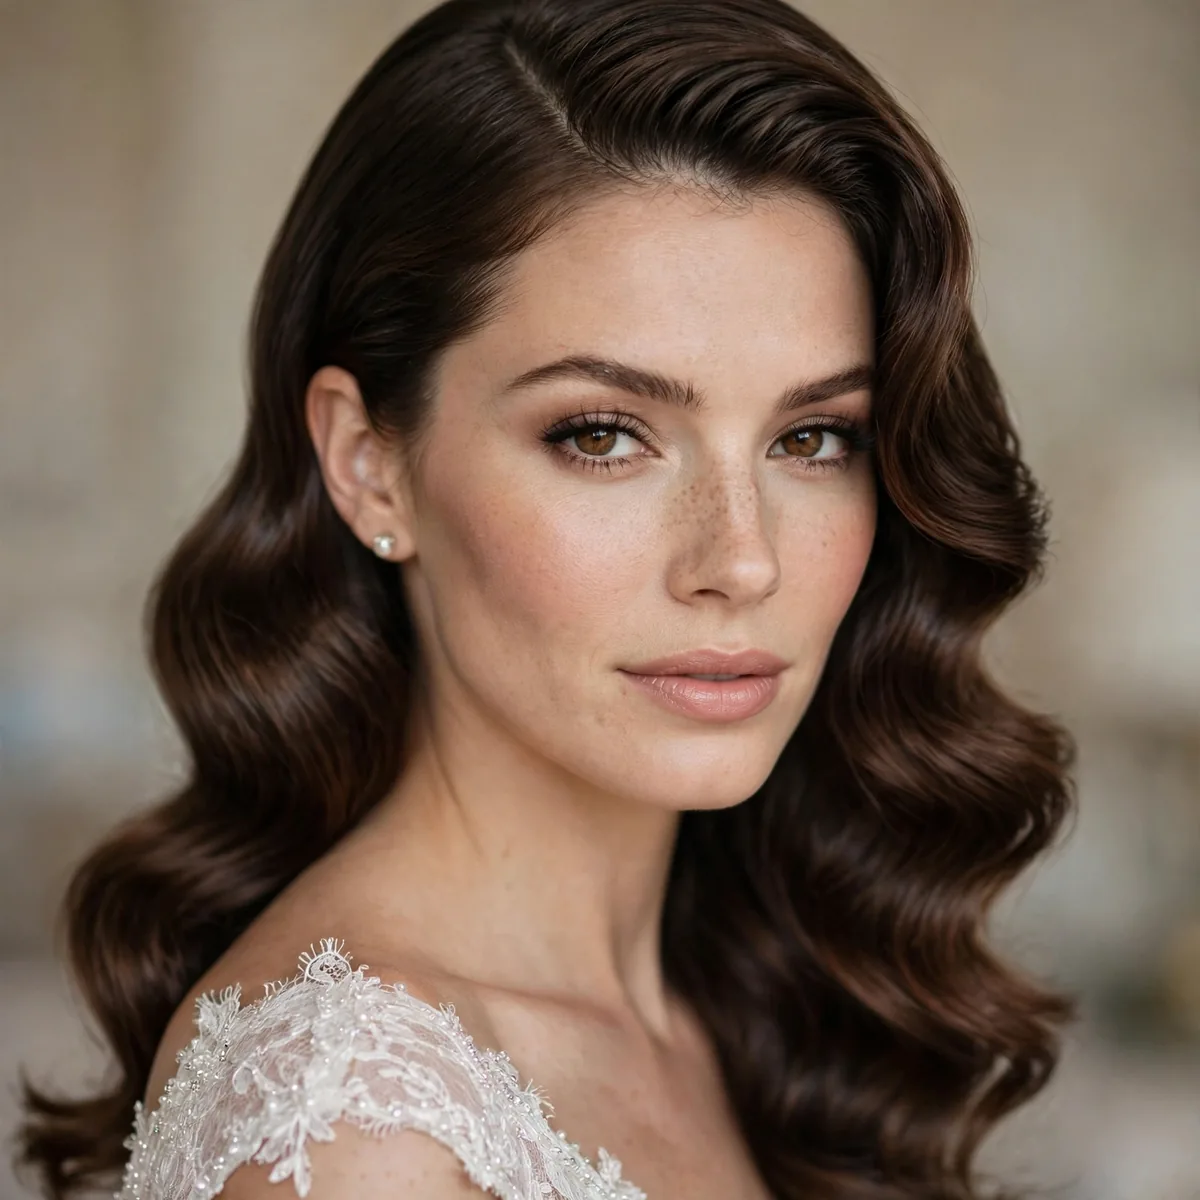
The deep side part is the fastest way to make any wave look expensive. Parting hair dramatically to one side creates instant asymmetry, volume at the crown, and that sweeping curtain of hair over one shoulder. It lifts the whole style from pretty to editorial. Combined with polished waves, it is the definitive power-bride look.
Create the part while hair is damp: use a tail comb to draw a clean line from the hairline back, placing it above the arch of one eyebrow. Blow-dry the roots in the direction of the part to train them, using a little volumizing mousse at the crown. Then set waves as usual, directing everything away from the part. A flat bobby pin hidden under the fuller side anchors the sweep.
Deep parts flatter round faces by adding height and asymmetry, and they give fine hair the illusion of much more volume. Brides with cowlicks should set the part at the trial and train it for a week with nightly pinning. The fuller side beautifully frames statement earrings. This parting works with every wave variation on this list.
A deep part wants to migrate back to center all day, so anchor it: a light spray of strong-hold hairspray directly on the part line, plus one hidden pin. Check it in the mirror after hugs — well-wishers lean on the fuller side. If it shifts, re-draw with a comb and re-pin in seconds. The drama is worth the maintenance.
Vintage Pin-Curl Set
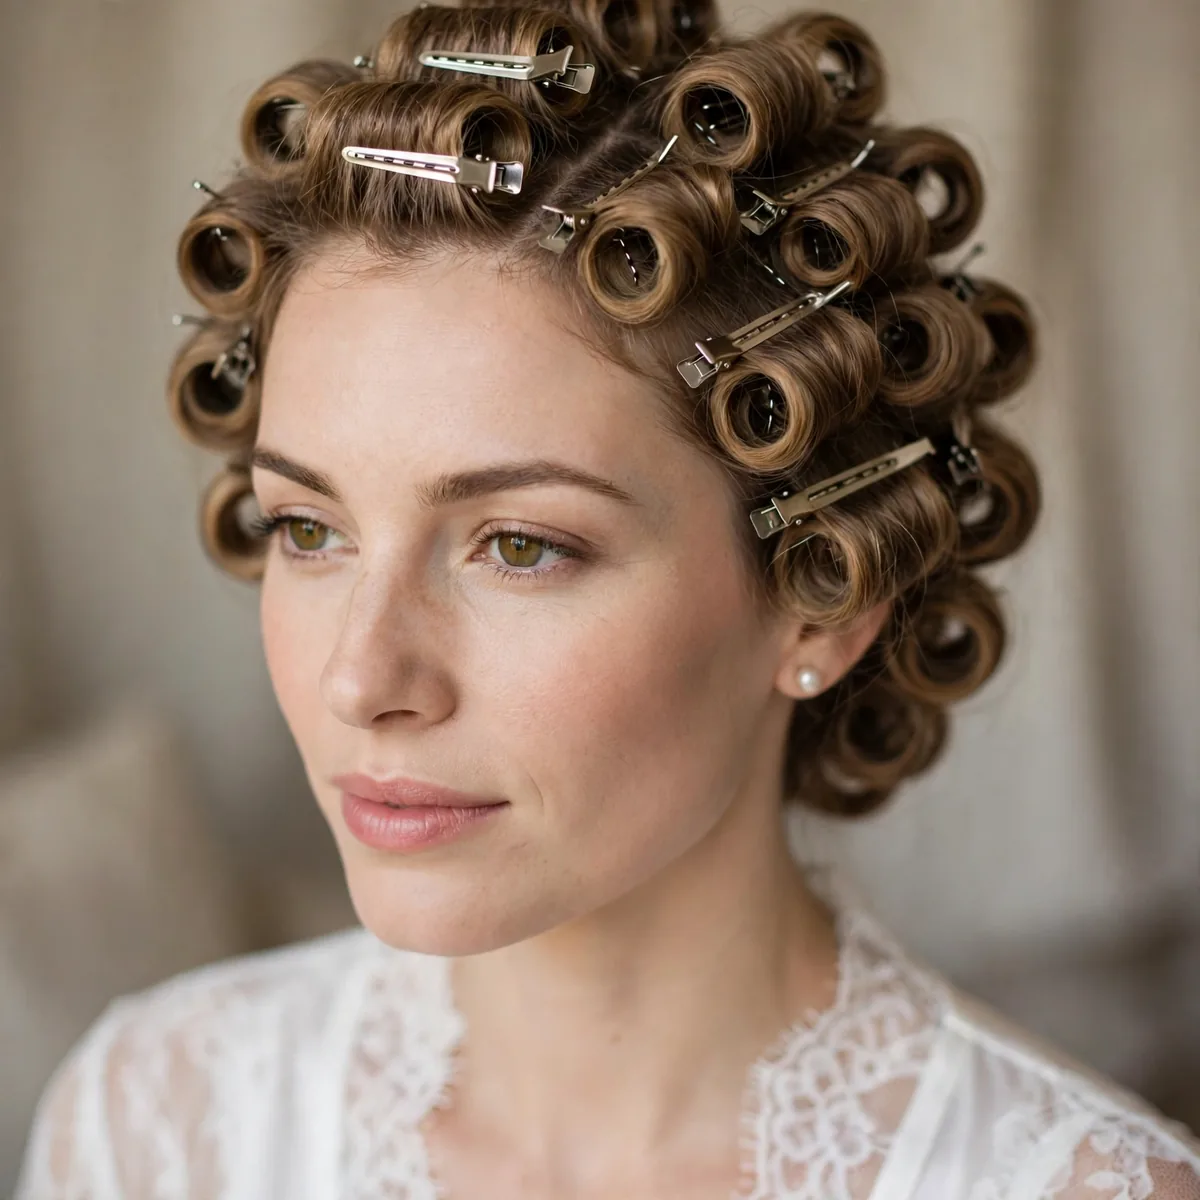
The pin-curl set is the original Hollywood wave foundation, and it still produces the longest-lasting results. Damp hair is wound into flat pin curls, set with lotion, and dried completely — creating a head of tight, springy curls that brush out into the smoothest, most uniform waves imaginable. It is labor-intensive and absolutely worth it. Nothing holds like a proper wet set.
Work in one-inch sections: comb smooth, wrap the ends around your finger, roll up to the scalp, and pin flat with two bobby pins in an X. Apply setting lotion to each section before rolling. Dry fully under a hooded dryer or overnight — damp spots will collapse the wave. Once bone dry, remove pins, brush thoroughly with boar bristles, and mold into waves with a tail comb.
Wet sets work on nearly all hair types, including resistant straight hair that drops curls by noon. Very short hair can still pin-curl, though the wave pattern will be tighter. This method is ideal for brides getting ready early — set the night before, sleep in a silk scarf, and brush out in the morning. The waves will outlast any same-day curling.
The overnight set is the ultimate wedding-morning time saver: wake up, brush out, mold, and go. Protect the set with a silk scarf, not cotton, to prevent frizz. In the morning, brush patiently — under-brushing leaves curls separated instead of waved. A final veil of strong-hold spray locks the sculpted finish for the entire day and night.
Brushed-Out Barrel Curls
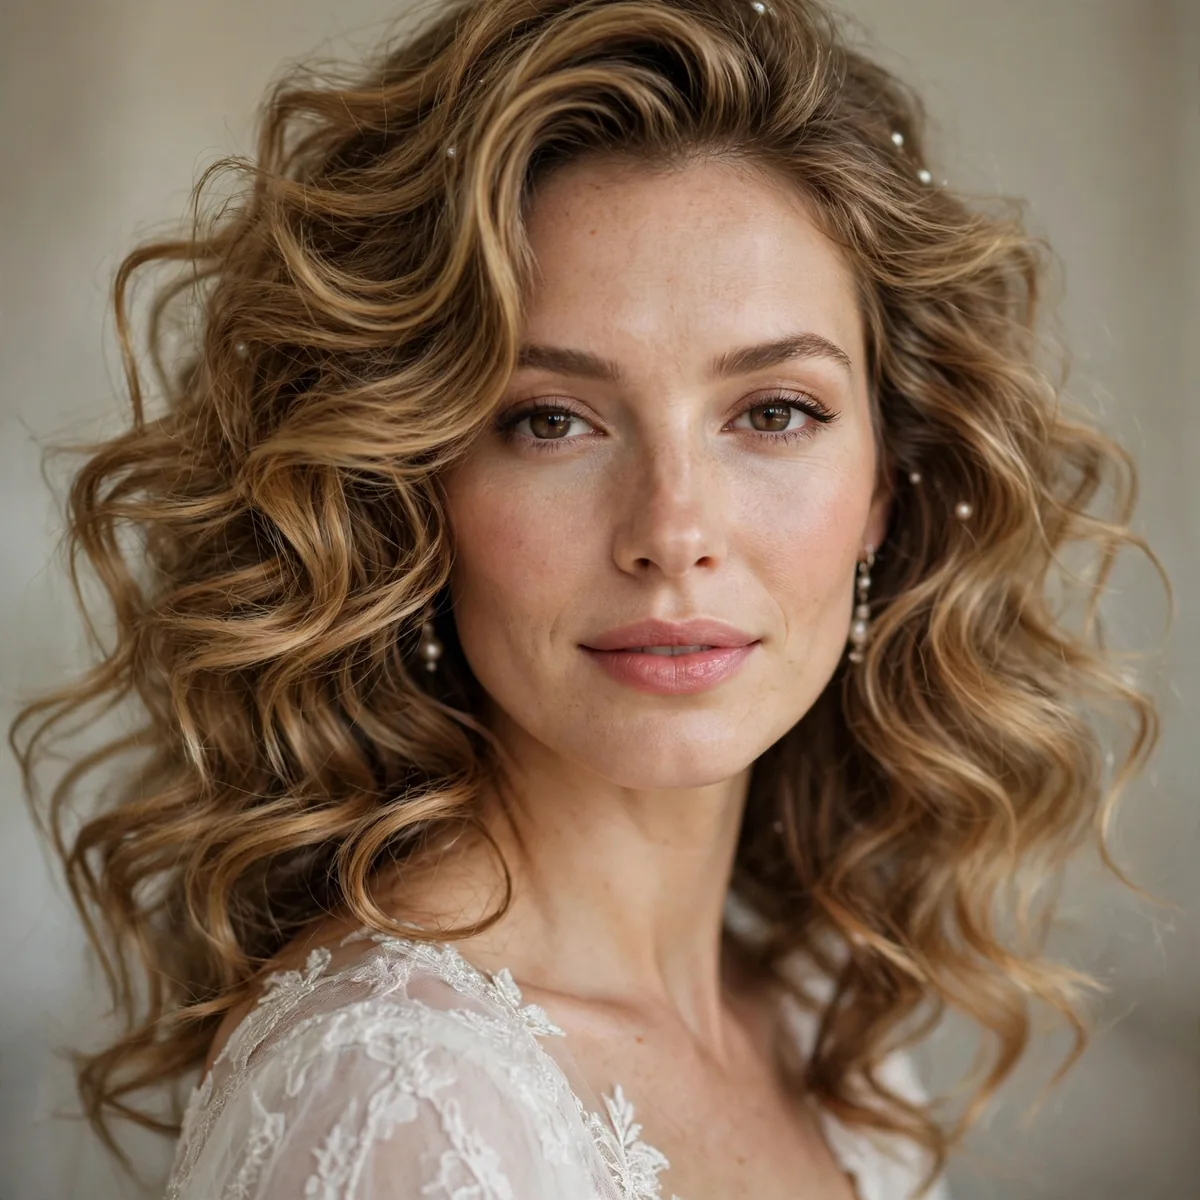
Brushed-out barrel curls deliver maximum volume with that signature Hollywood smoothness. Large sections are curled on a big barrel iron, cooled, then brushed into one continuous flowing wave with incredible body. The result is bigger and bouncier than classic sculpted waves — glamour with va-va-voom. Brides who want presence will love the drama.
Use a one-and-a-half-inch iron on two-inch sections, curling all in the same direction away from the face. Clip each curl to cool — this step builds the volume. Once cool, brush vigorously with a mixed-bristle brush: the first brushing looks alarming, all big and fluffy, but keep going. The curls will merge into smooth, voluminous waves. Direct the front into a deep side sweep.
Big hair flatters petite brides by adding presence and balances fuller figures beautifully. It needs length and density — fine hair should add a volumizing mousse and consider extensions. Round faces should keep the volume at the crown and ends rather than the sides. This is the wave for ballgowns and grand entrances.
Volume drops faster than wave pattern, so build the base well: mousse on damp roots, a root-lifting spray, and a cool shot from the dryer. Avoid heavy serums that weigh hair down; use a light shine mist instead. At the reception, flip hair upside down and massage roots to revive lift. Big waves photograph incredibly — they fill the frame beautifully.
Polished Marcel Waves
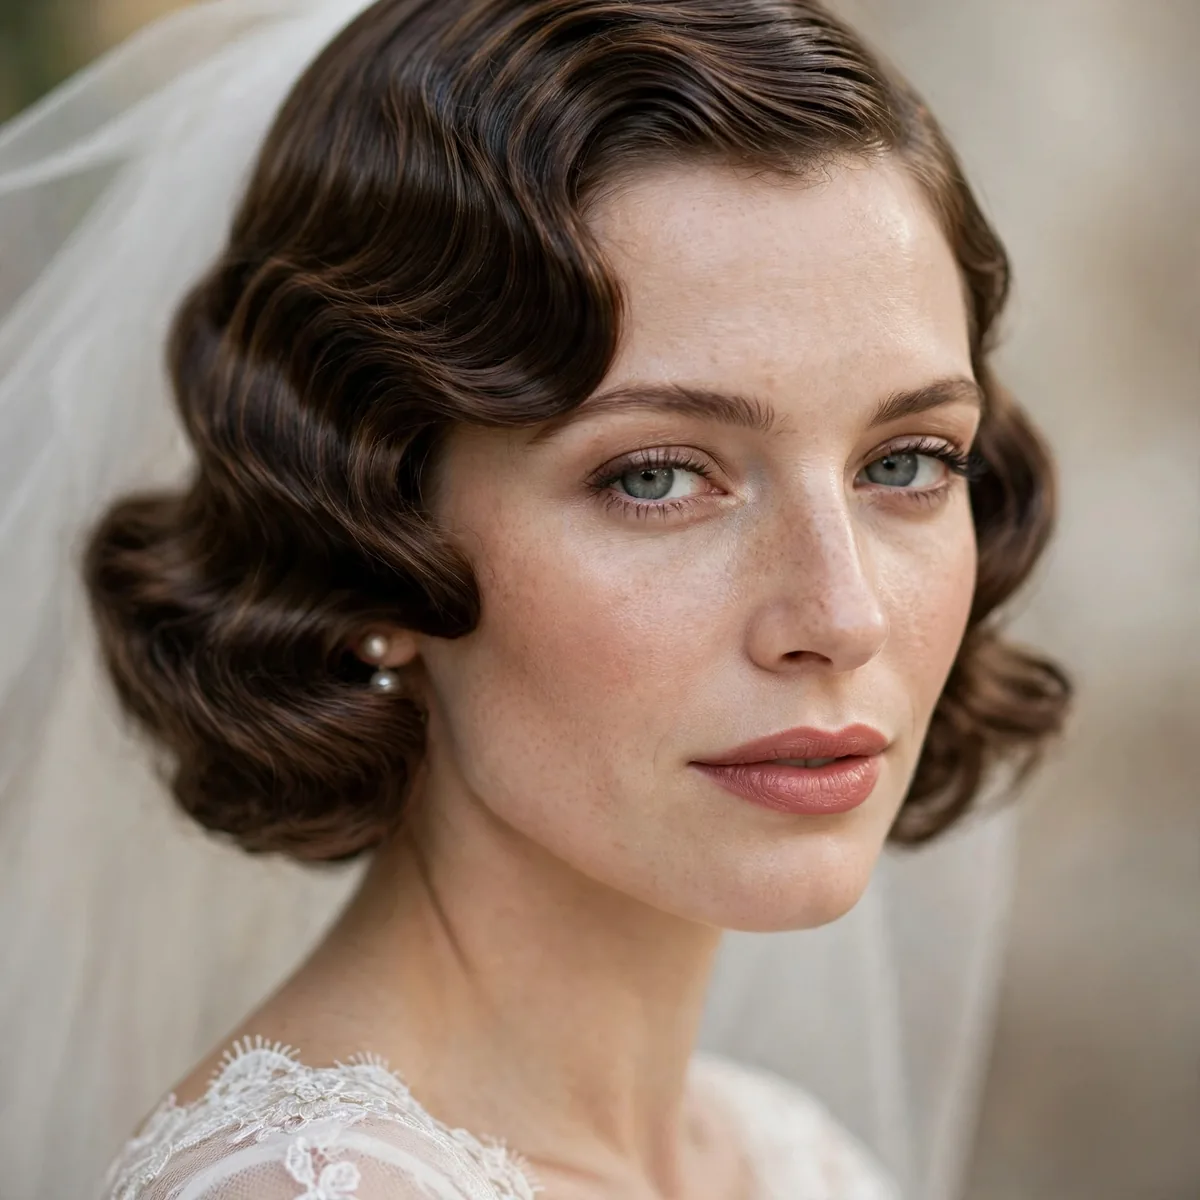
Marcel waves are the 1920s ancestor of Hollywood glamour — tight, uniform, deeply sculpted waves created with a marcel iron. The pattern is more compact and graphic than flowing S-waves, giving a striking vintage precision. On a bride, they deliver unforgettable Art Deco elegance. This is the choice for a Gatsby-themed or vintage-inspired wedding.
A marcel iron, with its rotating barrel, creates the signature dents: clamp, rotate, slide, repeat down each section. Alternatively, set the pattern with a triple-barrel waver for a similar effect with less skill required. Work in clean one-inch sections and keep the pattern consistent from roots to ends. The finish must be glass-smooth — any frizz breaks the graphic illusion.
Marcel waves suit medium-length hair beautifully, as the tight pattern needs less length to make an impact. They are stunning on dark hair, where the sculpted waves catch dramatic highlights and shadows. Oval and long faces wear the compact pattern well. This is a high-skill style — book a stylist experienced in vintage work and insist on a trial.
The sculpted finish is fragile: wind and humidity blur the crisp dents. An anti-humidity finishing spray is essential, and outdoor ceremonies need a backup plan. Touch-ups require re-ironing, so this style suits indoor weddings best. In photos, marcel waves are pure magic — every curve catches light like carved onyx.
Side-Swept Glamour Wave
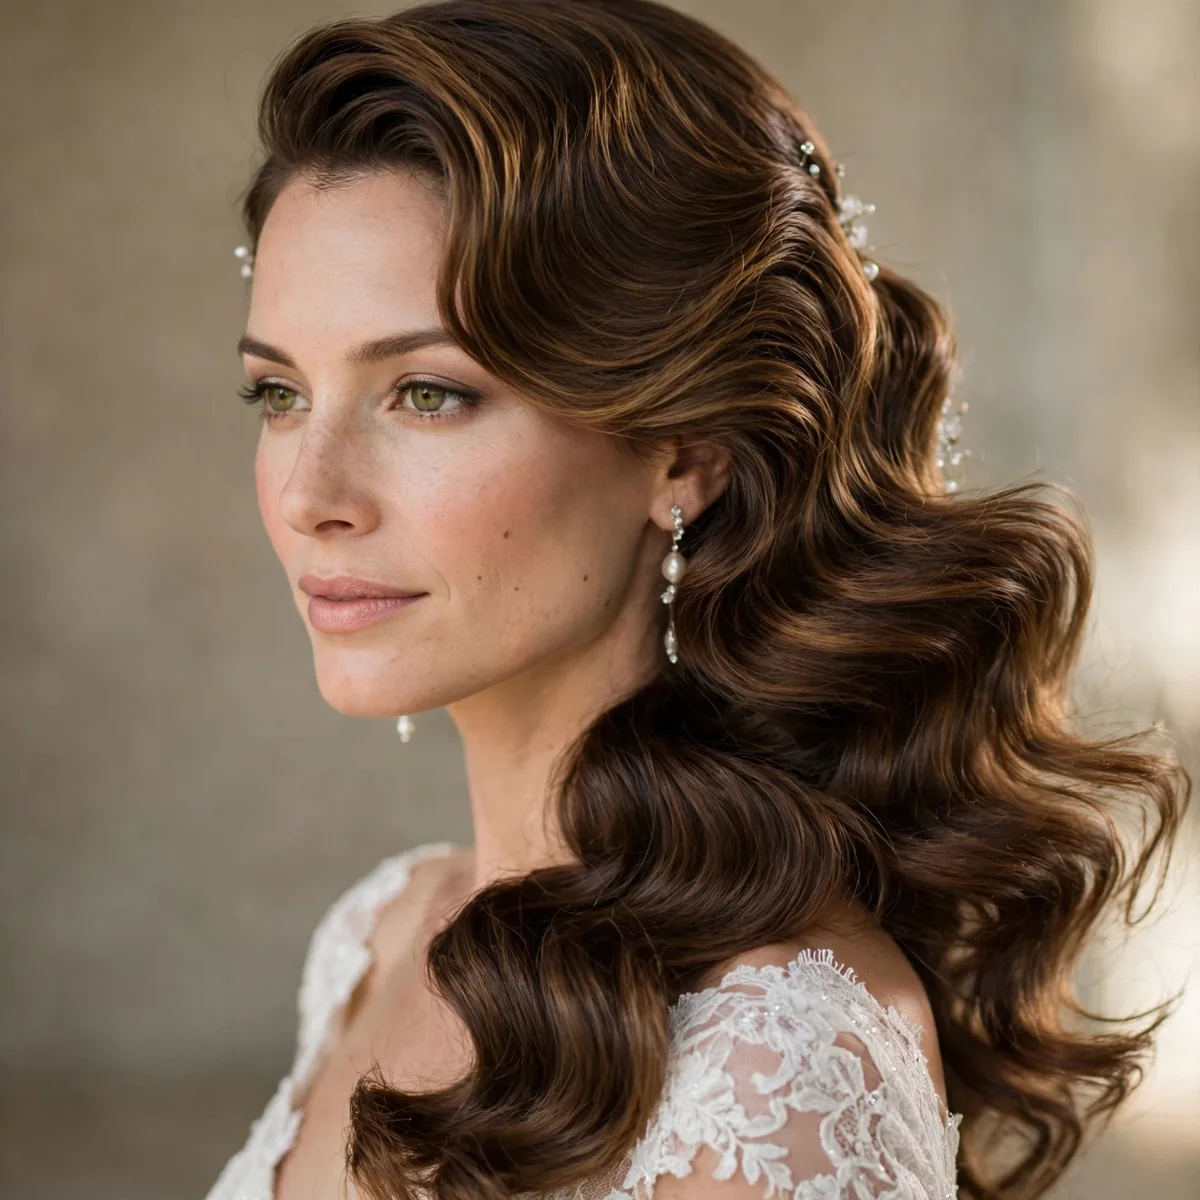
The side sweep takes Hollywood waves and drapes every strand over one shoulder — maximum romance, maximum shoulder-baring drama. All the waves cascade to one side, exposing the neck and back for stunning detail shots of the dress. It is sensual and red-carpet all at once. Brides with beautiful back or shoulder dress details should seriously consider this.
Set waves as usual, then gather everything to the chosen side. Secure the nape with flat bobby pins in a vertical line, hidden under the hair, creating an anchor the waves drape over. Smooth the top with a brush so the sweep looks intentional, not lopsided. Tuck the front behind one ear or let a face-framing wave fall free — both work.
The side sweep flatters every face shape and is especially gorgeous on brides with long necks and statement earrings. It needs enough length to drape — collarbone or longer. Fine hair benefits from texturizing spray at the anchor point for grip. This style photographs beautifully from the open side and creates gorgeous movement in video.
The anchor pins are the whole trick — without them, the sweep migrates back by the first dance. Use at least six pins and cross them for grip. A strong-hold spray over the nape area locks everything. Check the drape after hugging guests; a quick finger-comb restores it. This style holds remarkably well because gravity works with the drape, not against it.
Hollywood Wave Ponytail
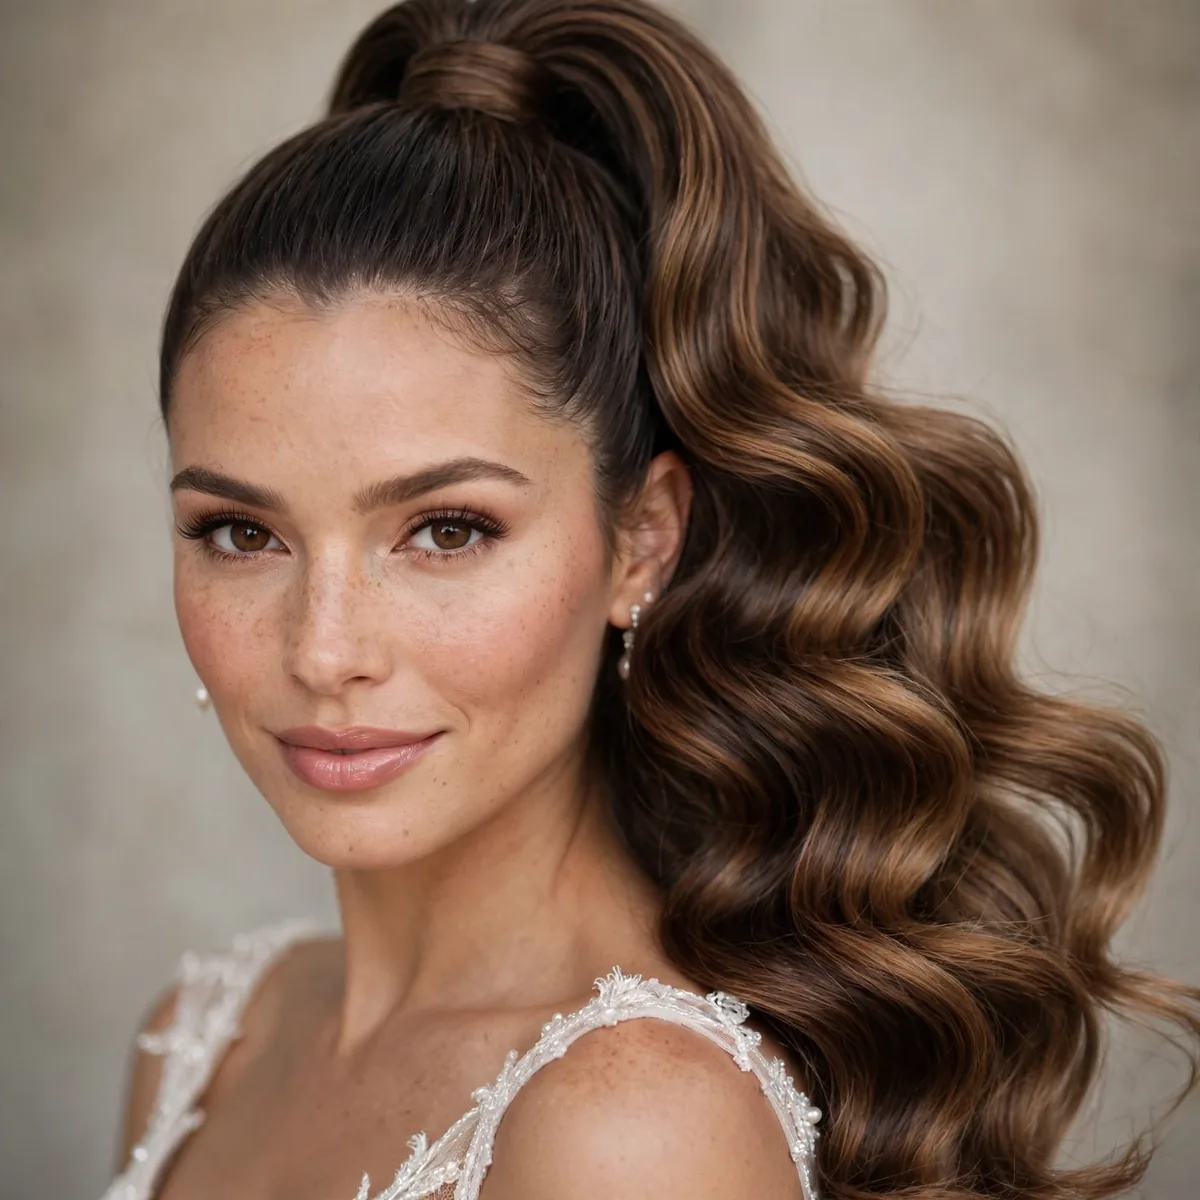
The Hollywood wave ponytail is glamour with practicality — all the polished waves, gathered into a high, swishing ponytail that survives dancing. The base is sleek and smooth, the tail a cascade of sculpted waves. It is modern red-carpet meets bridal, and it keeps hair off your neck for summer weddings. Brides who want to dance hard should look here.
Build volume at the crown first with backcombing and a cushion. Gather hair high, smoothing the top with a brush and a little gel for glass-like sleekness. Wrap a strand of hair around the elastic to hide it. Then curl the tail in sections with a large iron, cool, and brush into waves. Set the waves with spray so the tail moves as one fluid piece.
High ponytails flatter oval, round, and heart-shaped faces by lifting everything upward. They suit medium to long hair; extensions can add the dramatic length this style deserves. The lifted base has a subtle facelift effect that photographs beautifully. This is the ponytail for the bride who wants glamour without fussing over her hair all night.
Ponytails stay put better than loose waves, but the elastic must be strong — use two for very thick hair. Hide the elastics completely with the hair wrap and pins. The tail can be refreshed by re-curling just the ends at the reception. This style transitions perfectly from ceremony to dance floor with zero restyling needed.
Half-Up Hollywood Waves
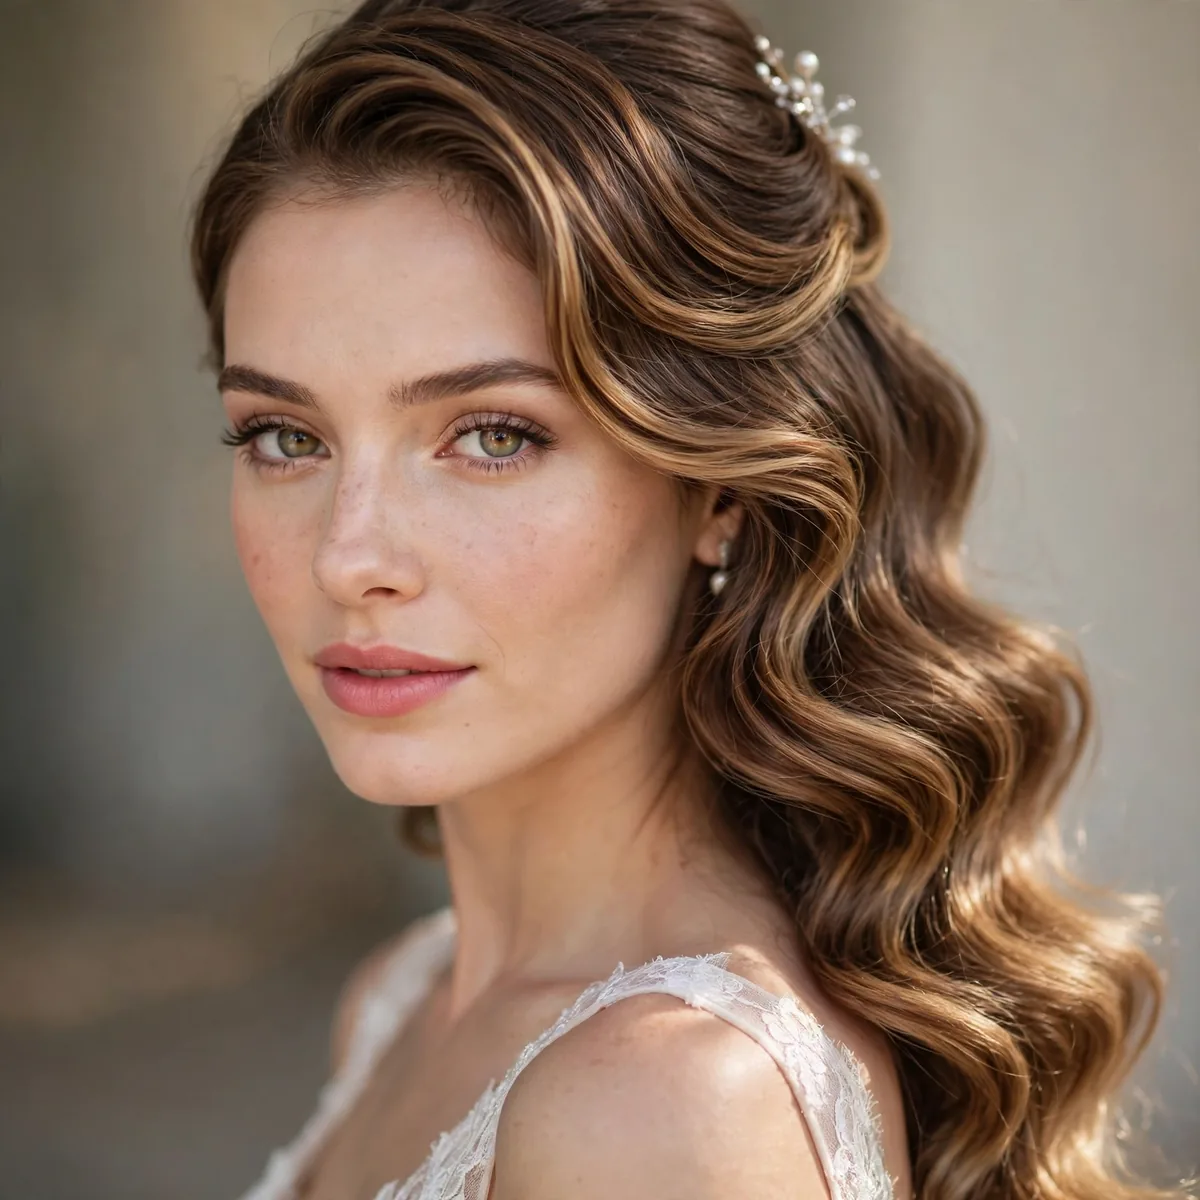
Half-up waves give you the best of both worlds: the face-framing polish of an updo with the romantic flow of loose Hollywood waves. The top section is swept back smoothly — sometimes with a little volume, sometimes sleek — while the rest cascades in sculpted waves. It keeps hair off your face for the ceremony while showing off the wave work. Universally flattering and endlessly wearable.
Section the top from temple to temple, smoothing it back with a brush. Add gentle volume with light backcombing at the crown, then secure with pins or a small clear elastic, hiding the fastening under a smoothed layer. Set the remaining hair in waves as usual, directing them to fall forward over the shoulders. Blend the secured section into the waves so there is no visible divide.
Half-up styles suit every face shape and are ideal for brides who fidget with their hair — the front stays controlled. They work beautifully with veils, which anchor into the secured section, and with tiaras or combs placed at the divide. Medium to long hair shows this style best. It is also the most veil-friendly of all the wave styles.
The secured section must be truly secure — this is the anchor for everything. Use both pins and a light spray on the top section. The loose waves can be touched up independently of the updo. If the crown volume drops, a quick lift with a tail comb and a pin restores it invisibly. This style photographs beautifully from the back during the ceremony.
Tousled Vintage Wave
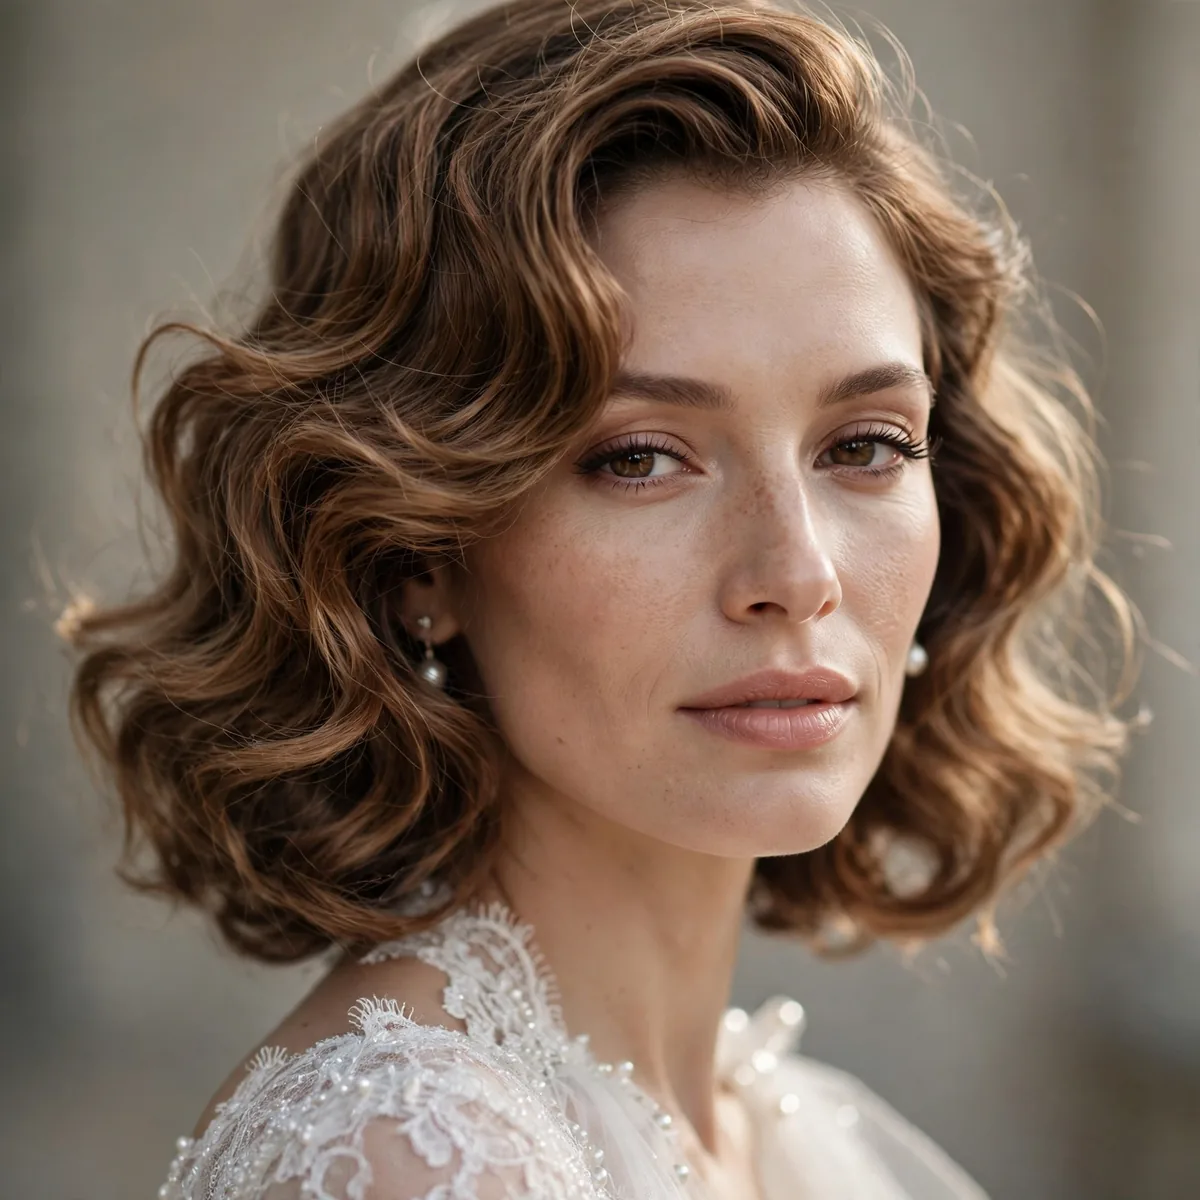
Tousled vintage waves are Hollywood glamour with the edges softened — the wave pattern is there, but it is broken up for a more relaxed, romantic finish. Think less sculpted siren, more starlet on her day off. The texture looks touchable and effortless while still reading as special-occasion hair. Perfect for the bride who finds classic waves too severe.
Set the waves with a medium iron, then — the key step — rake through them with your fingers and a wide-tooth comb instead of a brush. Mist with a texturizing spray rather than strong-hold, and scrunch gently to encourage separation. The waves should look like they are dissolving slightly at the ends. A deep side part keeps the vintage reference intact.
The tousled finish is forgiving on all hair textures, including natural waves that just need enhancing. It suits casual and outdoor weddings where strict sculpting would look out of place. Fine hair gains the illusion of thickness from the texture; thick hair looks lighter and more modern. This is the wave for boho-glam and garden weddings.
Tousled waves actually improve as the day goes on — movement just adds to the effect. Refresh with a shake and a light texturizing mist rather than re-curling. Avoid heavy sprays that would stiffen the softness. If humidity hits, the texture absorbs it gracefully instead of frizzing into failure. The most low-maintenance glamour on this list.
Sleek Gloss Waves
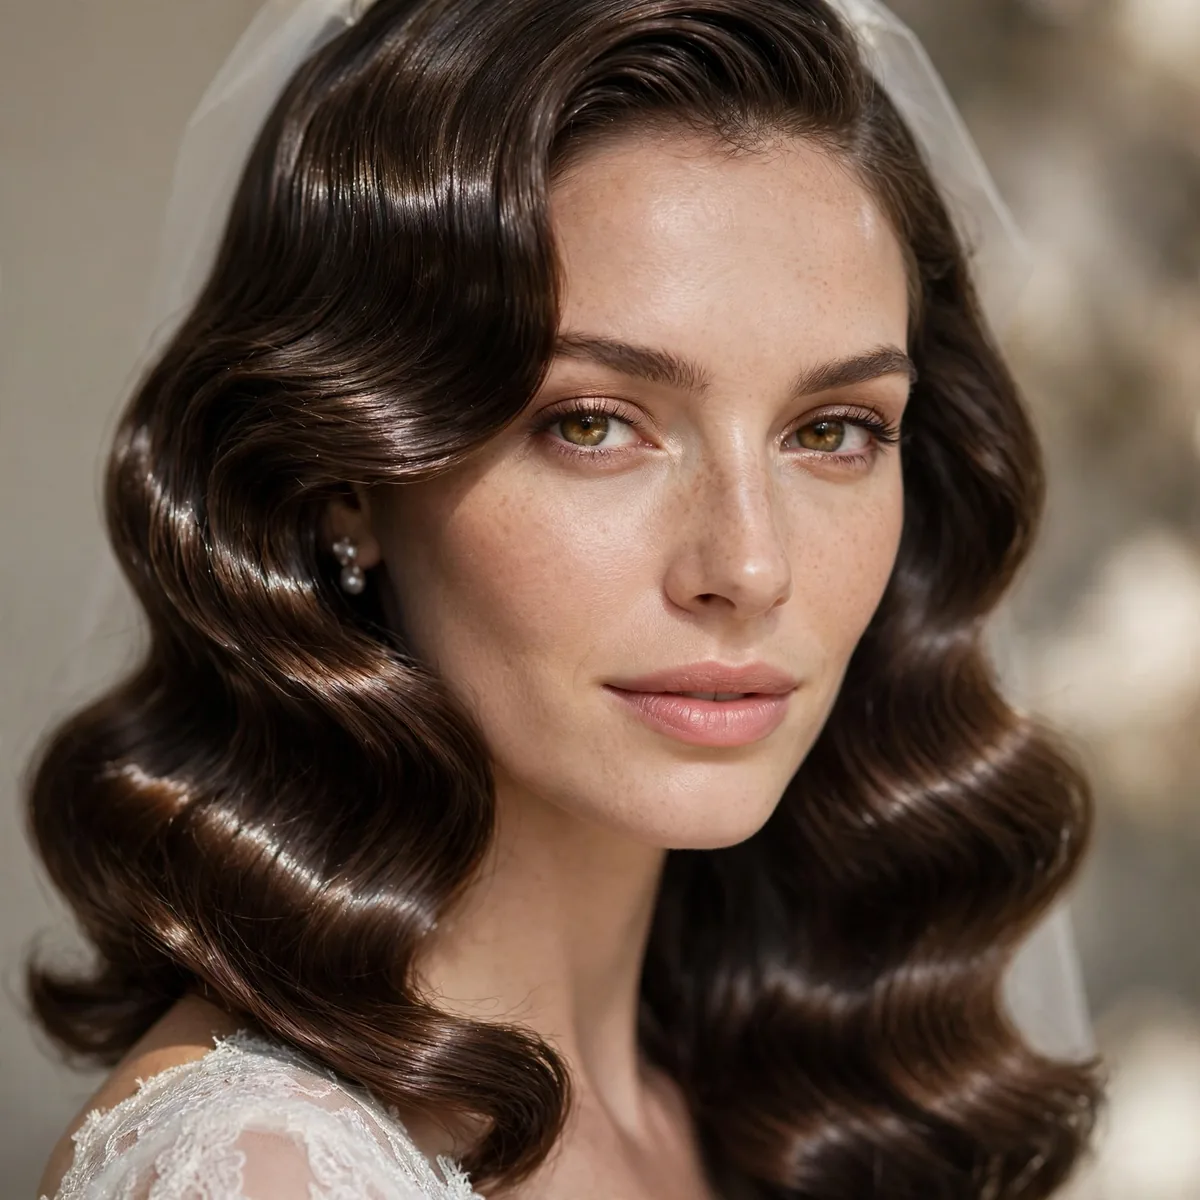
Sleek gloss waves are Hollywood glamour at its shiniest — every strand smoothed to a mirror finish, waves flowing like liquid. The emphasis here is on reflection: hair so glossy it bounces light in photos. It is minimal, expensive-looking, and quietly dramatic. Brides with healthy, well-conditioned hair can show it off like nothing else.
The foundation is a glass-smooth blowout: apply smoothing cream to damp hair, blow-dry with a paddle brush in sections, and finish with a flat iron pass on the lengths. Then create waves with a large iron, brushing them smooth rather than voluminous. The critical product is a high-shine serum or gloss spray applied to the surface — but sparingly, to avoid greasiness.
Glass hair suits straight and wavy textures best; very curly hair needs significant smoothing work. Dark hair shows gloss most dramatically, but all colors glow with the right products. This style demands healthy ends — schedule a trim and a gloss treatment two weeks before the wedding. It pairs beautifully with minimalist dresses and strong makeup.
Shine fades as the day wears on, so pack a travel shine mist for touch-ups — a light veil revives the reflection instantly. Avoid touching your hair, since fingers transfer oils that dull the finish unevenly. Humidity can puff sleek hair, so an anti-humidity spray underneath the gloss is wise. In photos, this hair looks like silk.
Retro Finger Waves
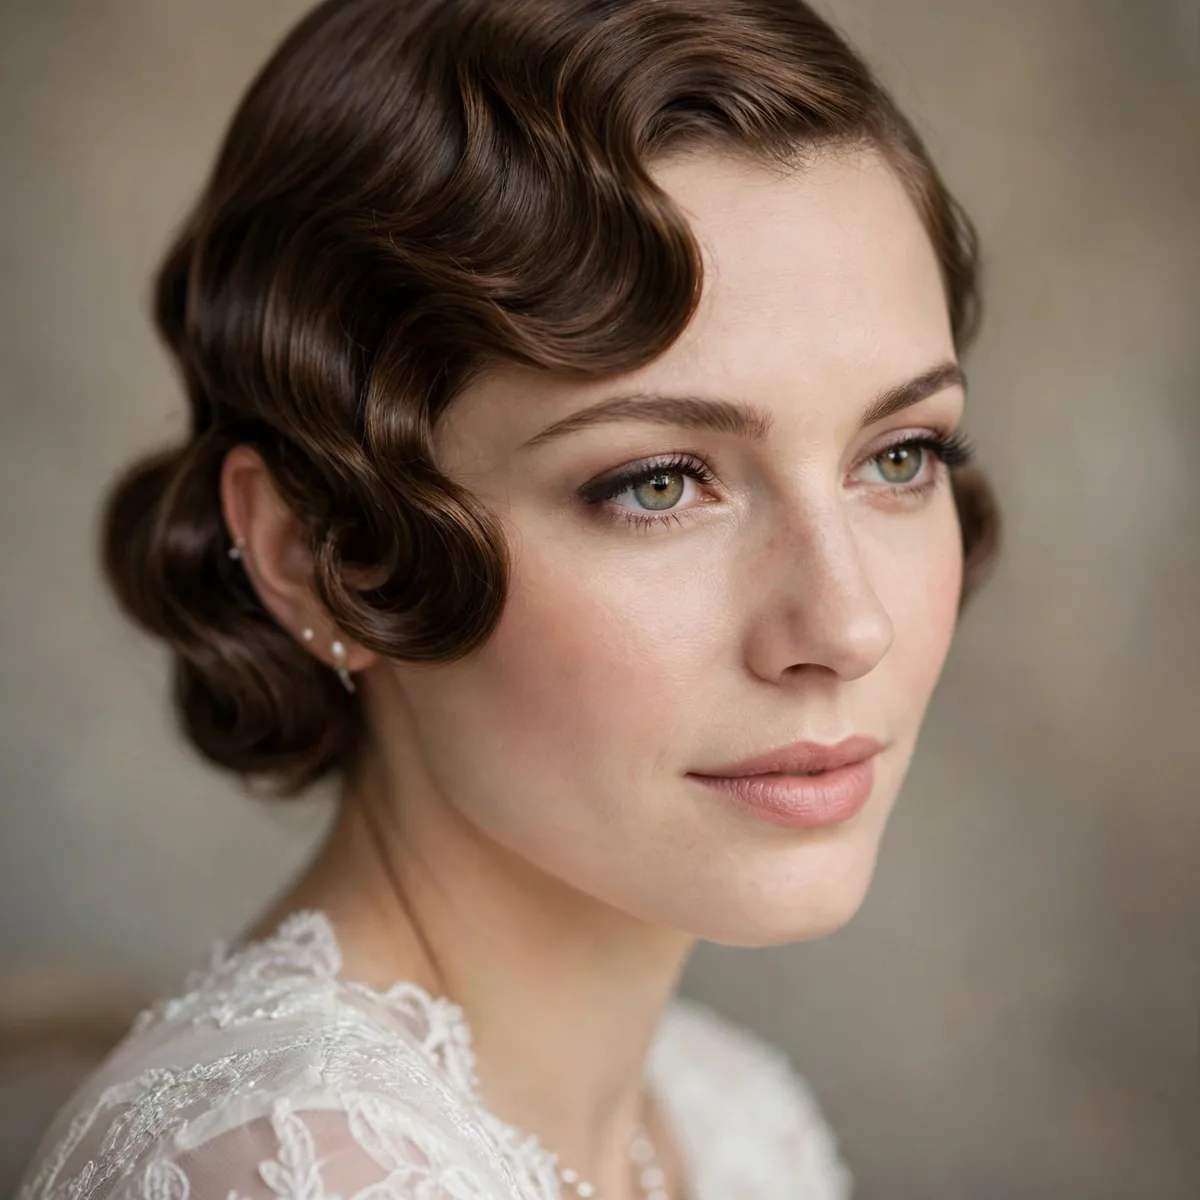
True finger waves are the most authentic vintage look here — sculpted directly onto the head with comb, fingers, and setting lotion, no heat required. The waves lie close to the scalp in precise ridges, creating a stunning sculptural effect. It is bold, artistic, and unforgettable. For a vintage-themed wedding, nothing is more correct.
On damp hair, apply setting lotion generously, then use a fine-tooth comb and your fingers to mold S-shaped ridges, securing each with long clips. Work from the hairline back, keeping the pattern tight and even. Dry completely under a hooded dryer — this takes time, so plan accordingly. Remove clips only when bone dry, then smooth the surface lightly without disturbing the ridges.
Finger waves suit short to medium hair best — the pattern shows most clearly on bobs and lobs. They are spectacular on all face shapes because the sculpting follows the head. This is a statement style that needs confidence and a matching aesthetic: vintage dress, classic makeup, period accessories. It is not the choice for a bride who wants to blend in.
The set is delicate until fully dry, so protect it during drying and transport. Once dry and sprayed, it holds remarkably well — wet sets are durable. Outdoor wind is the main risk; have a backup style in mind for very blustery days. In photographs, finger waves are pure art deco magic.
Long Curtain-Bang Waves
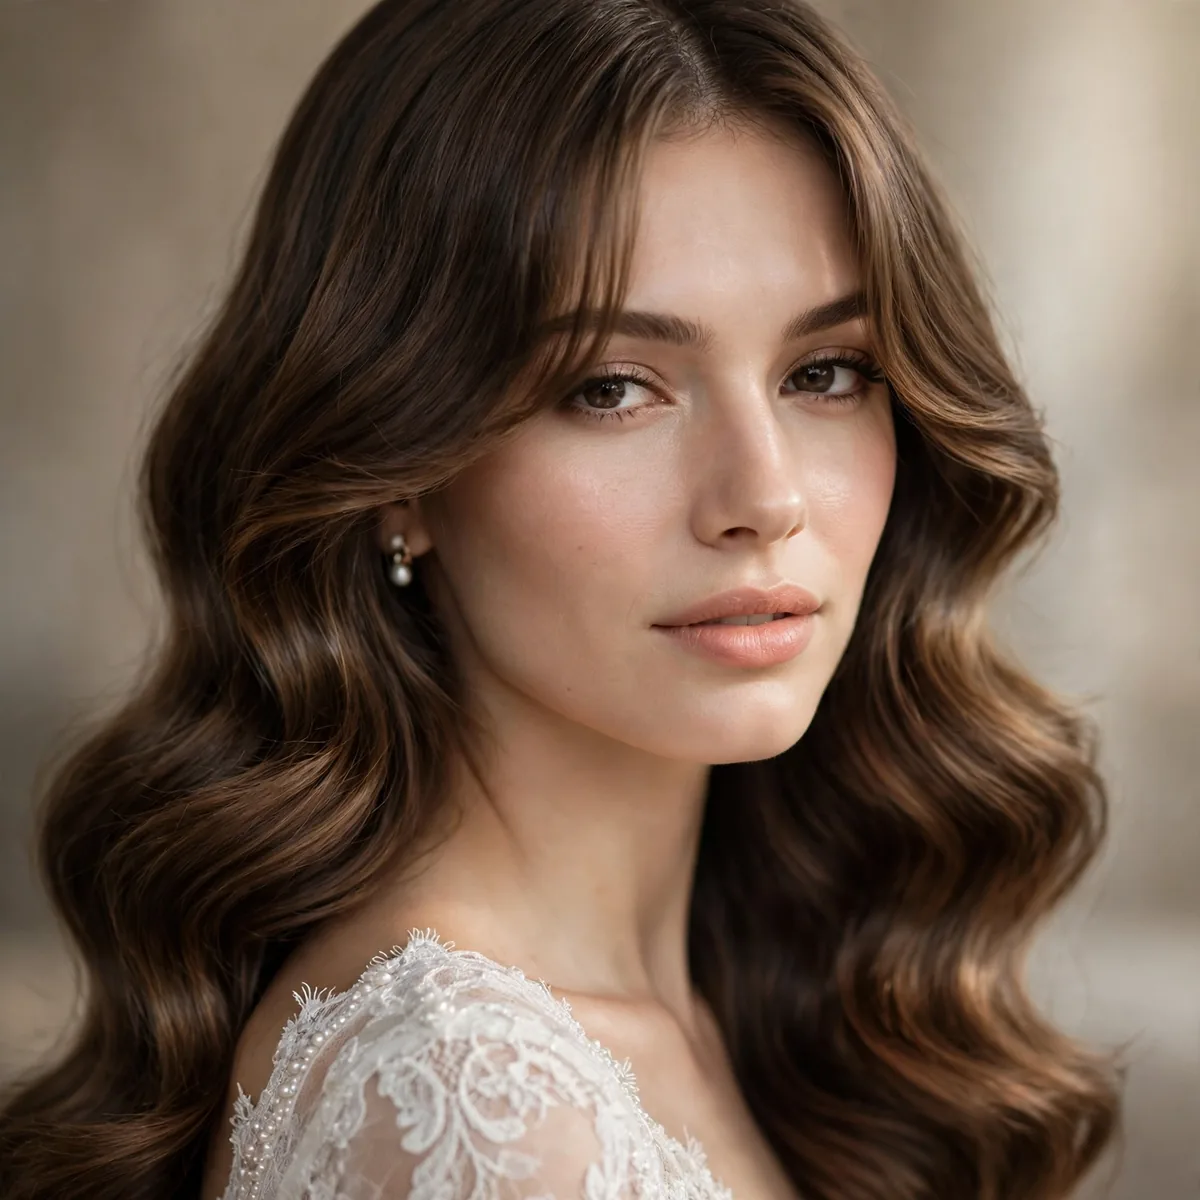
Curtain bangs meet Hollywood waves in this soft, face-framing combination. Long, parted bangs blend seamlessly into the surrounding waves, creating a continuous curtain of movement around the face. The effect is romantic and modern — vintage glamour updated with the most flattering fringe of the moment. It is incredibly photogenic from the front.
Cut or style the bangs to part in the middle and sweep outward, blending into the wave pattern at cheekbone level. Set the bangs with a medium iron curled away from the face, then brush them into the surrounding waves so there is no visible separation. The deep side part of classic waves can shift to a softer off-center part to accommodate the curtain.
Curtain bangs flatter every face shape — they soften foreheads, slim round faces, and balance long ones. Brides growing out bangs can fake this with face-framing layers. The style needs medium to long hair for the blending to work. It is especially lovely on brides who want softness around the face in close-up photos.
Bangs are the first thing to wilt, so set them with extra spray and keep them off your forehead until photos. Blotting papers on the forehead prevent oil from flattening them. A mini brush in your clutch lets you re-sweep them into place. If they misbehave at the reception, tucking one side behind the ear looks intentional and chic.
Second-Day Glam Waves
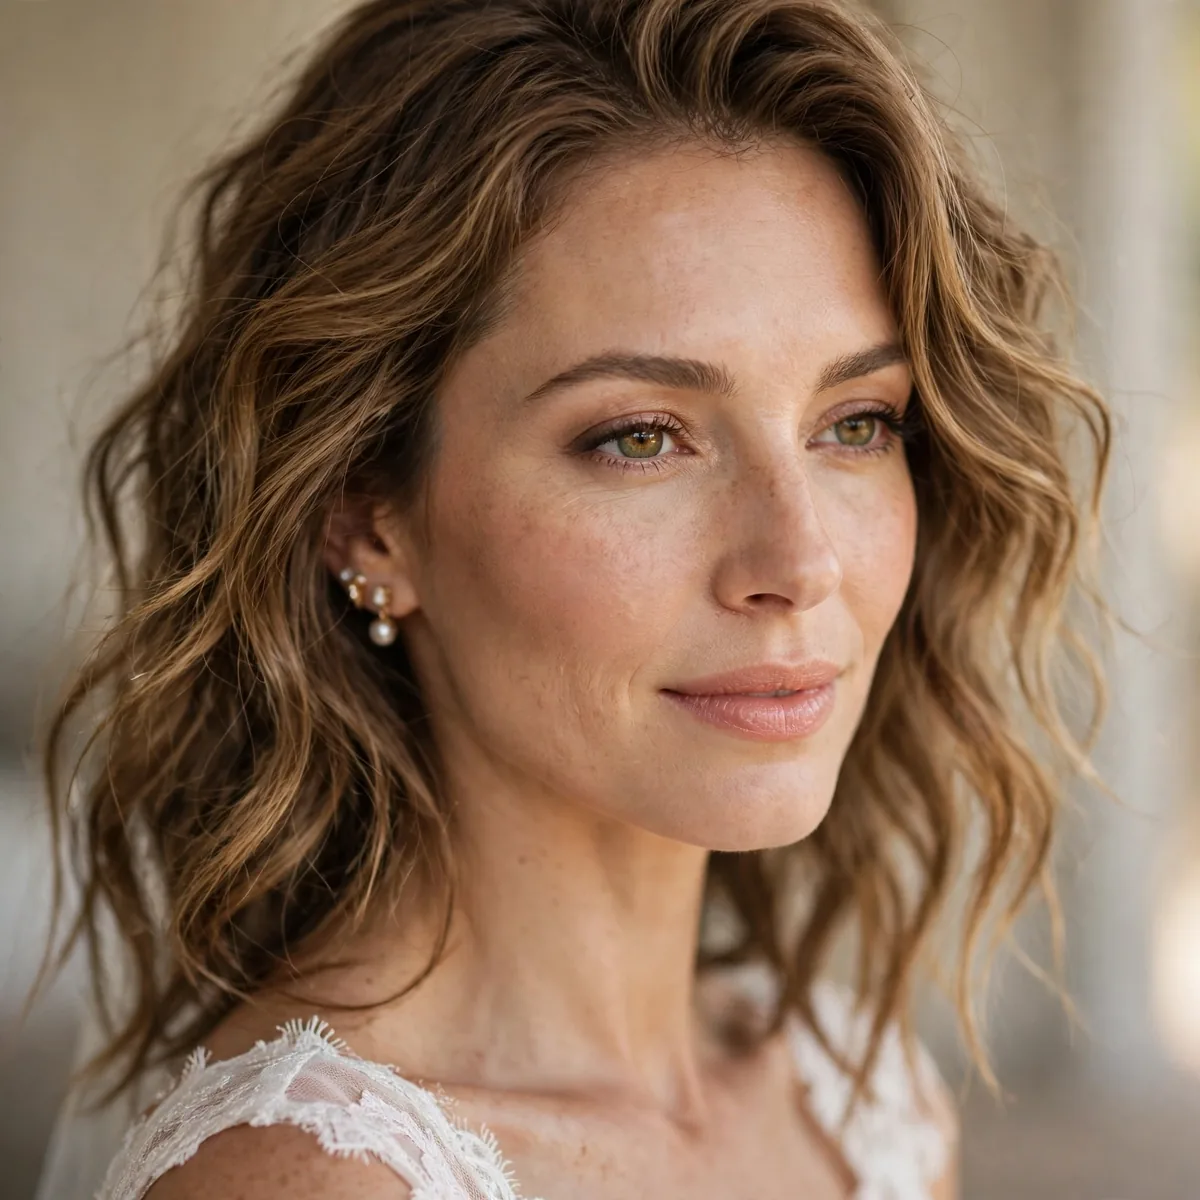
Second-day glam is the insider secret: waves set on day-old hair hold better than waves on freshly washed hair. Slightly lived-in texture gives grip that squeaky-clean hair lacks, so the set lasts hours longer. The finish looks naturally voluminous and touchable. Smart brides plan their wash schedule around this truth.
Wash hair the evening before the wedding, not the morning — apply dry shampoo at the roots before bed so it absorbs overnight. In the morning, the hair has perfect texture for setting: enough grip for curls to hold, enough cleanliness to look fresh. Style as usual with your chosen wave method. The set will outlast same-day-washed hair noticeably.
This approach suits all hair types, but it is transformative for fine, slippery hair that normally drops curls by noon. Oily scalps should double up on dry shampoo and focus it at the roots. The method works with every wave variation on this list. Tell your stylist your wash plan at the trial so they can calibrate products.
Protect the overnight texture with a loose topknot or silk scarf while sleeping — you want grip, not frizz. In the morning, do not re-wash or over-brush; just style. If roots look flat, a quick blast with the dryer upside down revives them. This is the easiest hold upgrade on the list: it costs nothing and changes everything.
High-Shine Glam Waves
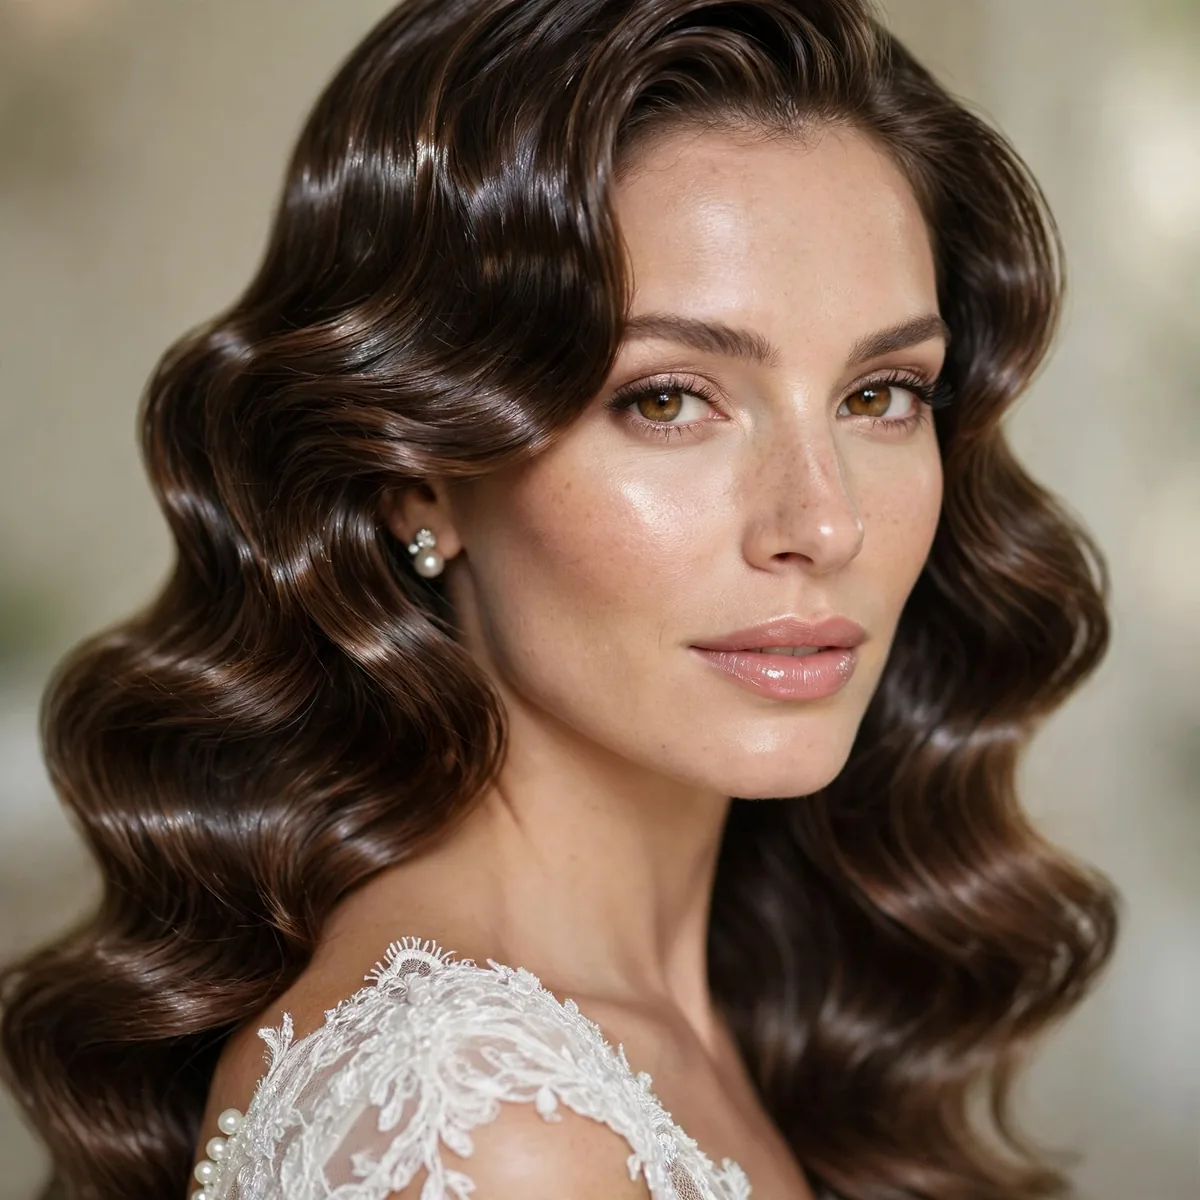
High-shine glam waves turn up the reflectivity to red-carpet levels — waves so glossy they look wet in the best way. Multiple shine layers build a reflective finish that catches every light in the room, from candles to camera flashes. It is glamour you can see from across the venue. Brides who love a high-impact finish will shine here, literally.
Layer shine products strategically: a smoothing serum on damp hair, a shine spray after blow-drying, and a final gloss mist over the finished waves. Each layer should be light — buildup looks greasy. Set the waves with a medium iron and brush smooth. The shine does the talking, so keep the wave pattern clean and uniform.
Shine shows most on dark, healthy hair, where the reflection is dramatic. Lighter hair gets a softer, candlelit glow. Damaged or porous hair will drink up shine products, so do a conditioning mask the week before. This finish pairs with luxe fabrics — satin, silk, mikado — for a cohesive high-glam aesthetic.
Shine fades with touching and time, so hands off after styling. Pack the gloss mist for touch-ups — one light veil revives the reflection. Avoid powdering near the hairline, as powder on glossy hair looks dusty. In flash photography, high-shine hair creates stunning highlights that elevate every portrait. Ask your stylist for a final gloss mist right before you leave for the ceremony.
Voluminous Crown Waves
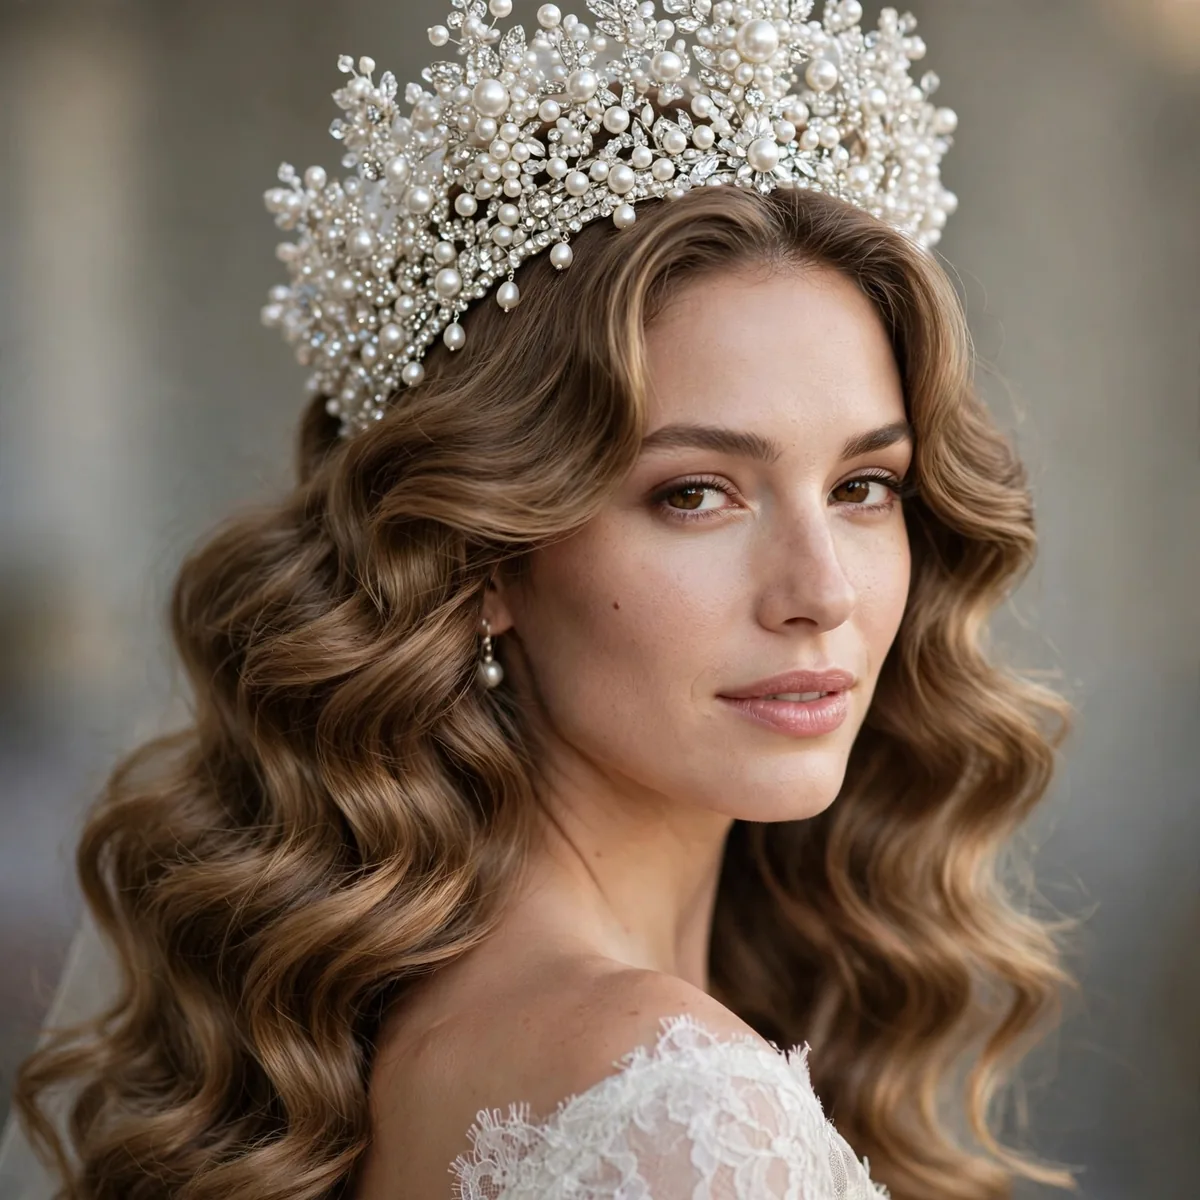
Voluminous crown waves put the drama on top — serious lift at the crown flowing into classic Hollywood waves below. The silhouette is regal and commanding, adding height that elongates the whole figure. It is the wave for grand ballrooms and cathedral veils. When you want presence, build it at the crown.
Backcomb the crown section thoroughly, smooth the top layer over it, and set with strong-hold spray — this is the foundation. Some stylists add a small hair cushion for extra architecture. Then set the lengths in waves as usual, keeping them smooth so the crown stays the star. The transition from volume to wave should be seamless, not a visible bump.
Crown volume flatters round and square faces by adding height, and it gives petite brides welcome stature. Fine hair needs the cushion and strong products; thick hair may need thinning at the crown to avoid a helmet effect. This silhouette pairs with veils beautifully — the veil anchors into the volume. It is made for formal, traditional weddings.
Crown volume is the first thing to fall, so overbuild slightly at the start — it will settle into perfect by ceremony time. Avoid leaning back on chairs during getting-ready photos. A few hidden pins in an X pattern lock the backcombing. Check the profile view in the mirror, not just the front; the silhouette matters most here.
Asymmetric Glam Tuck
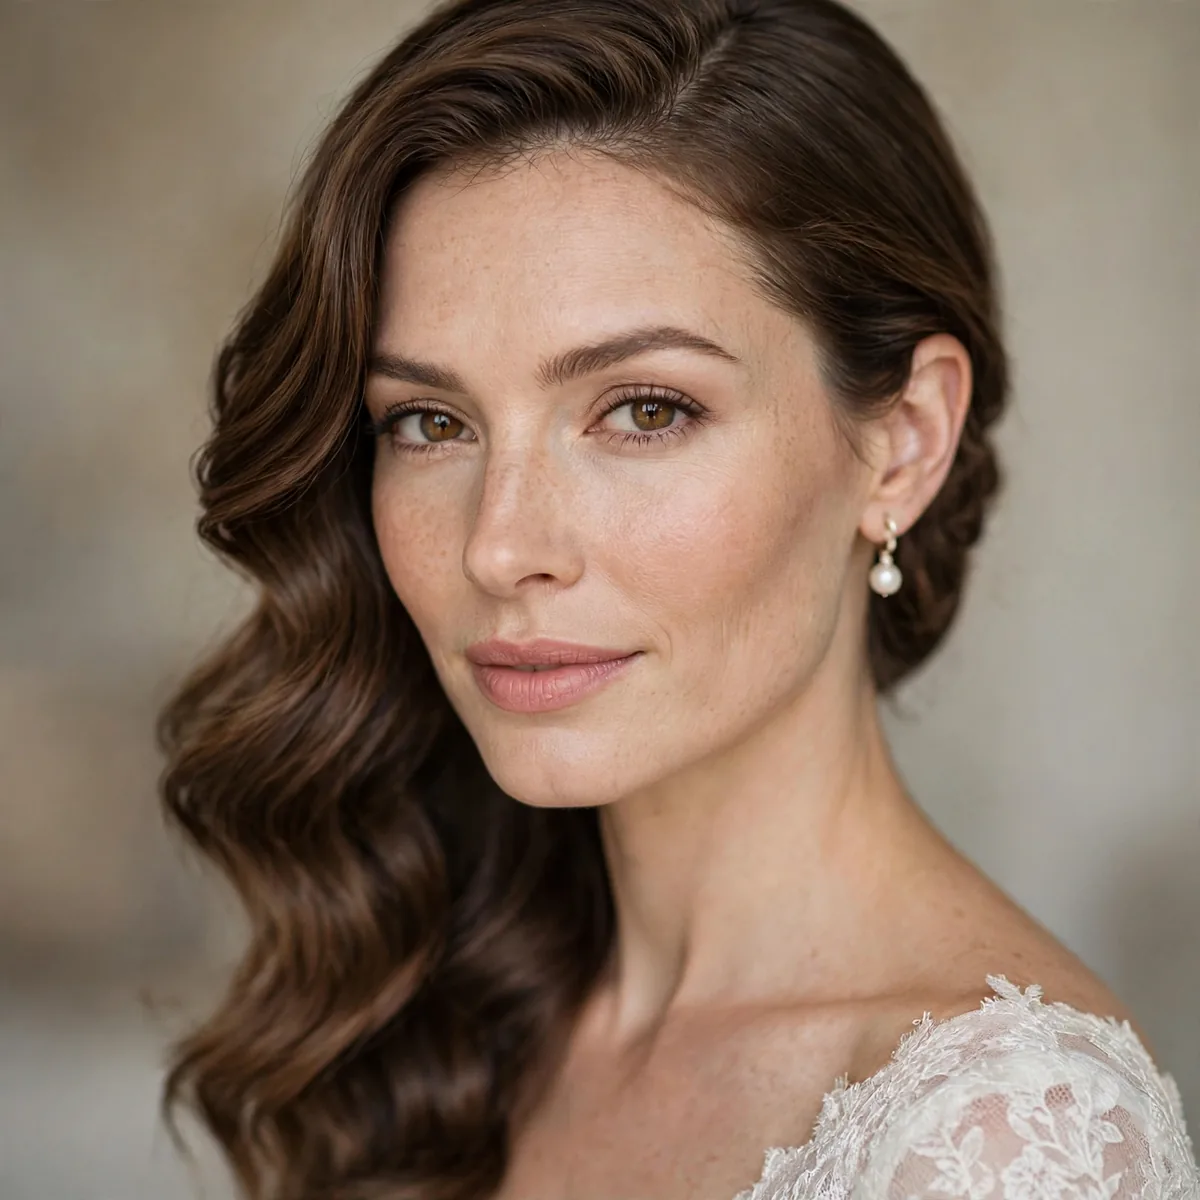
The asymmetric tuck is Hollywood waves with editorial edge: one side tucked sleekly behind the ear, the other cascading in full waves. The contrast between the controlled side and the flowing side creates striking visual interest. It shows off earrings spectacularly and photographs like a fashion editorial. Modern brides who love a little edge, take note.
Set full waves as usual, then choose your tuck side — usually the side away from the deep part. Smooth that section back with a little gel or pomade and tuck it behind the ear, securing with two crossed bobby pins hidden in the hair. Let the other side fall in full waves over the shoulder. The tucked side should look deliberate and sleek, not accidental.
The asymmetry flatters every face shape and is brilliant for brides with a statement earring or detailed dress neckline on one side. It works on medium to long hair. Brides with very thick hair should thin the tucked section slightly so it lies flat. This style has a fashion-forward feel that suits modern, minimalist weddings.
The tuck will try to escape, so the pins and product must be solid — gel plus crossed pins plus spray. Check it after hugs and re-tuck as needed; it takes five seconds. If the tucked side keeps popping out, a small braid hidden underneath can anchor it. The contrast is the point, so keep the tucked side truly sleek.
Vintage Wave Bob
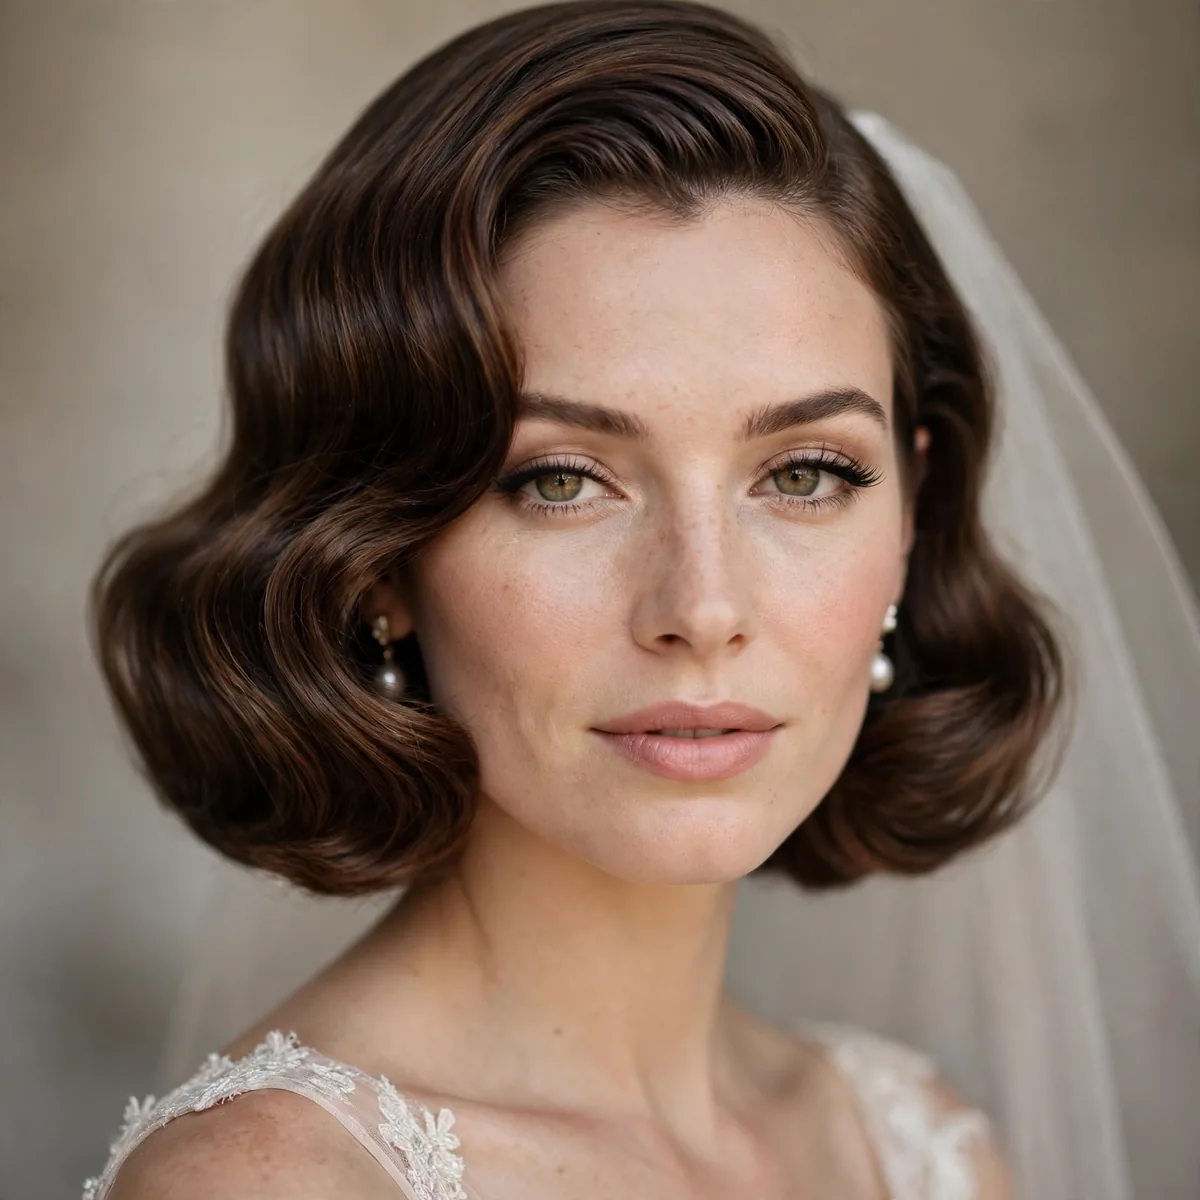
Short hair gets its Hollywood moment with the vintage wave bob — sculpted waves on a chin-length or longer bob. The compact length makes the wave pattern look even more precise and graphic, like a 1920s starlet updated for today. It is chic, bold, and incredibly elegant. Brides with bobs should never feel they are missing out on glamour.
Set the bob on small to medium rollers or a small iron, working in the classic wave pattern close to the head. Brush thoroughly to merge the curls into waves, then mold with a tail comb. The nape should hug the neck while the front sweeps into the signature wave. A deep side part keeps the vintage reference strong. Finish with strong-hold spray for the sculpted look.
The wave bob flatters oval, heart, and long faces beautifully; round faces should keep the length below the chin. It is ideal for brides with fine hair, as the short length maximizes the wave impact. This style pairs with birdcage veils and vintage headpieces like nothing else. It is the ultimate statement for the confident short-haired bride.
Short waves can lose definition faster than long ones, so the set must be thorough — consider a wet set for maximum hold. Wind affects short waves more visibly, so indoor venues or calm days suit this best. Carry extra pins; short hair escapes faster. In photos, the graphic pattern is pure vintage perfection.
Midnight Hold Glam Waves
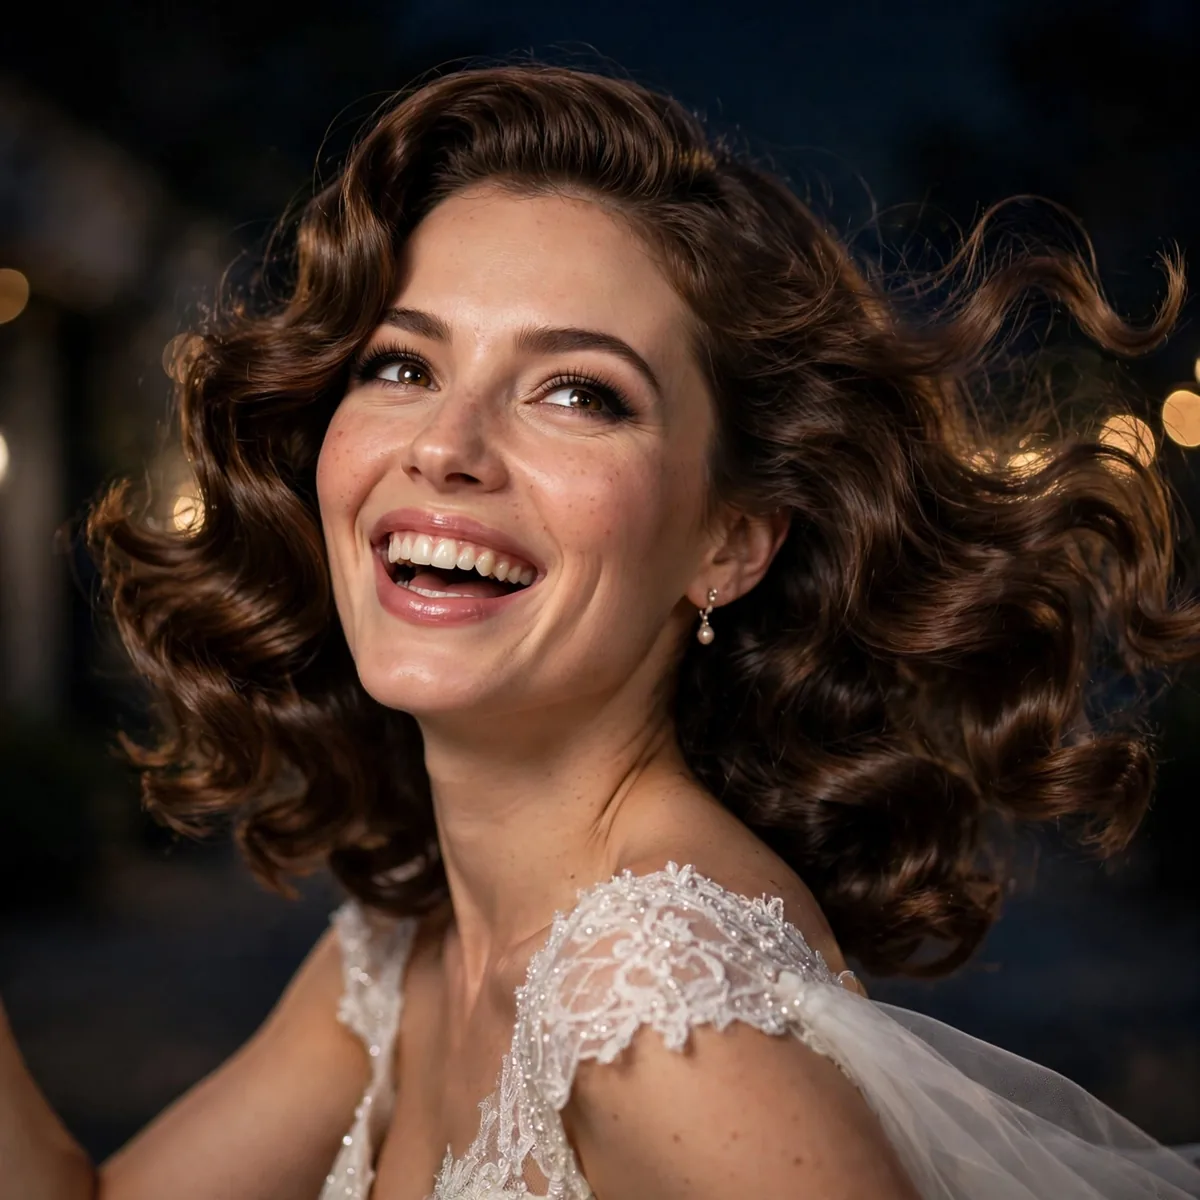
Midnight Hold waves are engineered for the last dance — every technique on this list optimized for maximum longevity. This is not a distinct style but a hold protocol: the product cocktail, setting method, and touch-up plan that keep any Hollywood wave sculpted from first look to final farewell. For the bride who wants perfection at midnight, this is the blueprint.
The protocol: mousse on damp hair, heat protectant, firm-hold spray on each section before curling, pin curls to cool, brush into waves, strong-hold spray in layers, anti-humidity shield on top. Each product layer should be light — the strength comes from layering, not drenching. Set the style at least two hours before the ceremony so it settles into itself.
Every hair type benefits from the protocol, but fine hair should go lighter on each layer to avoid stiffness, while thick hair can handle the full cocktail. Resistant hair that normally drops curls needs every step. Discuss the protocol with your stylist at the trial and test the full timeline — style at the trial time, then check it eight hours later.
Pack the touch-up kit: mini strong-hold spray, bobby pins, a small brush, and blotting papers for the hairline. At the reception, do a two-minute check: smooth the front, re-pin any escapees, mist lightly. The waves will not look freshly set at midnight — they will look lived-in and glamorous, which is even better in the last photos of the night.
Save these timeless waves for your trial run — and pair them with red-carpet glam from our vintage waves hairstyles and glam wedding makeup ideas.