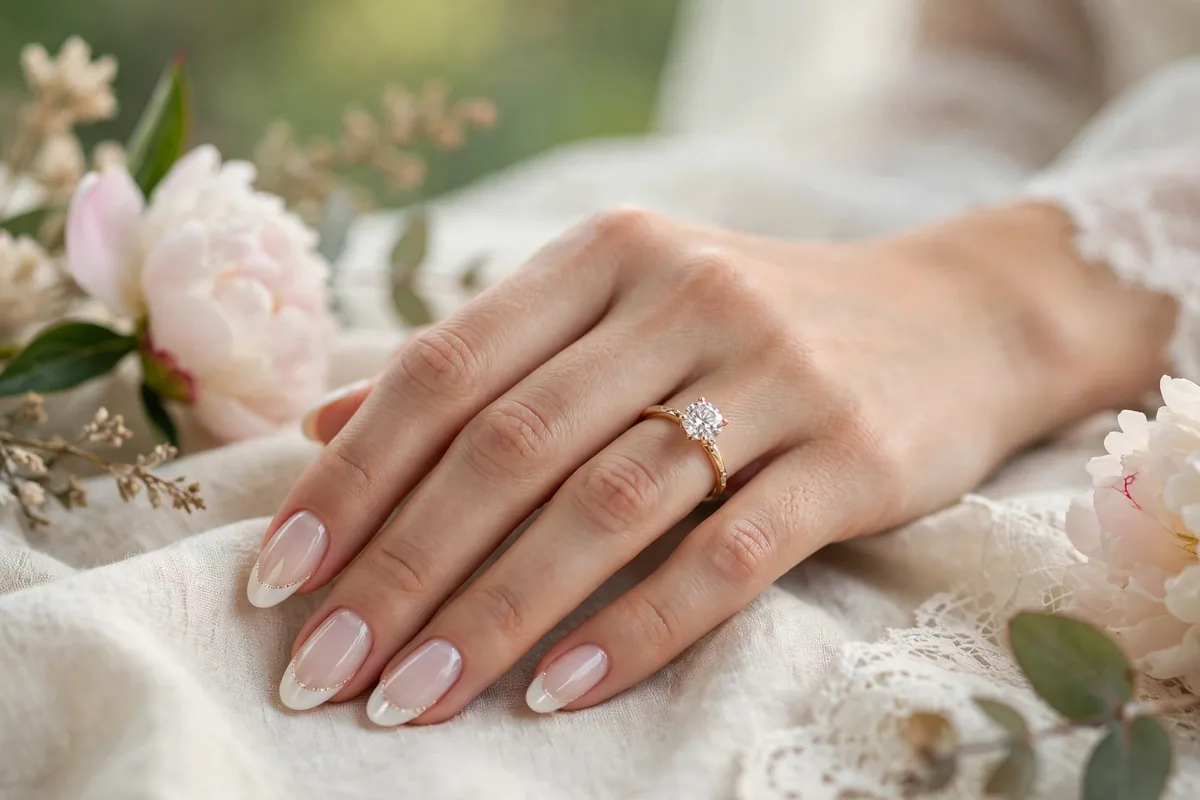
Your hands star in more wedding photos than you’d think — ring shots, bouquet holds, hand-holding.
The bridal nail brief: elegant, photogenic, and durable enough to last through the honeymoon.
Classic shapes (almond, oval, squoval) photograph best; extreme lengths can look dated in timeless photos.
Here are 15 beautiful options. Let’s get into it.
The Classic French
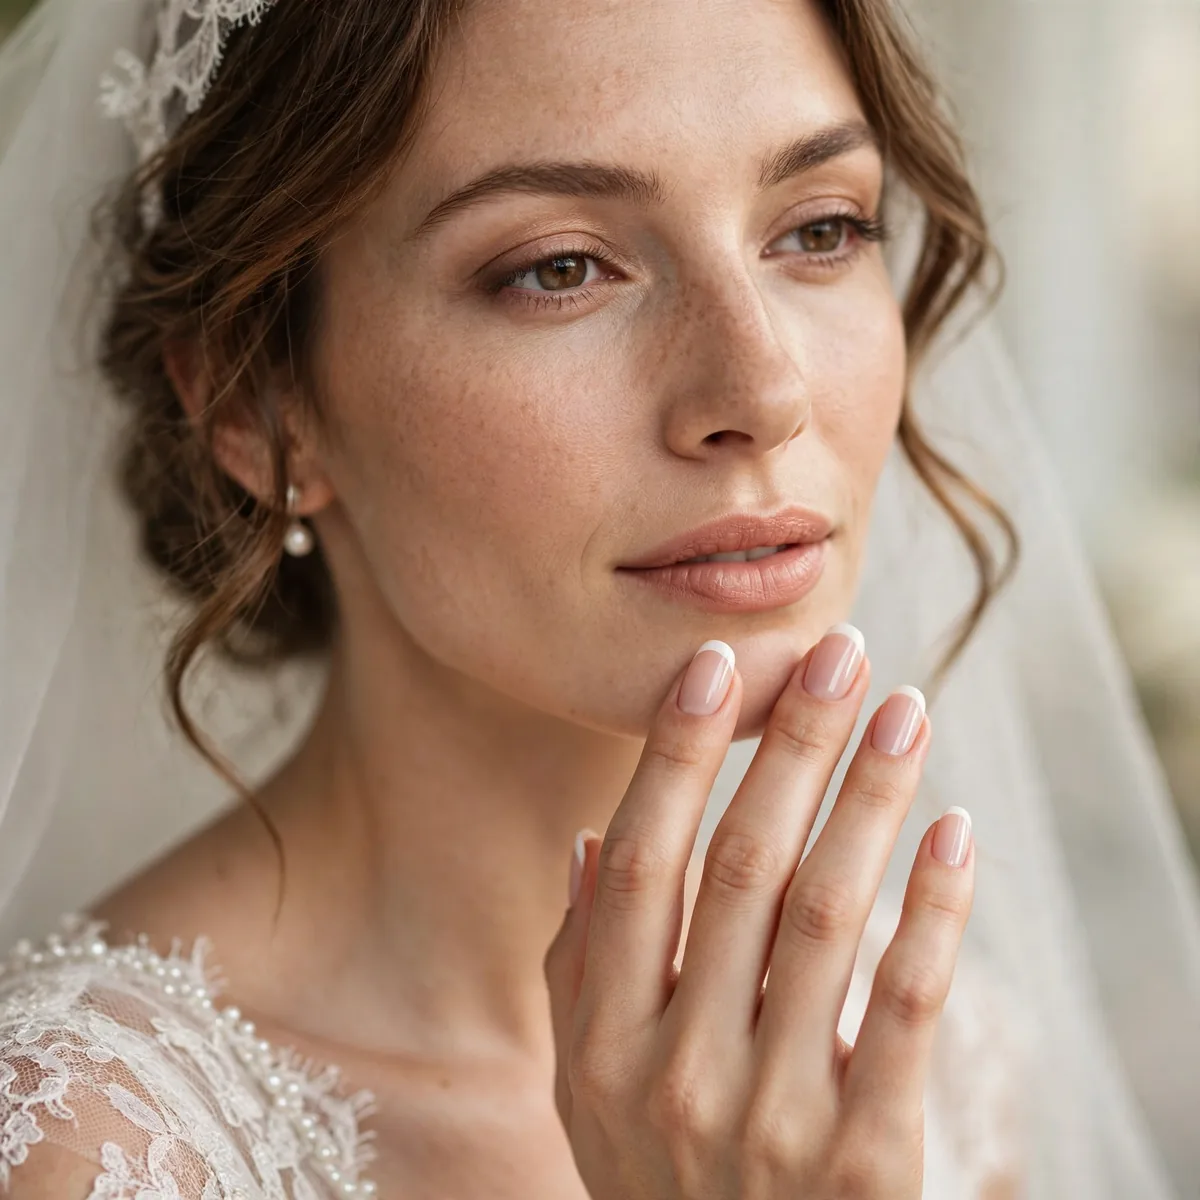
The eternal bridal choice: pinkish-nude base, white tips. Clean, elegant, timeless.
Modern French uses softer white — less stark, more natural.
The modern French trades stark white for a soft, milky tip — ask your tech for an off-white or sheer white to avoid the dated 2000s look. The smile line should follow your natural nail’s curve; a too-deep smile shortens the nail bed visually. At home, silicone stamping guides or a fine striping brush give the steadiest lines — freehand tips wobble. Choose a pinkish-nude base with your undertone: cool pinks for fair skin, warm beiges for deep.
French tips show wear first at the free edge, so gel or dip powder is worth it — regular polish chips on the white within days. Book the manicure one to two days before the wedding; any earlier and grow-out shows at the cuticle in ring close-ups. In photographs, the French’s crisp contrast makes hands look instantly groomed — it is the highest photogenic-effort ratio of any bridal nail. Keep the length medium; very long French tips veer costume.
Sheer Pink Elegance
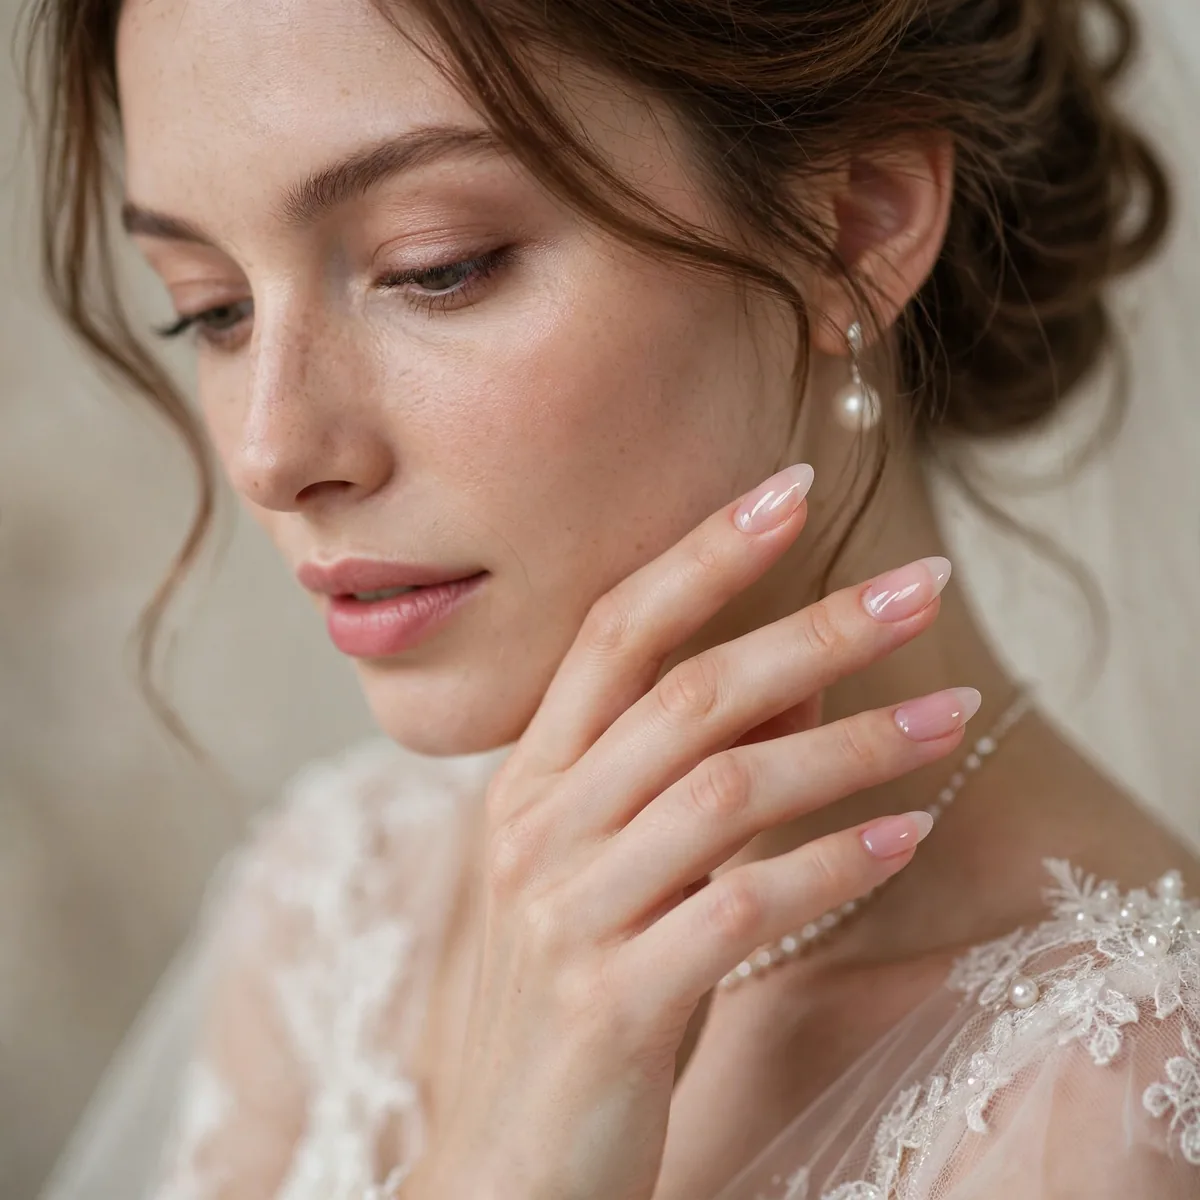
A sheer pink that’s barely there — your nails, perfected. The minimalist bride’s choice.
Sheer polishes are forgiving on imperfect nail beds.
Sheer pinks come as jellies or sheer crèmes — jellies offer glassy translucency, crèmes a whisper more coverage. Apply three thin coats rather than two thick ones; sheer formulas streak when overloaded. The beauty of sheers is forgiveness: they camouflage ridges, uneven nail beds, and minor imperfections that opaque polishes spotlight. They also grow out invisibly, so a manicure done four days before still looks fresh.
Sheers are the most DIY-friendly bridal polish — mistakes barely show, making them ideal for at-home manicures. Never skip the base coat; sheer pinks stain the nail plate yellow without one. Finish with a glossy top coat for that plump, healthy look, and reapply top coat on day three to extend the shine. In ring shots, sheer pink reads as naturally perfect nails — the ‘your nails but better’ effect photographers love.
Milky White
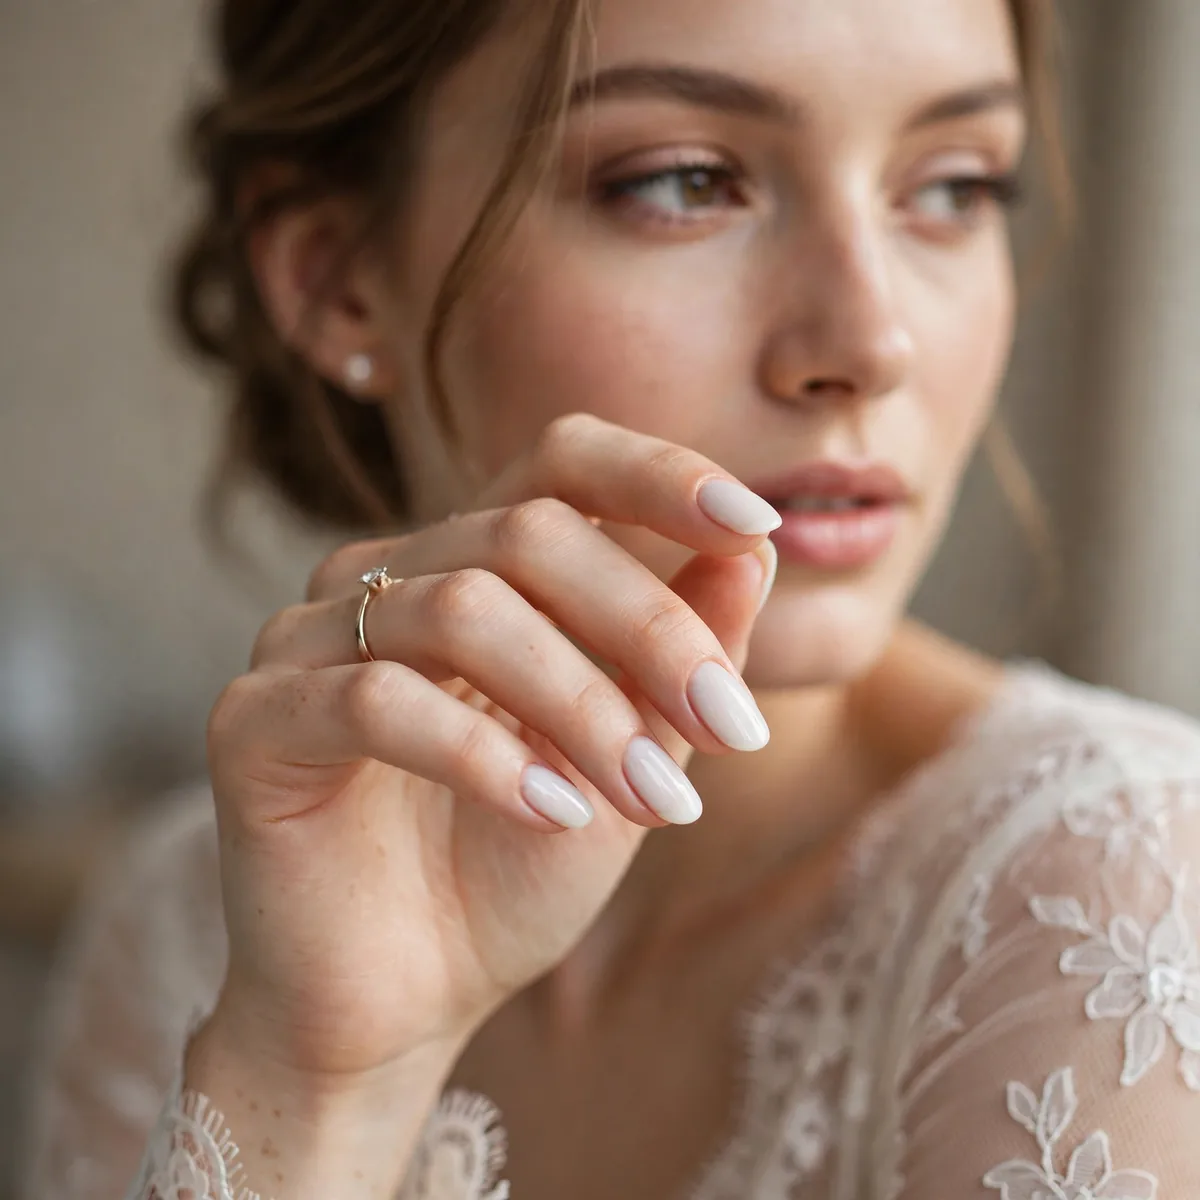
Milky, translucent white — modern, chic, and incredibly photogenic.
Two thin coats give the perfect milky opacity.
Milky white is white polish sheered out — translucent enough to hint the nail beneath, opaque enough to read white. Two thin coats hit the sweet spot; a third turns it chalky. Roll the bottle between palms instead of shaking to avoid bubbles, which show badly in milky formulas. The shade flatters every skin tone, from the fairest to the deepest — one of the few truly universal bridal polishes.
Milky white is a photographer’s dream — it reads bright and clean in every light, making hands pop in bouquet and ring shots. In gel form it wears two to three weeks without yellowing; regular polish versions can stain slightly, so a good base coat is essential. Grow-out shows less obviously than a French’s cuticle line, buying you flexibility on timing. Keep nails medium-short; milky white on very long nails can look stark.
Soft Nude to Match
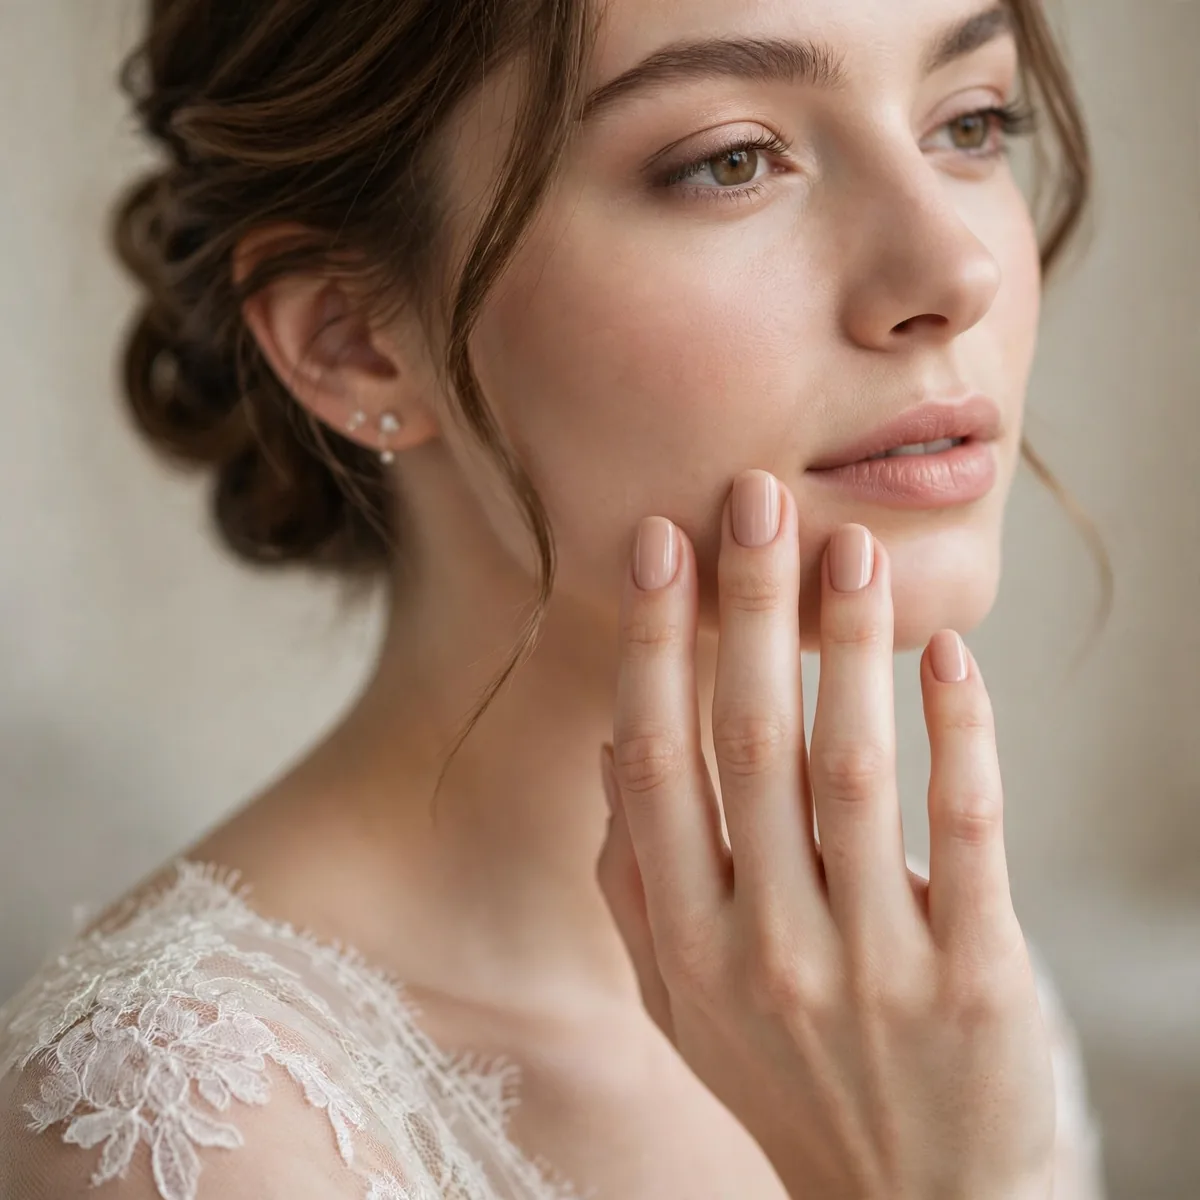
A nude matched to your skin tone elongates fingers beautifully in close-ups.
Bring your foundation to the salon to match undertones.
Nude is not one color — it spans pink-beige, true beige, caramel, and deep espresso, and the wrong undertone makes hands look washed out or ashy. Bring your foundation to the salon and hold bottles against your jaw in daylight; the closest match wins. Paint one nail and live with it for an hour before committing — nudes shift dramatically between bottle, nail, and lighting. When in doubt, choose the slightly deeper option; sheerer nudes are more forgiving.
A perfectly matched nude visually extends the finger — there is no line where skin ends and nail begins, which is why it dominates close-up photography. Choose a crème finish for classic elegance or a satin-matte for modern edge; both photograph beautifully. In gel, nudes wear flawlessly for weeks with invisible grow-out. For the honeymoon, the same shade on toes creates a polished, coordinated look without trying.
Pearl Chrome Finish
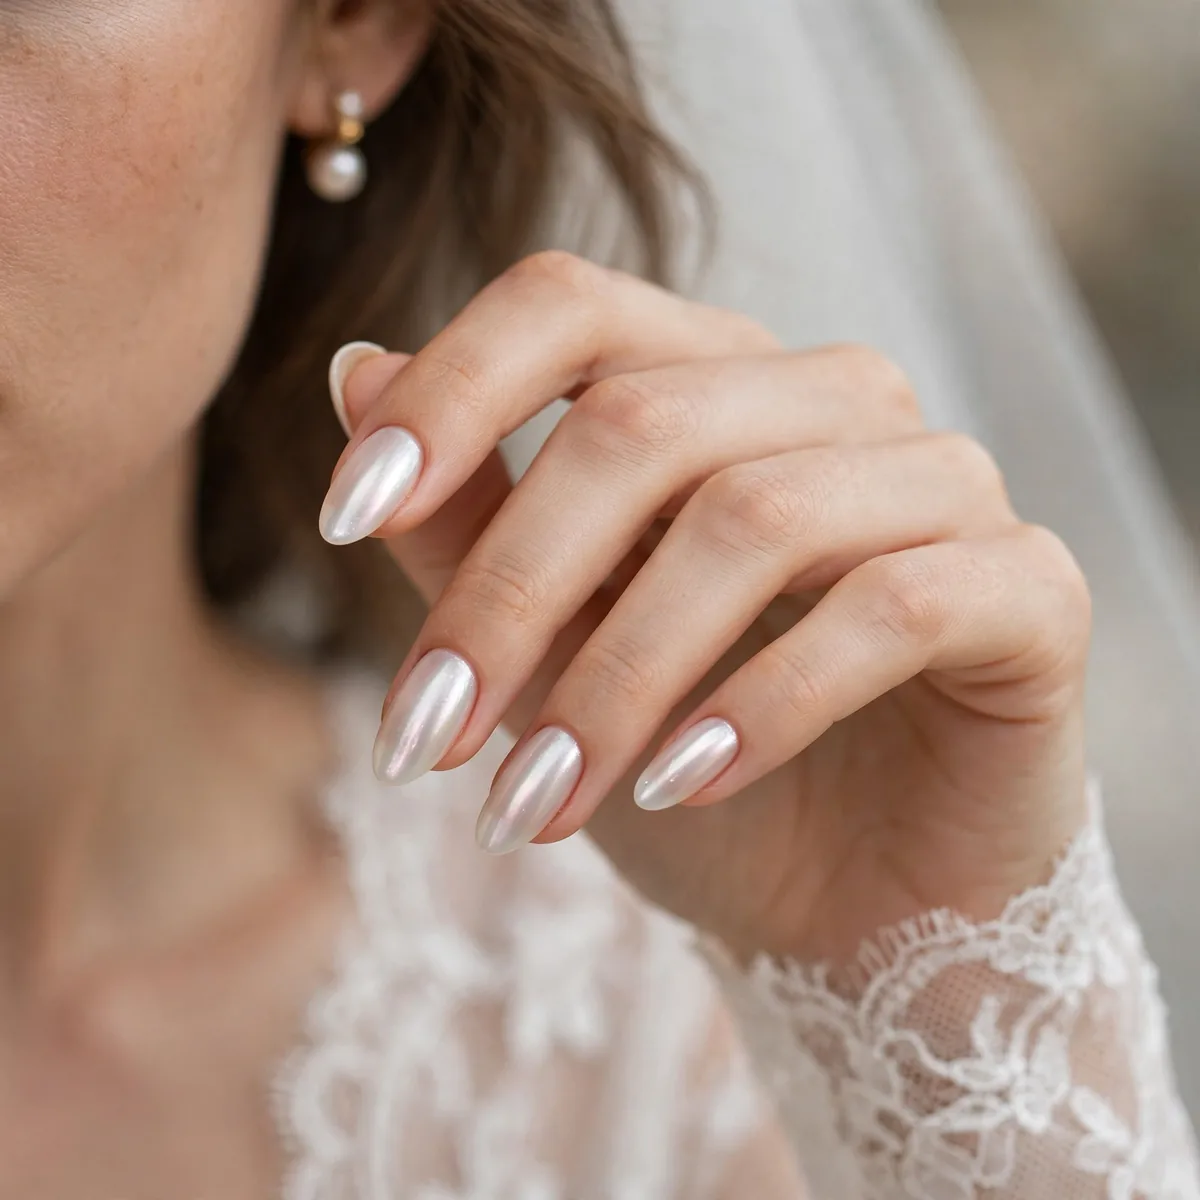
Glazed-donut pearl chrome — subtle shimmer that catches light in photos.
It’s the modern French: classic shape, contemporary finish.
Pearl chrome is a fine shimmer powder burnished over a cured gel base — usually a sheer pink or white — then sealed with a no-wipe top coat. The powder application is the skill: it must be buffed evenly with a silicone tool, since patchy pressure creates cloudy spots. Ask for ‘glazed’ or ‘pearl’ specifically; silver and holographic chromes read futuristic rather than bridal. The effect shifts subtly in different lights, which photographs as dimension.
Chrome over gel is exceptionally durable — the sealed powder cannot chip the way glitter polish does, lasting through the honeymoon. At-home chrome kits exist, but the burnishing technique takes practice; book the salon for the wedding and practice the kit later. Avoid harsh cleaning chemicals without gloves, which can dull the chrome’s luster. If a nail chips, the whole set usually needs redoing — chrome does not spot-repair well, so handle with care.
Micro French Tips
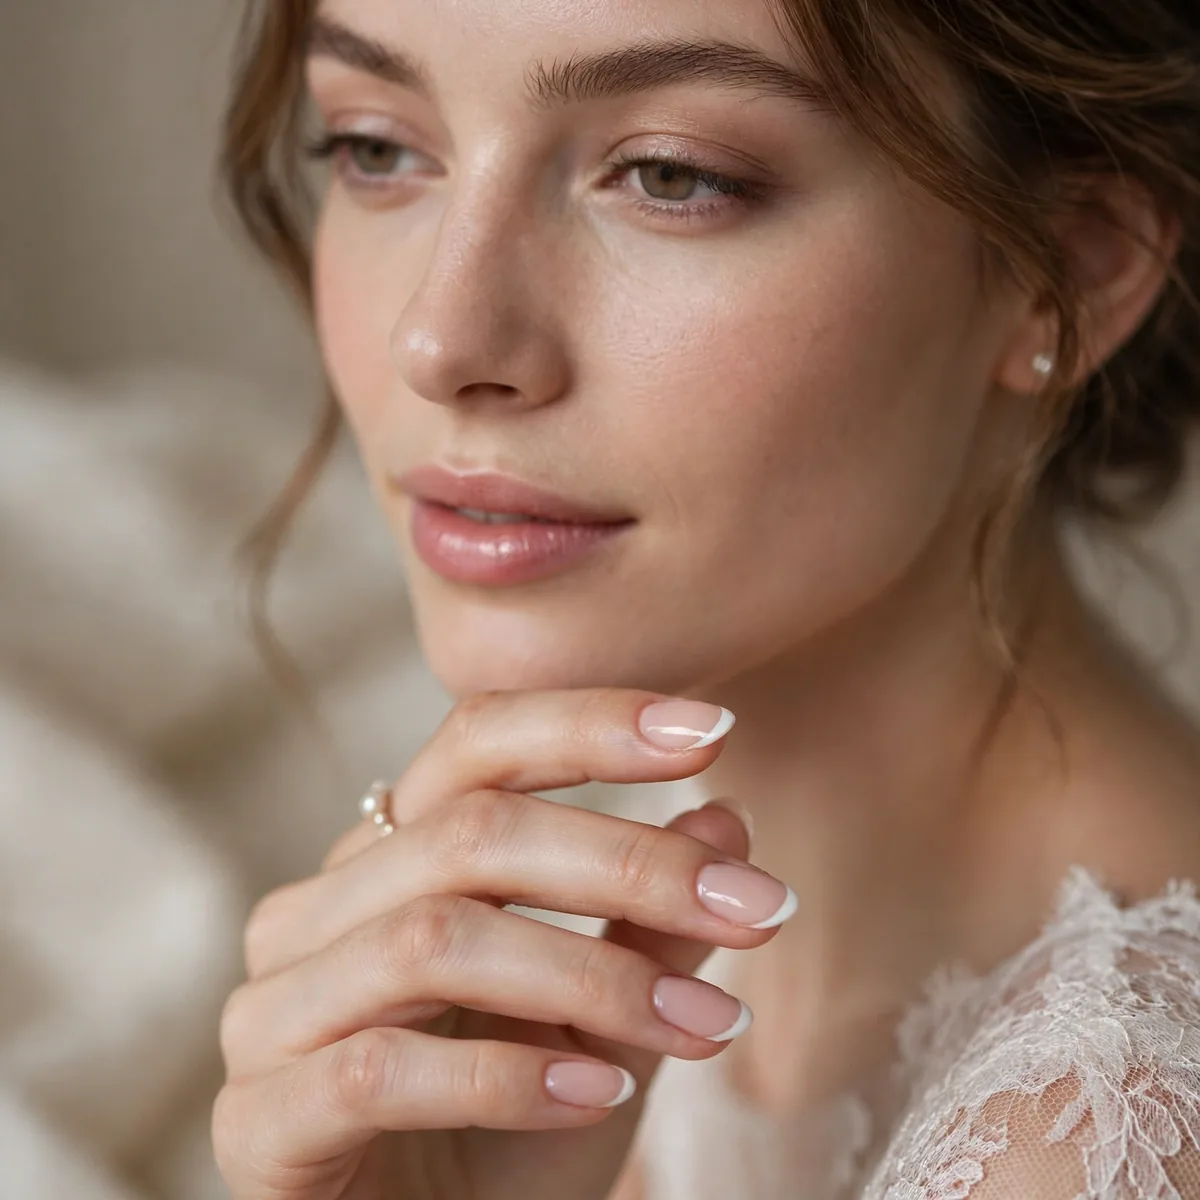
An ultra-thin French tip — the refined, 2020s update to the classic.
Best on almond or oval shapes; the thin line elongates.
The micro French uses a tip line barely a millimeter thick — painted with a fine striping brush or the very edge of the polish brush, wiped nearly clean. The thinness is the point: it reads as a crisp highlight on the nail’s edge rather than a painted tip. Almond and oval shapes carry it best, the slim line echoing the nail’s taper. It is the minimalist’s French — all the polish, none of the retro baggage.
Precision is everything with micro tips — a wobble that hides in a classic French screams in a micro line, so this is a salon job for most brides. The thin edge chips faster than a full tip; gel is strongly recommended. For a personal twist, ask for the micro line in champagne, pale gold, or your wedding color — the colored micro French is thoroughly modern while keeping the refined silhouette.
Blush Ombré
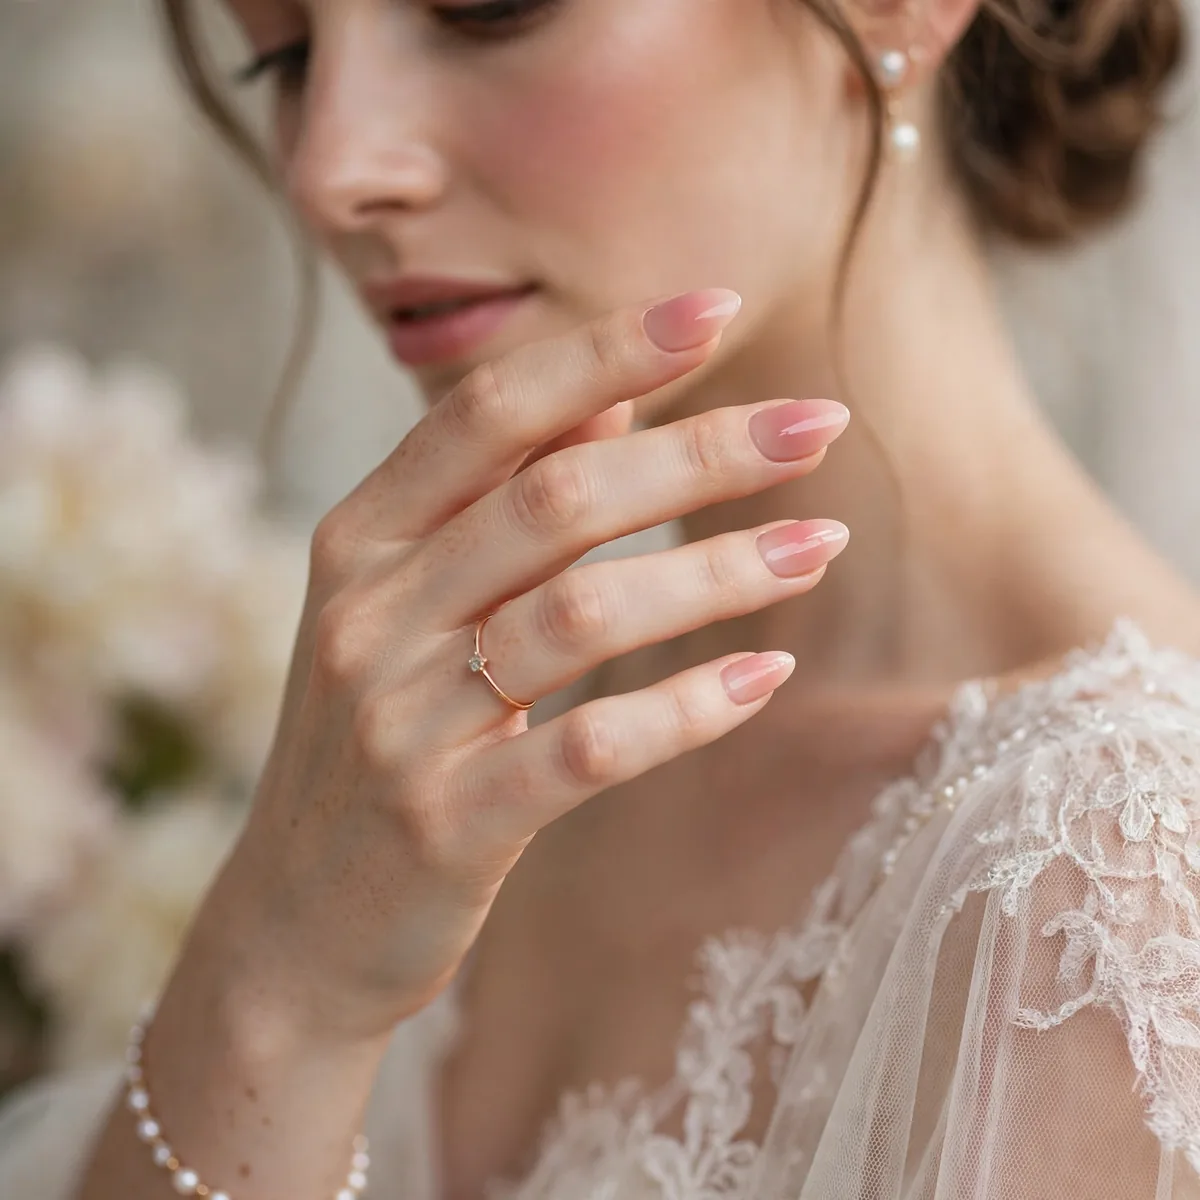
Baby-boomer ombré: nude fading to white — soft, romantic, flawless in photos.
Airbrushed ombré lasts longer than sponged; ask your tech.
The baby-boomer fade — nude melting into white — is best airbrushed: a fine mist creates the seamless gradient that sponging can only approximate. Ask your tech specifically for airbrush ombré; not every salon offers it. The fade should sit with white at the tip dissolving into nude at the cuticle — reversed placement looks odd. Two to three passes build the gradient; rushing creates harsh lines.
In gel, the ombré wears for weeks with completely invisible grow-out — the nude base simply extends as nails grow. At home, a makeup sponge can approximate the fade: paint stripes of nude and white on the sponge, dab onto the nail, and repeat — then clean up with acetone. It takes practice, so do a trial run a month before. The ombré’s softness flatters short nails especially, where harsh lines would overwhelm.
Delicate Floral Accent
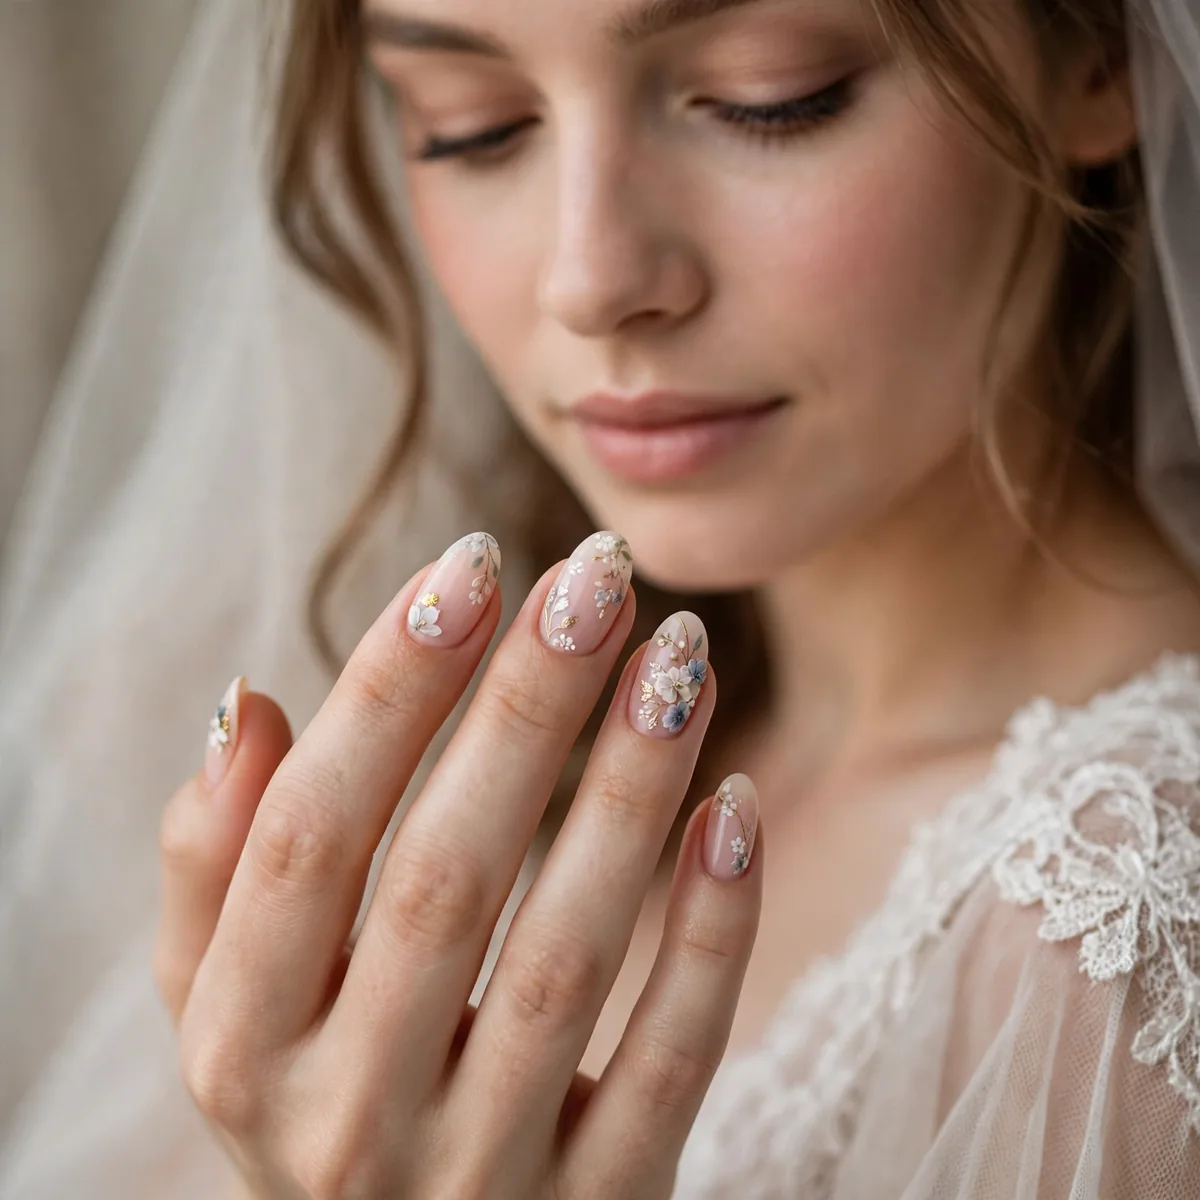
Tiny hand-painted florals on one or two accent nails — romantic detail.
Keep it to accents; full floral sets can look busy in ring shots.
Hand-painted florals need a dotting tool and a fine detail brush — tiny five-petal blossoms in white or blush over a nude base. Keep the art to one or two accent nails, usually the ring fingers; full sets read busy in ring shots. Nail-art stickers and water decals are a flawless shortcut — modern decals are nearly indistinguishable from hand painting. Seal with two layers of top coat so the art survives the week.
Coordinate the floral motif with your bouquet — tiny roses for a rose bouquet, cherry blossoms for spring weddings — for a thoughtful detail photographers notice. Book a nail artist with a portfolio of fine art; not every tech paints florals well. In gel, the art is sealed under the top coat and lasts weeks. Do the art at the final appointment, one to two days before — fresh art photographs crispest.
Champagne Shimmer
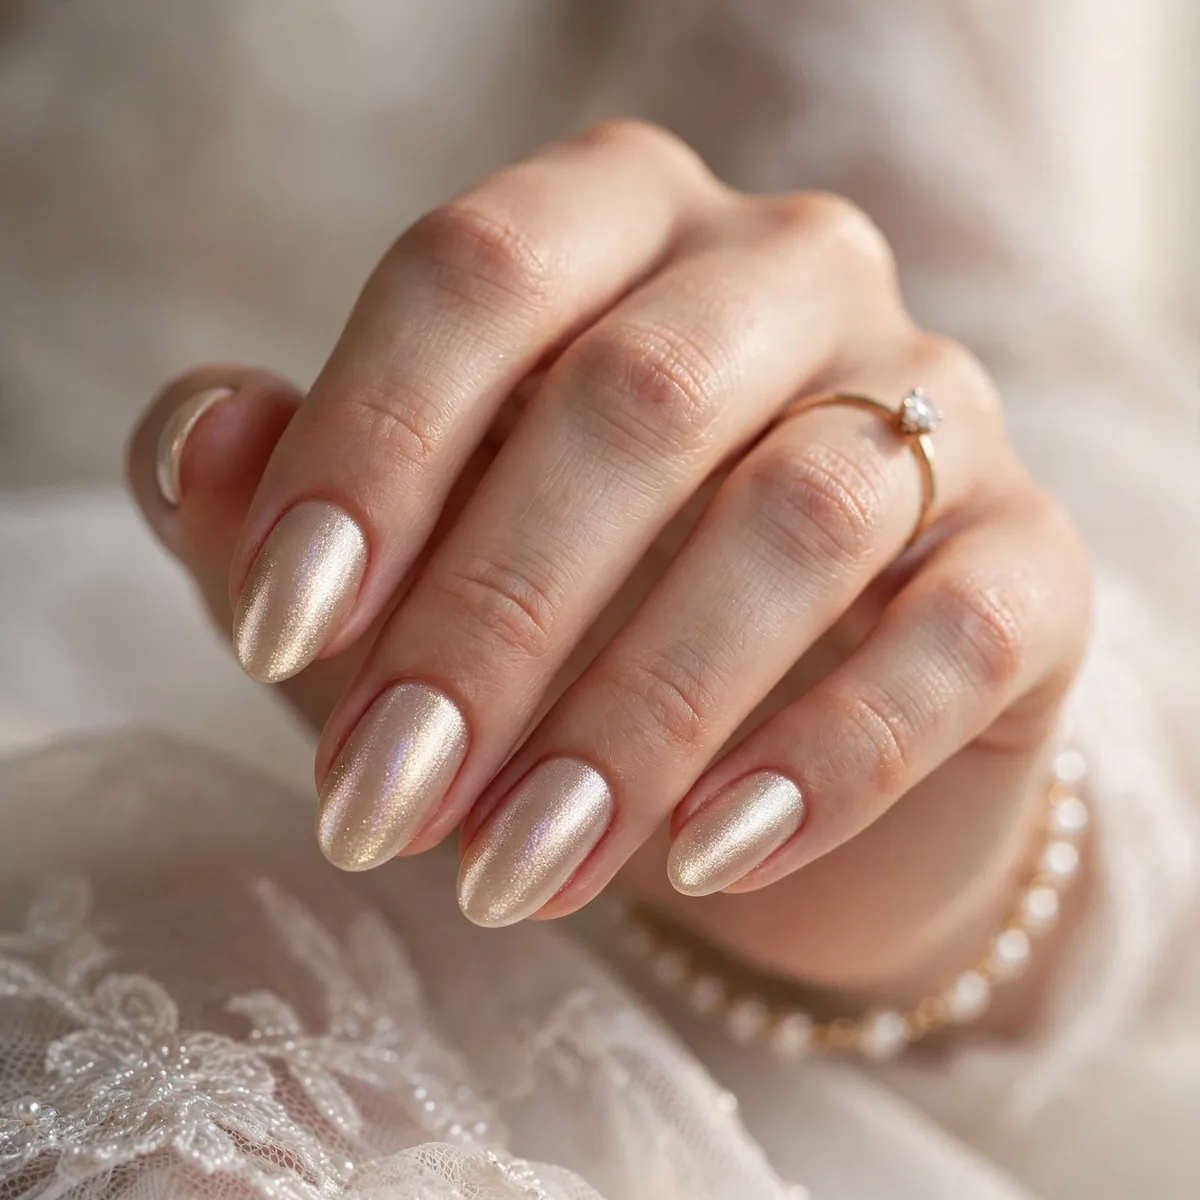
A whisper of champagne shimmer — festive but bridal-appropriate.
Fine shimmer photographs as glow; chunky glitter doesn’t.
Choose fine-milled shimmer, not chunky glitter — micro-shimmer reads as lit-from-within glow in photos, while large particles create harsh hotspots. Champagne shades with a pink or gold base flatter most skin tones; test against your ring’s metal. Apply two thin coats; shimmer formulas go streaky when thick. A glossy top coat deepens the glow, while matte top coat mutes it — glossy is the bridal choice.
Champagne shimmer threads the needle between festive and bridal — celebratory without reading party-nail. It wears well, hiding tip wear better than crème polishes. Removal takes patience: soak cotton in acetone, wrap each nail in foil for ten minutes, then slide the polish off — scrubbing spreads shimmer everywhere. In gel form, it lasts through the honeymoon with zero maintenance.
Almond Shape Perfection
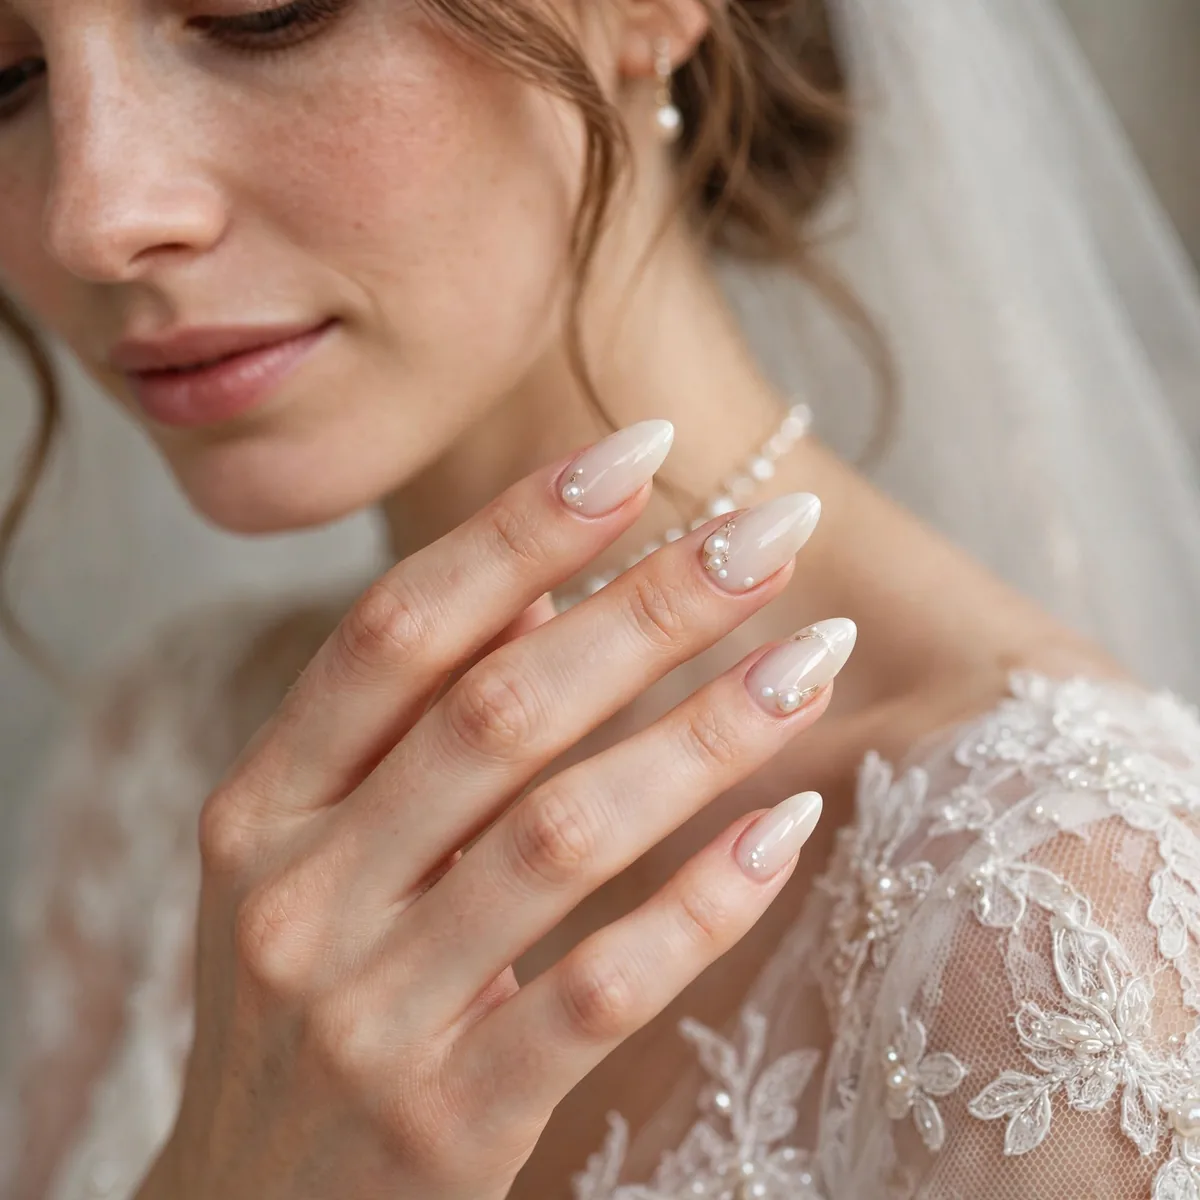
The almond shape is the most elegant and elongating — the bridal standard.
Medium length is the sweet spot for timeless photos.
Shape almonds by filing the sidewalls toward the center at a consistent angle, then rounding the tip — check symmetry by flipping the hand over and comparing. Medium length, extending just past the fingertip, is the timeless sweet spot; longer almonds veer dramatic. Almond beats stiletto for brides — the softer tip is elegant, not edgy — and beats square, which can look severe in close-ups. File in one direction only to prevent splitting.
Almond is the most elongating shape for short or wide fingers — the tapered tip creates an unbroken line that lengthens. Structurally, the shape distributes stress well, making it sturdier than square corners that catch and break. Maintain with weekly filing of the sidewalls; almonds lose their line fast as nails grow. For the wedding, shape three to four days before so any filing marks settle and the edges look naturally smooth.
Something Blue
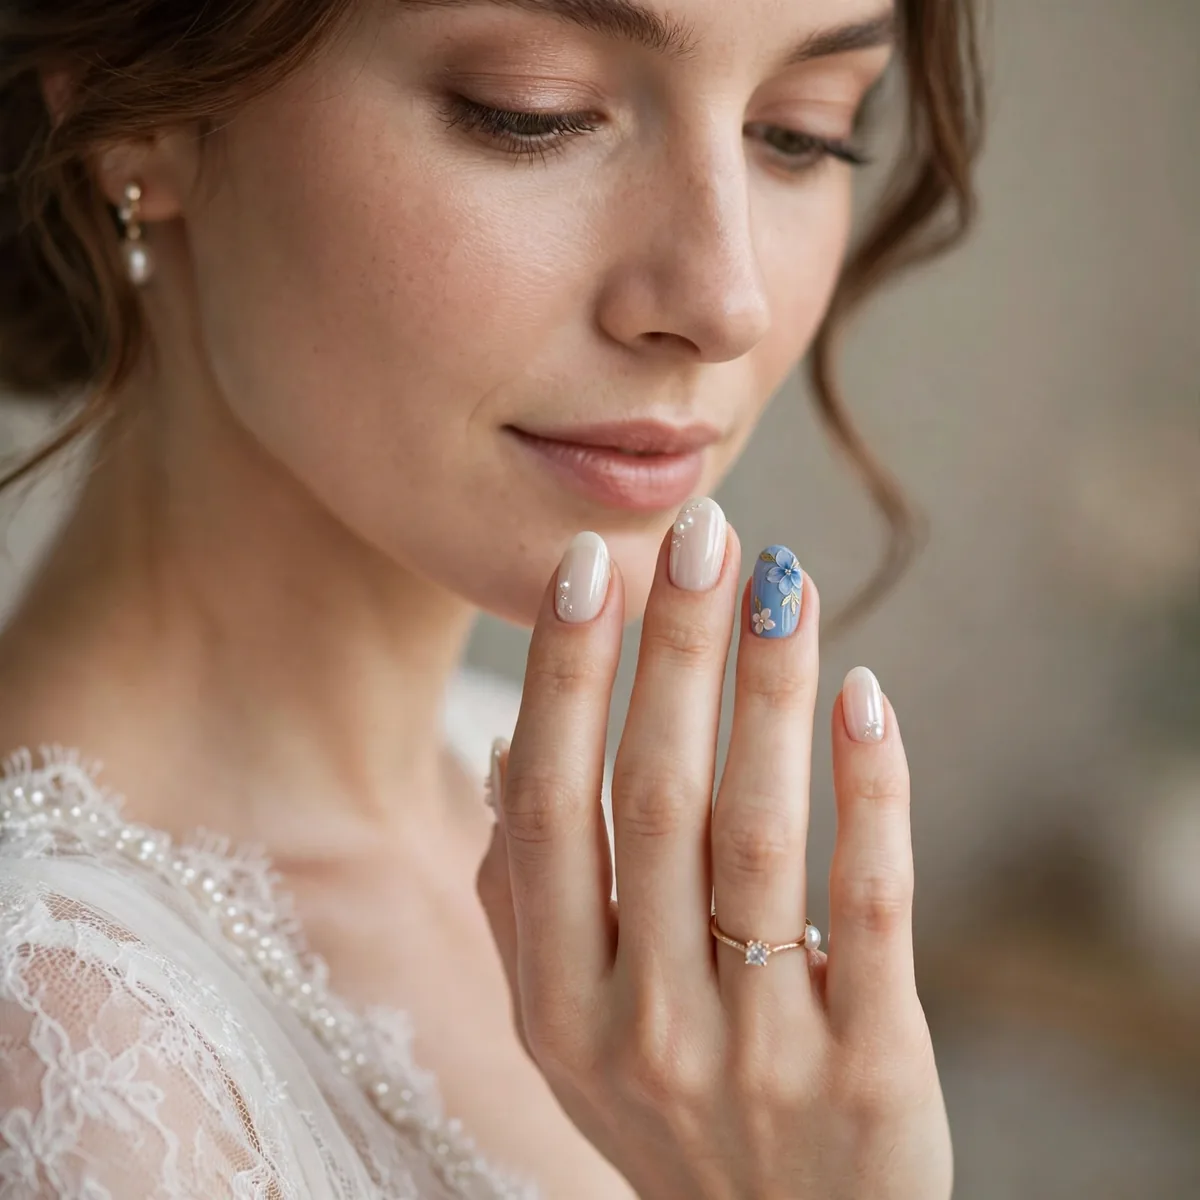
A pale blue accent nail as your "something blue" — sweet tradition, modern execution.
Powder blue or a tiny blue heart — subtle is key.
Execute it as a single accent — usually the ring finger, where the ring sits — in powder blue, periwinkle, or baby blue. A tiny blue heart, a slim blue micro tip, or delicate blue dots keep it sweet rather than loud. The rest of the manicure stays classic nude or French so the blue reads as intentional. This is the easiest tradition to wear: visible in detail shots, invisible from the aisle.
Alternatives: paint the blue on toes only, hide it under a French tip’s smile line, or choose a blue-tinted top coat over the whole set for the subtlest nod. In gel, the accent lasts through the honeymoon. Mention it to your photographer — the something-blue detail shot, ring beside the blue accent, is a beloved album page. Keep the blue pale; deep navy on one nail looks like a mistake rather than a tradition.
Short and Chic
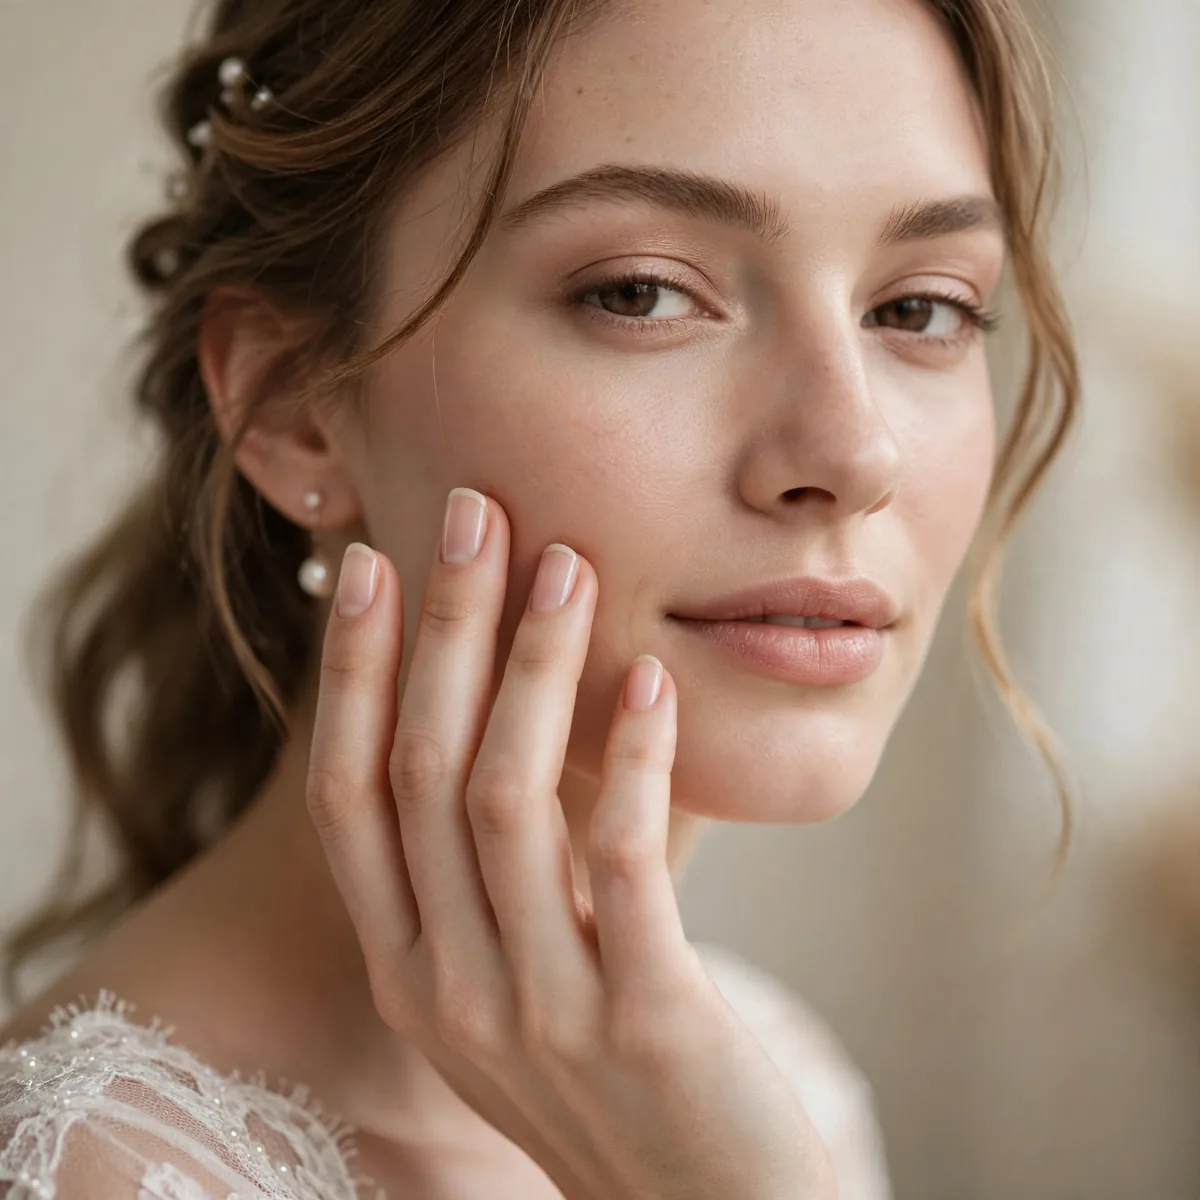
Short, neat, polished — short nails are completely bridal-appropriate and practical.
A clean short manicure photographs beautifully; length isn’t required.
On short nails, the squoval — square with softened corners — is the most flattering shape, giving structure without harshness. Push back cuticles gently after a warm soak; neat cuticles matter more than length for a polished look. Sheer pinks and soft nudes are the best short-nail polishes — dark colors can make short nails look stubby. Keep the free edge just past the fingertip for the most elegant proportion.
Short nails are the practical bride’s superpower — typing, fastening jewelry, and handling the dress all stay easy. They chip far less than long nails, since there is less free edge to catch. In photos, a neat short manicure looks modern and intentional, never underdone. If you are tempted by length, try press-ons for the day instead of growing them — you keep your practical nails and get the look for portraits.
Gel for Longevity
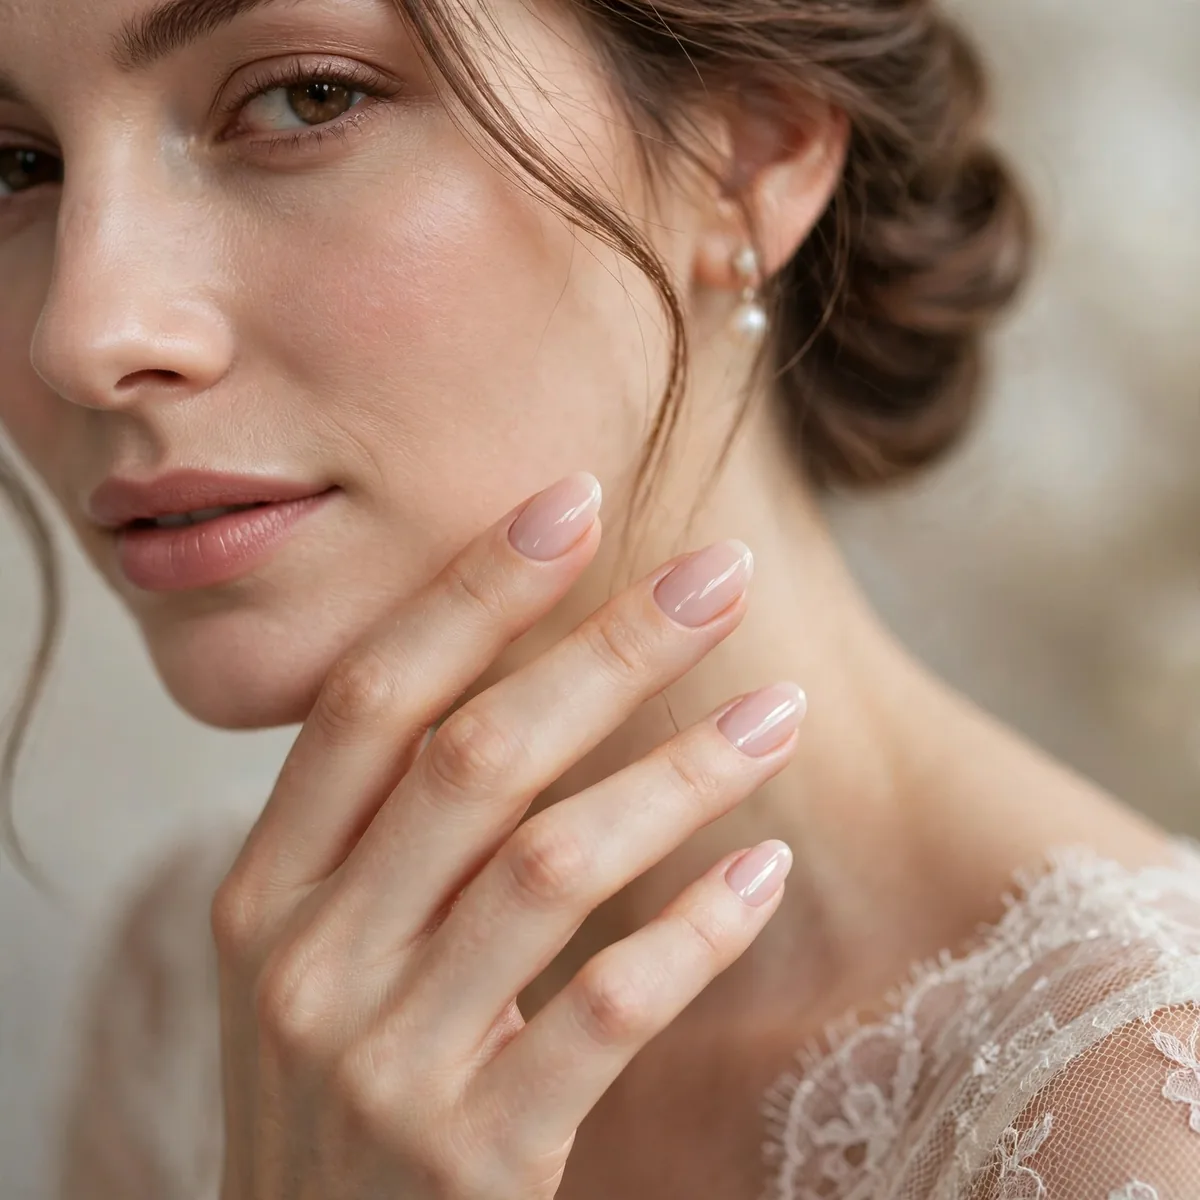
Get your manicure 1-2 days before in gel — it’ll last through the honeymoon.
Schedule a trial manicure a month before to test shape and color.
Gel polish cures under a UV or LED lamp between coats, creating a hard, glossy shell that resists chips for two to three weeks. Book the wedding manicure one to two days before — close enough that grow-out is invisible, with buffer time for fixes. Do a full trial manicure a month out to test the shape, length, and color in real life; what looks perfect under salon lights can surprise in daylight.
Never peel gel off — it lifts layers of the natural nail with it. Soak-off removal with acetone wraps takes fifteen minutes at the salon and preserves nail health. Give nails a breather between gel sets if you wear it constantly; a week of bare nails with cuticle oil restores strength. Compared to dip powder, gel is thinner and more natural-looking; compared to acrylics, it is less damaging. For most brides, gel is the sweet spot.
Matching Toes
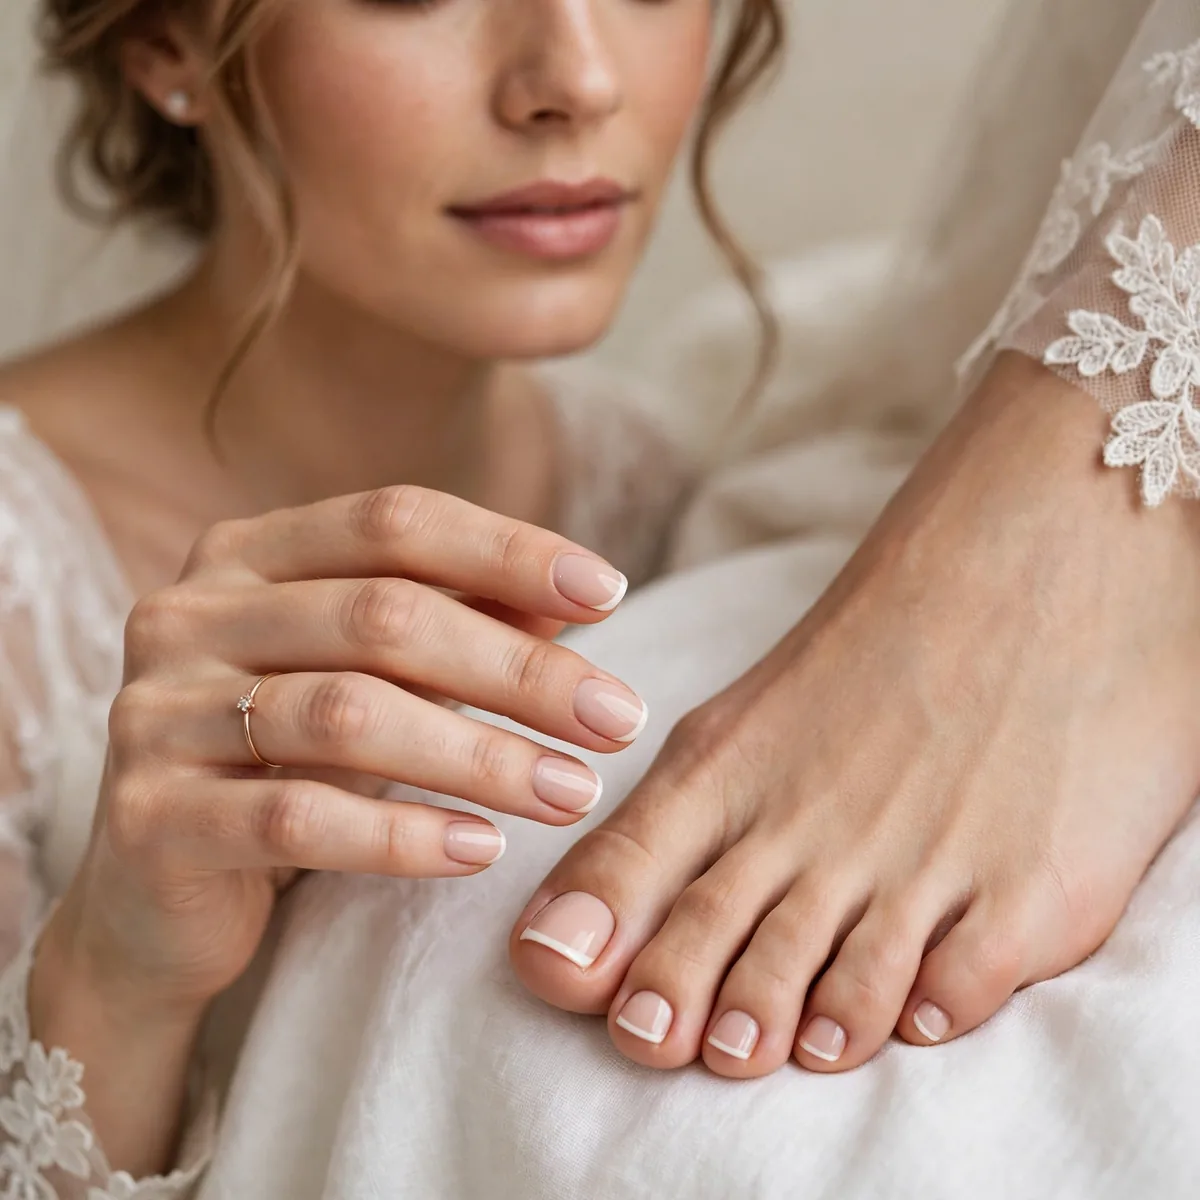
Don’t forget the pedicure — open-toe shoes and honeymoon sandals demand it.
Match or coordinate with your manicure for cohesion.
Book the pedicure two to three days before the wedding — feet need the extra day for any redness to settle. Match the manicure exactly for classic cohesion, or choose a complementary shade: a soft pink pedi with a French mani, for instance. With open-toe shoes, the pedicure is non-negotiable — photographers shoot the shoes, and feet will be in frame. Exfoliate heels well; cracked heels ruin even the prettiest polish.
A gel pedicure lasts through the entire honeymoon — through sand, salt water, and sandals — making it the best beauty investment of the trip. At home, a warm foot soak, cuticle care, and two thin coats plus top coat give a respectable DIY pedi. Moisturize feet nightly the week before; hydrated skin photographs smooth. Pack the polish for touch-ups — toenails chip on luggage and adventure activities.
Emergency Kit
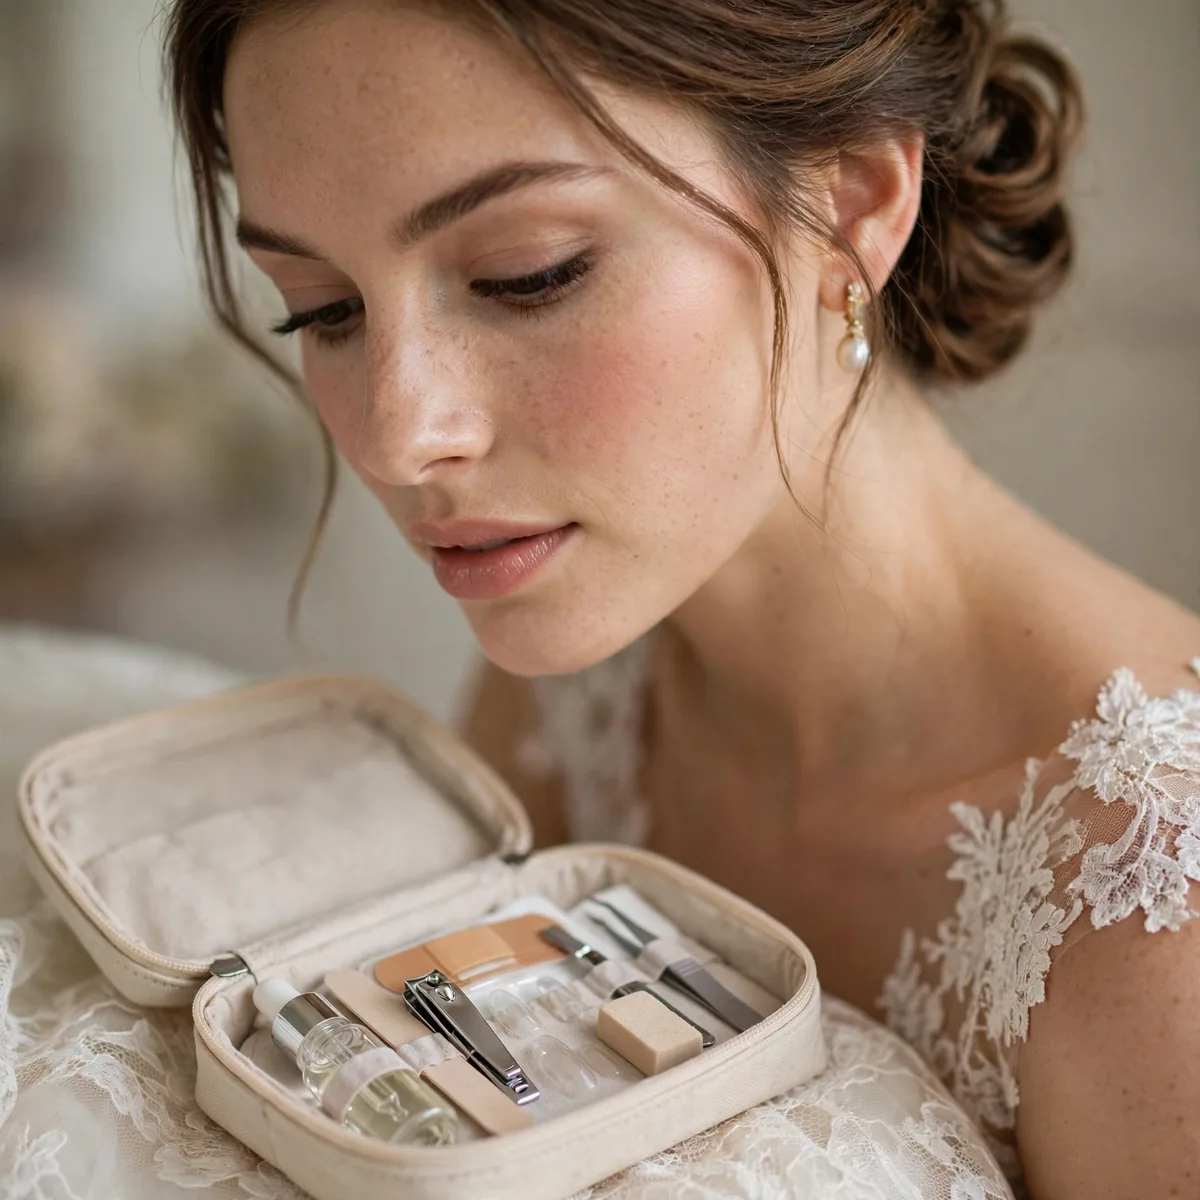
Pack: your polish for chips, nail glue, a file, and clear top coat.
For more seasonal nail inspiration, see our fall nail ideas.
Pack the exact polish for chip touch-ups — even the right color family is visibly off. Add nail glue for a lifted press-on or broken tip, a fine-grit file to smooth snags, clear top coat to seal repairs, and a buffer to blend. Toss in cuticle oil for hangnails and adhesive bandages to hide a broken nail gracefully. The whole kit fits in a sunglasses case — small enough that it actually travels with you.
Hand the kit to your maid of honor with a two-sentence briefing — she will spot chips before you do. For a chip, dab polish only on the bare spot, let it dry, then seal the whole nail with top coat; repainting the entire nail looks thicker and mismatched. Prevent damage by wearing gloves for any setup tasks and avoiding using nails as tools. A calm, prepared approach beats panic every time.
Hands ready for their close-up. Save these ideas, and for everyday nail inspiration see our fall nail ideas.