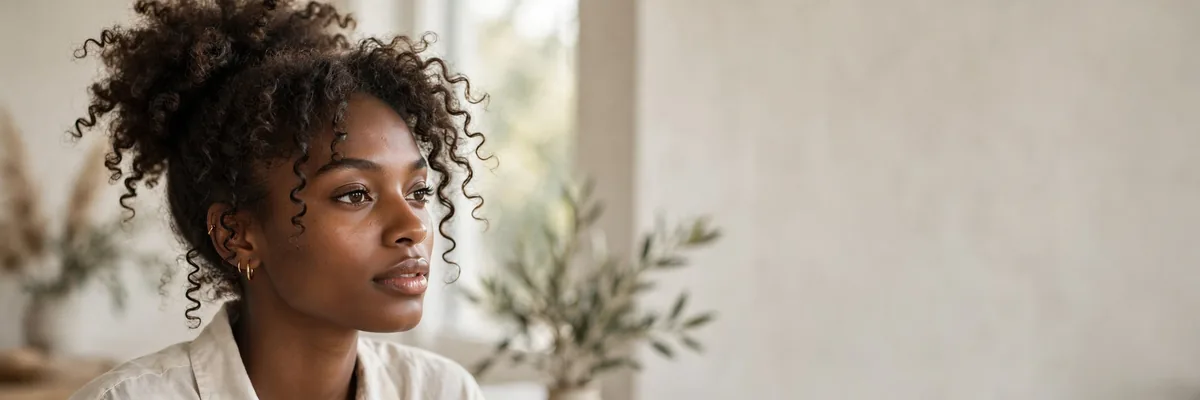
Second-day curls have a reputation problem — flat on top, frizzy at the ends, and somehow both at once.
But here’s the truth: day-two curls often have better texture and hold than wash-day curls. They just need a refresh and a style that works with their lived-in character.
A light mist of water, a little product reactivation, and the right updo or half-up style can make day two look better than day one.
Here are 18 styles built for second-day curls. Let’s get into it.
The Pineapple Refresh
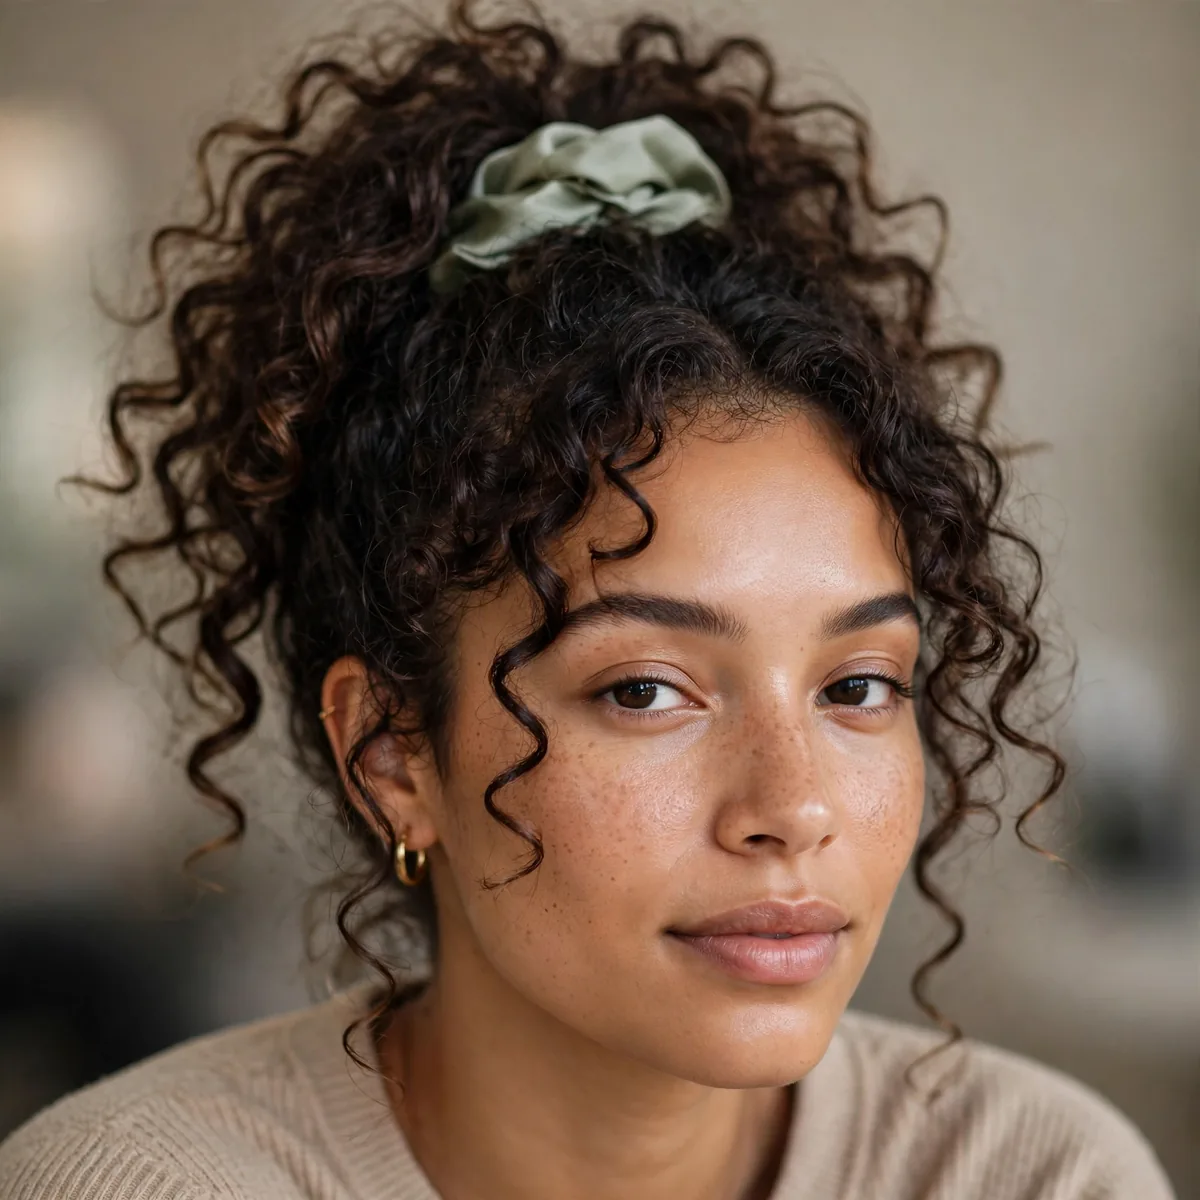
Mist curls lightly with water, scrunch in a dab of leave-in, and gather everything into a loose high pineapple for ten minutes. Gravity revives the roots while the ends re-form.
Best for: the classic day-two reset. It’s called a refresh, not a restyle, for a reason — fast and effective.
Your density changes how a pineapple refresh behaves, so calibrate the approach. Thick hair needs more numerous, smaller sections to stay controlled, while fine hair does better with fewer sections plus edge control at the roots for the illusion of fullness. Naturally thick hair often holds the style longest since the bend grips itself. Whatever your density, step back and check the balance — the silhouette should feel even, never heavy on one side.
Humidity is the sworn enemy of a crisp pineapple refresh, so plan accordingly. On damp days, lean on a texturizing spray with anti-frizz properties and avoid over-touching the hair, since hands transfer moisture and oils that encourage puffiness. If the style does expand, resist the urge to reheat everything — smoothing just the outer layer with a round brush usually restores order. A style that survives a humid commute is a style worth repeating.
Half-Up Pineapple
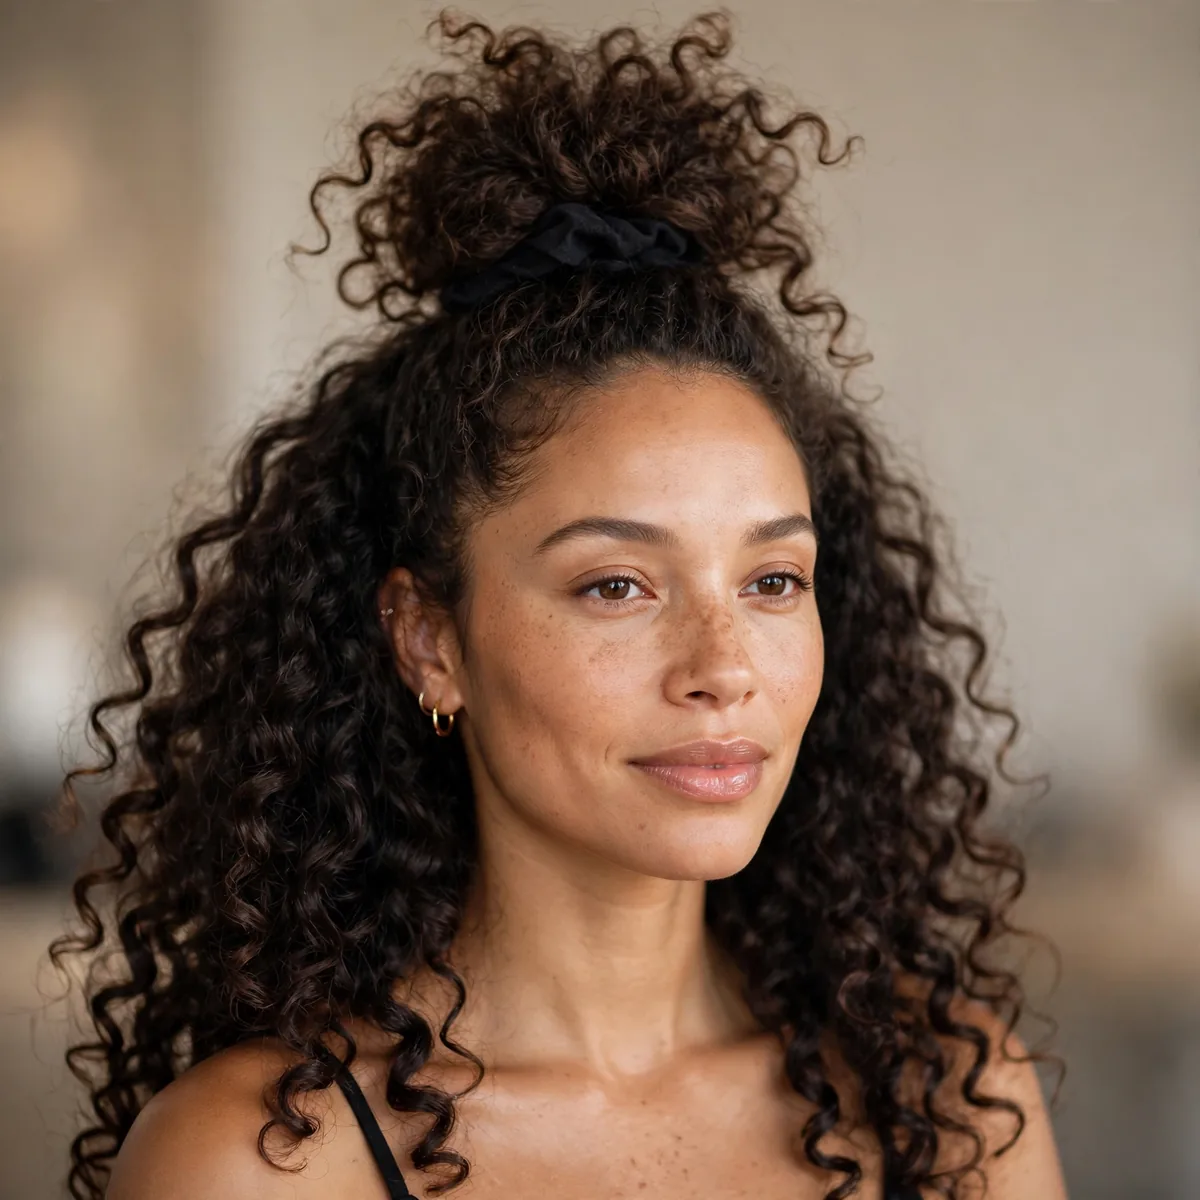
Only the top half goes into the pineapple, leaving the bottom curls flowing. Lifts flat roots while showing off your length.
Best for: when the crown is flat but the ends still look good. The contrast is flattering.
The half-up pineapple earns its place as a go-to for job interviews because it balances polish with personality. For daytime versions, keep the finish soft and touchable; for evening, sharpen the details — sleeker roots, more defined pieces, a glossier finish. A volumizing powder helps the style transition from desk to dinner without a full redo. It is the kind of versatile look that justifies the ten minutes it takes to perfect.
Layer the half-up pineapple with complementary details for extra dimension. Face-framing layers, a softened hairline, or a contrasting texture at the ends all add interest without complicating the style. A curling wand refines these details, while lightweight mousse keeps them defined through the day. Think of the base style as the canvas and these small additions as the brushstrokes that make it personal.
High Puff
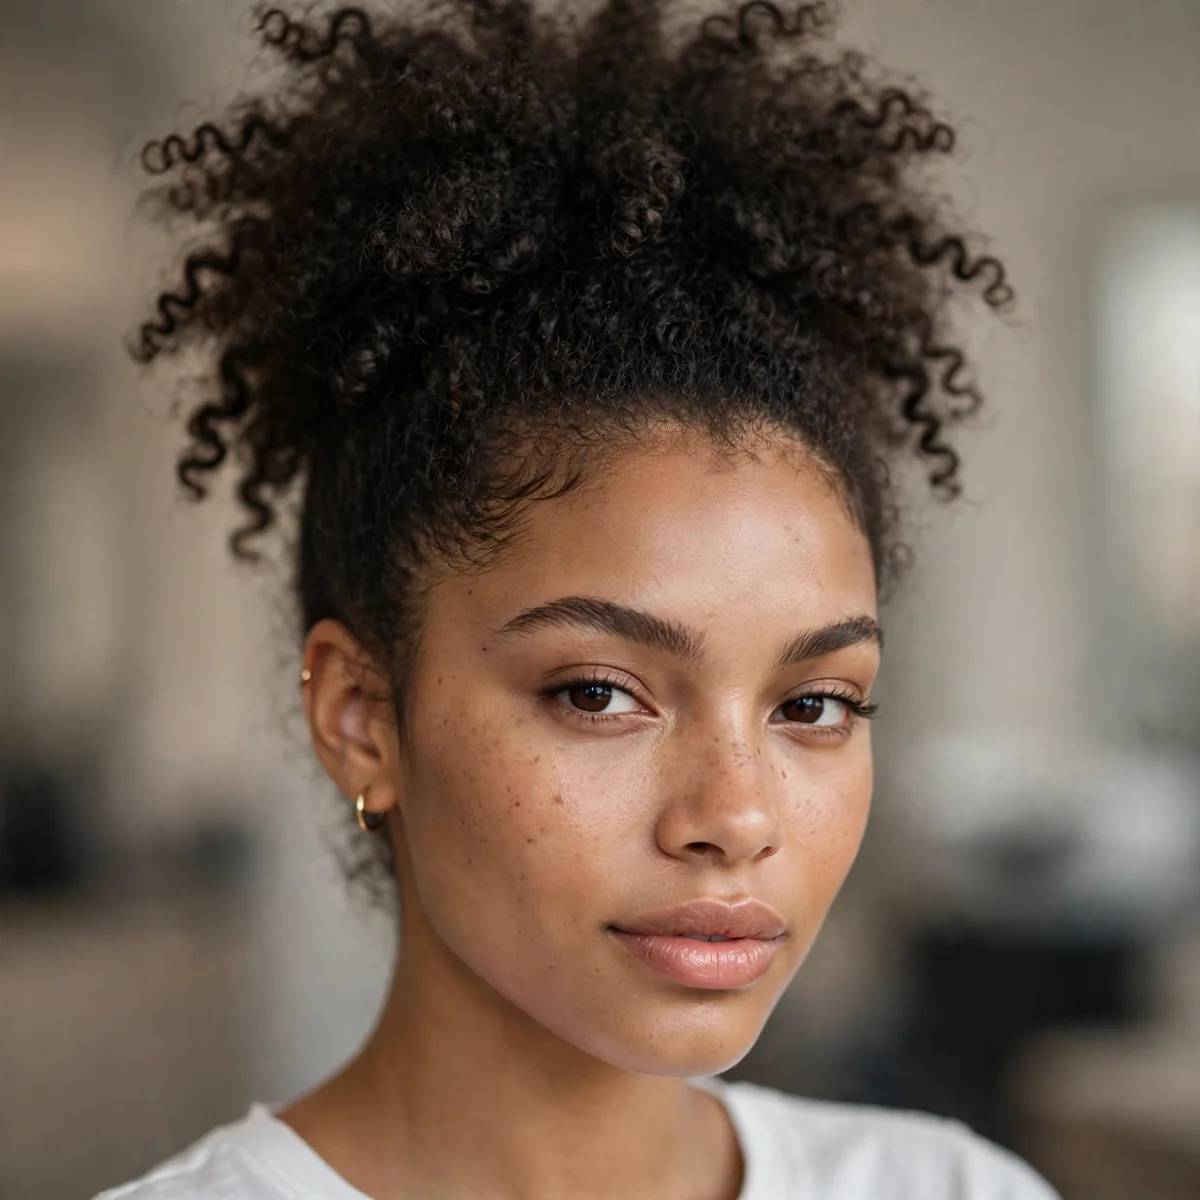
Gather all curls into a high puff with a satin scrunchie or headband. The puff shape hides flat roots completely and shows off curl volume.
Best for: type 3c–4c curls especially. Fluff the puff with your fingers for maximum roundness.
The most common high puff mistake is working against the hair instead of with it — forcing sleekness on air-dried texture or volume on pin-straight lengths without prep. If the style fights you, stop and add dry shampoo or switch tools; a curling wand often solves what fingers cannot. Tension issues cause most failures: too tight looks severe and causes breakage, too loose unravels. Aim for secure but comfortable, and the style will cooperate.
The front sections make or break a high puff — they are the frame around your features. Soften the hairline with a few released pieces if the style runs severe, or sharpen it with a flat iron for a more sculpted effect. A touch of sea-salt spray keeps face-framing strands defined without looking stiff. Even tiny adjustments at the front change how the entire style reads, so give this area the most attention.
Low Curly Bun
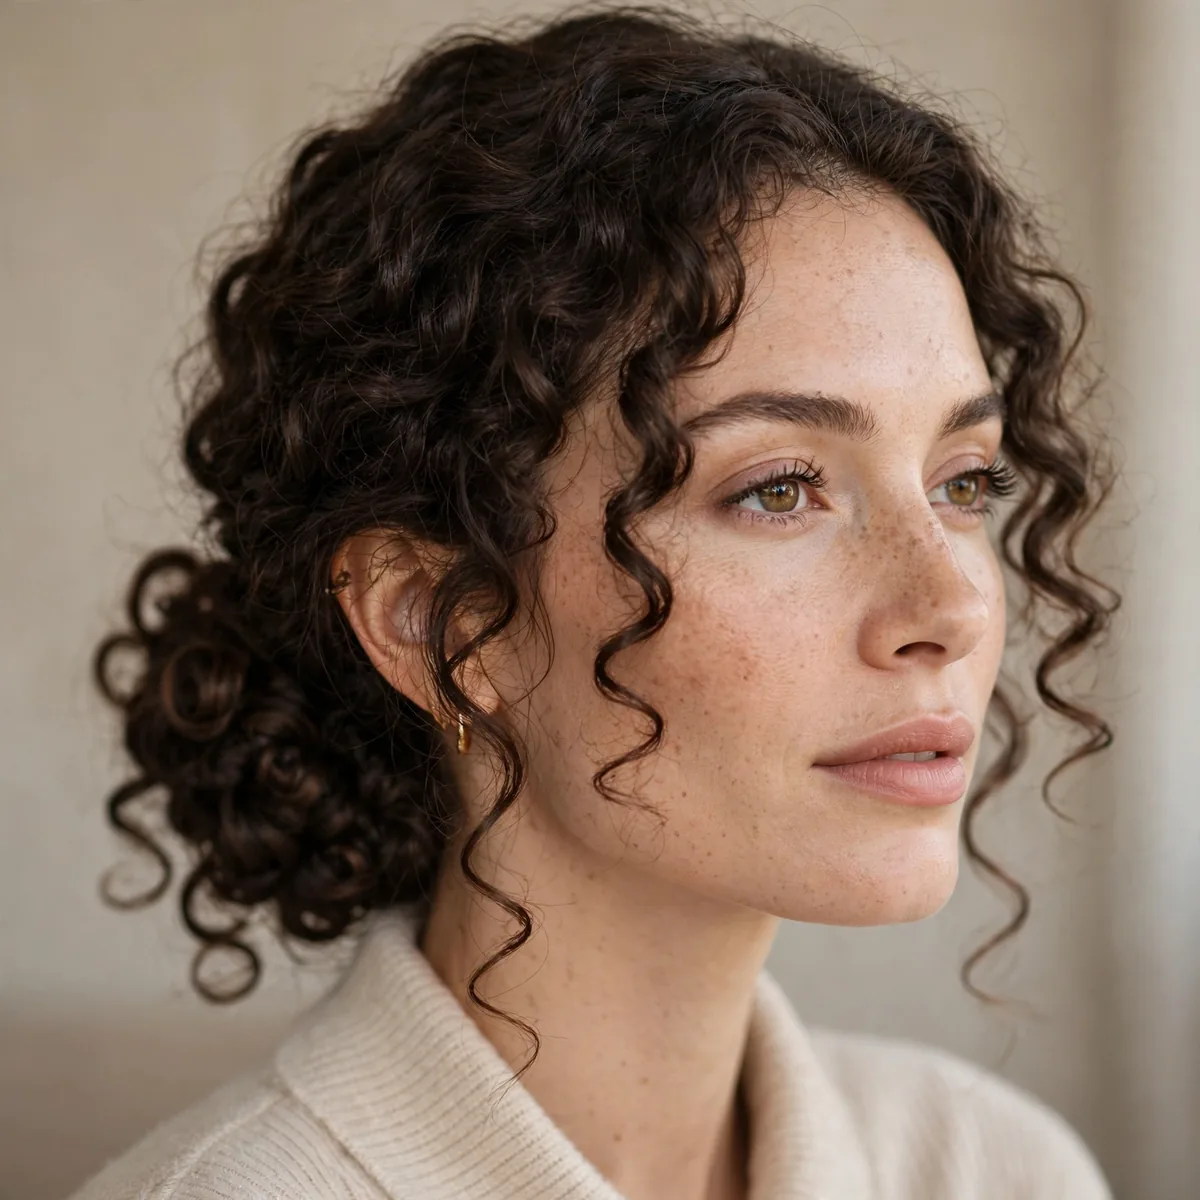
Gather curls into a loose low bun, letting the texture do the talking. Messy is the goal — perfect buns fight curl pattern.
Best for: workdays. It’s polished without fighting your texture.
Clean sectioning is what separates a polished low curly bun from one that gives up by lunch. Clip the crown away with a wide-tooth comb and build from the bottom layers upward, keeping partings crisp and tension even from roots to ends. A little edge control smoothed through the lengths beforehand gives freshly washed or slippery hair the grip it needs. This unglamorous prep is exactly why salon work outlasts most DIY attempts.
A Low curly bun rewards the well-stocked kit. Keep a round brush on hand for precision work and a reliable argan oil for taming the mid-lengths and ends. For thick hair specifically, layering a leave-in under your styler prevents the dryness that makes styles look frizzy by afternoon. The goal is hair that moves naturally while holding its shape — products should be felt, not seen.
Side Braid Refresh
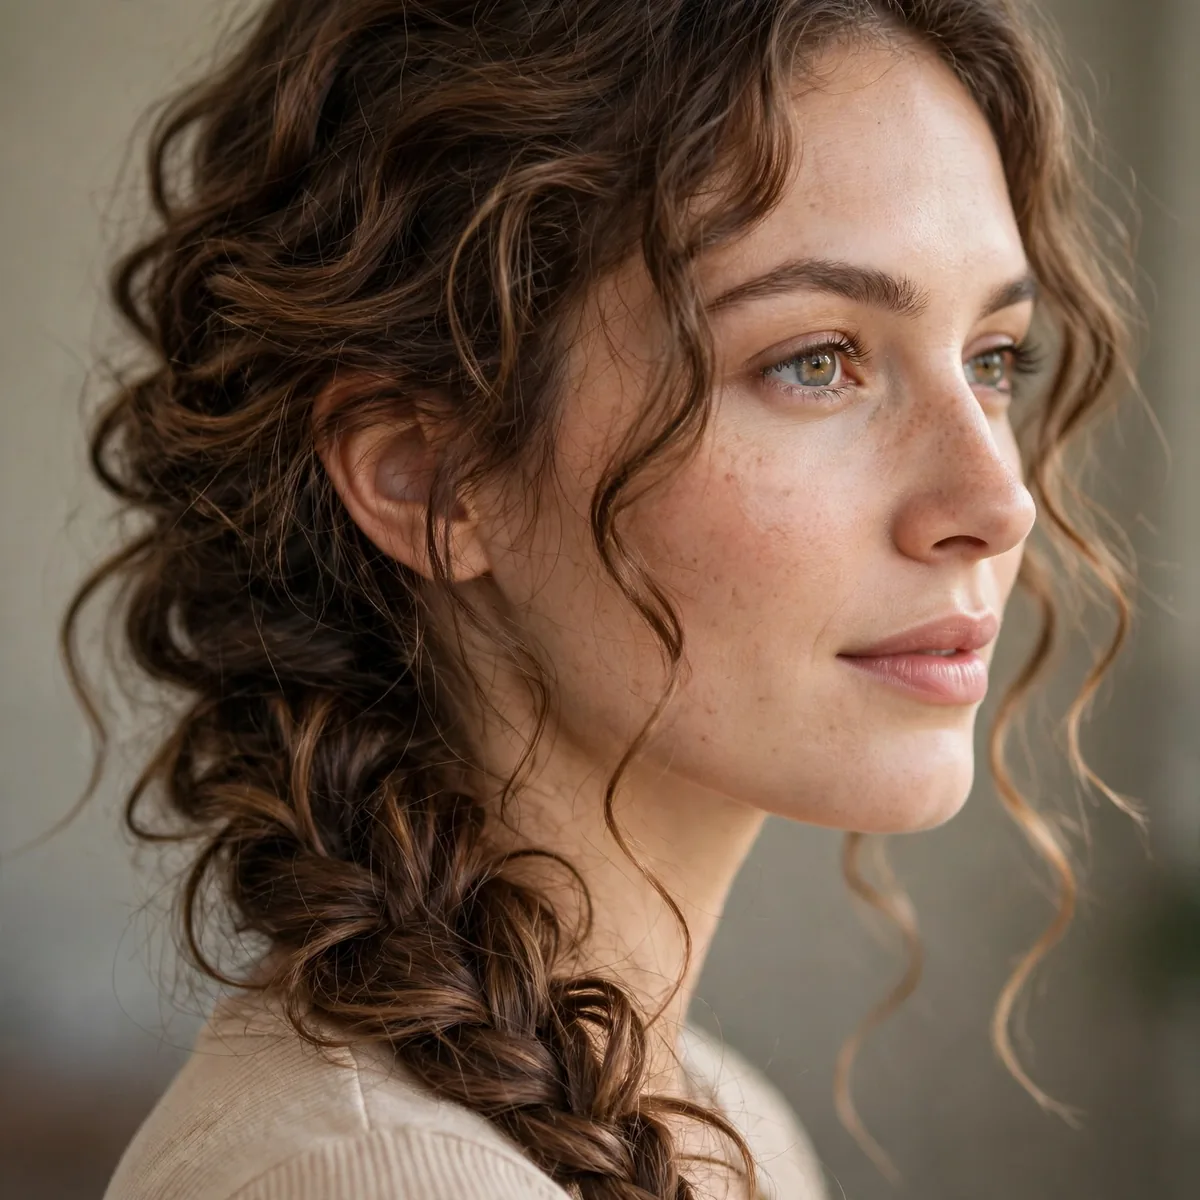
A loose three-strand braid over one shoulder — the braid texture blends beautifully with curls, and frizz just adds to the charm.
Best for: disguising frizz. Braids absorb frizz into texture instead of fighting it.
The side braid refresh is particularly flattering on fine hair, where natural texture adds dimension that elevates the look. Other hair types can wear it too — heat protectant or a quick pass with heat tools can mimic the grit or smoothness the style needs. Very dense hair may require extra sectioning for control, while finer hair benefits from volumizing prep at the roots. Adapt the technique to your hair, not the other way around.
Extend the life of your side braid refresh with smart day-two tactics. Sleep with the hair loosely secured rather than tight, which prevents dents and kinks from setting in. In the morning, spot-fix only the sections that actually need it using a microfiber towel, and revive flat roots with heat protectant massaged in at the scalp. Knowing which parts of a style age fastest — usually the front — lets you refresh strategically instead of starting over.
Halo Twist
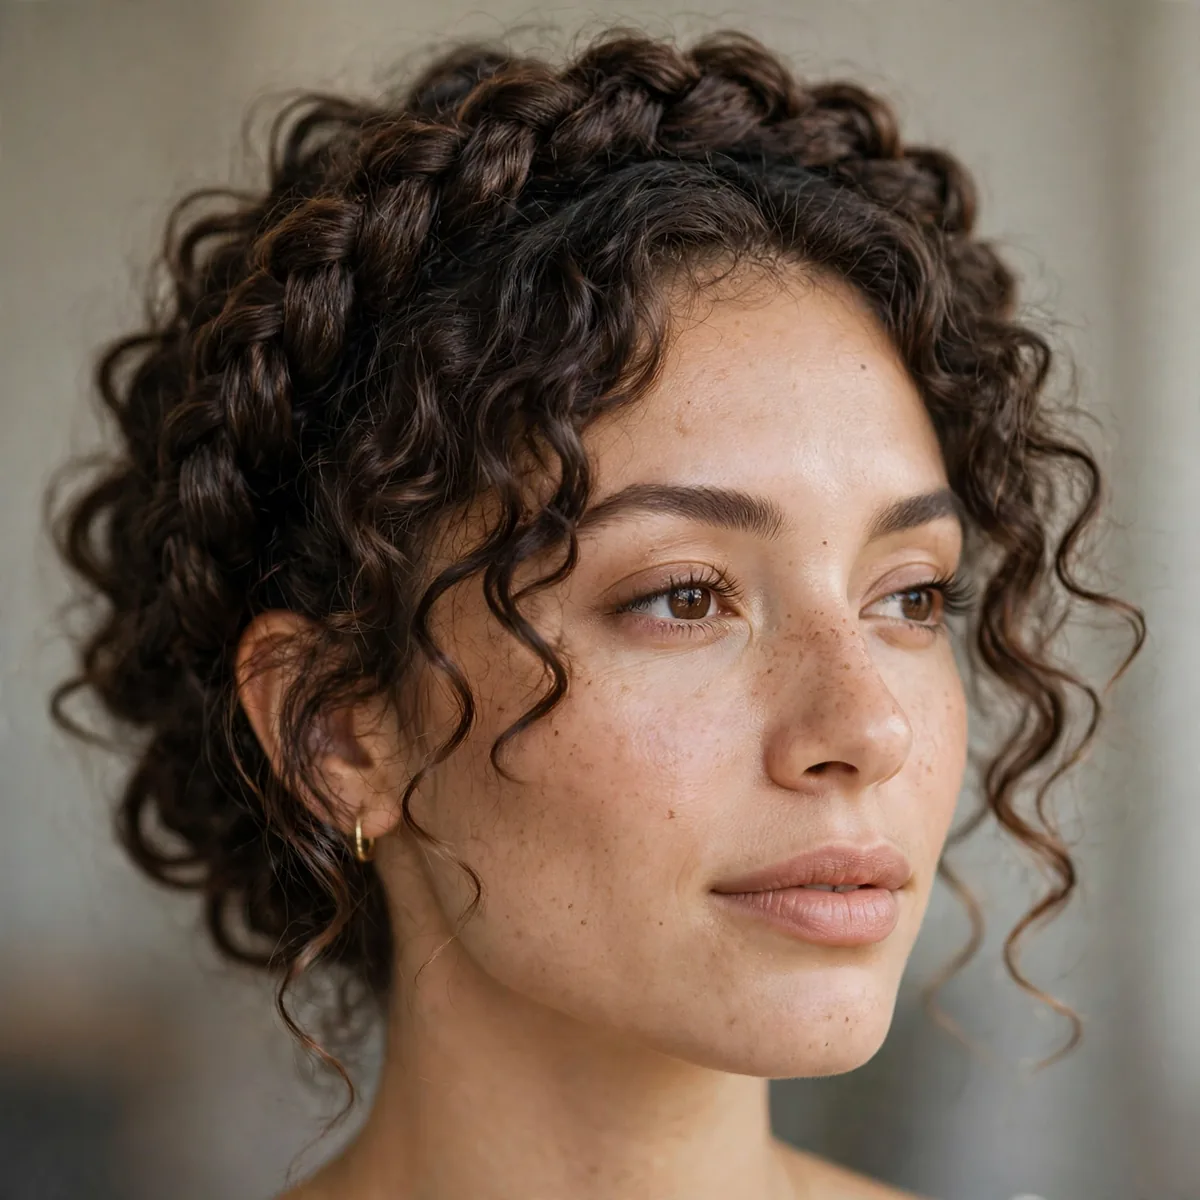
Twist two front sections back and pin them into a halo, leaving the rest of the curls down. Controls the frizziest zone — the front — elegantly.
Best for: when the front curls have lost definition but the back still looks good.
Seasonal tweaks keep a halo twist feeling current year-round. In warmer months, prioritize lightweight formulas like texturizing spray so the style does not feel heavy or collapse in heat, and consider pulling a few face-framing pieces free for airiness. Cooler weather invites richer textures and more structured finishes. The bones of the style stay the same; only the finish and the products change with the forecast.
If the standard halo twist feels too expected, push one element further. More volume at the crown, a sleeker finish through the lengths, an asymmetrical placement — exaggerating a single feature creates a signature version. Use styling cream to support whichever direction you take it, since bolder shapes need more structural help. The goal is not a different style; it is your unmistakable take on this one.
Curly High Ponytail
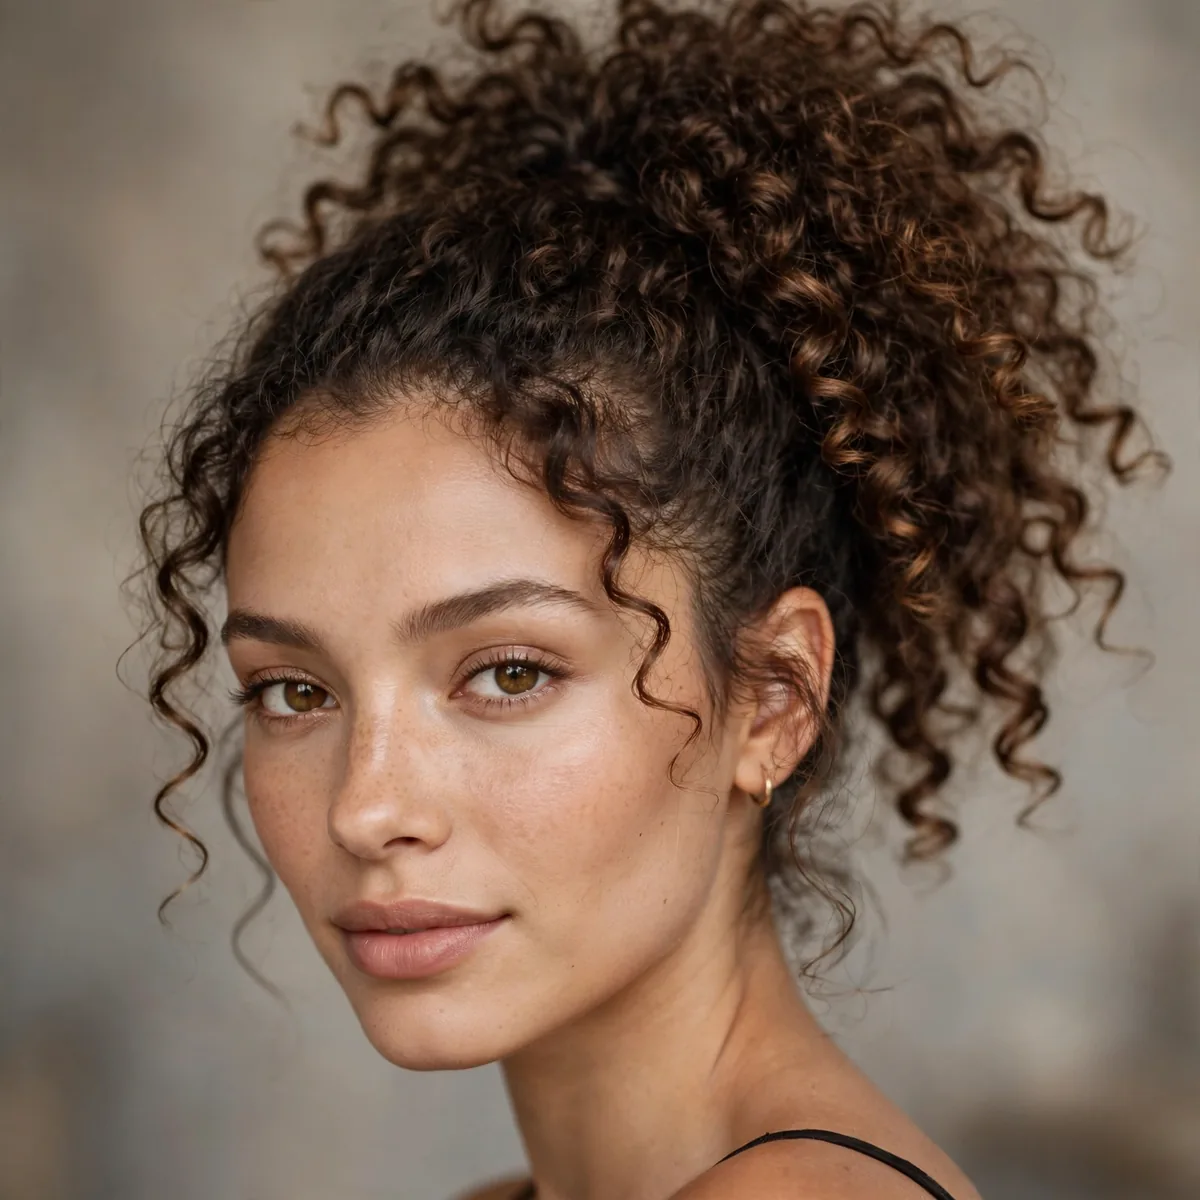
A high pony on curly hair is pure volume — the curls cascade like a fountain. Refresh the pony tail with water and scrunch for bounce.
Best for: showing off length and volume. A strong but gentle elastic prevents breakage.
Frizz ambushing your curly high ponytail usually means the hair needed more moisture before styling, not more hold afterward. Next time, layer a hydrating base under your texturizing spray and smooth the cuticle with a paddle brush while the hair is still slightly damp. If flyaways appear midday, do not pile on more product — smooth them with barely-damp palms instead. Adding product on top of frizz just creates buildup that attracts more frizz.
The front sections make or break a curly high ponytail — they are the frame around your features. Soften the hairline with a few released pieces if the style runs severe, or sharpen it with a flat iron for a more sculpted effect. A touch of texturizing spray keeps face-framing strands defined without looking stiff. Even tiny adjustments at the front change how the entire style reads, so give this area the most attention.
Messy Topknot
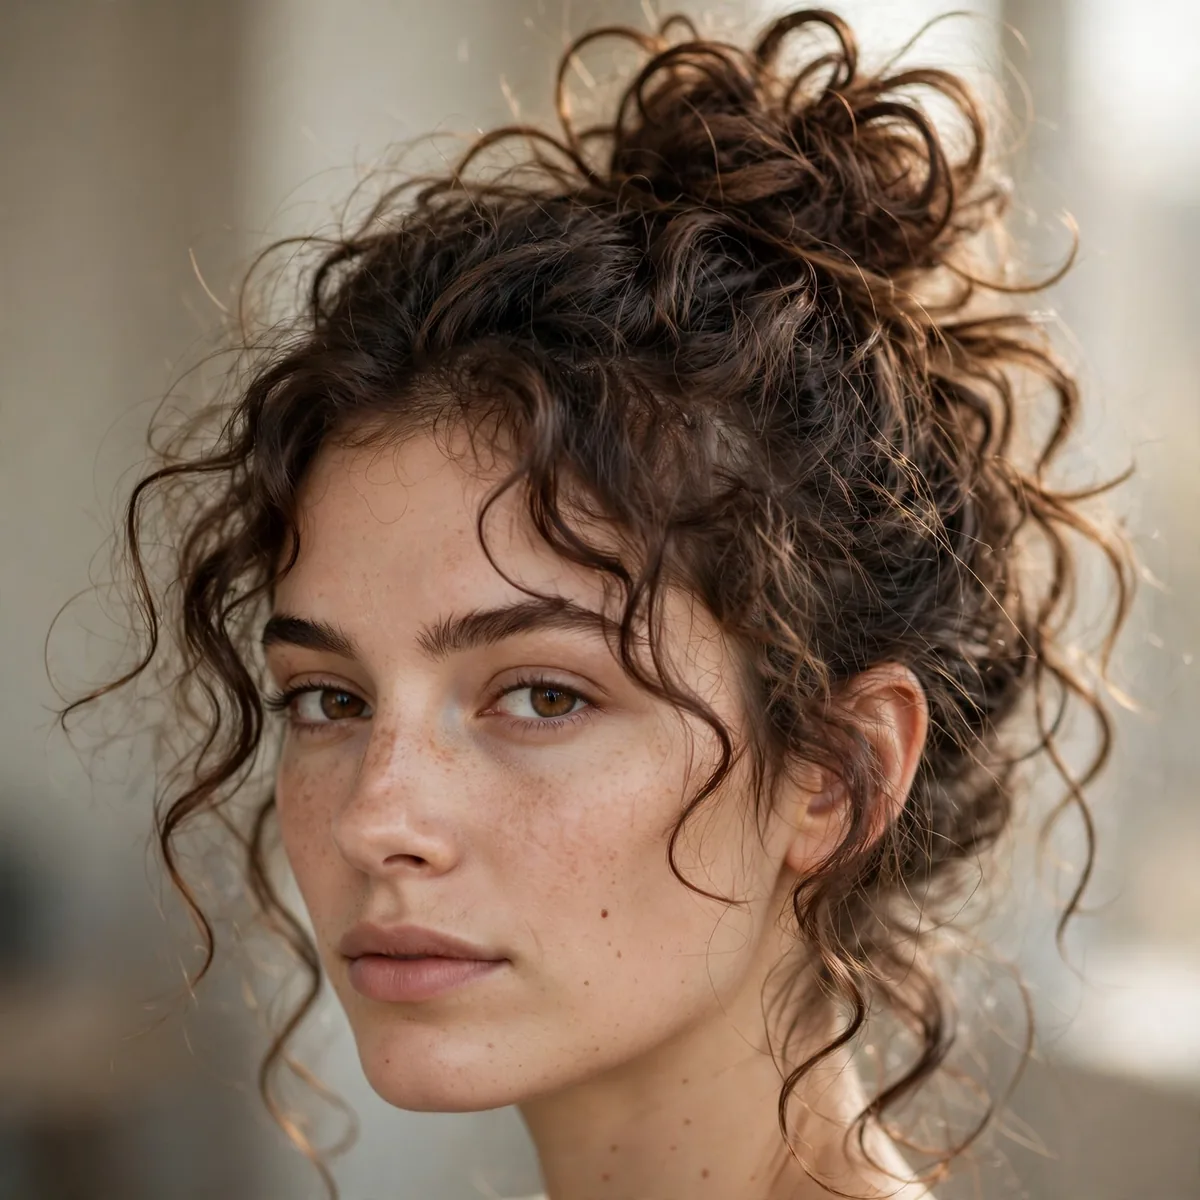
Pile curls into a topknot and let the texture explode naturally. On curly hair, the “messy” happens by itself — lean in.
Best for: the frizziest days. When curls won’t cooperate, the topknot always does.
The foundation of a lasting messy topknot is laid before the styling even starts. Rough-dry or air-dry the hair first, then use a wide-tooth comb to map out clean sections so every part of the style has a defined place to live. Work a touch of smoothing serum through the mid-lengths to control flyaways without stiffness. Checking the back with a hand mirror as you go catches the uneven spots you would otherwise discover in photos.
If your messy topknot never looks quite like the inspiration photo, the missing piece is usually product. Start with a styling cream on damp or dry hair to create a workable base, then reach for a round brush to refine the details. Less is more with styling products; you can always add another pea-sized amount, but overloading leads to buildup that dulls shine. Build gradually and assess in natural light before deciding you need more.
Pinned-Back Curls
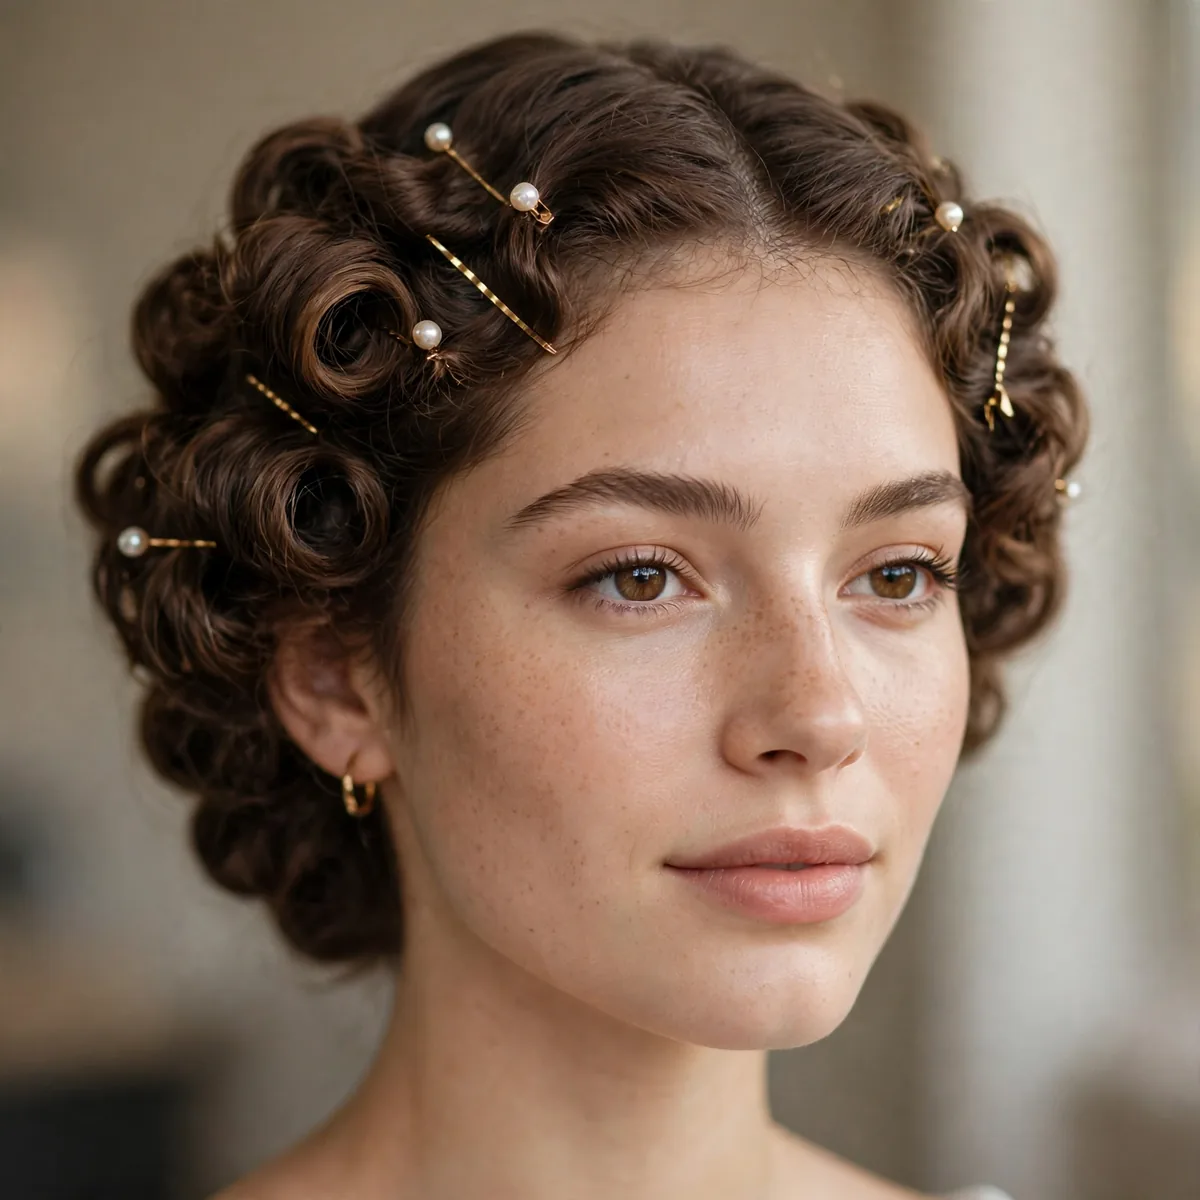
Pin the front curls back with decorative clips or bobby pins, leaving the rest free. Instant face-framing control with zero restyling.
Best for: when you like your curls but they’re in your face. Pearl or gold pins make it look deliberate.
The pinned-back curls is particularly flattering on medium-density hair, where natural texture adds dimension that elevates the look. Other hair types can wear it too — styling cream or a quick pass with heat tools can mimic the grit or smoothness the style needs. Very dense hair may require extra sectioning for control, while finer hair benefits from volumizing prep at the roots. Adapt the technique to your hair, not the other way around.
Refresh rather than redo when your pinned-back curls starts to tire. A light mist of water followed by smoothing serum reactivates the shape without a full restyle, and a duckbill clip can neaten partings in seconds. Focus revival efforts on the hairline and crown — that is where styles visibly age first. Tucking one loose piece behind the ear or adding an accessory can disguise day-two softness while looking completely intentional.
Scarf-Wrapped Style
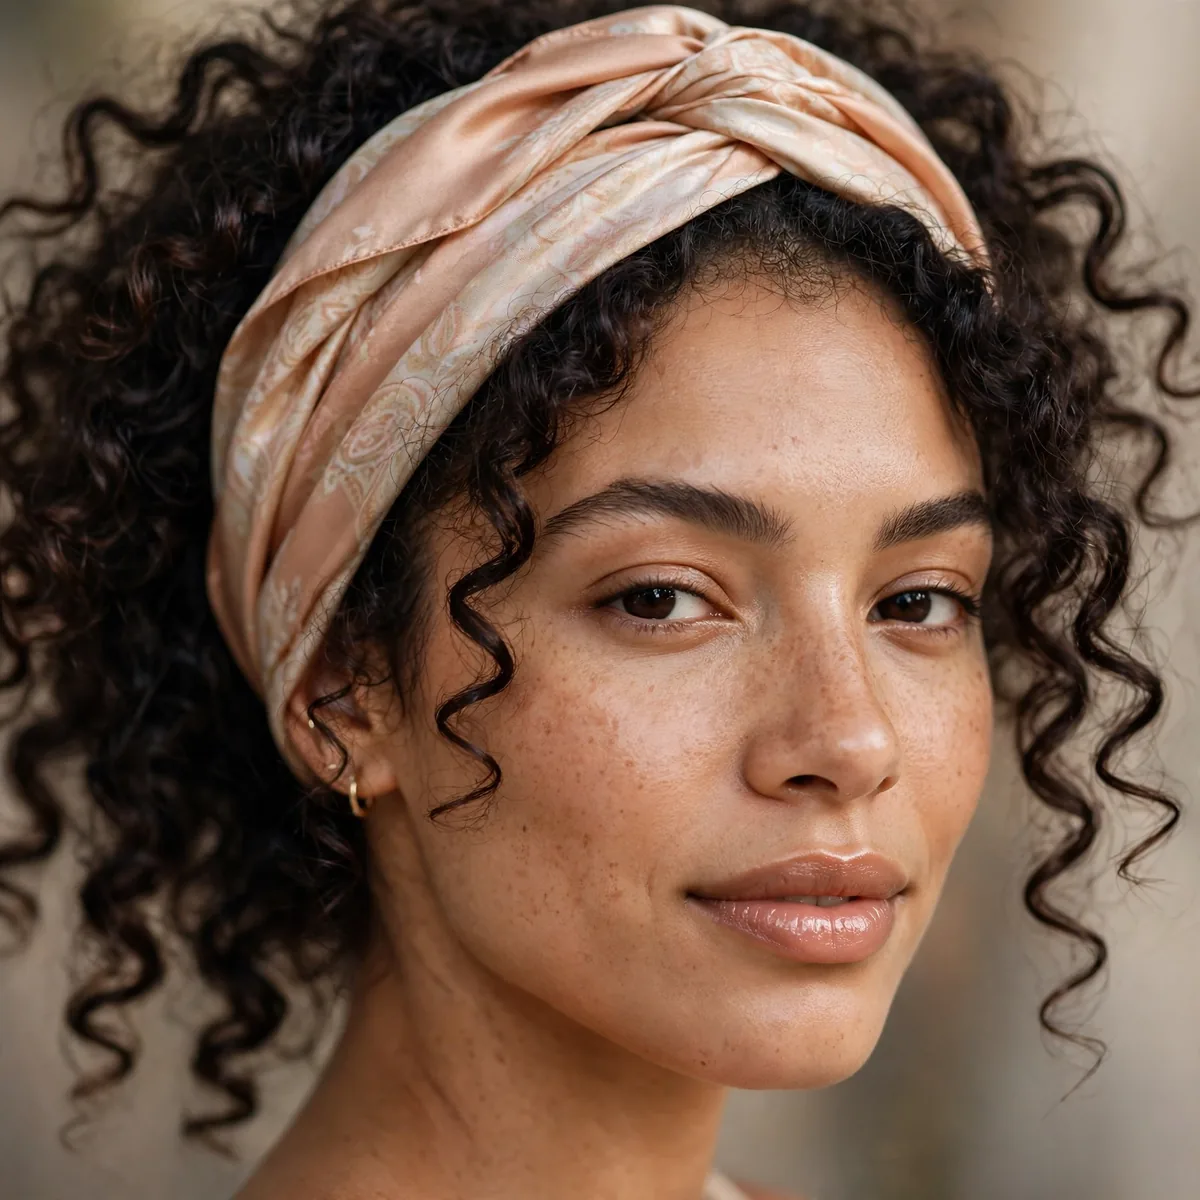
Tie a silk scarf as a headband over your curls — it tames the hairline frizz, adds color, and protects edges. Style and function in one.
Best for: the frizziest hairlines. The scarf covers what refreshing can’t fix.
Dress the scarf-wrapped style up or down with small finishing choices. For casual job interviews, leave the texture a little undone and skip the strong-hold products; for formal moments, smooth everything with a spray bottle and lock it with texturizing spray. Accessories — a silk scarf, minimal pins, a headband — shift the mood instantly without changing the base style. One good foundation, endless interpretations.
If the standard scarf-wrapped style feels too expected, push one element further. More volume at the crown, a sleeker finish through the lengths, an asymmetrical placement — exaggerating a single feature creates a signature version. Use dry shampoo to support whichever direction you take it, since bolder shapes need more structural help. The goal is not a different style; it is your unmistakable take on this one.
Waterfall Braid on Curls
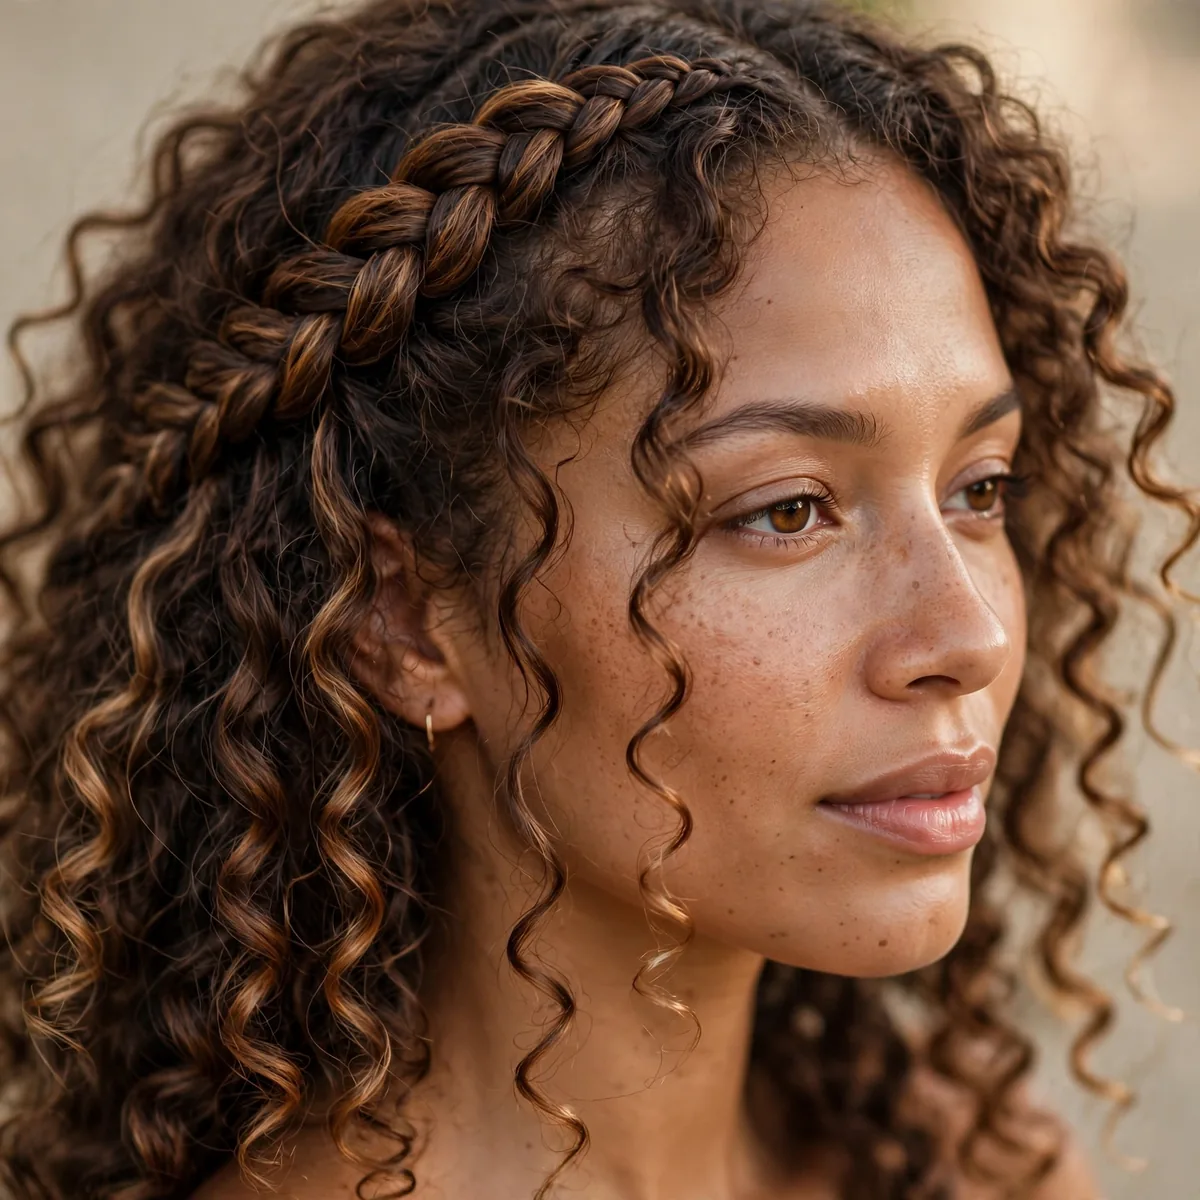
A waterfall braid across the crown with curls flowing through and beneath it. The braid adds structure; the curls add romance.
Best for: date nights. It’s the prettiest way to control day-two volume.
When a waterfall braid on curls falls flat within hours, the culprit is almost always skipped prep or overloaded product. Strip it back: clean sections, a modest amount of argan oil, and a duckbill clip for precision. Another frequent issue is building the style on the wrong foundation — too-clean hair slips, too-dirty hair looks dull. Day-old hair is the sweet spot for most versions of this look.
A Waterfall braid on curls becomes truly flattering when it is tuned to your face shape. Softer, long faces benefit from height at the crown and pieces that fall vertically, while longer faces look best with width at the sides. Use a microfiber towel to direct the front sections intentionally rather than letting them fall randomly. These small directional choices separate a style that suits you from one that just sits on you.
Braid-Out Refresh
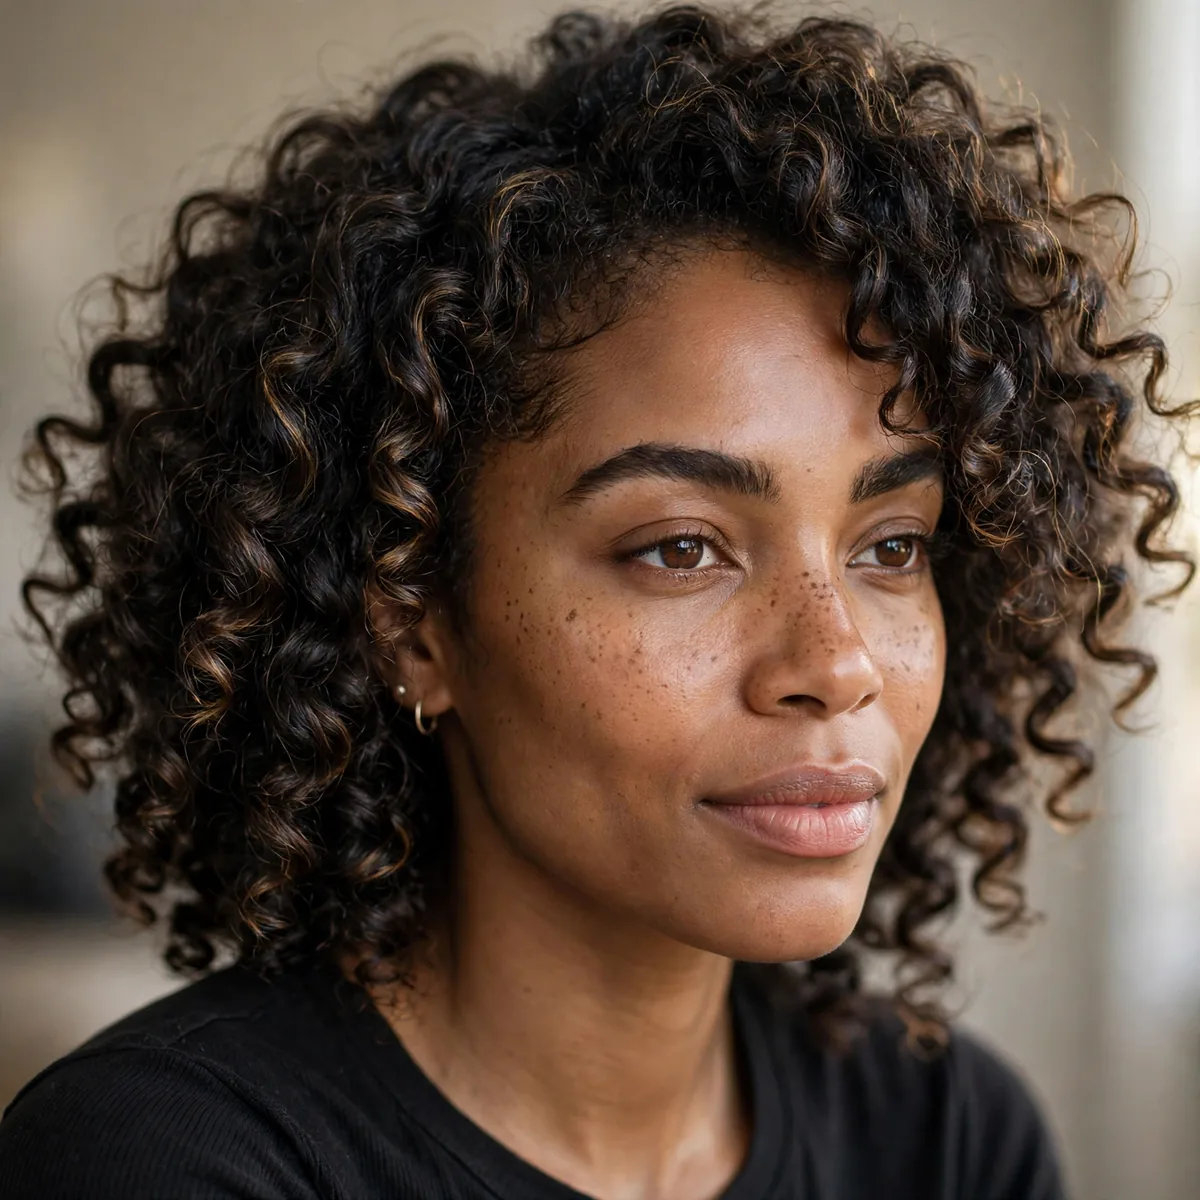
Re-braid a few sections overnight, or simply re-twist the frizziest pieces in the morning. Targeted refreshing beats full restyling every time.
Best for: braid-out and twist-out wearers. Refresh only what needs it.
Start your braid-out refresh on hair with a bit of texture to it — day-old hair or strands prepped with smoothing serum hold shape far better than squeaky-clean lengths. Divide everything with a duckbill clip, working in small sections instead of handfuls, and finish each zone before moving to the next. Even tension is the goal; inconsistent pulling creates lumps and loose pieces. Slow down here and the rest of the style builds itself.
The right products make a braid-out refresh dramatically easier to execute. A sea-salt spray is the real workhorse — it adds grip, calms frizz, and helps the style hold for hours without visible residue. Work it through before you begin styling rather than layering it on at the end, so it supports the hair's structure from the inside. A light mist to finish keeps everything touchable instead of crunchy.
Half-Up Bun
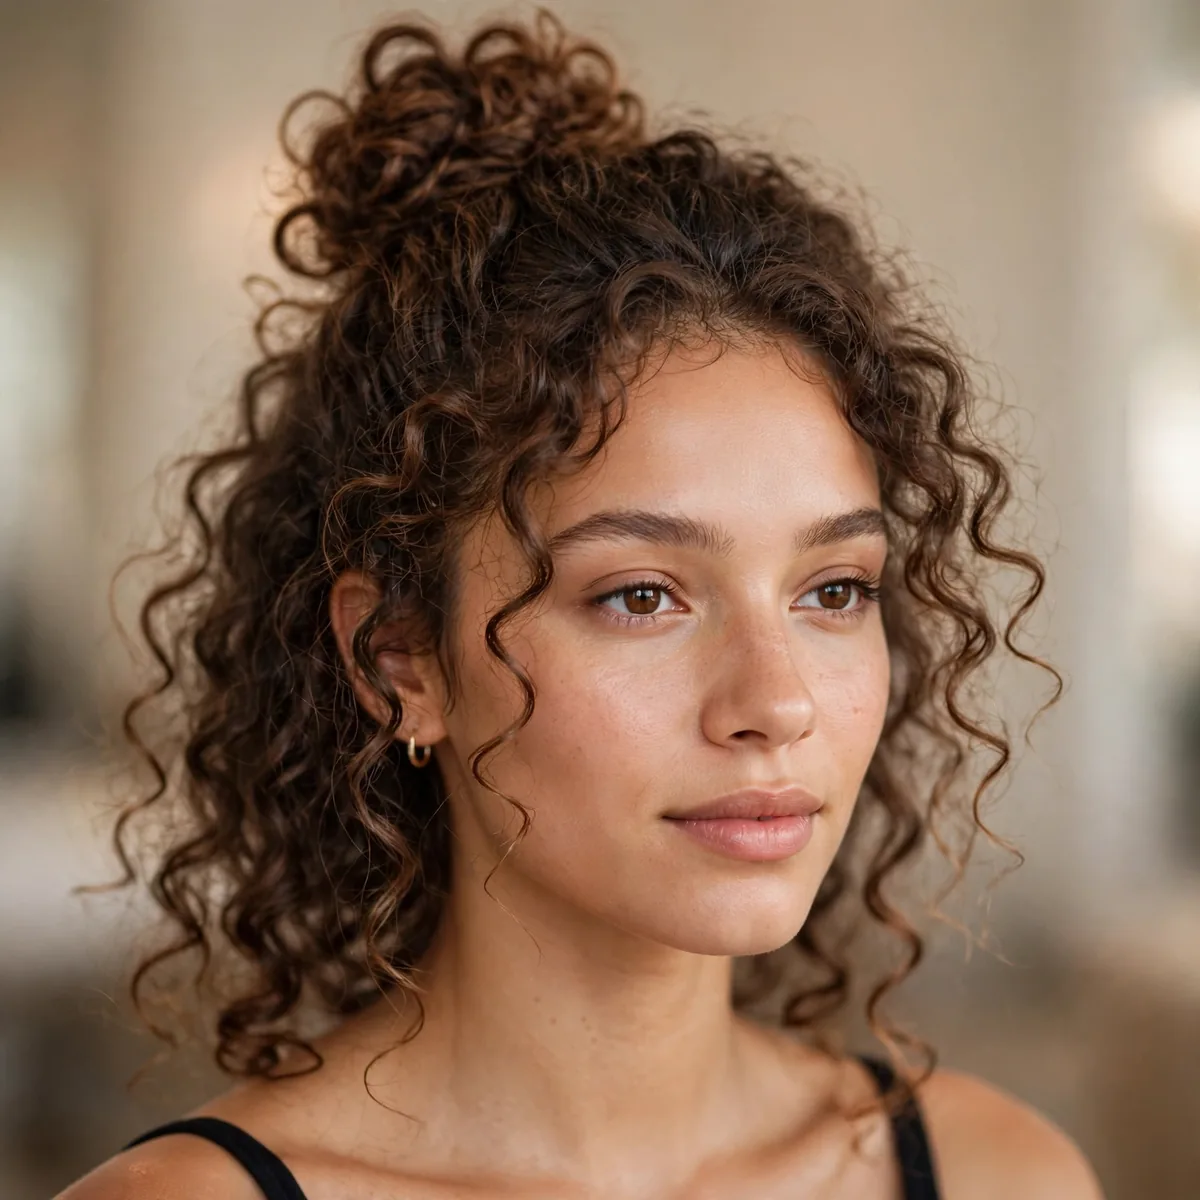
Top half into a bun, bottom curls left down. The bun hides flat crown curls while the loose bottom shows off your texture.
Best for: the universal day-two fix. It works on every curl type, every time.
Length and texture together determine how a half-up bun falls. Longer, wavy lengths give the style beautiful movement, while shorter lengths create a perkier, more graphic version — both are valid. If your hair is very silky, lightweight mousse is non-negotiable for hold; if it is prone to frizz, smooth a serum over the surface as the final step. The same style can look soft or structured depending on these small prep choices.
Extend the life of your half-up bun with smart day-two tactics. Sleep with the hair loosely secured rather than tight, which prevents dents and kinks from setting in. In the morning, spot-fix only the sections that actually need it using a wide-tooth comb, and revive flat roots with styling cream massaged in at the scalp. Knowing which parts of a style age fastest — usually the front — lets you refresh strategically instead of starting over.
Crown Twist
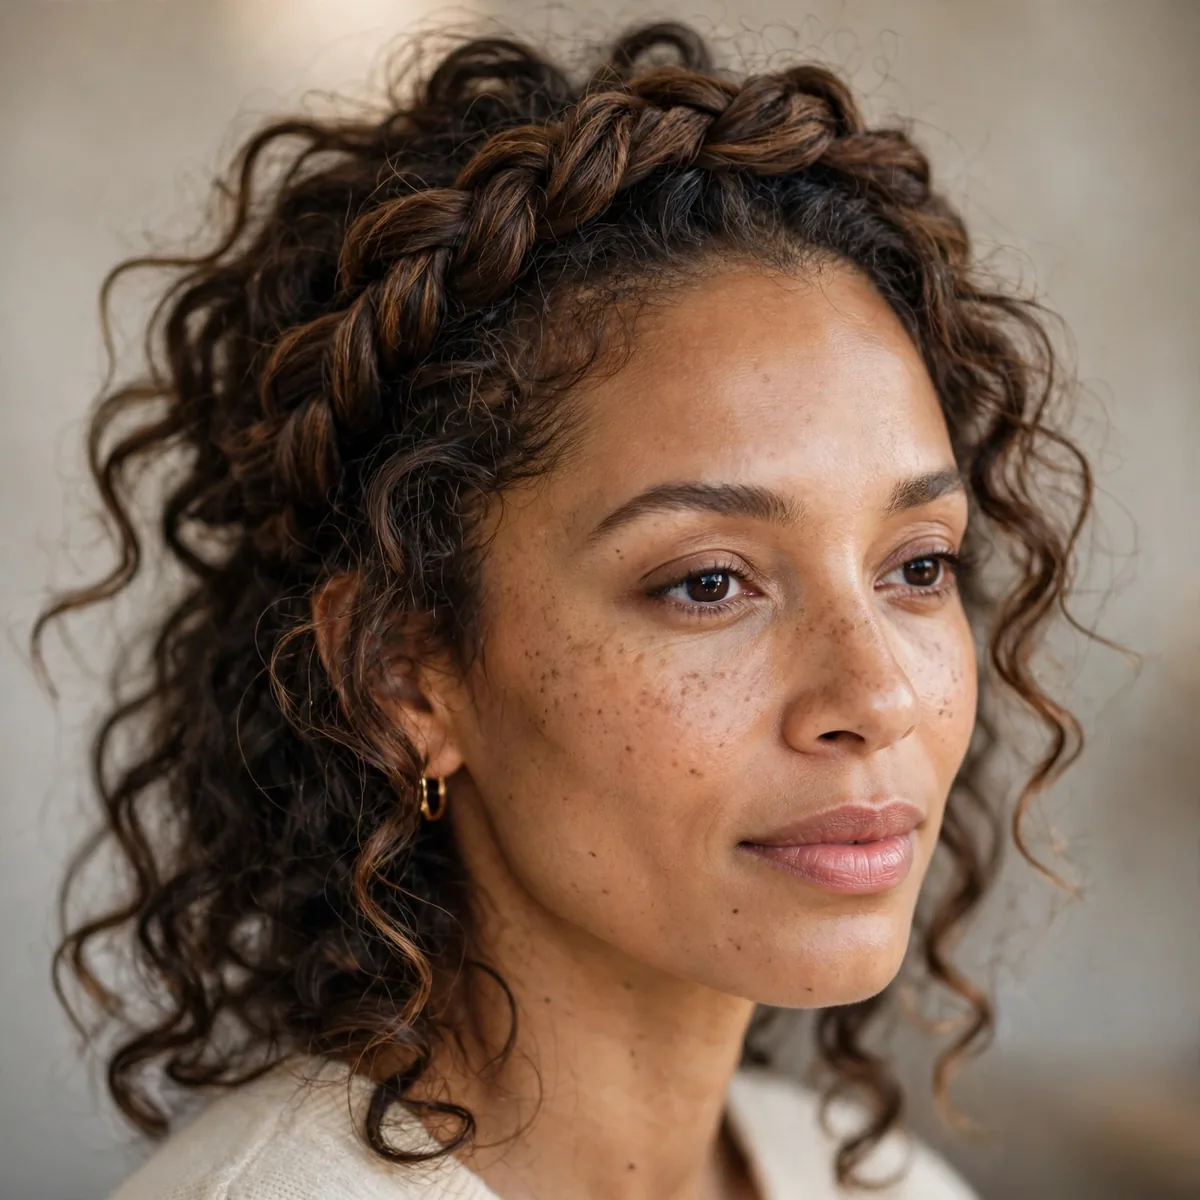
Two flat twists from the temples meeting at the back in a small puff or bun. Keeps the front controlled while curls flow behind.
Best for: longer curly hair. The twists add a detailed, intentional look.
Dress the crown twist up or down with small finishing choices. For casual workdays, leave the texture a little undone and skip the strong-hold products; for formal moments, smooth everything with a duckbill clip and lock it with texturizing spray. Accessories — a silk scarf, minimal pins, a headband — shift the mood instantly without changing the base style. One good foundation, endless interpretations.
If the standard crown twist feels too expected, push one element further. More volume at the crown, a sleeker finish through the lengths, an asymmetrical placement — exaggerating a single feature creates a signature version. Use dry shampoo to support whichever direction you take it, since bolder shapes need more structural help. The goal is not a different style; it is your unmistakable take on this one.
Curly Pony with Bandana
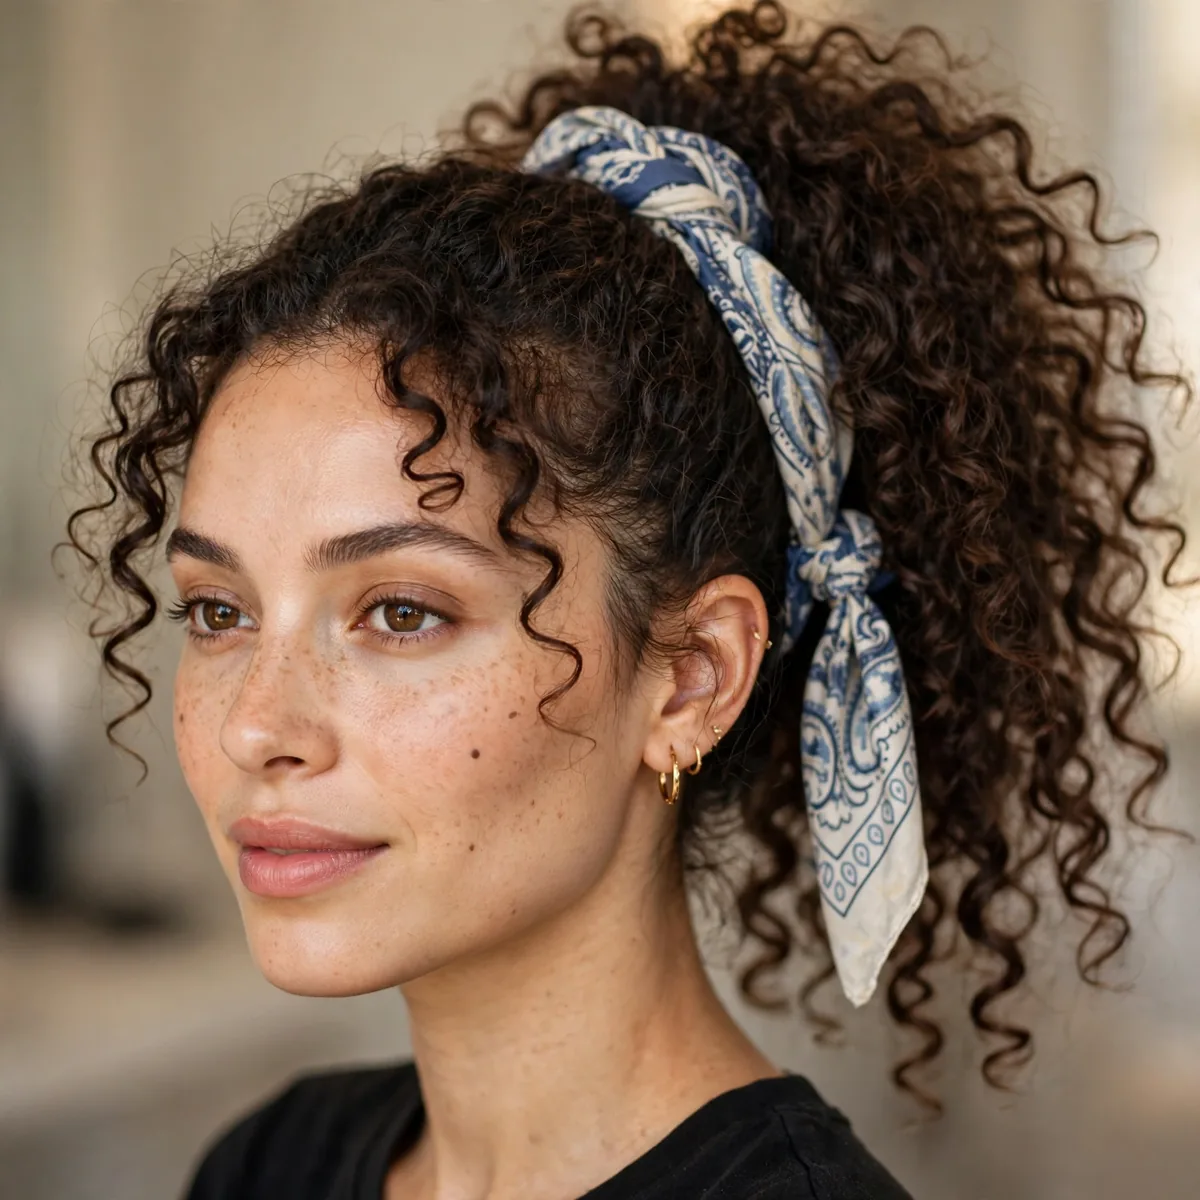
A high curly pony with a bandana tied at the base — retro, fun, and the bandana hides any root flatness at the crown.
Best for: casual days with personality. Match the bandana to your outfit for a styled look.
When a curly pony with bandana falls flat within hours, the culprit is almost always skipped prep or overloaded product. Strip it back: clean sections, a modest amount of argan oil, and a rattail comb for precision. Another frequent issue is building the style on the wrong foundation — too-clean hair slips, too-dirty hair looks dull. Day-old hair is the sweet spot for most versions of this look.
Balance is the key to wearing a curly pony with bandana well. If the style has a lot of volume, keep the front relatively calm; if the silhouette is sleek, a little texture around the face prevents severity. oval faces particularly benefit from this push-and-pull approach. Finish the hairline with volumizing powder on a round brush for a polished edge that still looks touchable. Proportion awareness turns a good style into a great one.
Low Side Ponytail
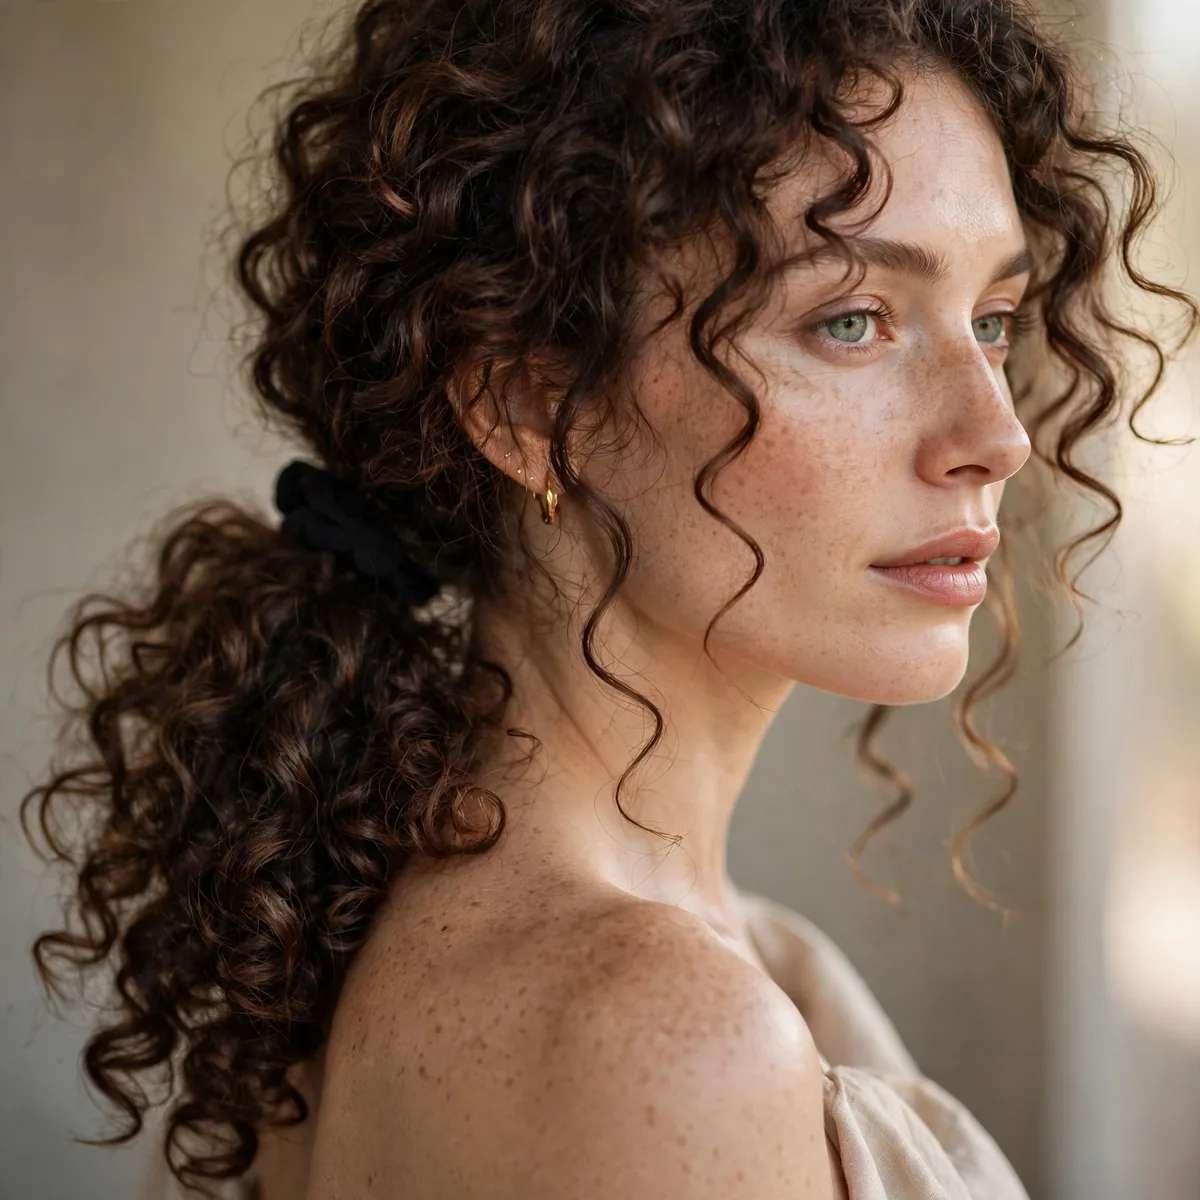
Sweep curls low over one shoulder. The side placement lets curls bunch naturally for volume, and it’s endlessly romantic.
Best for: evenings. Let a few curls escape around the face for softness.
The foundation of a lasting low side ponytail is laid before the styling even starts. Rough-dry or air-dry the hair first, then use a wide-tooth comb to map out clean sections so every part of the style has a defined place to live. Work a touch of sea-salt spray through the mid-lengths to control flyaways without stiffness. Checking the back with a hand mirror as you go catches the uneven spots you would otherwise discover in photos.
Invest in the tools and your low side ponytail gets twice as good with half the effort. A diffuser attachment gives you the control that fingers alone cannot, especially for crisp partings and smooth roots. Pair it with a lightweight mousse suited to your curly texture — fine hair needs featherweight formulas while thicker hair can handle richer creams. Using products matched to your density is the difference between a style that holds and one that collapses.
Defined Coil Pin-Up
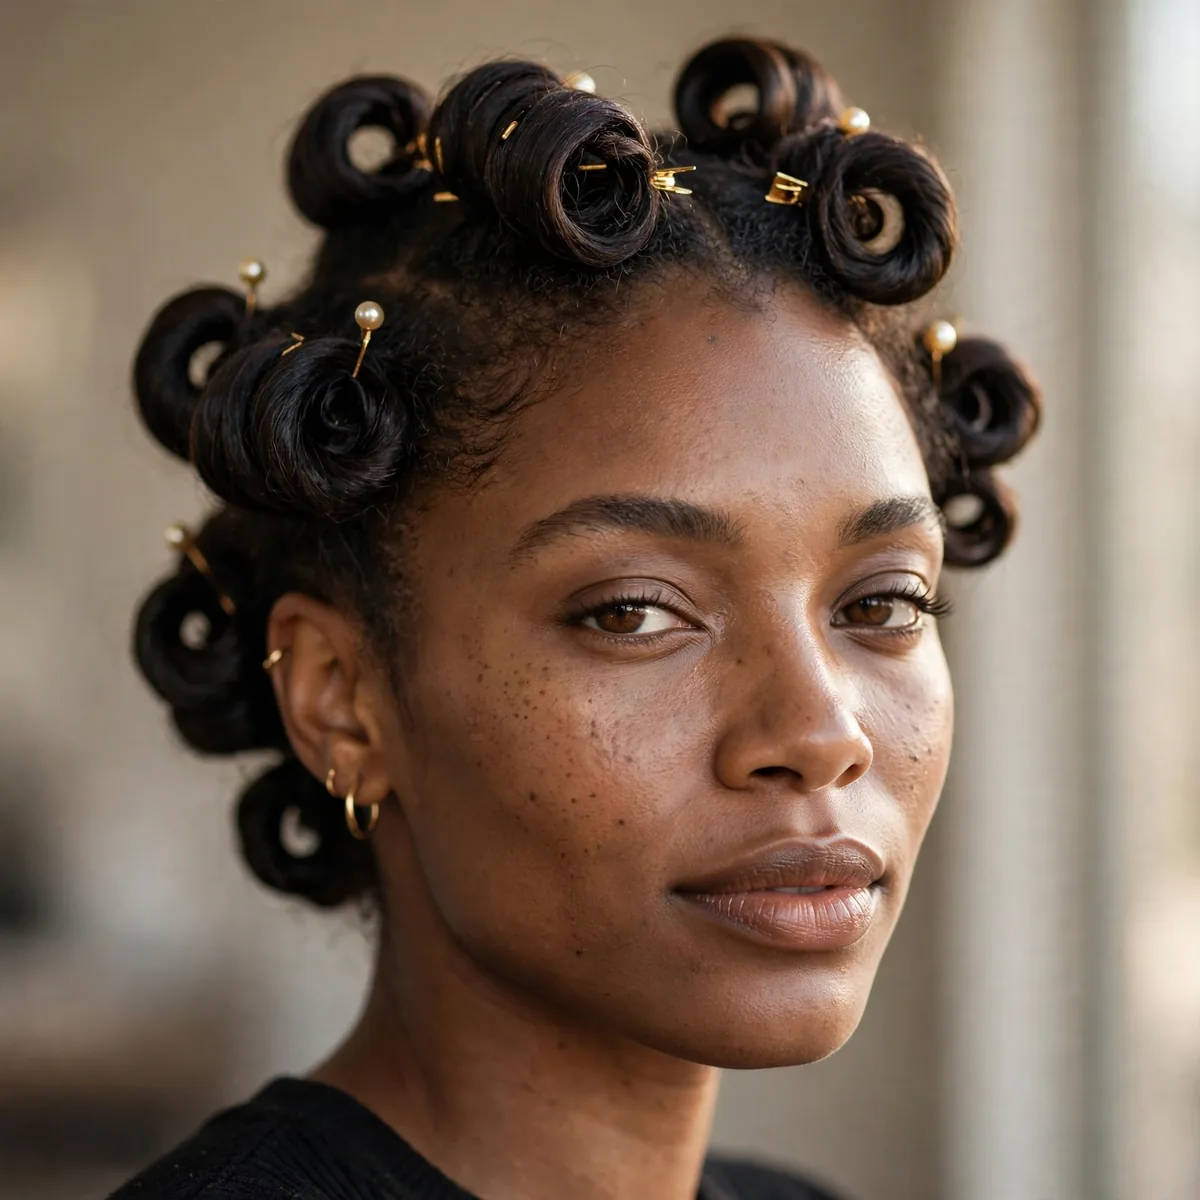
For coily textures: define a few front coils with gel, then pin the rest up. The defined front reads as “styled” even when the rest is simple.
Best for: 4a–4c textures. A little definition at the front transforms the whole look.
Length and texture together determine how a defined coil pin-up falls. Longer, medium-density lengths give the style beautiful movement, while shorter lengths create a perkier, more graphic version — both are valid. If your hair is very silky, texturizing spray is non-negotiable for hold; if it is prone to frizz, smooth a serum over the surface as the final step. The same style can look soft or structured depending on these small prep choices.
Refresh rather than redo when your defined coil pin-up starts to tire. A light mist of water followed by dry shampoo reactivates the shape without a full restyle, and a teasing comb can neaten partings in seconds. Focus revival efforts on the hairline and crown — that is where styles visibly age first. Tucking one loose piece behind the ear or adding an accessory can disguise day-two softness while looking completely intentional.
The Curly Fauxhawk
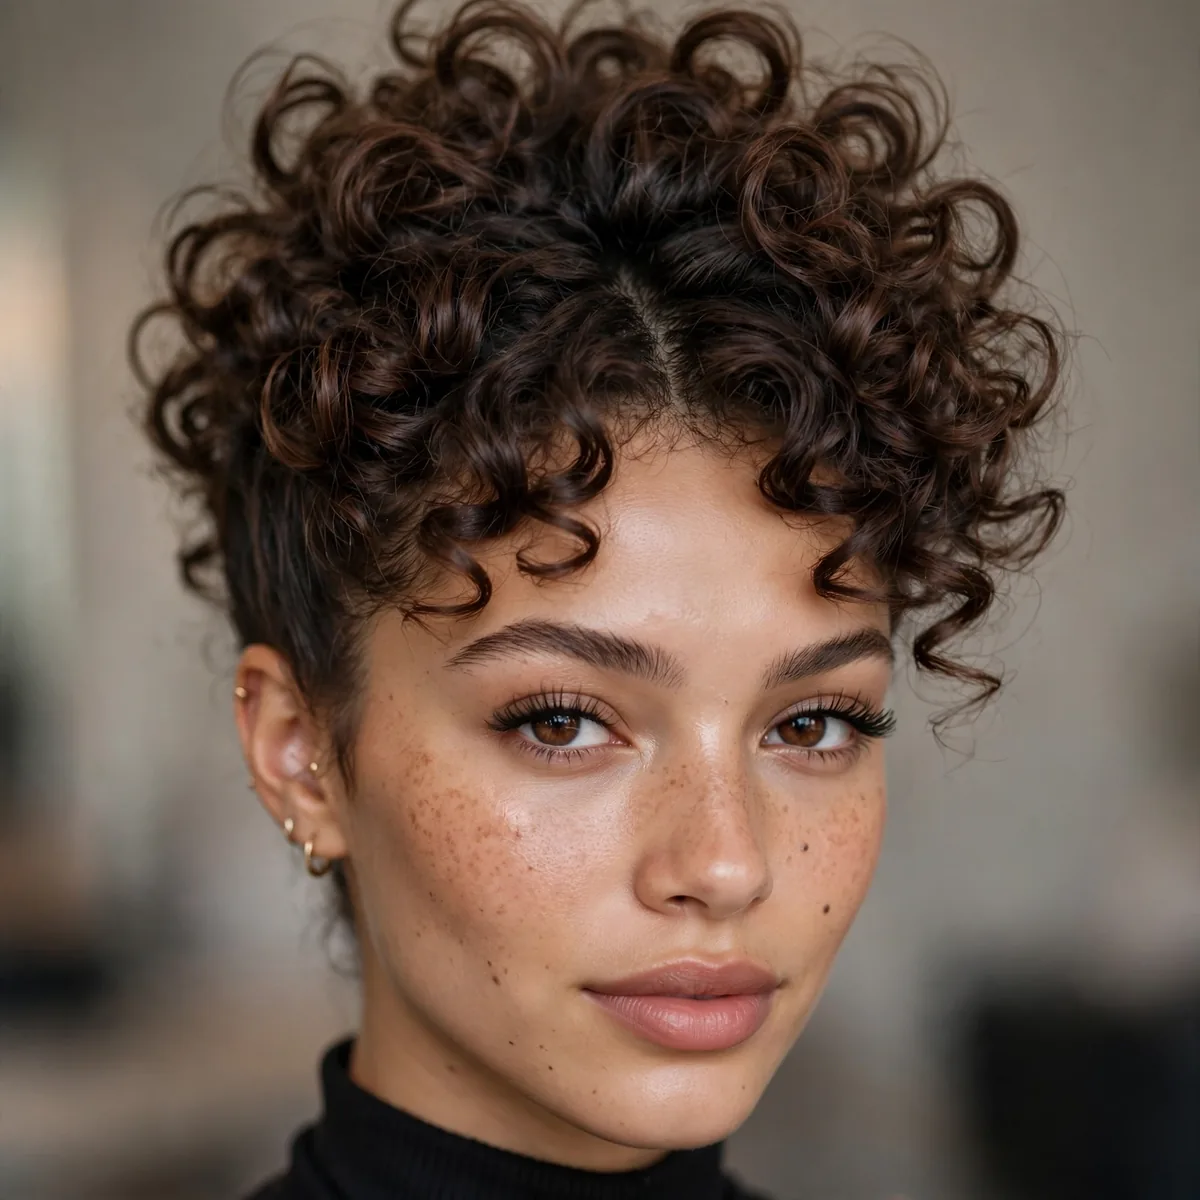
Pin the sides up toward the center, letting curls explode along the middle. Edgy, dramatic, and it uses day-two volume as a feature.
Best for: bold days. It’s a statement style that takes ten minutes with bobby pins. For more protective options, see our protective hairstyles for natural hair.
The curly fauxhawk earns its place as a go-to for festivals because it balances polish with personality. For daytime versions, keep the finish soft and touchable; for evening, sharpen the details — sleeker roots, more defined pieces, a glossier finish. An edge control helps the style transition from desk to dinner without a full redo. It is the kind of versatile look that justifies the ten minutes it takes to perfect.
If the standard curly fauxhawk feels too expected, push one element further. More volume at the crown, a sleeker finish through the lengths, an asymmetrical placement — exaggerating a single feature creates a signature version. Use leave-in conditioner to support whichever direction you take it, since bolder shapes need more structural help. The goal is not a different style; it is your unmistakable take on this one.
Day-two curls are a feature, not a flaw. Pin your favorite refreshes — and for styles that protect your texture long-term, see our protective hairstyles for natural hair.