You do not need braiding skills or a salon appointment to look formal. You need one simple technique, done well.
Formal hair has a reputation for being complicated, but the styles that look most expensive are often the simplest: a smooth bun, a clean twist, a polished ponytail. Complexity is optional; polish is not.
Every style below was chosen for a true beginner — no French braiding, no intricate weaving, nothing that requires a second pair of hands. If you can make a ponytail and use a bobby pin, you can do all twenty.
The secret that makes beginner styles look pro is finishing: smooth roots, hidden elastics, and secured ends. Get those three right and any simple style looks salon-done.
Smooth Low Bun
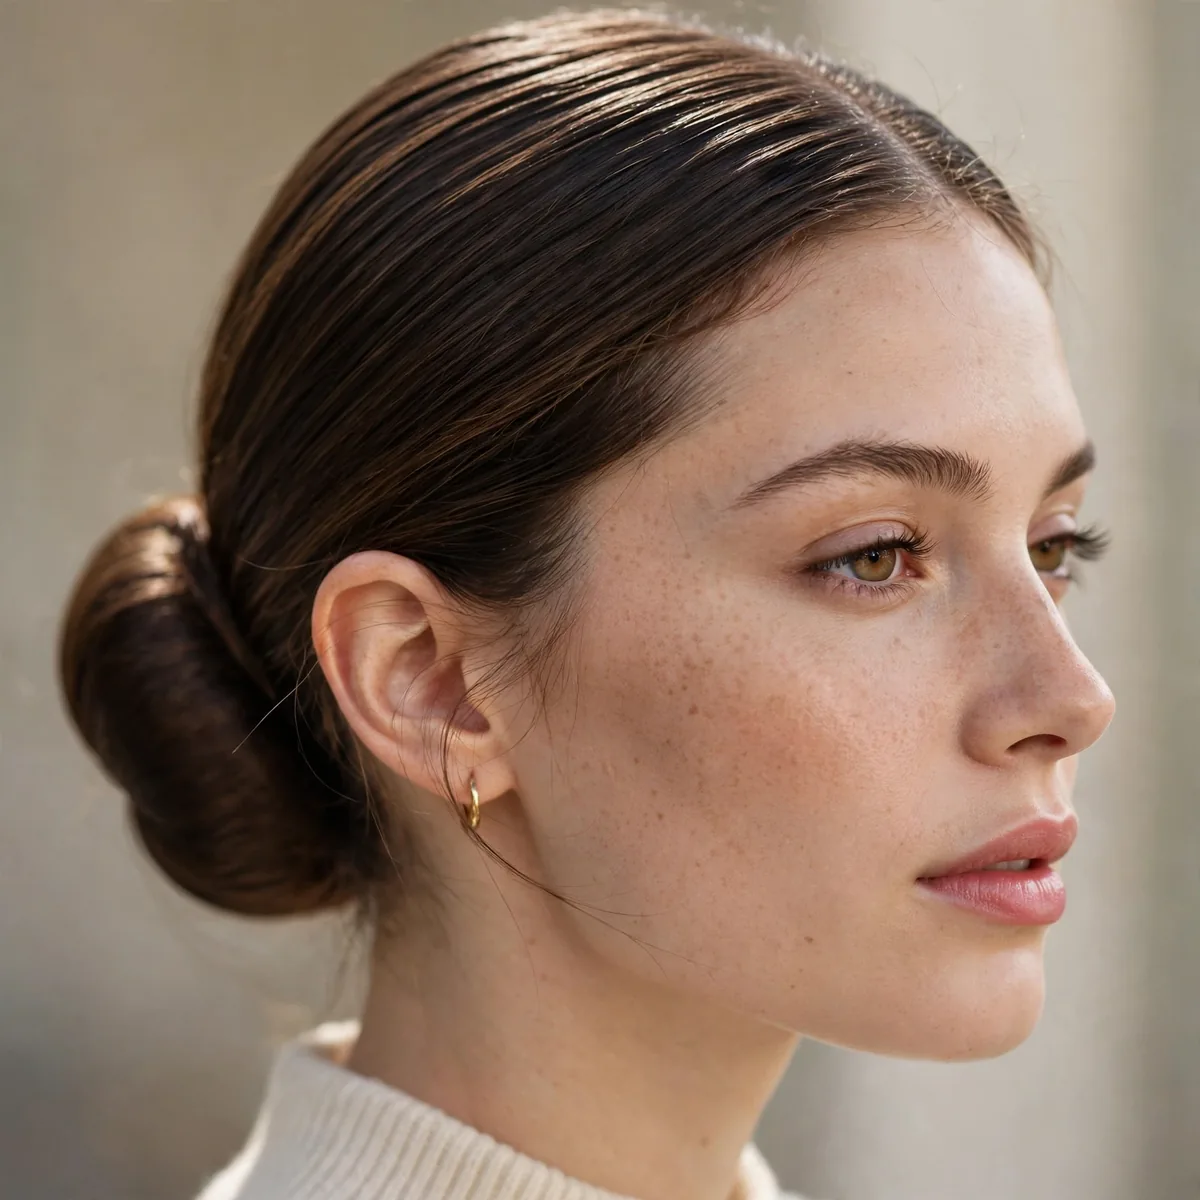
A ponytail twisted and coiled into a low bun — the foundation of all formal hair. Smooth, simple, and appropriate for literally any formal event.
Brush everything into a low ponytail, twist the tail, coil it around the base, and pin. Wrap a strand around the elastic to hide it — that one detail makes it look pro.
Oval and heart-shaped faces wear this style especially well, since the low placement keeps the silhouette soft rather than severe. Medium to thick hair holds the coil best, though a light texturizing powder at the roots gives fine hair enough grip. Think of it as your interview-to-wedding default: it reads polished under office lights and elegant in evening photos, pairing beautifully with statement earrings or a bold lip.
Mist the finished bun with a flexible-hold hairspray, then smooth any flyaways with a pea-sized dab of anti-frizz serum warmed between your palms. If the style loosens by afternoon, push two extra pins in at an X angle rather than redoing the whole bun — it holds for hours. For very long or heavy hair, split the ponytail into two smaller coils stacked together; each one pins more securely than a single massive twist.
Twisted Low Ponytail
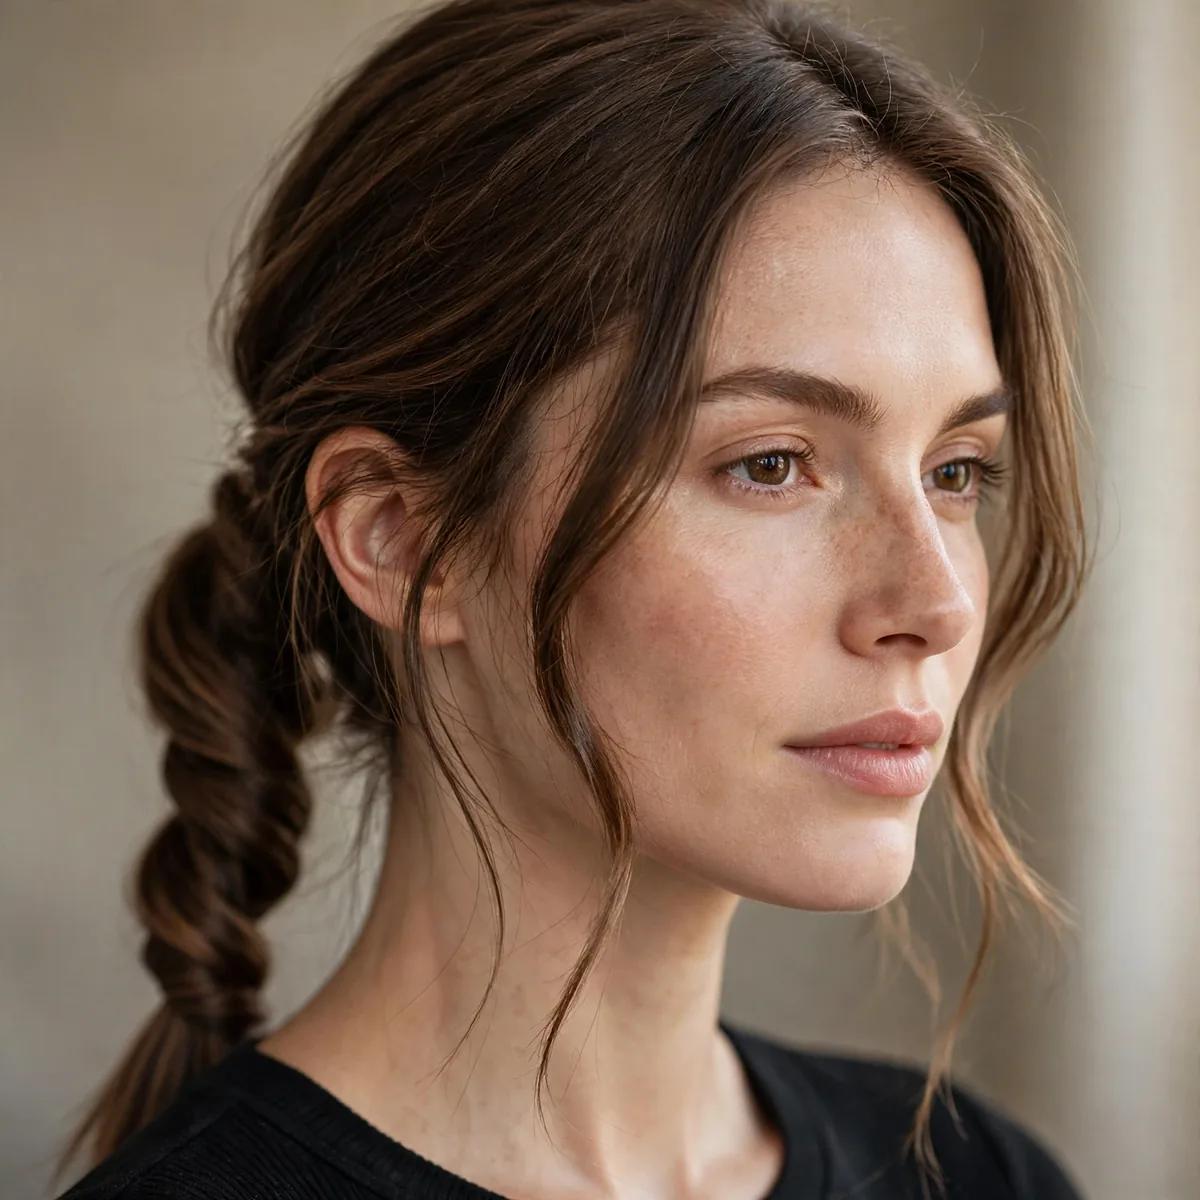
A low ponytail with the tail twisted before securing — the twist adds texture that reads as styling with almost no extra effort.
Divide the ponytail in two, twist the sections around each other, and secure. The rope texture looks intricate but takes thirty seconds.
Round faces benefit from this style because the rope texture draws the eye downward, lengthening the look of the face. Wavy and curly hair twists most beautifully, but straight hair works too — just spritz a sea-salt spray through the tail first so the twist doesn't slip loose. It transitions from daytime errands to dinner effortlessly, and it hides day-three roots far better than a sleek ponytail ever could.
Secure the rope with a small elastic, then tug the twisted sections gently outward to plump each loop — that gentle pancaking gives the tail salon-level dimension. A spritz of shine spray over the finished twist catches the light and emphasizes the rope pattern. For a dressier take, wrap a strand of hair around the elastic or thread a thin ribbon through the twist before your event.
Simple French Twist Hack
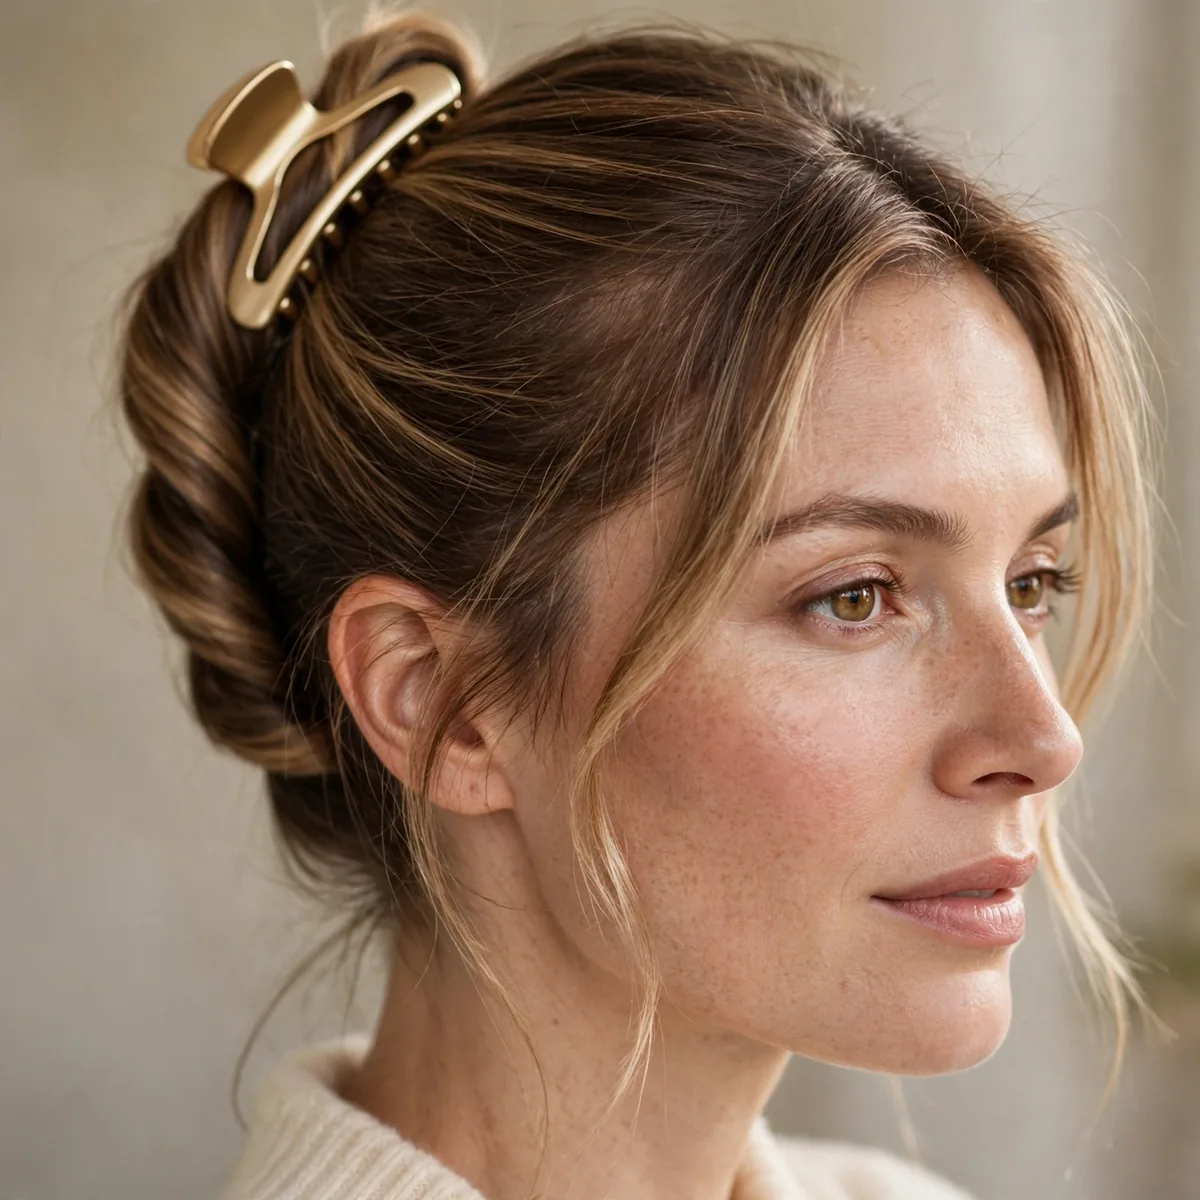
The French twist cheat: gather hair to one side, twist upward, and pin — no rolling technique required. It gives the twist silhouette with beginner-friendly steps.
Hold the gathered hair like a ponytail, twist it up against the head, and pin along the seam. Tuck the ends into the top of the twist. Imperfections hide inside the roll.
Long faces and oval faces carry this silhouette best, since the vertical line adds height without widening the cheeks. It flatters women of every age — from teens at prom to grandmothers at weddings — because the shape is timeless rather than trendy. Medium and thick hair fills the twist most convincingly; fine hair can still work if you tease the underlayers lightly before gathering.
A matte texture paste rubbed through the lengths before twisting keeps slippery, freshly washed hair from sliding out — dirty hair genuinely holds better here. Pin with French twist pins (the long U-shaped ones) rather than short bobby pins for a hold that survives dancing. In humid months, a veil of anti-humidity spray over the finished roll stops frizz from breaking through by evening.
Half-Up Twist
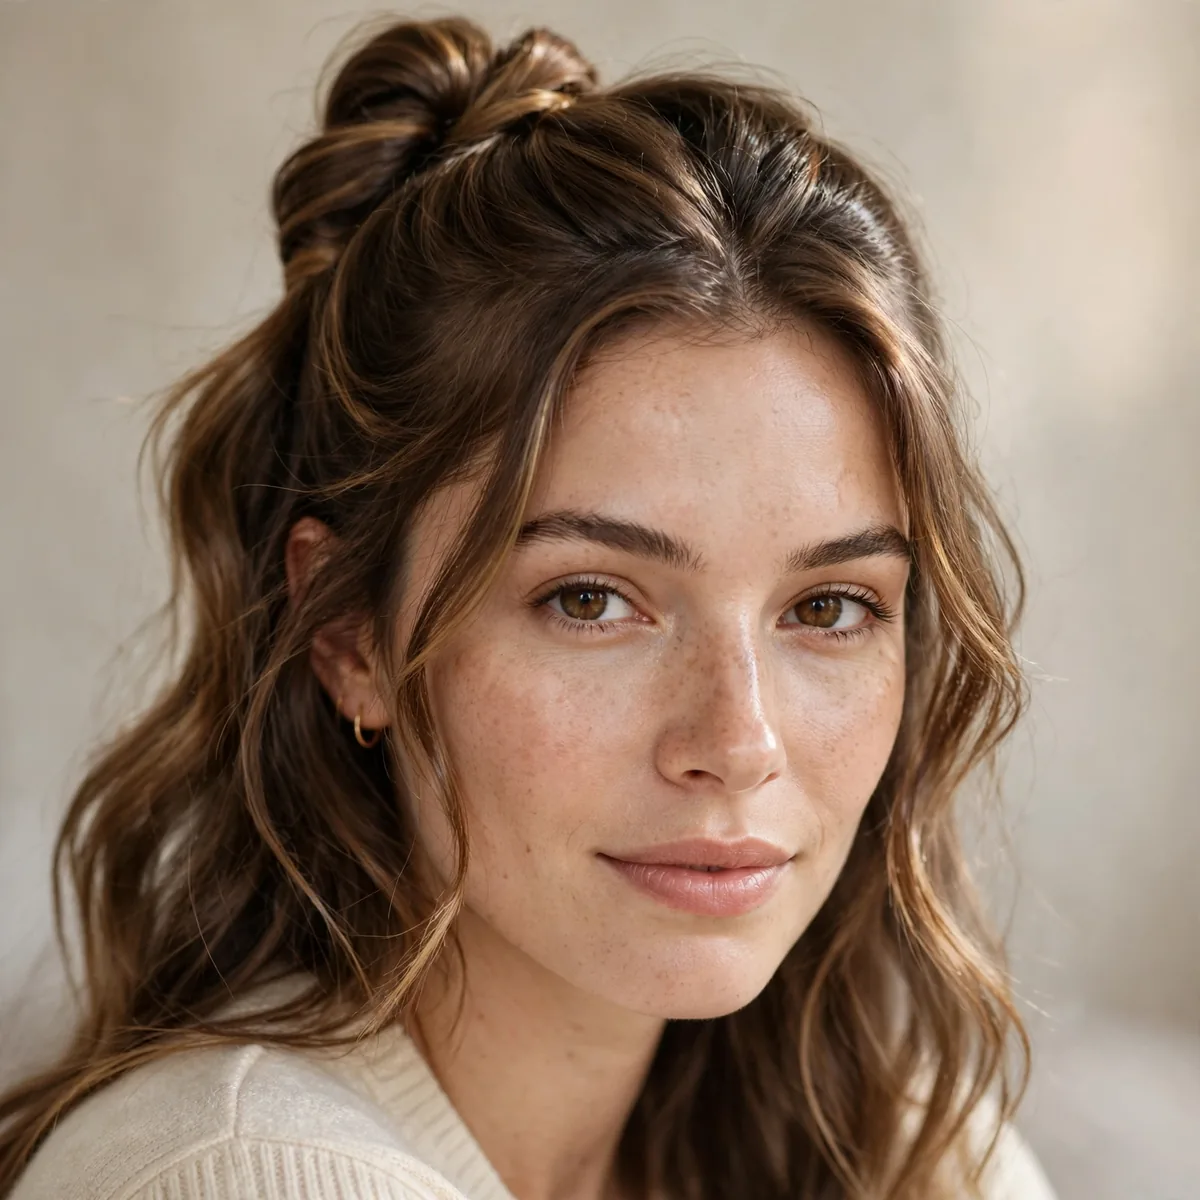
Two sections twisted back and pinned — the easiest formal style that exists. It takes five minutes and suits every hair type.
Twist each side section away from the face, cross them at the back, and pin with two crossed bobby pins. Done — genuinely.
Round and square faces gain balance from this style because the crown lift elongates the face. It suits naturally textured hair beautifully — curls and waves give the pinned sections soft fullness without any teasing. Wear it to brunch, job interviews, or family gatherings; the visible length keeps it friendly while the twisted crown reads polished.
Dust a little dry shampoo or volumizing powder along the crown before twisting; it plumps the sections so the style doesn't look flat by noon. If your hair is slippery, crisscross two bobby pins in an X — the grip doubles. For evening, swap plain pins for pearl or crystal ones and suddenly the same five-minute style looks event-ready.
Sleek High Ponytail
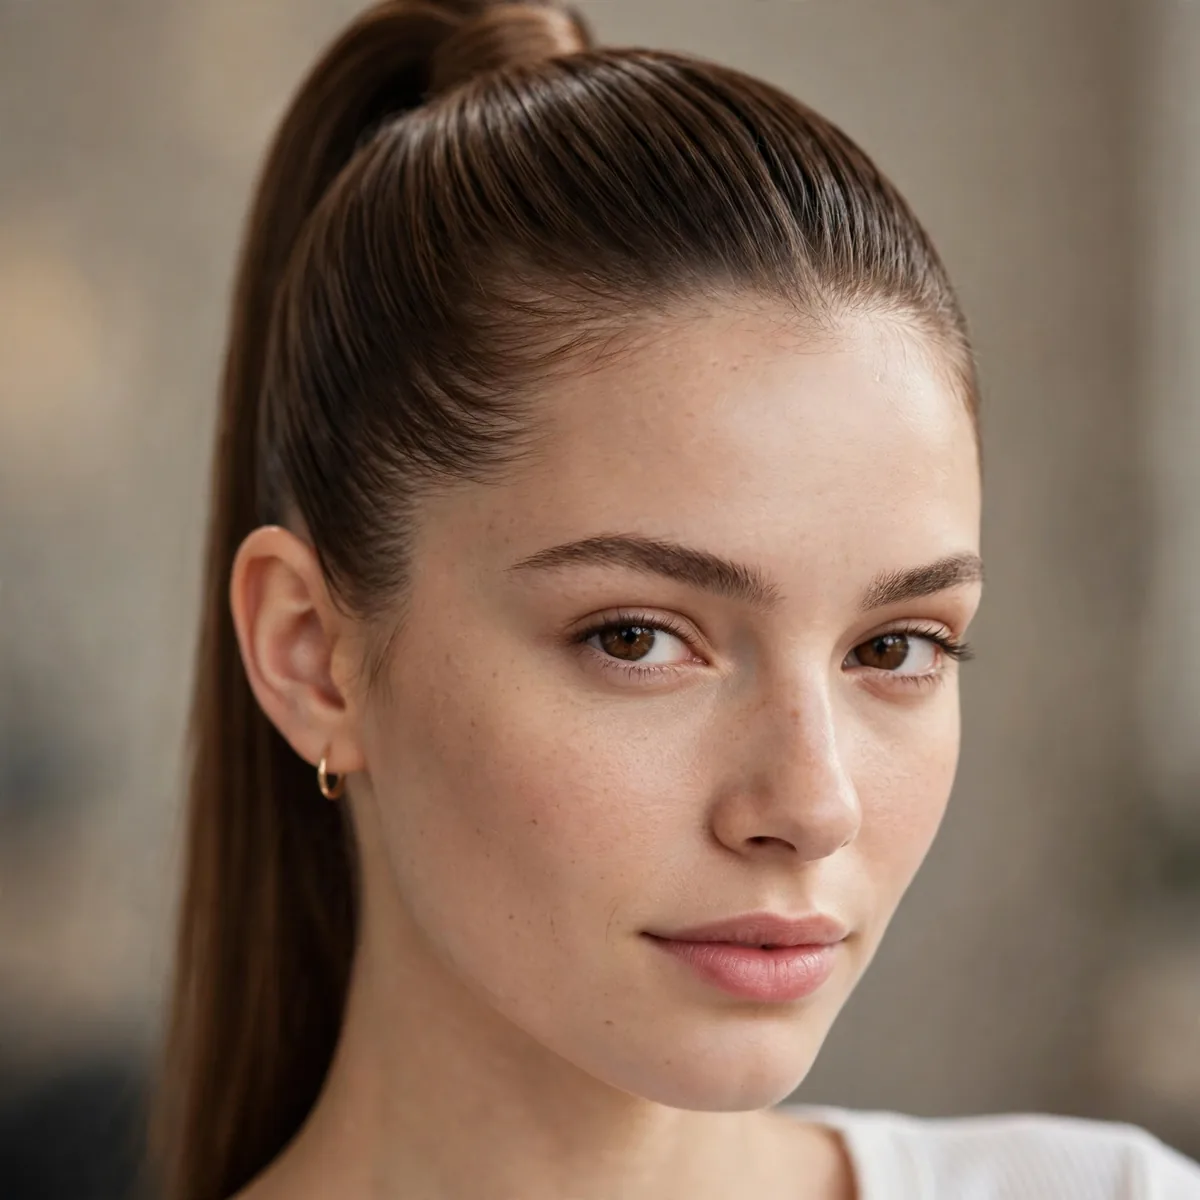
A smooth high ponytail with a wrapped base — polished, lifted, and formal enough for evening when the finish is perfect.
The pro look comes from smooth roots: brush with a boar-bristle brush, smooth with serum, and wrap the base. Three steps, big payoff.
Heart-shaped and oval faces shine with this lift, since the high placement showcases the cheekbones and opens the eyes. It is a favorite across ages — teens love it for school dances, and women in their thirties wear it to cocktail events. Straight to wavy textures smooth fastest; very curly hair needs a flat-iron pass at the roots first, but the payoff is dramatic.
Gel applied to damp roots, then dried with a blow-dryer using the tension method, creates a mirror-smooth finish no flyaway can fight. Finish with a glossing mist rather than heavy hairspray — you want shine, not stiffness. To stop the ponytail drooping by evening, prop two small pins vertically against the elastic at the base; the invisible scaffolding keeps the lift.
Low Chignon with a Donut
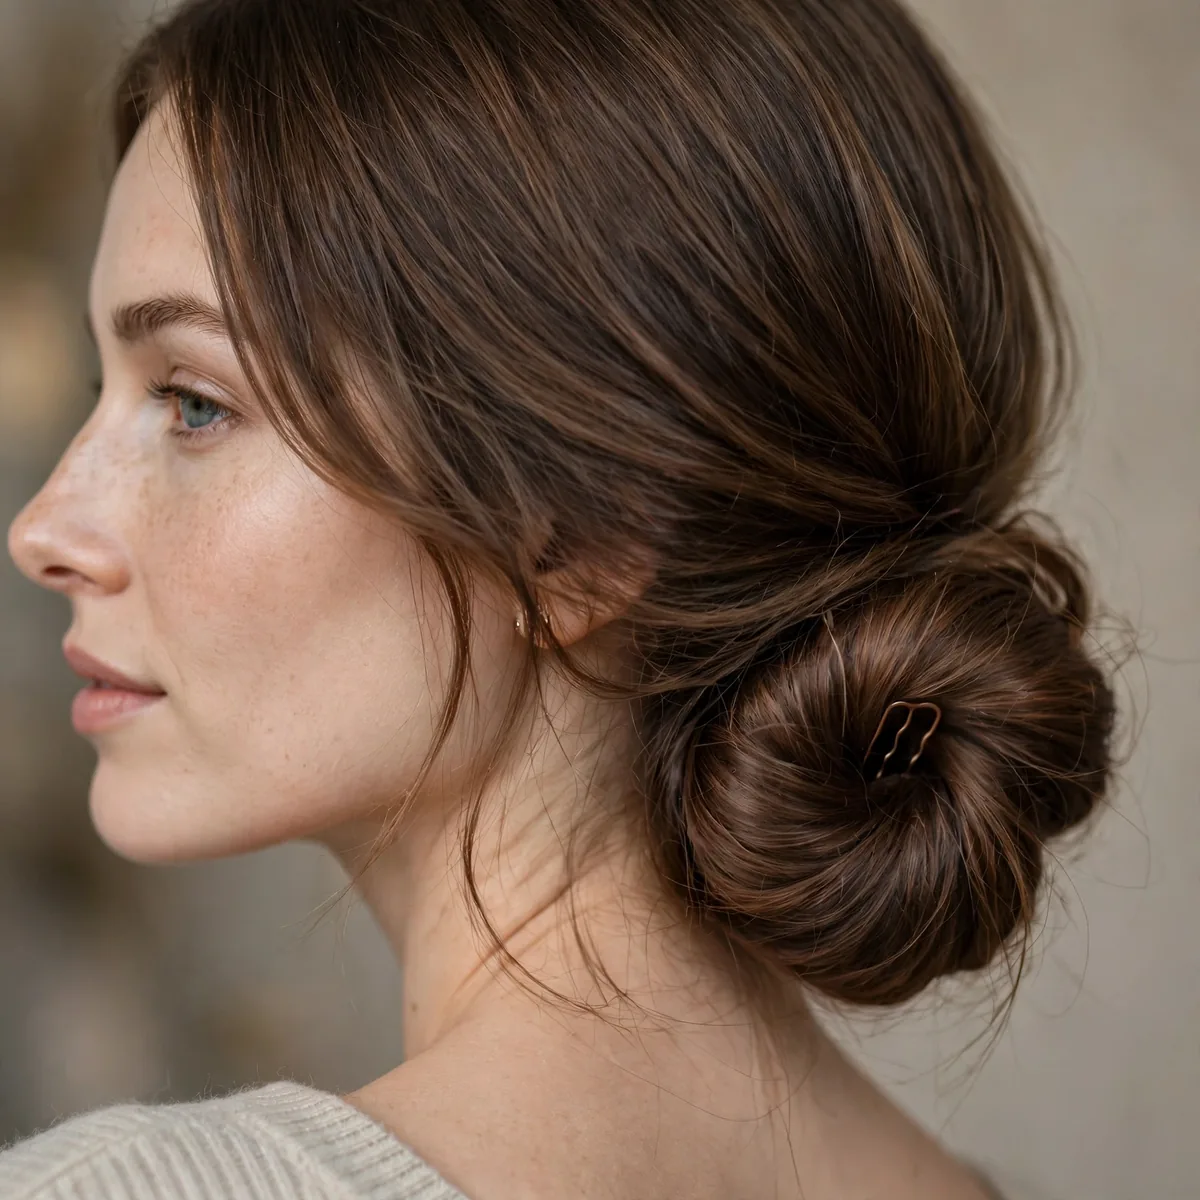
A bun donut does the shaping for you — spread the ponytail over the form, tuck the ends, and you have a perfect round bun. The tool makes the beginner look expert.
Donuts come in sizes; match it to your hair thickness. Spread the hair evenly so no foam shows through, and pin the ends underneath.
This is the kindest style for round faces at formal events — the low, neat placement keeps everything proportional without adding width. It is also a lifesaver for mothers of the bride and bridesmaids who need a dependable all-day updo. Fine to medium hair wraps a donut most invisibly; very thick hair may need the largest donut size and longer pins.
Choose a donut that matches your hair color — dark hair needs a brown or black form, blondes need beige, or edges will peek through. Anchor the donut with four pins before spreading the hair; a shifting form ruins the symmetry. Set everything with a strong-hold hairspray, and carry two spare pins in your clutch — one pin reinserted saves the bun after a long night of hugging.
Side Low Bun
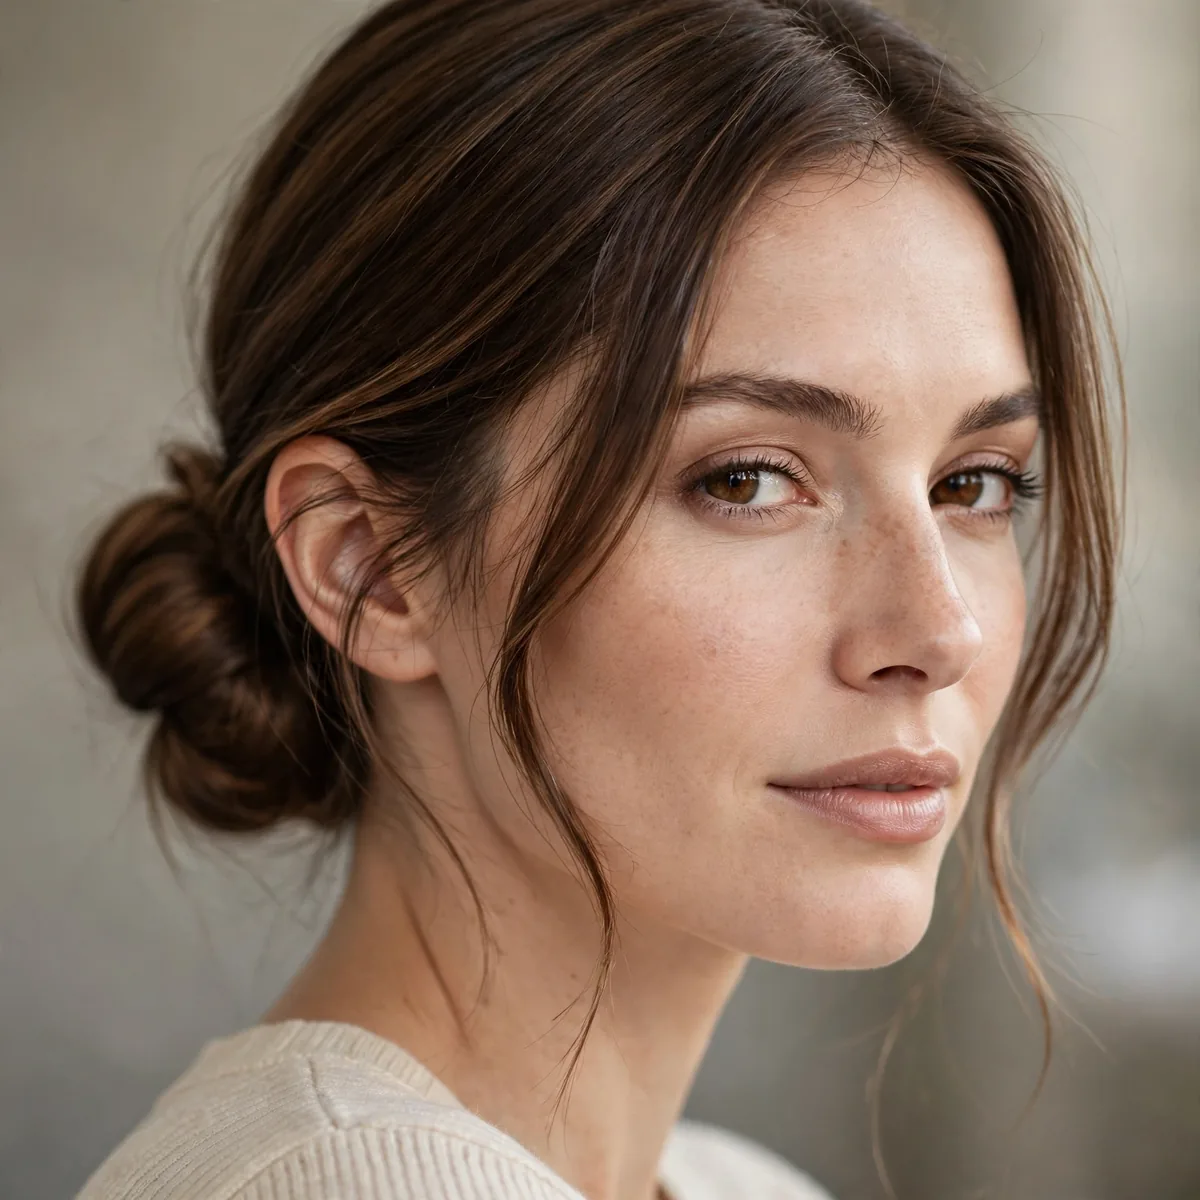
A low bun shifted to one side — the asymmetry makes a basic bun look styled. It takes no extra skill, just different placement.
Gather the ponytail behind one ear instead of center, then bun as usual. The side placement photographs beautifully and suits off-shoulder necklines.
Asymmetry flatters square jawlines by breaking the mirror-line of the face, which is why this placement photographs so well. It suits second-day hair perfectly — the natural oils smooth the gathering. One-shoulder dresses and strapless gowns pair beautifully with the exposed side, making it a go-to for wedding guests and prom.
Build a touch of volume at the crown with a quick backcomb before gathering; without it, the side sweep can look flat against the head. Pin the bun with its flat side toward the ear so it sits snugly. For a softer finish, curl the tail loosely before coiling — the waves give the bun a romantic texture that elevates the whole look.
Twisted Crown
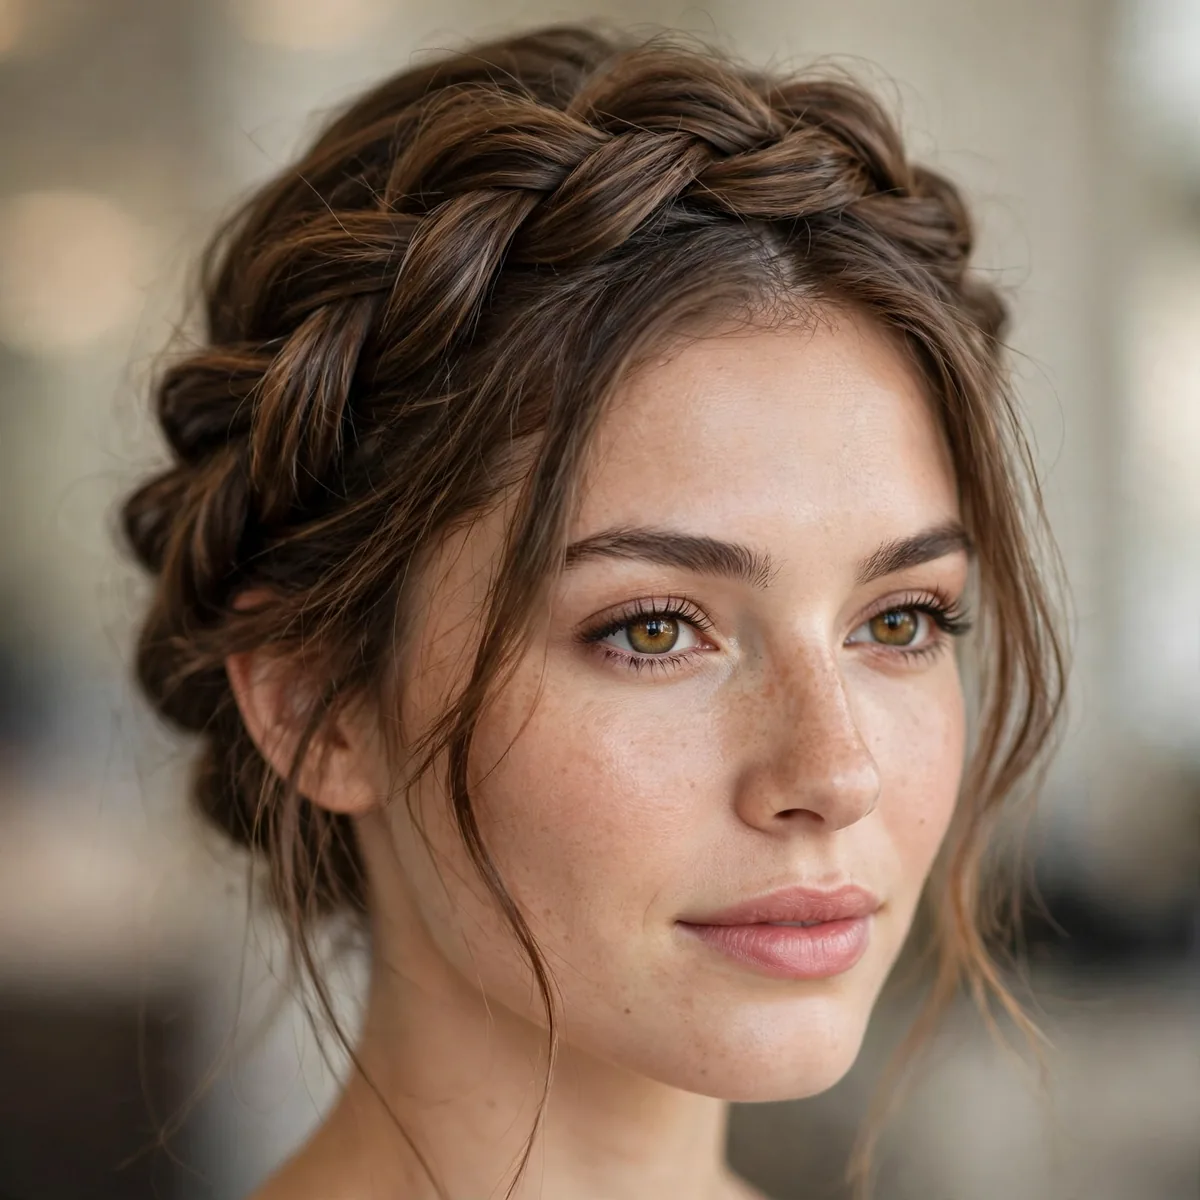
Two twists meet at the back over loose hair — romantic, simple, and very forgiving. Uneven twists still look good because the style is soft.
This is the most forgiving formal style for beginners; there is no precise part or smooth surface required. Twist, cross, pin — that is the whole tutorial.
Oval faces and long faces both love this halo of twists — it frames the features without the formality of an updo. Curly and wavy textures grip best, so straight hair benefits from a pass of texturizing spray first. It is the rare romantic style that works for teenagers and forty-somethings alike, equally at home at garden weddings and holiday parties.
Where the two twists meet, overlap them slightly and pin downward into the head — the overlap hides the joint completely. If wisps fall out around the face, leave them; soft tendrils make the style look intentional. Spray the crown lightly, not the loose lengths, so the hair underneath keeps its movement while the twists stay put.
Bubble Ponytail, Formal Version
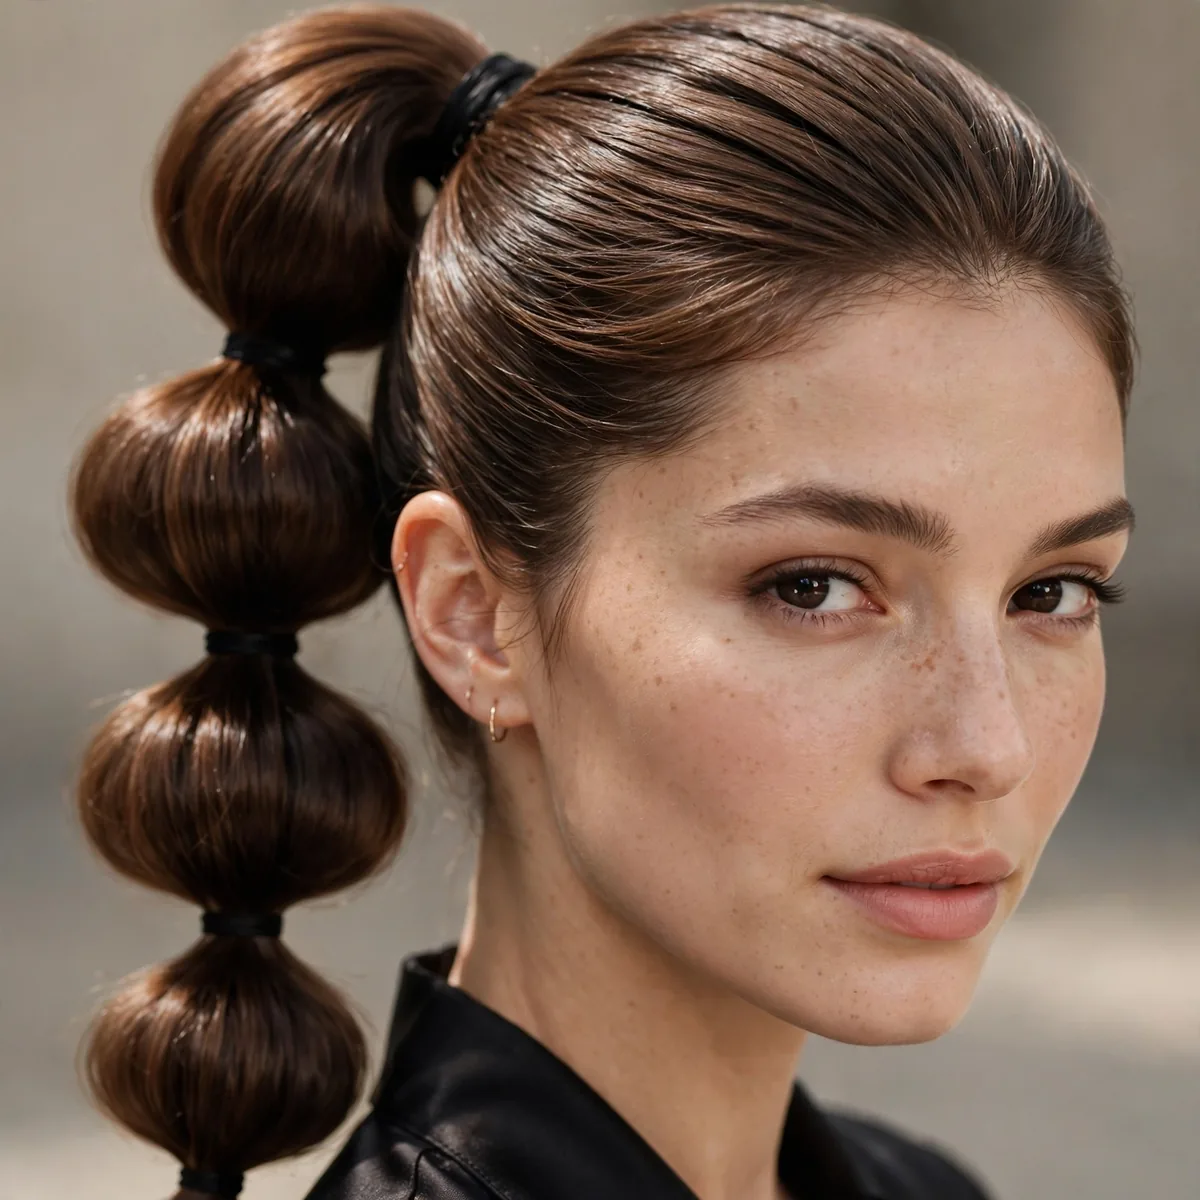
A low bubble ponytail with the bubbles kept sleek and even — playful shape, polished finish. It looks far more complicated than it is.
Use clear mini elastics and keep each bubble smooth rather than tousled. The sleek finish is what makes it formal instead of casual.
This style flatters long necks and oval faces because the elongated shape draws the eye vertically. Teens and twenty-somethings wear it to formals and graduation parties, where its modern edge stands out against classic updos. Thick hair makes the fullest bubbles; fine hair needs a texturizing powder at each elastic point so the sections don't collapse.
Spacing matters: keep the gaps between elastics even, about two to three inches, or the bubbles look lopsided. Fan each bubble gently outward with your fingertips for symmetry, then mist the whole tail with a medium-hold spray. A deep shine gloss over the smoothed sections is what sells the formal version — it turns playful into polished.
Simple Rolled Updo
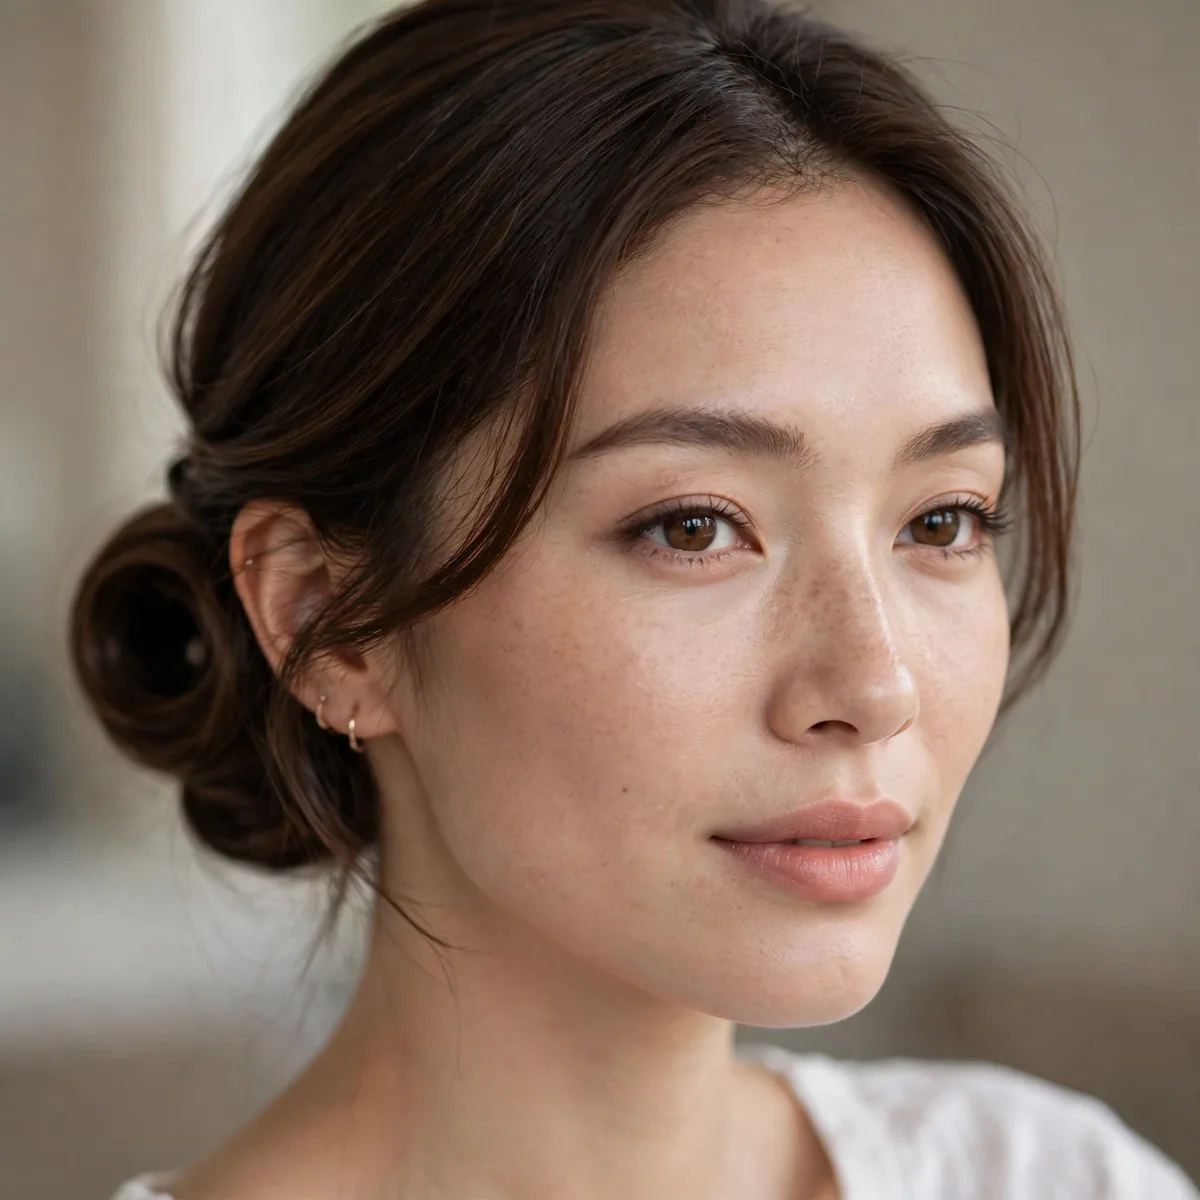
Hair rolled upward and pinned — one motion, elegant result. The roll hides all ends, which is what makes it look formal.
Gather into a low ponytail, roll it upward toward the head, and pin along the roll. The ends disappear inside, so no perfect tucking is needed.
Medium to long hair rolls most easily, and this silhouette suits heart-shaped faces by adding gentle fullness at the nape. It is a classic mother-of-the-groom choice — dignified without trying too hard. The roll also works beautifully on freshly colored hair, since the smooth surface shows off balayage and dimension without any heat styling.
Tease the crown lightly before rolling; the roll sits higher and reads more finished with that lift. Pin along the seam in a zigzag so no pins show from the sides in photos. If the roll feels loose by evening, mist the underside with hairspray and re-pin — the hidden side is the structural one, and a quick reinforcement keeps the elegance intact.
Pull-Through Ponytail
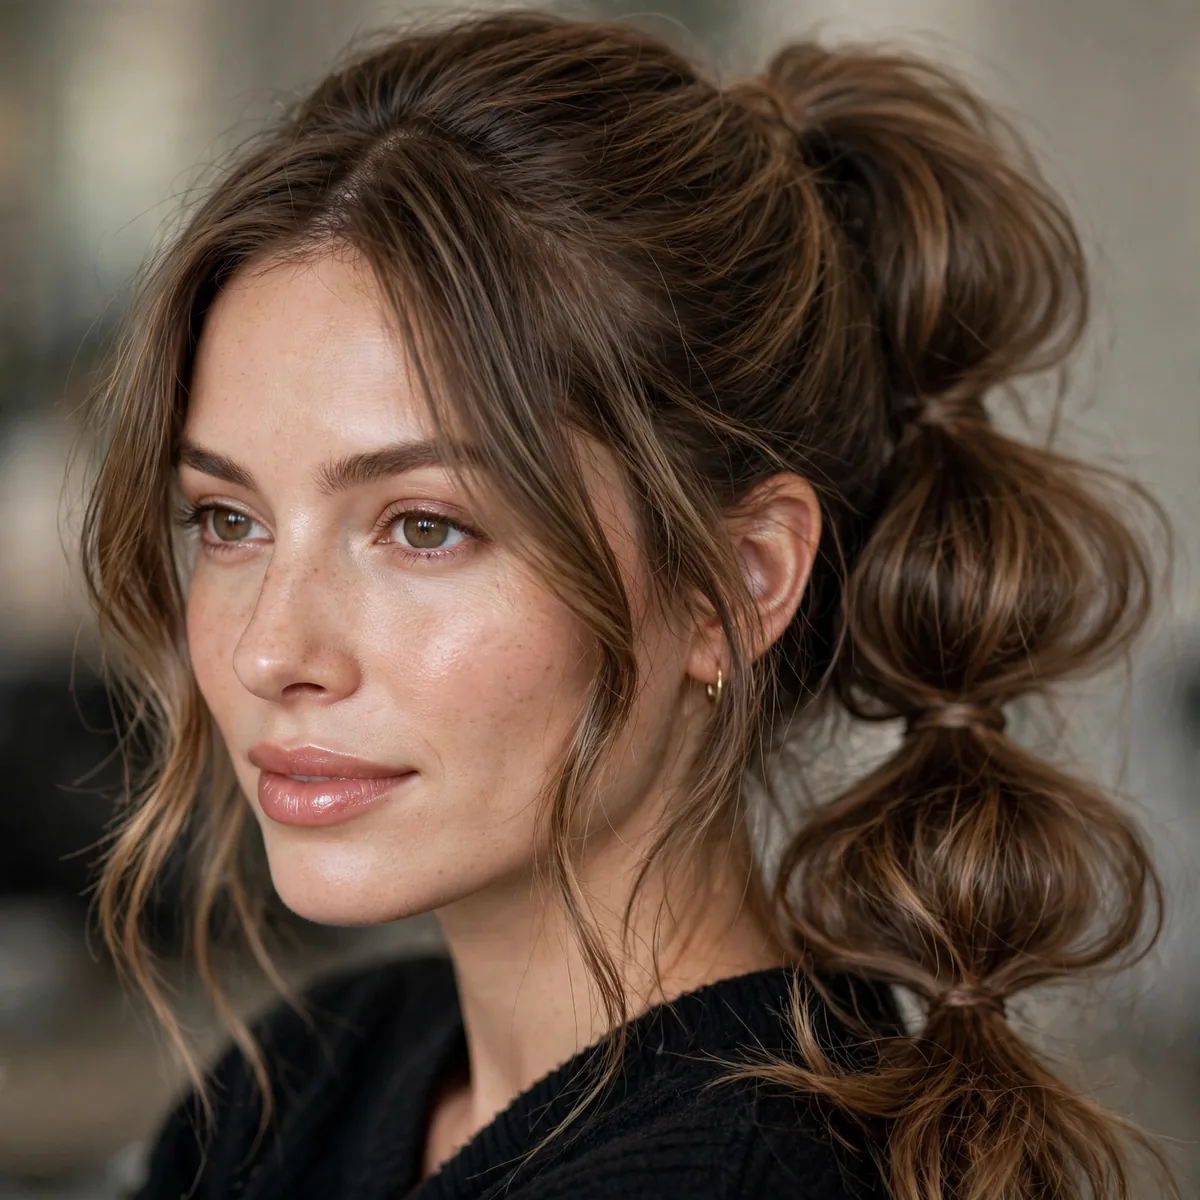
Stacked ponytails create a faux-braid effect with big volume — no braiding skill needed, dramatic result. It looks like you spent an hour.
Secure small stacked ponytails down the length, then pancake each section wide. The technique is in our high ponytail hairstyles too, where the volume trick gets fully explained.
Long, thick hair creates the most dramatic version of this style — the pancaked sections look like a waterfall of volume. Round faces benefit from the crown height the stacking creates. It is a showstopper at evening events and proms, where the intricate look reads expensive. Just avoid it in high wind; the wide sections catch air.
Work on slightly dirty hair or spray each section with dry shampoo — grip is everything, since slippery strands collapse when pancaked. Pancake from the bottom section upward so the upper layers fall over full ones, hiding the elastics. Clear elastics disappear into the style, while colored ones peeking through can ruin the illusion of a real braid.
Low Twisted Bun
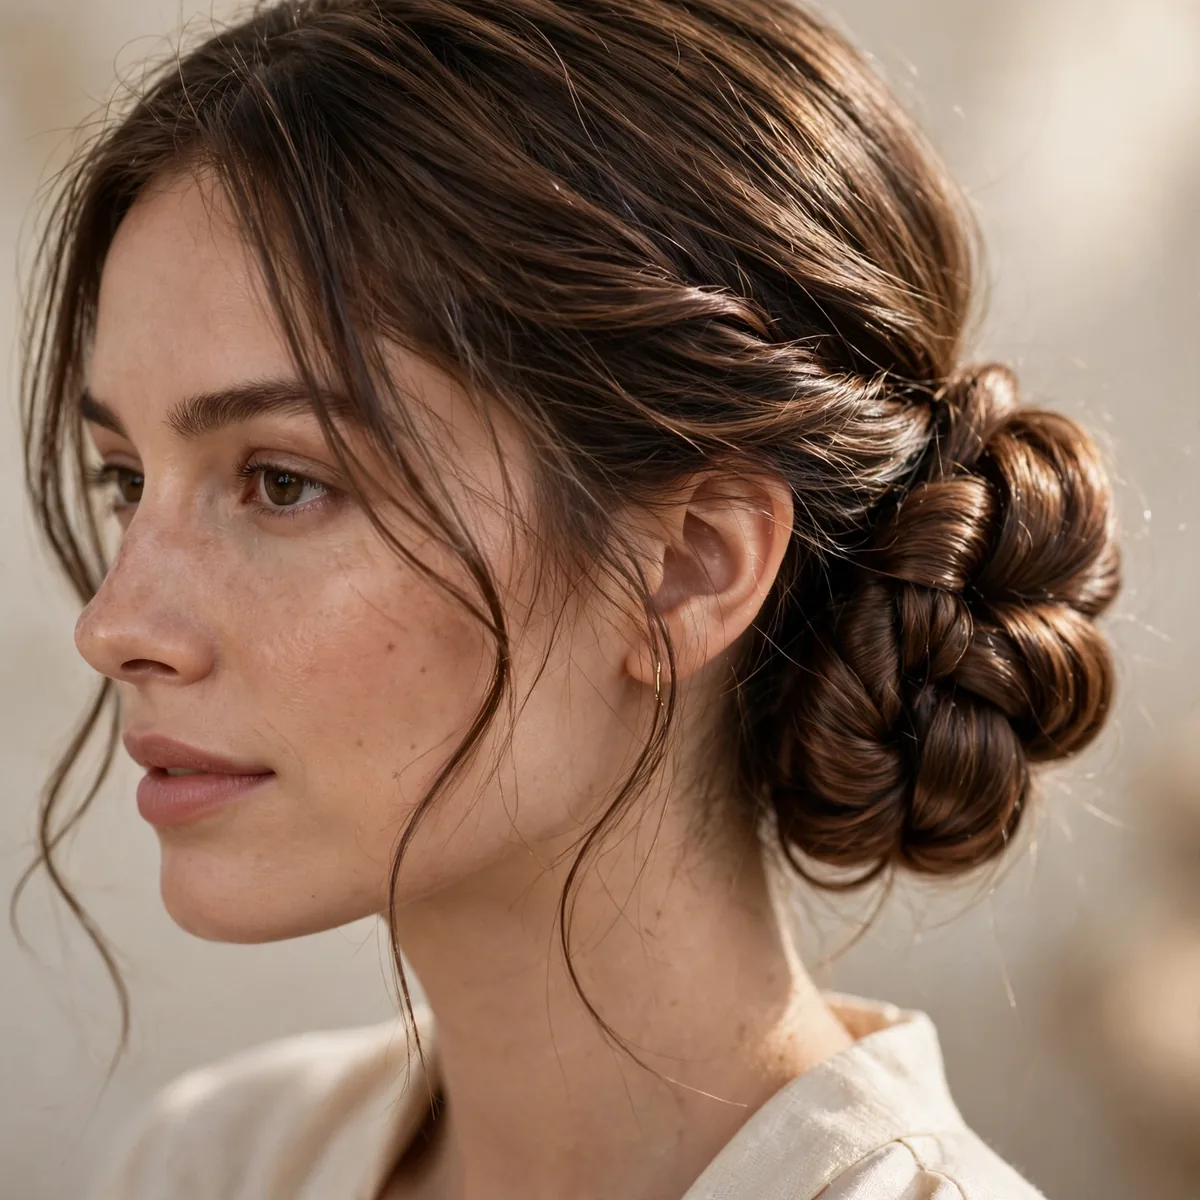
The ponytail twisted into a rope, then coiled — the twist texture makes a plain bun look styled. One extra step, completely different result.
Twist tightly for a defined rope or loosely for soft texture. Either way, the twisted surface catches light better than a smooth coil.
The rope texture gives this bun a jewelry-like quality, making it ideal for evening weddings and galas. Oval and oblong faces wear it beautifully, since the bun's width balances length. Wavy and curly hair twists into the most interesting rope patterns, though straight hair looks sleek and graphic. It is a natural pick when you want texture without fuss.
A dab of pomade on your palms before twisting tames flyaways and makes the rope look deliberately sculpted. Twist the rope tight at the base and looser toward the ends for a graduated texture that catches candlelight. When pinning, push the pins into the base of the coil rather than through the rope itself — the twist keeps its shape instead of flattening.
Half-Up Bun
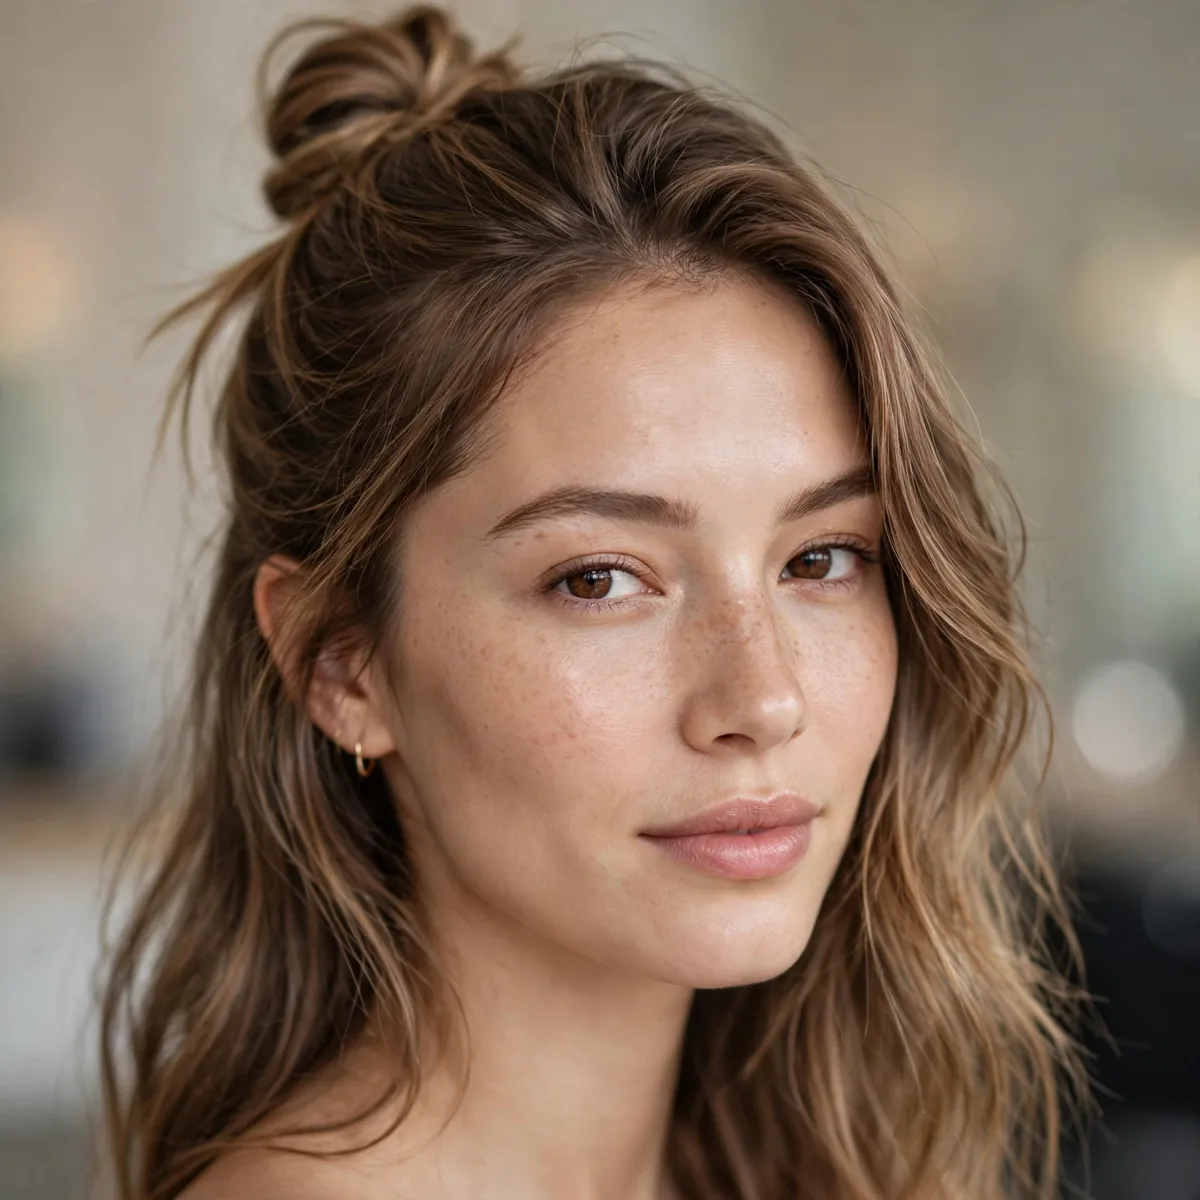
The top half in a small bun, the rest down — casual shape, formal potential with smooth roots. It is the fastest updo on this list.
Keep the bun small and the roots smooth. The contrast between the polished crown and the bun is what elevates it beyond everyday.
This playful silhouette suits younger wearers and casual-formal settings — think rehearsal dinners and graduation parties. Round faces get a flattering lift from the topknot's height. Thick hair makes the bunniest bun; fine hair should gather less hair so the knot doesn't disappear. Leave the bottom lengths with their natural texture for the easiest version.
Smooth the crown with a smoothing brush and a touch of serum before forming the bun — frizz on top ruins the polished-versus-playful balance. Secure the knot with a small elastic plus one crossed pin for insurance. If the bun tilts sideways by evening, it usually means the base elastic loosened; re-gather the top section tight and the style resets in seconds.
Pinned-Back Front Sections
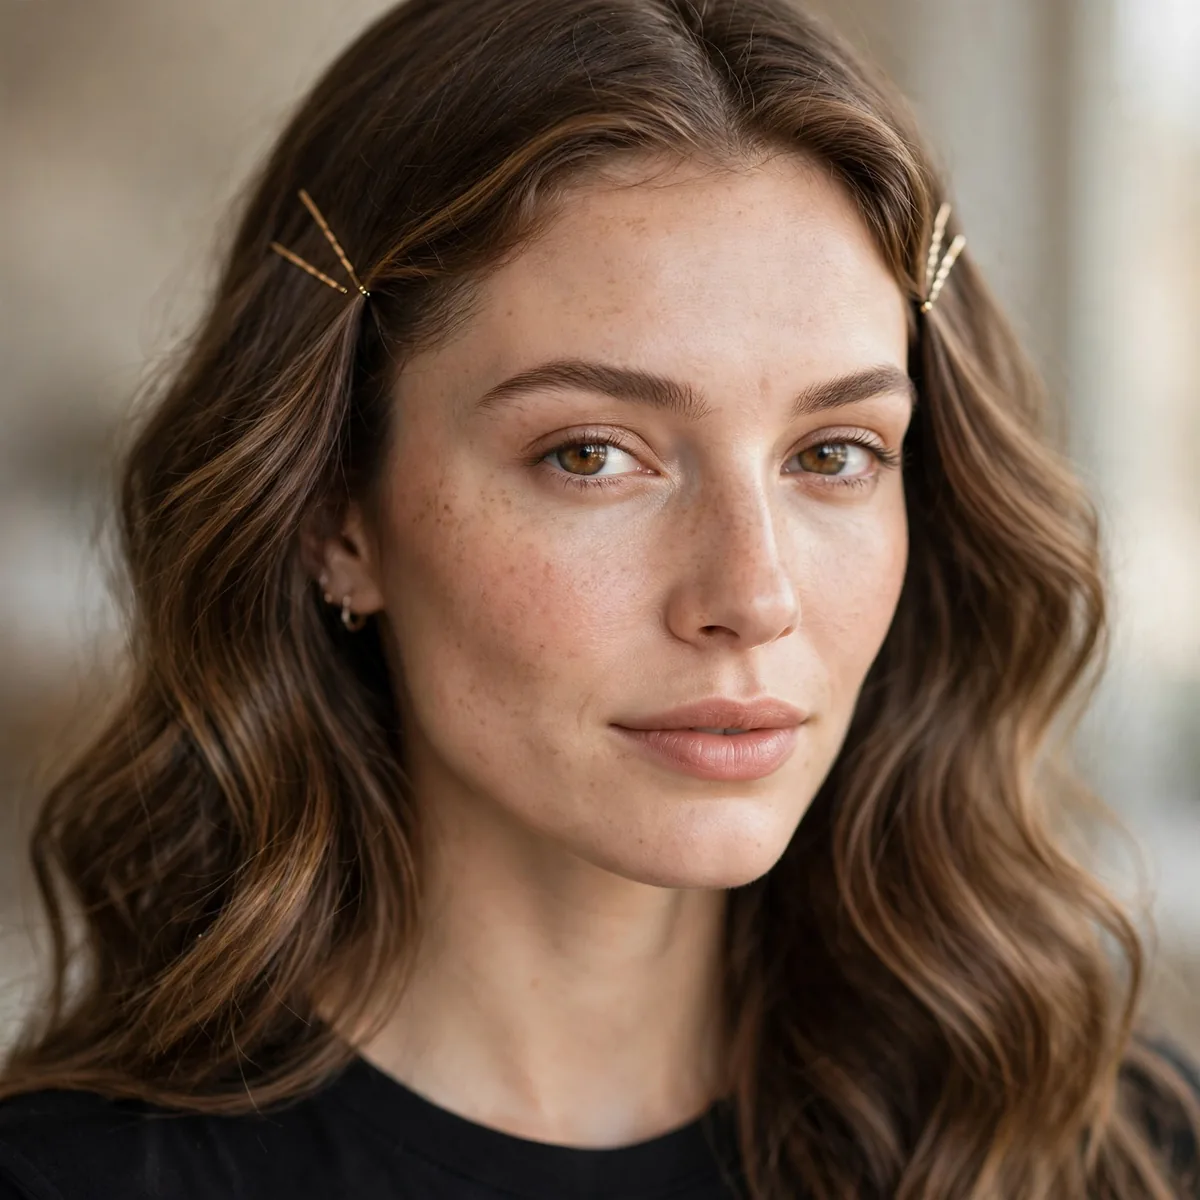
The front sections simply pinned back with decorative pins — minimal technique, maximum polish. The pins do the styling work.
Smooth the front sections back and secure with pretty pins or a small clip. Choose pins that look intentional — decorative, not the plain bobby pins from the drugstore.
This minimalist style suits women of every age — it is the same trick stylists use backstage to keep models' faces clear without sacrificing polish. Oblong and oval faces wear it beautifully, since the sweep opens the forehead. It shines on fine, straight hair where decorative pins are visible, and it works from boardroom meetings to cocktail hours.
Choose pins with real weight — gold, pearl, or crystal — since flimsy plastic reads cheap in photos. Push each pin in against the direction of the hair's pull so it anchors instead of sliding. For staying power on silky hair, spritz the section with hairspray before pinning. Asymmetry is your friend: one statement pin on a single side looks modern and deliberate.
Low Ponytail with a Deep Part
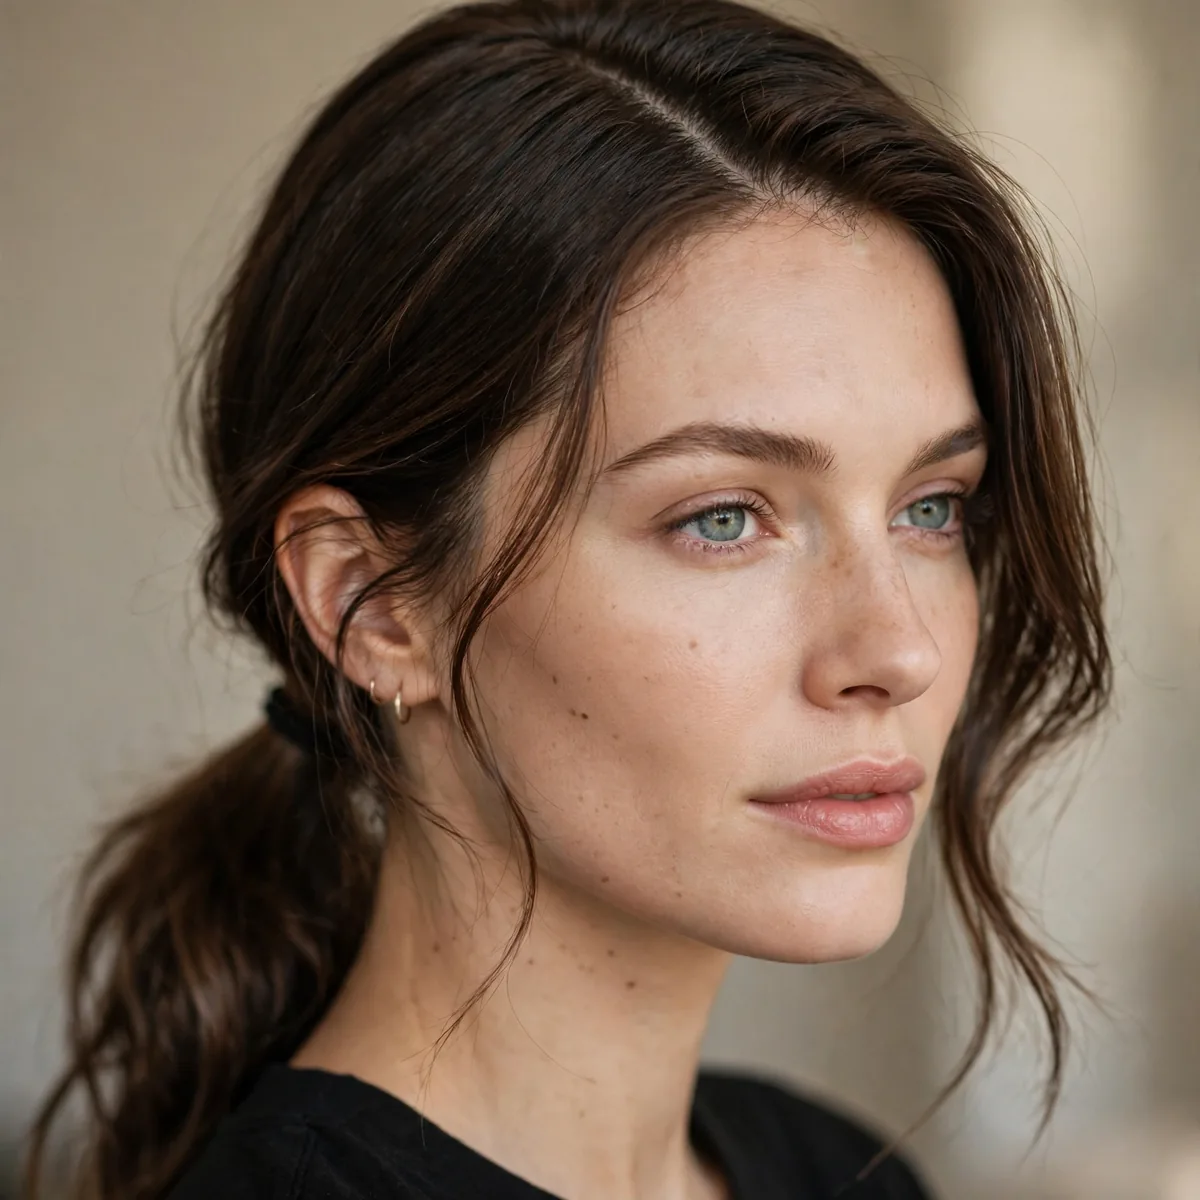
A deep side part transforms a plain low ponytail into something with shape and intention. The part is the entire style.
Set the deep part on damp hair for the cleanest line. Smooth everything back into the low pony and wrap the base. Minimal effort, real polish.
Heart-shaped faces look striking with a deep side part, since the asymmetry balances a wider forehead. This is the office-appropriate evening style — understated at work, then polished enough for after-hours drinks. Straight and slightly wavy textures part most cleanly; very curly hair needs the part set with clips while damp.
A shine serum smoothed down the lengths after gathering turns this simple pony into something editorial — gloss is the whole luxury signal. Tuck the tail behind one shoulder for photos; the drape shows off the part's shape. Refresh the part line midday with a quick comb pass, since it migrates on fine hair by afternoon.
Simple Gibson Tuck
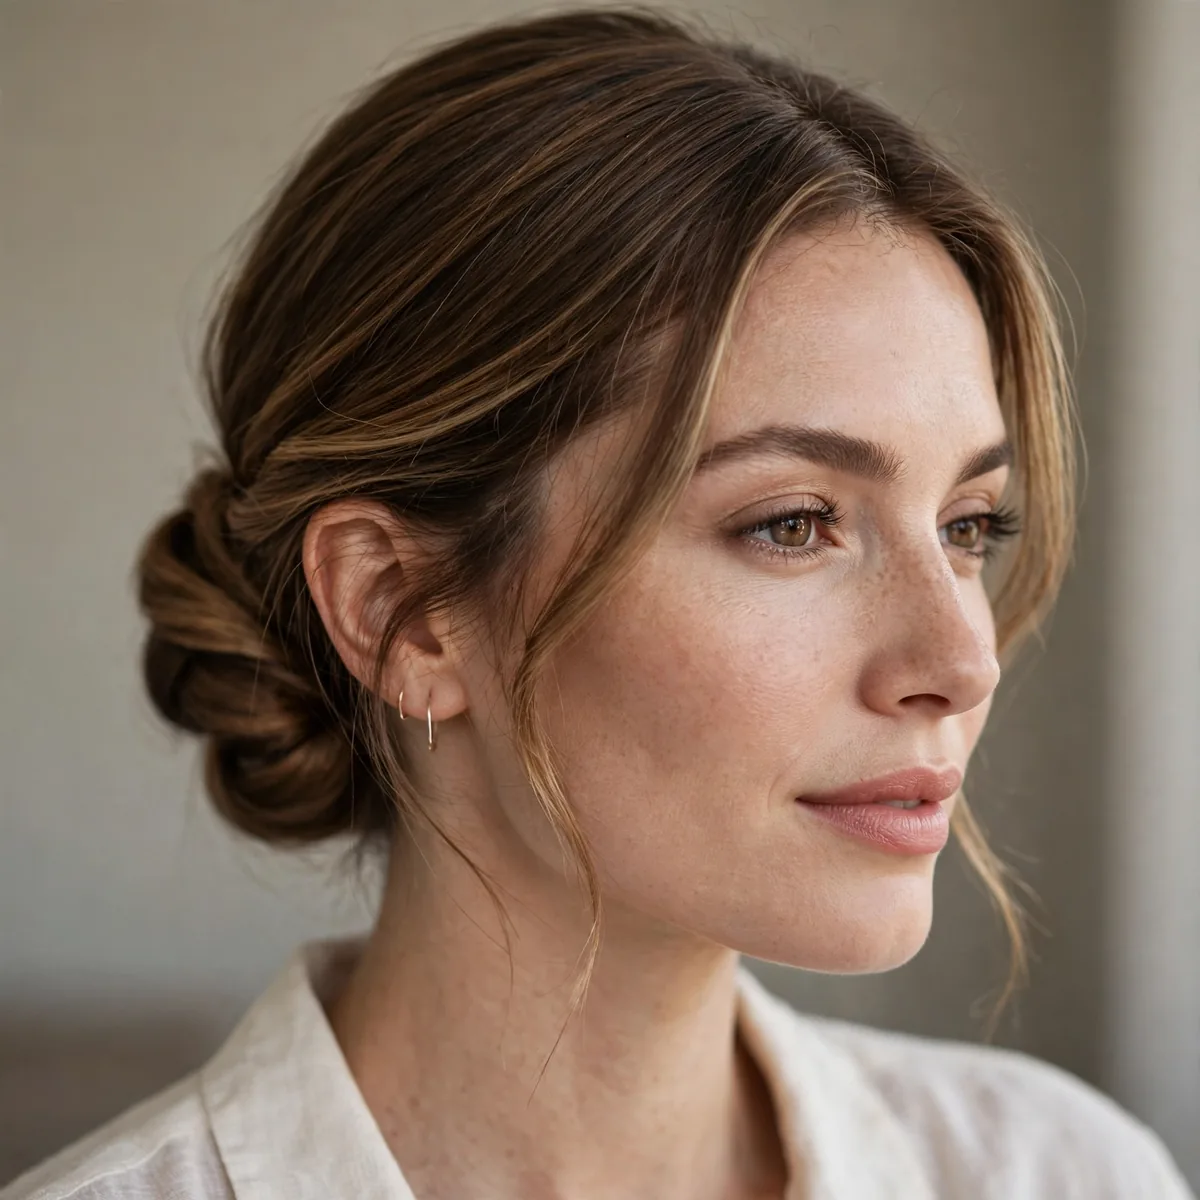
A low ponytail flipped and tucked into itself — the topsy-tail technique grown up. It creates a rolled edge that looks like real styling.
Use the topsy-tail method: flip the ponytail through a gap above the elastic, then tuck the ends. Two flips create the full tucked roll.
This vintage silhouette suits medium-length hair best — the tuck needs enough length to roll under, but not so much that it bunches. Oval and heart-shaped faces wear the low, soft roll beautifully. It is a lovely choice for afternoon tea, church events, and winter weddings, where its understated elegance fits the mood.
If your elastic shows after the flip, that's normal on the first try — a second flip tightens the pocket and hides it. Pin the sides of the roll flat to the head so the silhouette stays sleek rather than puffy. For extra romance, leave two face-framing pieces out before flipping; they soften the vintage shape for modern tastes.
Sleek Middle-Part Low Pony
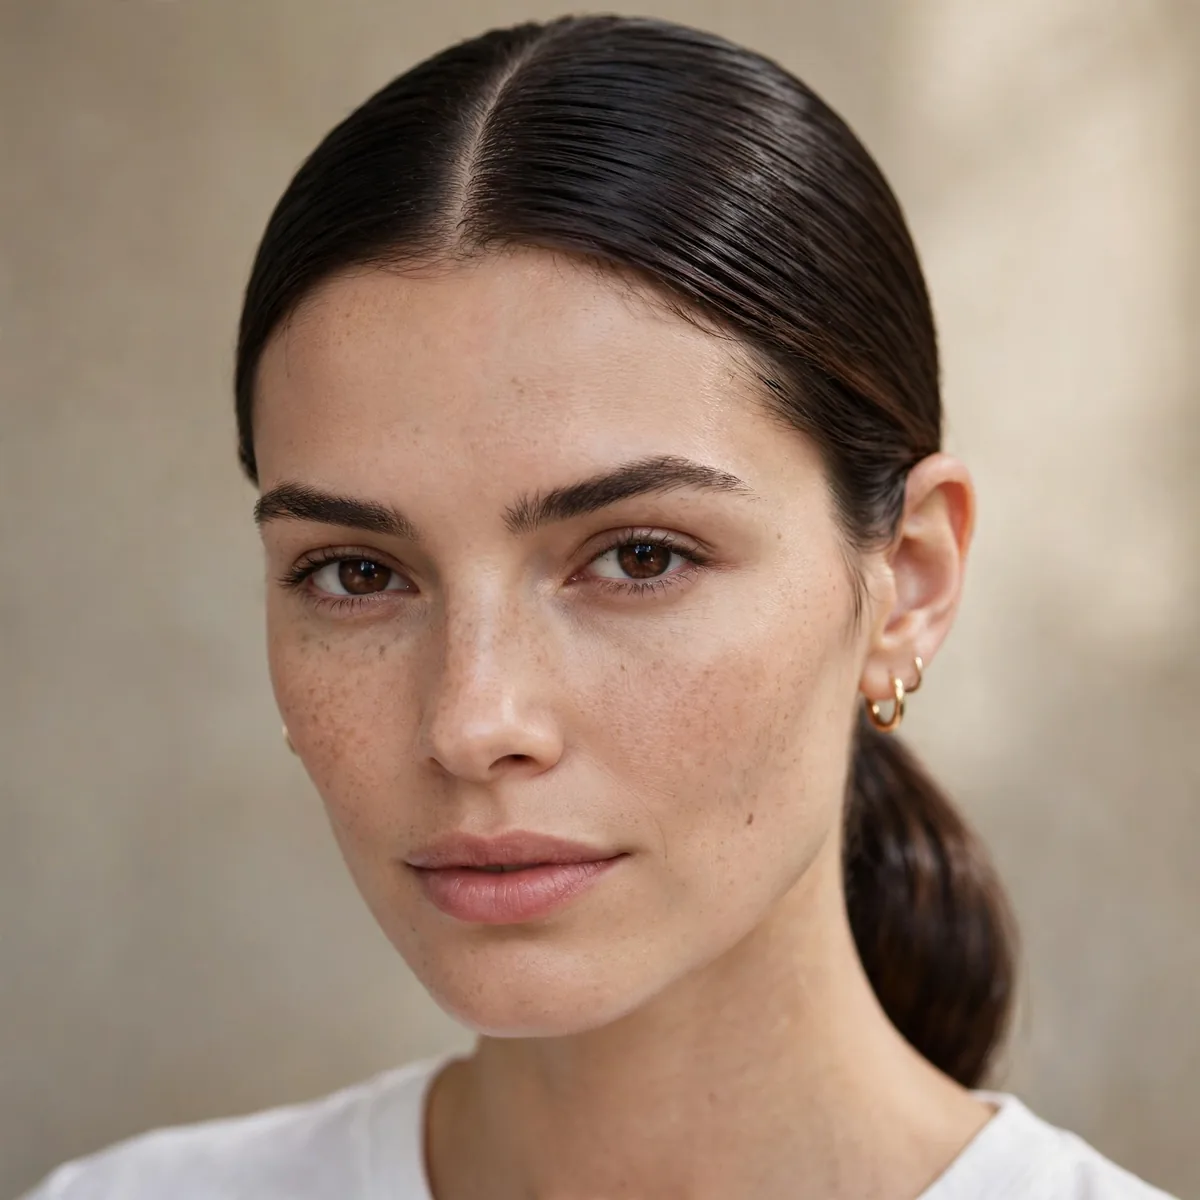
A precise middle part with a smooth low ponytail — graphic, modern, and minimal. The symmetry does all the talking.
The part must be exact; use a tail comb and take your time. Smooth both sides equally so the symmetry holds.
Symmetrical, oval faces carry this graphic style best — the center part mirrors balanced features. It is the power look of minimalism: fashion editors and executives favor it for its no-distraction polish. Straight hair achieves the look fastest, while wavy textures need a flat-iron pass down the tail. Pair it with strong brows for maximum impact.
Edge control or a strong gel along the part line keeps the center line razor-sharp all day — reapply sparingly rather than layering. Smooth the tail with a paddle brush and finish with anti-frizz oil on the ends only. If the ponytail swings and breaks the graphic symmetry, a hidden second elastic a few inches down keeps the tail disciplined.
Twisted Side Ponytail
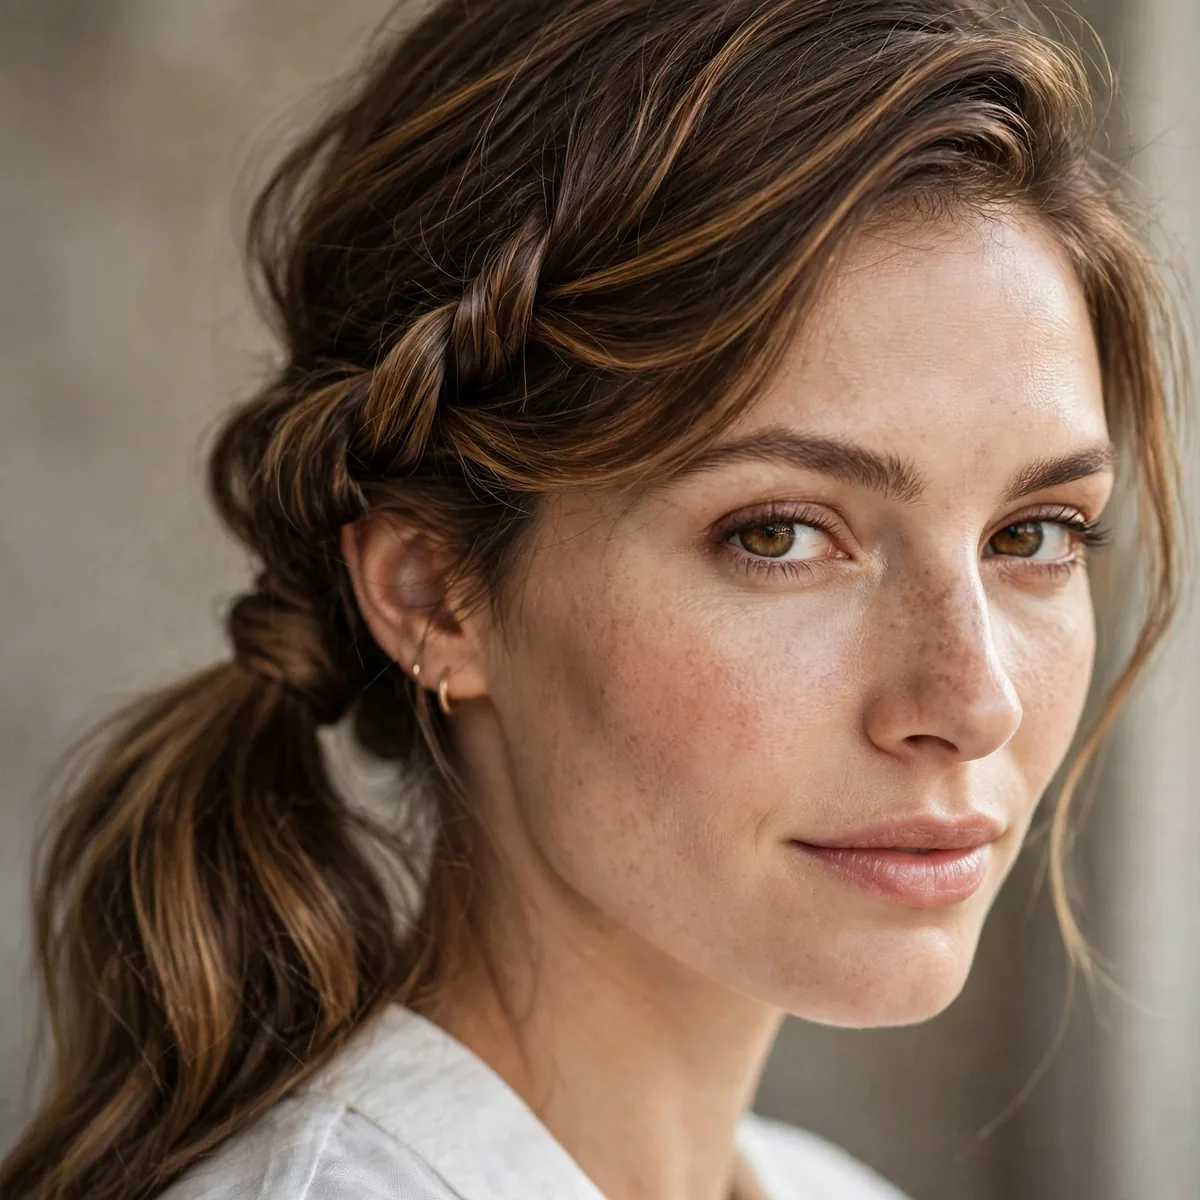
One side twists back into a low side ponytail — asymmetric interest with beginner technique. The twist adds just enough detail.
Twist the front section on one side, gather it with the rest into a low pony. The single twist is the detail that makes it look styled.
Oval and heart-shaped faces glow with this asymmetric detail — the twist opens one side of the face while the ponytail balances the other. It flatters teens at school formals and bridesmaids alike, offering interest without updo formality. Wavy textures twist most prettily, but straight hair keeps the line crisp and modern.
Twist away from the face rather than toward it — the direction keeps the section smooth against the temple instead of puffing outward. Pin the twist where it joins the ponytail so the junction is invisible, then wrap the base with a strand. For photography, flip the tail over the same shoulder as the twist; the composition looks deliberate from every angle.
Voluminous Low Bun for Thin Hair
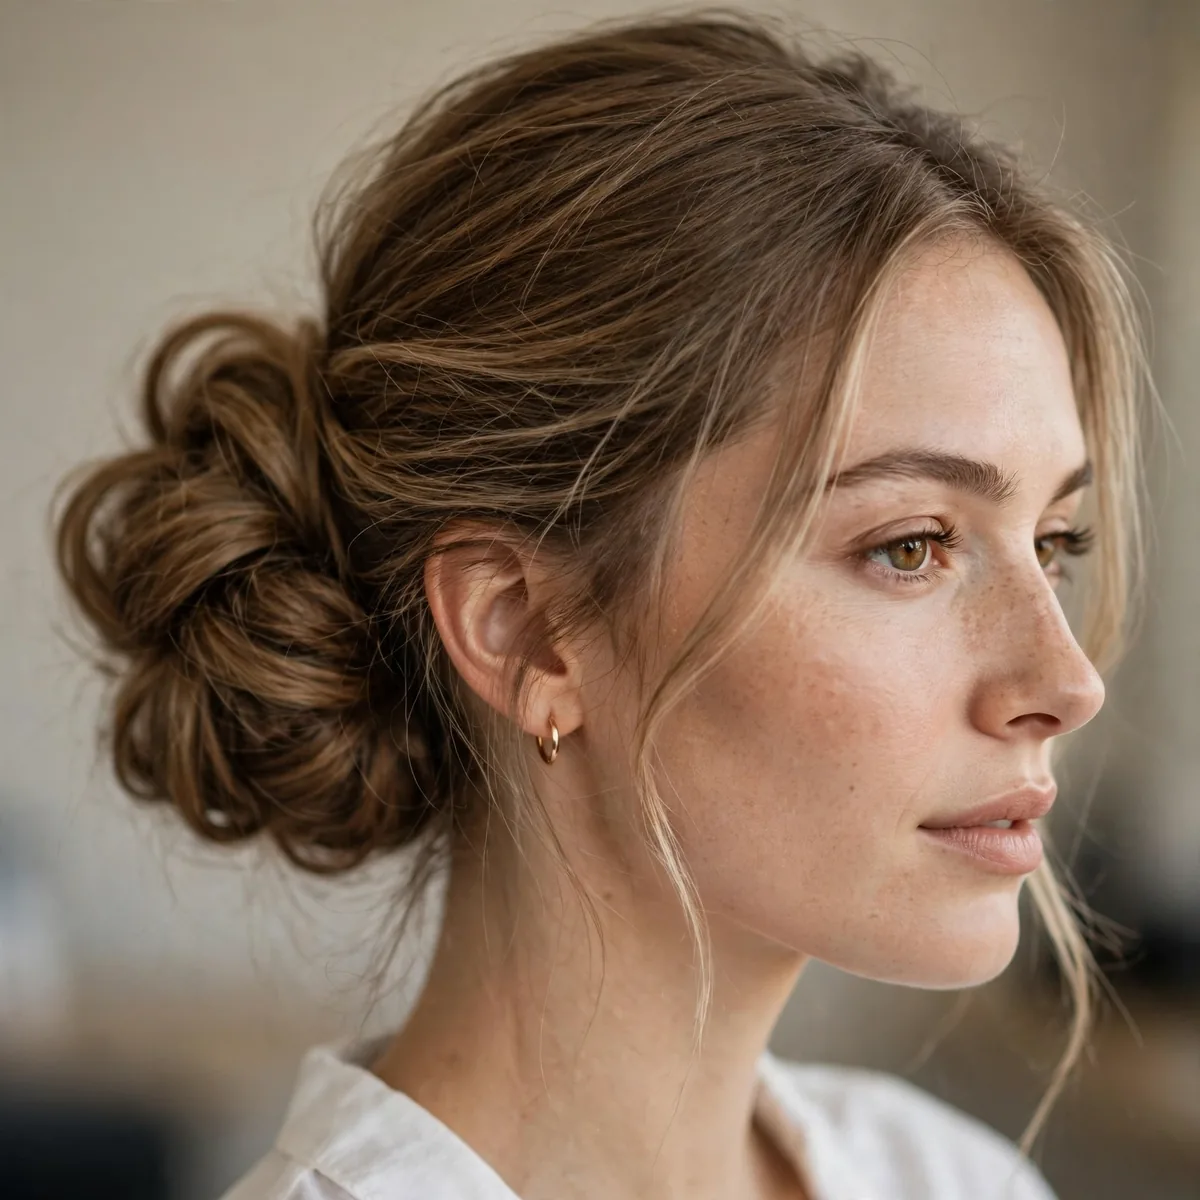
Teasing plus a donut gives fine hair a full-looking formal bun — the combination solves the thin-hair bun problem completely.
Tease the ponytail before spreading it over the donut. The teasing fills out the form so the bun looks lush, not sparse. For more thin-hair help, our bob hairstyles for fine hair cover cuts that add fullness.
Women with fine, low-density hair finally get a full bun here — the tease-and-donut combination is the single best trick in the thin-hair playbook. Round and oval faces both suit the low placement. It is a wedding-guest favorite for mature women, where fullness reads youthful. Short layers can be pinned in first so nothing pokes out.
Clip-in extensions at the back of the ponytail add real volume under the teasing — even one weft transforms the result. Backcomb in small sections rather than one big pass; layered teasing builds density instead of tangling. A volumizing mousse applied before drying gives fine hair the body it needs to hold the whole structure.
Formal High Bun in Five Minutes
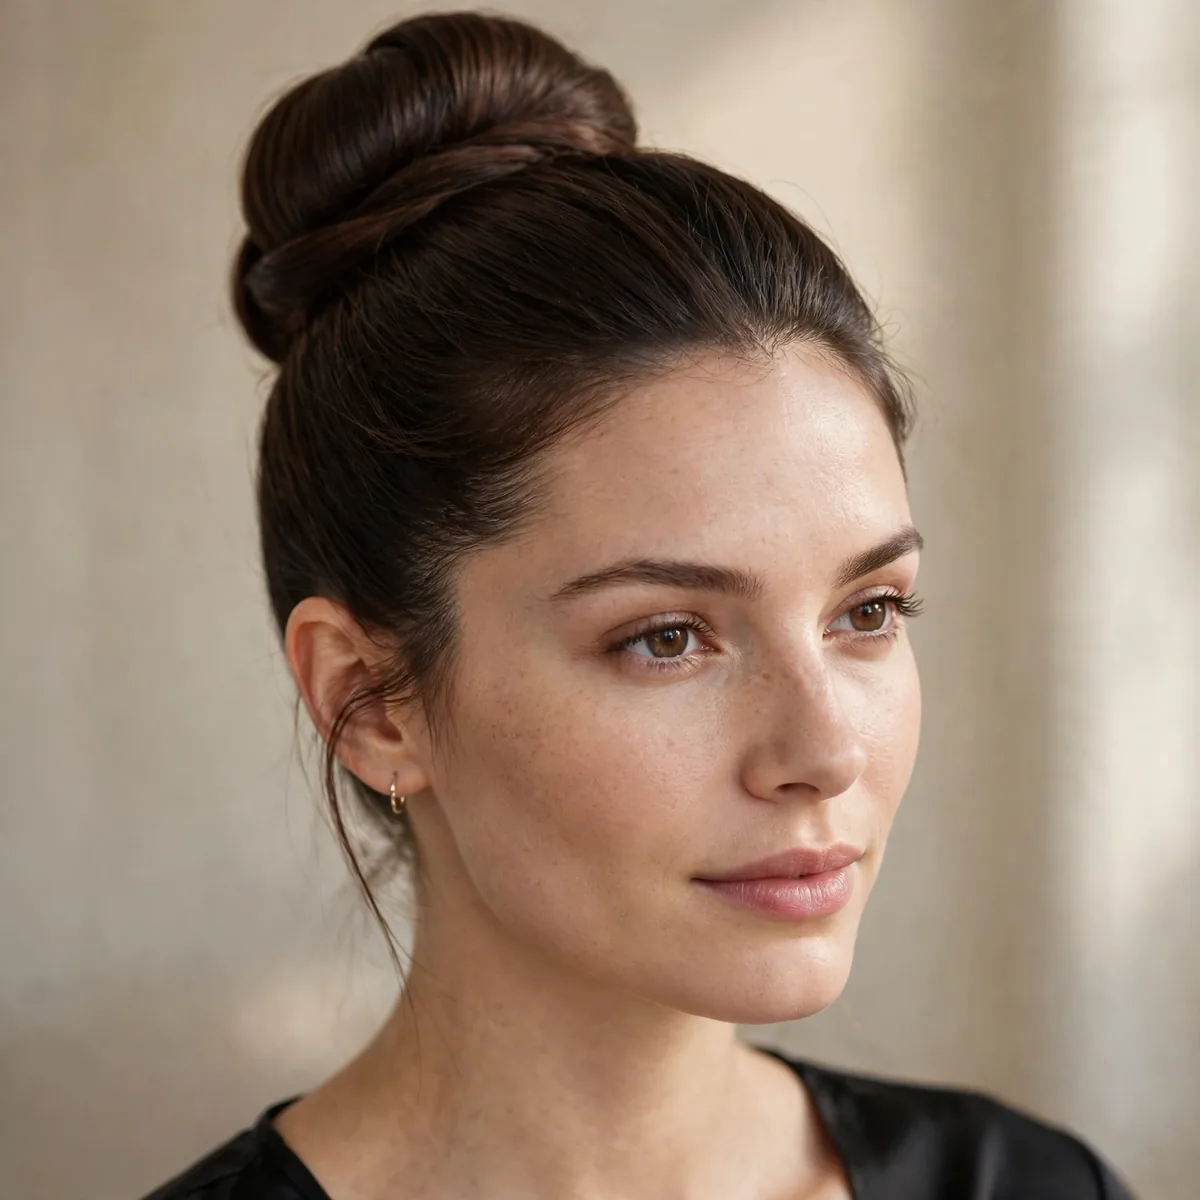
A high ponytail twisted and pinned into a bun — the fastest formal updo. Smooth roots make it event-ready in minutes.
The speed trick is committing: gather high, twist once, coil, pin four times, spray. Practiced twice, this takes under five minutes.
Oval and long faces benefit from the crown height — it adds presence without the severity of a center part. Bridesmaids in a rush, speakers before a panel, and anyone running late all rely on this bun. Medium to thick hair coils fastest; fine hair benefits from a quick tease of the tail before wrapping.
Place the ponytail high on the crown — at the level of the temples, not the back of the head — or the bun sits too low to read as formal. Four pins in a compass pattern (north, south, east, west) anchor it evenly. A final veil of strong-hold hairspray, applied from twelve inches away, freezes the finish without a crunchy shell.
Formal hair is a skill that builds fast — master two or three of these and you will never panic before an event again. When you are ready to level up, the braided updo hairstyles for special occasions add the next technique, and our fishtail braid hairstyles for beginners teach the braid step by step.