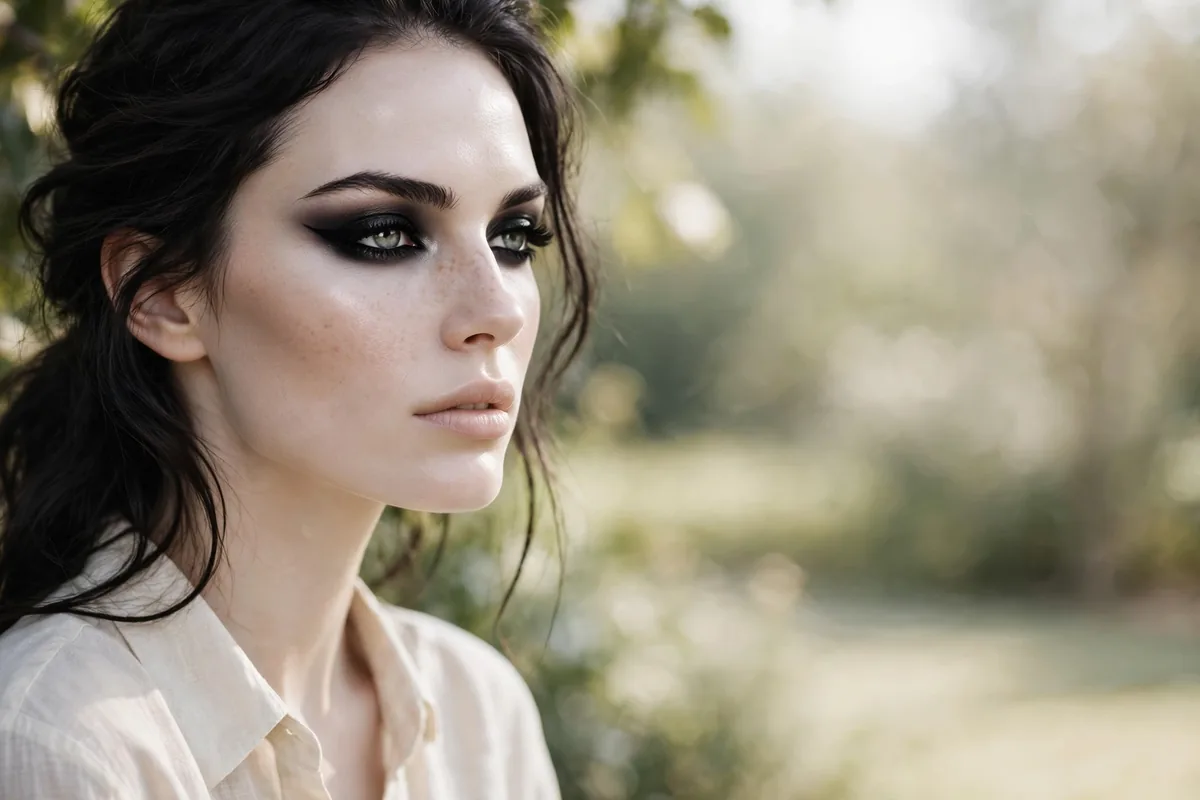
The most striking makeup looks are built on contrast — bold opposites in deliberate balance.
High-contrast makeup works because the human eye is drawn to difference. Dark liner against pale skin, bright lip against nude face, matte skin against glossy lids — each pairing makes both elements more vivid. It is color theory and drama in perfect partnership.
The key is intentionality. Contrast without control looks chaotic; contrast with precision looks powerful. These 20 looks range from wearable daily drama to full editorial statements, all built on the same principle: opposites, balanced beautifully.
Precision tools matter here — sharp liners, clean brushes, and the patience to perfect edges. Let's turn up the contrast.
Stark Black Wing + Bare Skin
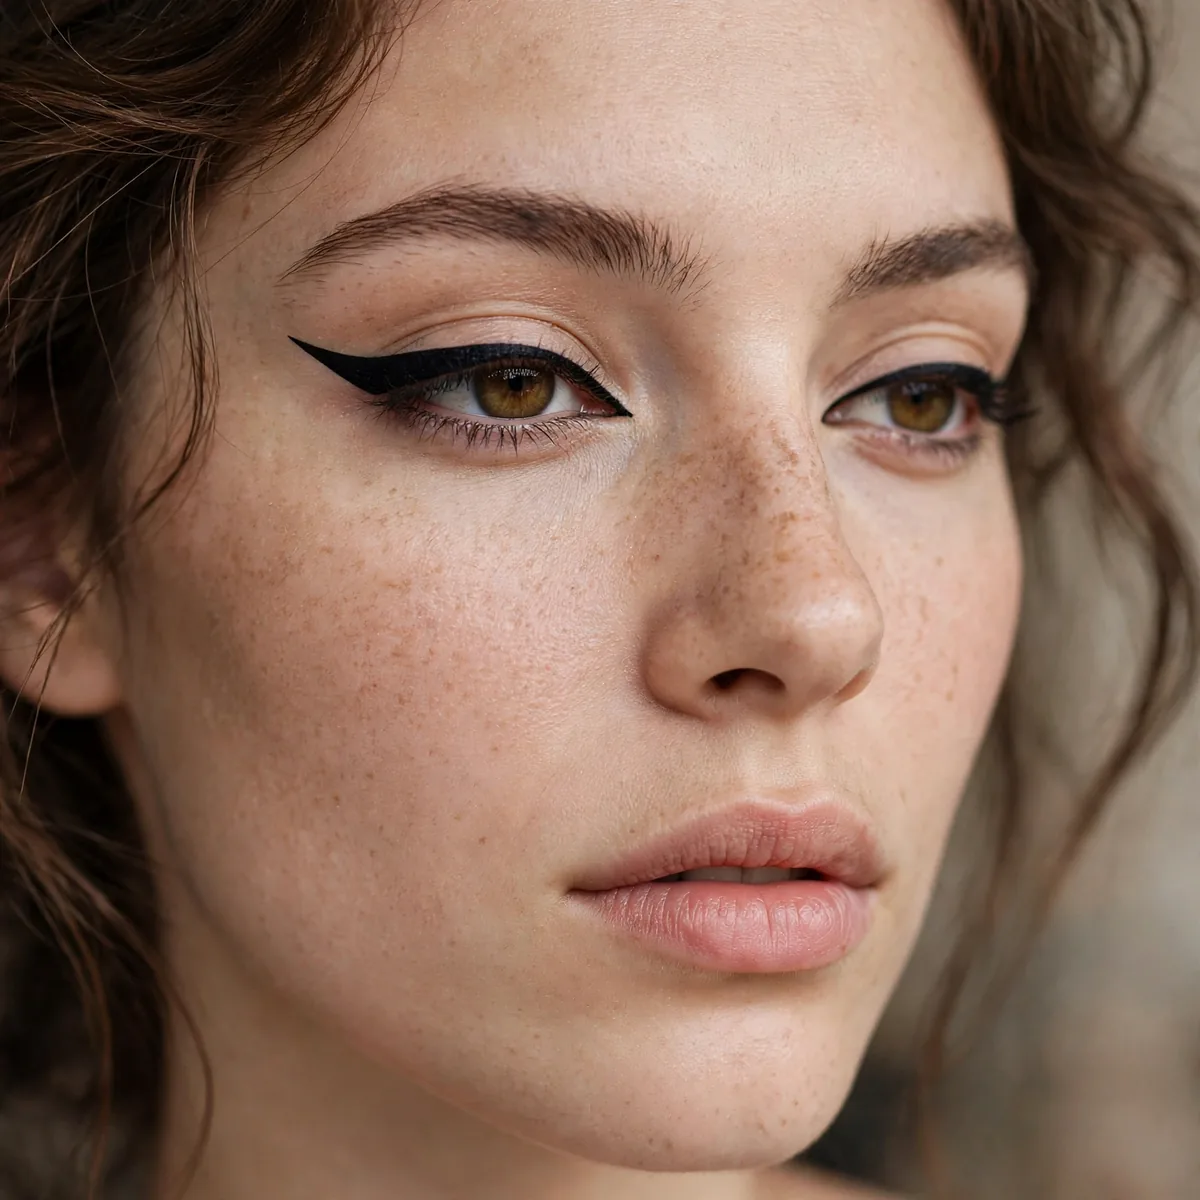
The stark black wing against bare skin is high contrast at its purest: one graphic black line, nothing else competing. The nakedness of the skin makes the wing look even bolder; the boldness of the wing makes the skin look even fresher. Perfect opposition. The color payoff is rich without ever turning loud, giving the whole look a depth that quietly draws people in.
This suits minimalists who want maximum impact from minimum product. The look flatters all eye shapes — the wing adapts — and the bare skin keeps it modern rather than retro. It is ideal for those with good skin who want their liner to be the entire statement. Younger wearers love the freshness of it, while the solid technique underneath gives the result genuine staying power.
Keep the skin truly minimal: tinted moisturizer or just concealer where needed, groomed brows, nothing else. The wing must be flawless — sharp, symmetrical, opaque — because there is nothing to distract from it. This is precision as the whole look. Building in thin, gradual layers rather than one heavy application gives a smoother and noticeably longer-lasting result.
Draw the wing with a waterproof liquid liner and clean any mistakes with micellar water on a precision cotton bud before they set. The skin needs to look like skin, not like skipped makeup — hydrate well and spot-conceal. The contrast only works when both sides are perfect. Tested against humidity and long nights, the structure of this look is genuinely built to survive real life.
White Liner Graphic Pop
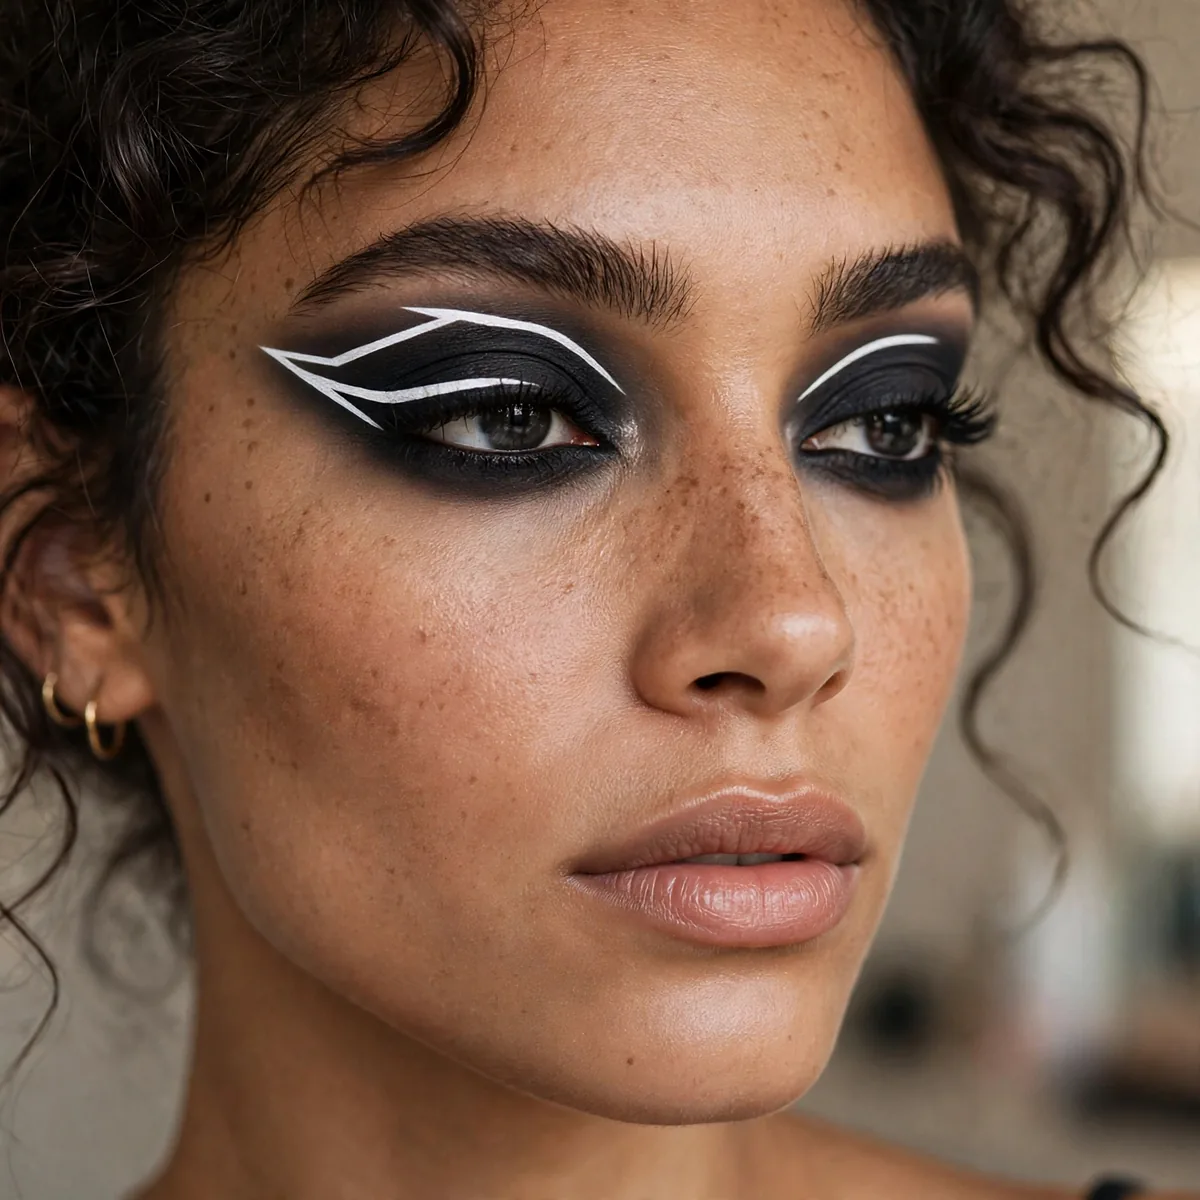
White liner on dark shadow is contrast turned graphic: bright white lines cutting through black or deep smoke. It is editorial, futuristic, and utterly eye-catching — the negative space of eyeliner. For those who find black liner too expected. It carries that effortless quality that looks simple at first glance but actually relies on thoughtful, careful layering underneath.
This suits the fashion-forward and creative occasions — photoshoots, concerts, nights out. The white pops against all skin tones, though it reads brightest against deeper skin. It flatters all eye shapes; the graphic placement adapts to the lid space available. It is especially flattering in photographs, where the balanced, harmonious tones read as healthy and naturally radiant.
Build a dark smokey base first — black or deep grey blended around the eye — then add the white graphic element: a floating line above the crease, a sharp inner corner, or a bold wing over the smoke. The white should be opaque; sheer white looks grey and defeats the purpose.
White liner needs a white base to be truly opaque — layer a white eyeshadow under the liner or use a highly pigmented liquid formula. Set the dark base thoroughly so the white doesn't pick up grey. Precision is everything; graphic looks expose wobbles. A full trial run before any major event lets you fine-tune the intensity and confirm the wear time suits your plans.
Blood Red Lip + Porcelain Skin
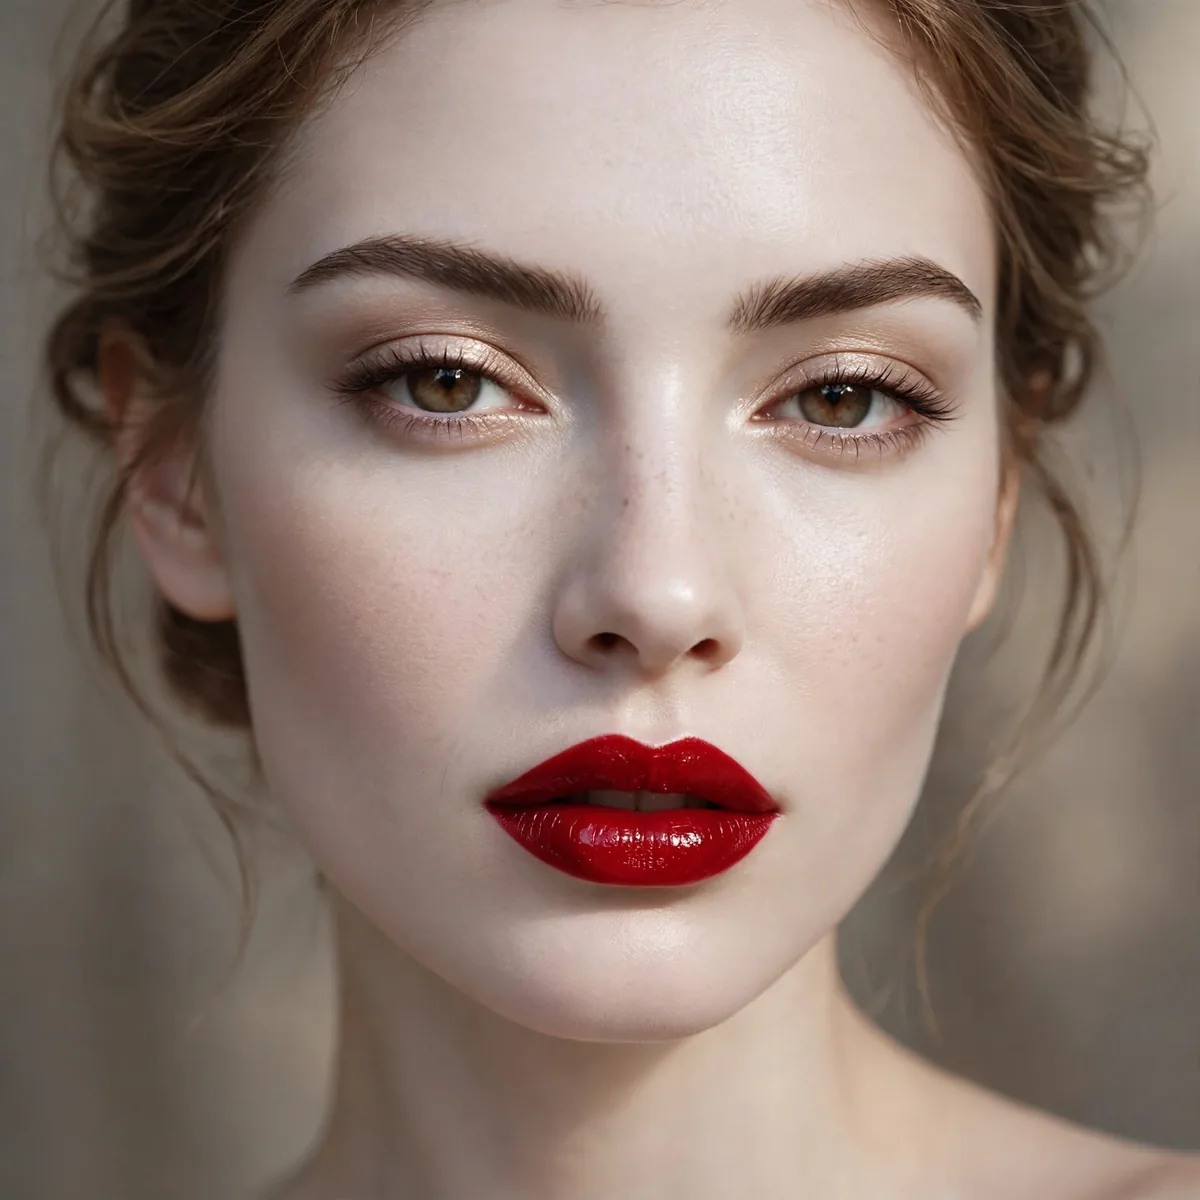
Blood red lips against porcelain skin is the oldest high-contrast trick in beauty — Snow White drama rendered in makeup. The paleness amplifies the red; the red gives the paleness purpose. Timeless, striking, and endlessly photogenic. From a distance it reads soft and pretty, while up close the detail work reveals genuine artistry in the blending.
This suits fair to light skin most naturally, where the porcelain-red contrast is most dramatic — though the principle adapts across skin tones with adjusted base shades. It flatters all lip shapes and works for evening events, photoshoots, and anyone channeling vintage glamour. The versatility is the real victory here — it pairs effortlessly with everything from casual denim to full evening glamour.
Perfect a pale, flawless base — full coverage, matte-satin finish — and keep the eyes defined but simple: black liner, full lashes. The red lip is the chromatic explosion; everything else is the quiet canvas. Brows should be defined to frame the drama. Finish with the lightest press of translucent powder only where truly needed, so the dimension you built stays alive.
The base must be flawless — high contrast exposes every imperfection. Take time with foundation, conceal, and set. The red lip needs liner, brush application, and blotting for longevity. This is a look that rewards meticulous prep and punishes shortcuts. Toss the key products into a small pouch so any necessary touch-ups take seconds rather than requiring full reapplication.
Neon Against Nude
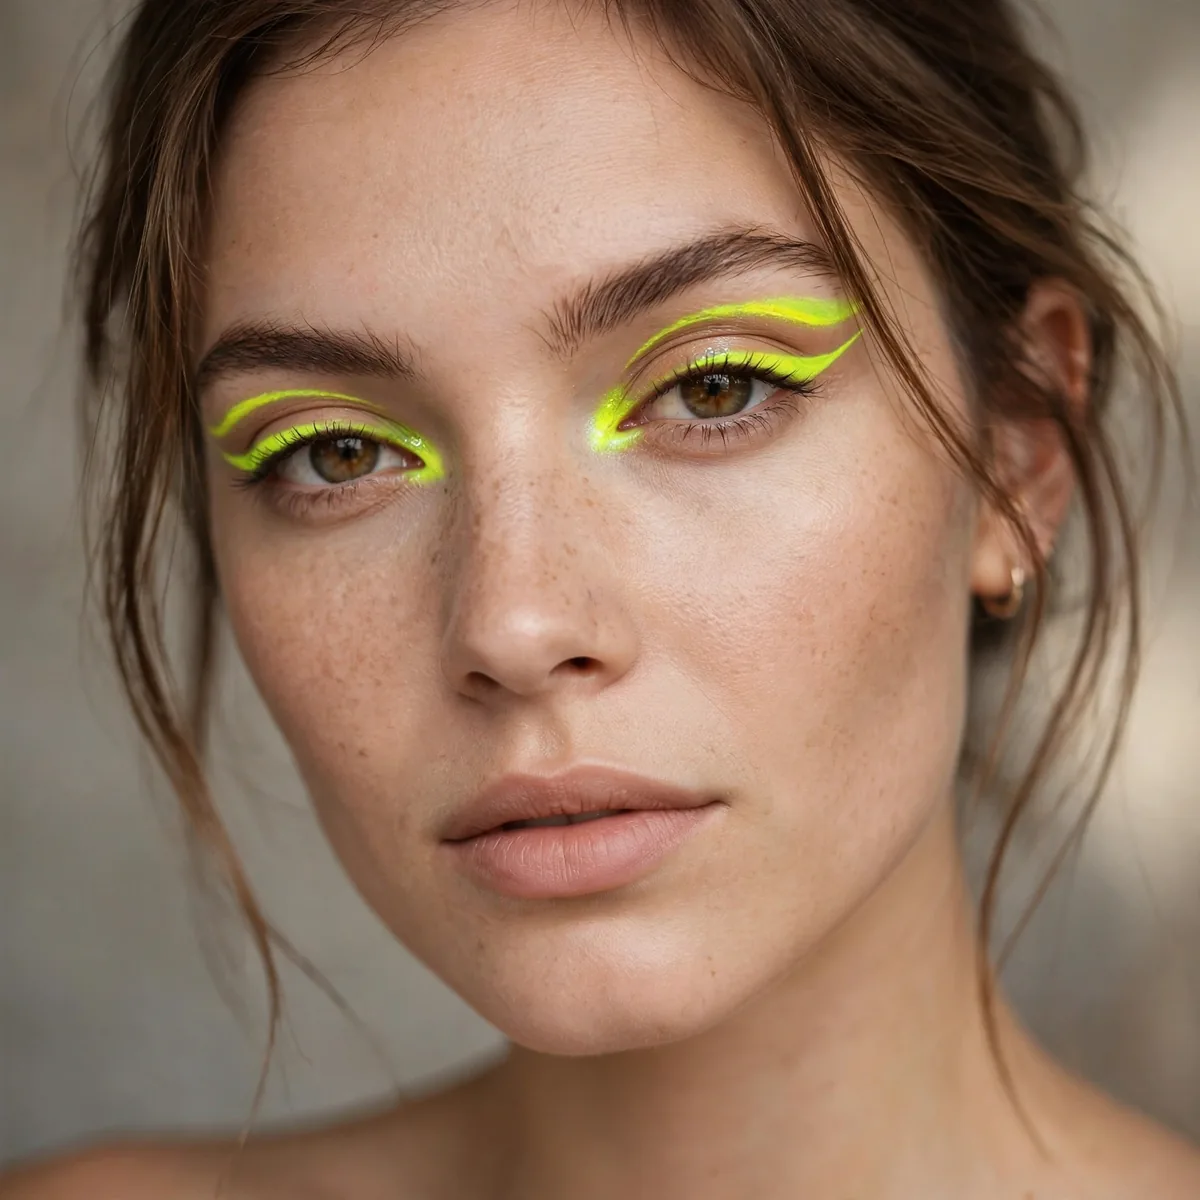
Neon against nude is modern contrast: electric color — lime, hot pink, electric blue — placed precisely on an otherwise bare, nude face. The shock of the neon is amplified by the quiet around it. Futuristic minimalism with a jolt. The tones melt together so seamlessly that the eye travels across the face without catching on a single harsh line.
This suits the bold and the fashion-forward — festivals, creative events, nights out. Neon flatters all skin tones; the brightness is the point regardless of complexion. It works best on those comfortable being stared at, because neon demands attention. Anyone nervous about bolder makeup will find this a welcoming entry point that still delivers a real transformation.
Keep the face genuinely nude: light base, groomed brows, bare lips or clear gloss. Place the neon as a single precise element — a graphic liner, a pop at the inner corner, a bold lid wash. One neon statement; the restraint around it is what makes it shocking. A damp beauty sponge pressed gently over the finished base melts every layer together for a truly skin-like effect.
Neon pigments often need a white base to reach full brightness — layer white shadow under the neon. Use highly pigmented formulas; sheer neon looks pastel and loses the contrast. Set the nude base well so the neon has a clean canvas. Precision placement is everything. A final veil of setting spray is the real difference between makeup that survives hours and makeup that survives all day.
Matte Skin, Gloss Everything
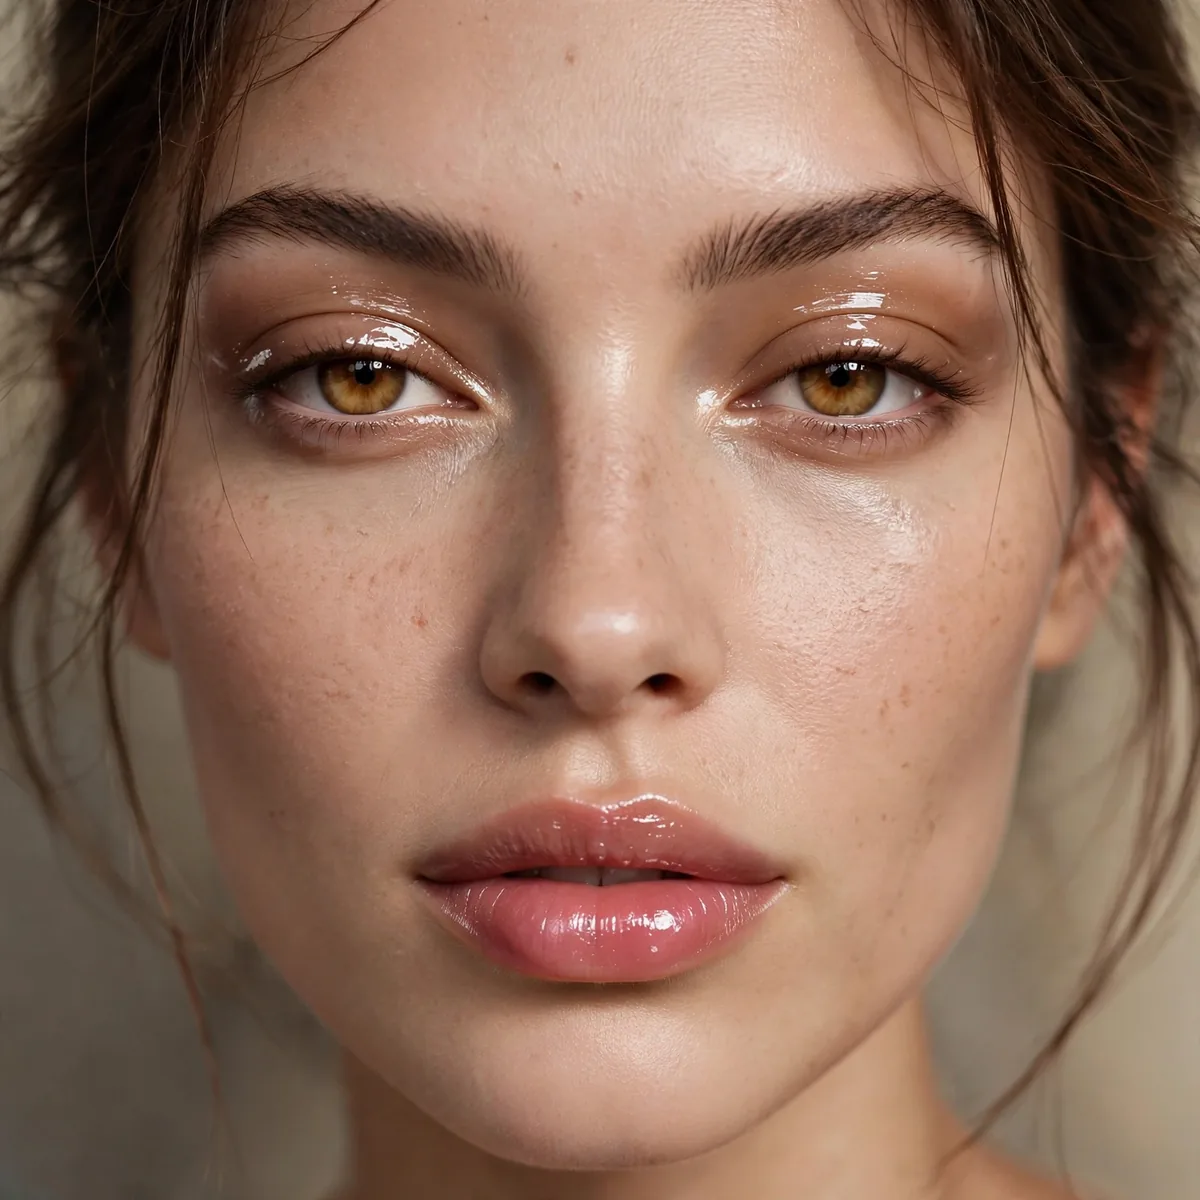
Matte skin against glossy lids and lips is texture contrast: flat, velvety skin making wet-look shine look even more dramatic. The opposition of finishes creates depth that color alone cannot. It is editorial texture play at its most wearable. It is the kind of look that earns compliments from people who cannot quite put their finger on what exactly changed.
This suits those who love shine but want it controlled. The matte base flatters oily skin and photographs smoothly, while the gloss adds the dimension matte alone lacks. It works for evening events and photoshoots where the texture play reads clearly. It also transitions beautifully from day to evening, needing only a deeper lip shade or one extra coat of mascara.
Perfect a matte full-coverage base — velvety, shine-free — then add gloss strategically: clear gloss on the lids, glass-shine on the lips, maybe a wet-look highlight on the cheekbones. The gloss should be placed, not everywhere; boundaries make the contrast. For added dimension, tap a small amount of highlighter onto the high points of the face after everything else is set.
Keep blotting papers handy — the matte base must stay matte for the contrast to work. Apply lid gloss with a fingertip, patting rather than sweeping. Expect the lid gloss to crease; this is a shorter-wear look. The lips need reapplication through the evening. Blotting papers pressed gently over the T-zone refresh the finish beautifully without disturbing the careful layers underneath.
Black and White Duo
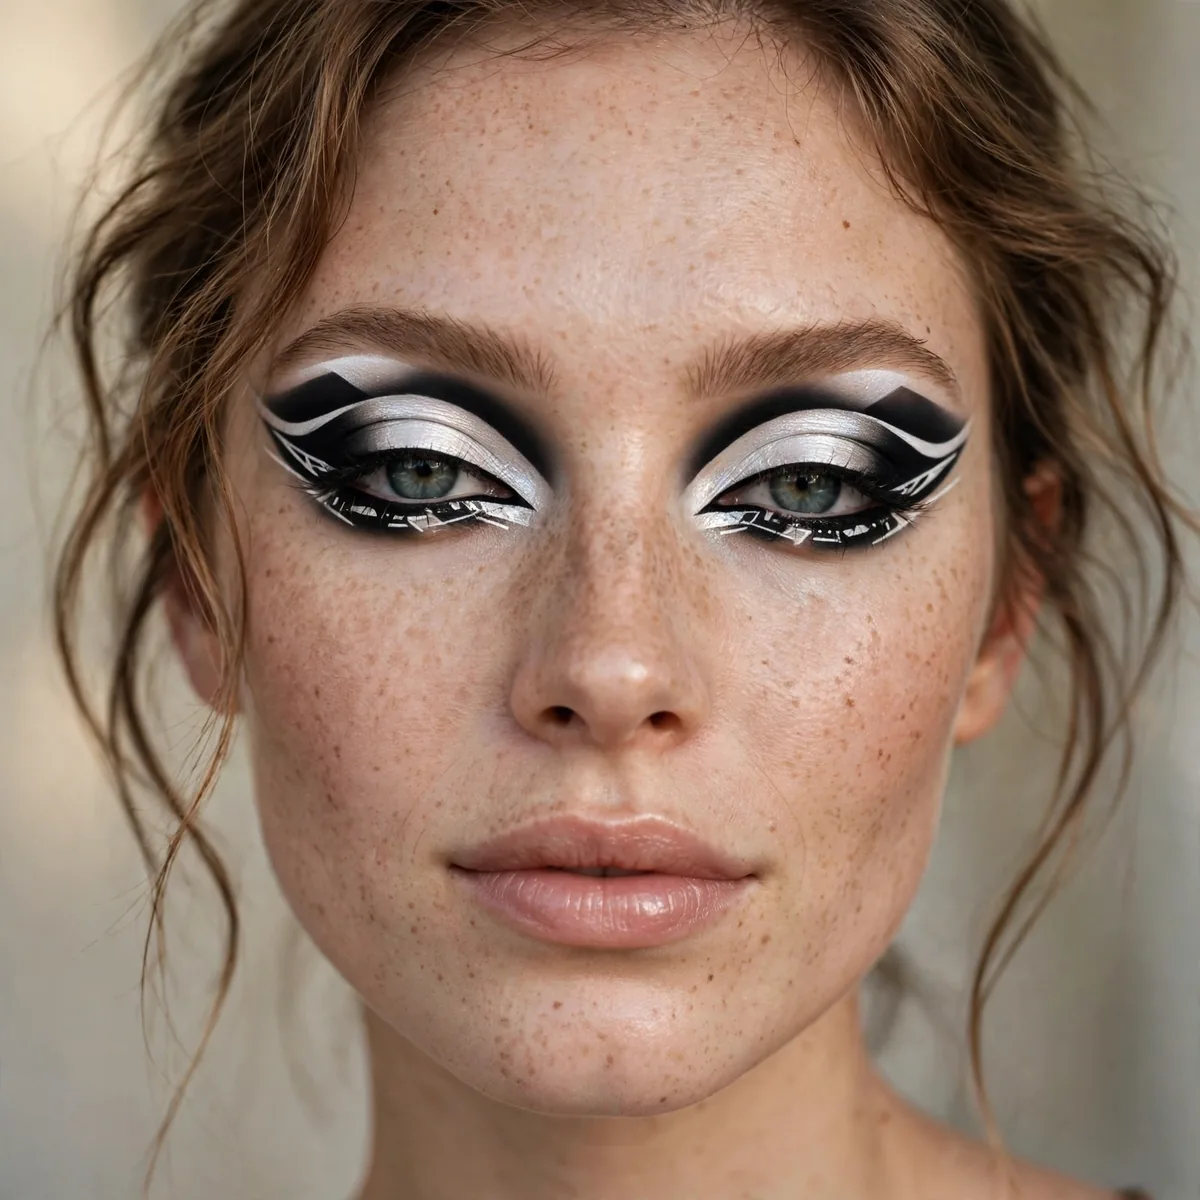
The black-and-white duo is contrast without color: graphic black and stark white in deliberate composition on the eyes. It is the most architectural look here — pure light and shadow, no hue to soften it. Striking in its absolute simplicity. In person, the finish catches light beautifully, shifting subtly as you move through different lighting over the course of the day.
This suits lovers of graphic, editorial beauty and monochrome aesthetics. The absence of color makes the shapes the entire statement — it flatters strong bone structure and photographs with incredible graphic power. It is a photoshoot and statement-event look. Mature wearers will appreciate how forgiving the finish is, smoothing over texture rather than settling into it.
Compose the eye with intention: white on the lid, black in the crease; or a black wing with a white floating line; or split — half black, half white. The design should be deliberate and symmetrical. Keep the rest of the face minimal — nude lips, clean skin. Cream formulas layered beneath their powder counterparts will effectively double the wear time of this entire look.
Both the black and white must be fully opaque — sheer versions turn grey and muddy the contrast. Use pigmented formulas and layer as needed. Symmetry is critical; graphic monochrome exposes every imbalance. Take time, check both eyes together, and photograph the result. For long events, this layering approach holds up remarkably well, asking only for one quick midday check.
Deep Plum + Champagne Pop
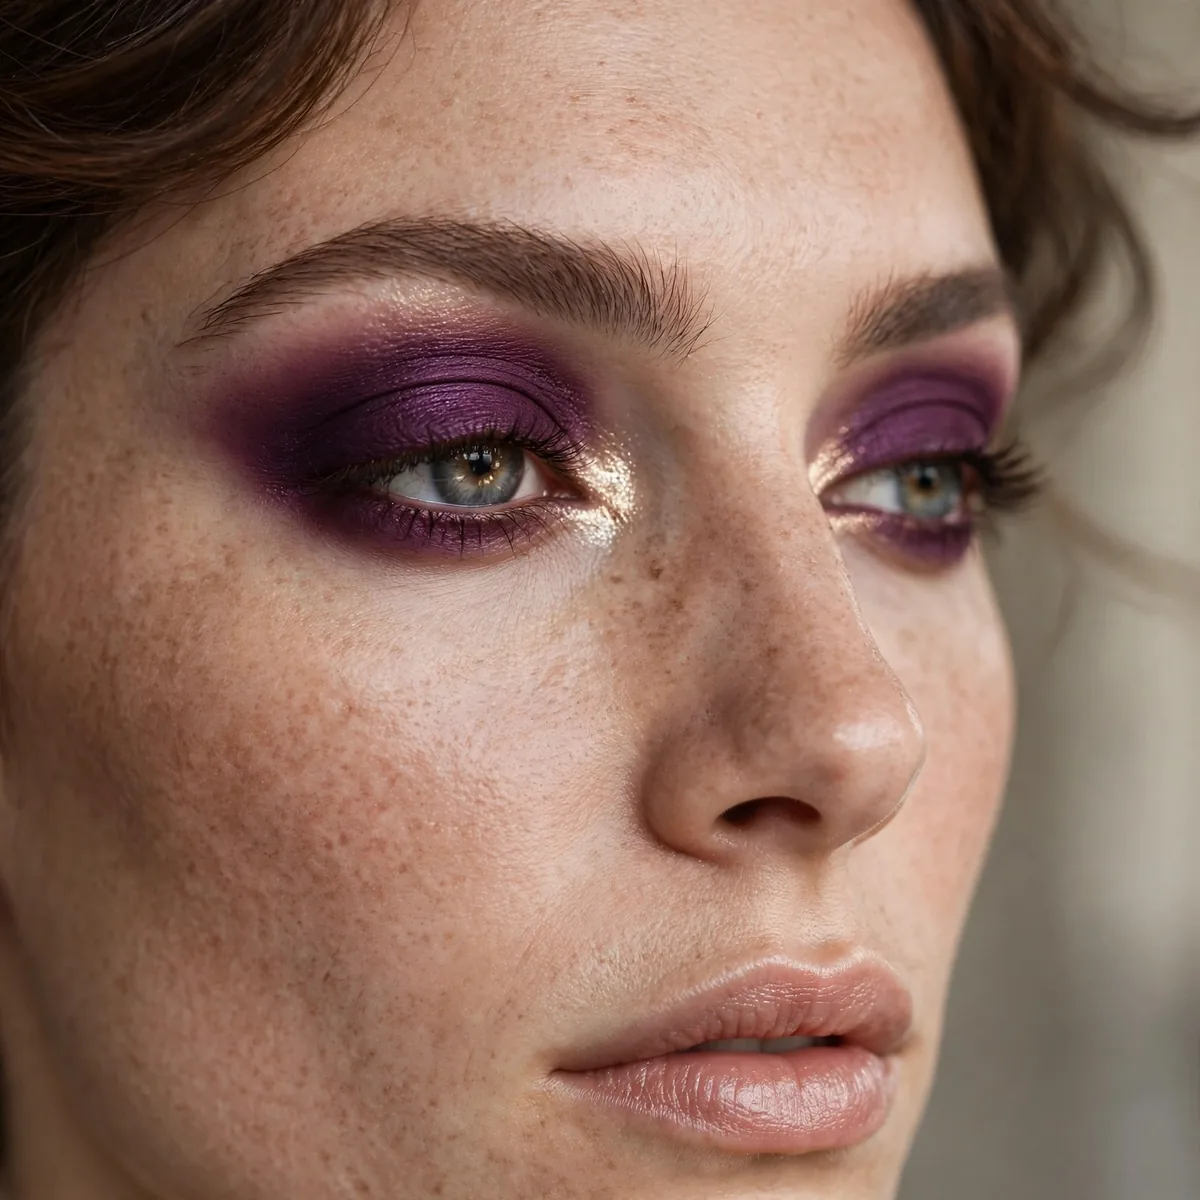
Deep plum shadow with a champagne pop at the inner corner is contrast within the eye: darkness at the outer edge, light at the inner. The opposition makes the eye look larger, brighter, and more dimensional. It is the most wearable contrast on this list. Up close, the texture looks genuinely expensive — smooth, even, and deliberately placed rather than heavy or obvious.
This suits everyone — the technique flatters all eye shapes and colors. The plum is soft enough for daytime, dramatic enough for evening. It is ideal for those who want contrast without graphic harshness; the blend keeps it beautiful rather than severe. It photographs reliably in both natural daylight and artificial light, which matters enormously for events with mixed lighting.
Smoke deep plum through the crease and outer corner, then press bright champagne shimmer into the inner corner and inner third of the lid. The gradient between them should be seamless — the contrast comes from the endpoints, not a harsh line. Defined lashes complete the dimension. Keep a clean fluffy brush within reach to soften any edges — diffused, seamless application is what reads as professional.
Blend the transition thoroughly; the magic is in the gradient, not the extremes. A sticky primer keeps the champagne pop bright all day. Tightline for definition without adding competing darkness. This is a technique that rewards patience in blending. The genuine secret is thin layers — heavy, thick application breaks down faster regardless of how good the products are.
Sharp Contour + Soft Blush
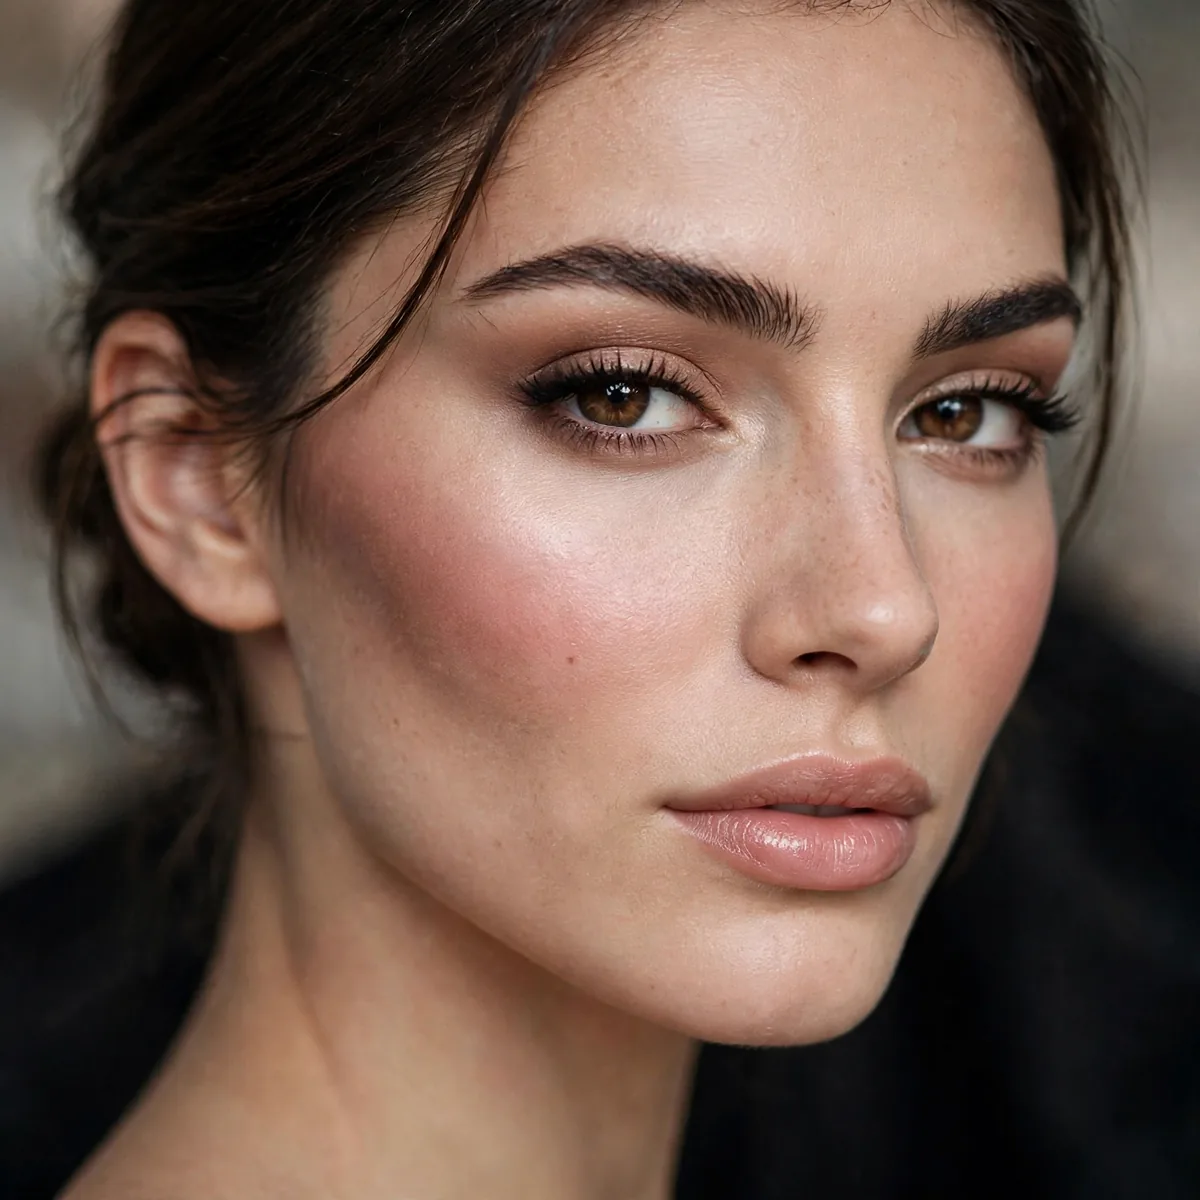
Sharp contour against soft blush is structure meeting softness: carved cheekbones with a diffused, romantic flush over them. The opposition of hard and soft on the same cheek creates dimension with complexity. Sculpture with a heartbeat. The overall effect is polished without ever feeling overdone, striking that rare balance between noticeable and completely natural.
This suits those who love both contour and blush and refuse to choose. The sharp contour flatters all face shapes with adjusted placement; the soft blush keeps it from reading severe. It works for evening events where the dimension can be appreciated. The look adapts easily across seasons too, requiring only a simple shade swap to feel right for spring or fall.
Carve with cream contour in precise lines — under the cheekbone, along the jaw — then apply blush diffused softly over the apples, blending upward. The contour should read as structure, the blush as life. Set the contour, keep the blush luminous. A fine mist of setting spray between layers locks each step in place and helps prevent any midday breakdown.
Apply contour first, blend its edges, then add blush — reversing the order muddies both. The contour lines should be precise but the edges diffused; the blush should have no edges at all. Check in natural light to ensure the balance reads intentional. Keep a cotton bud lightly dipped in micellar water nearby for sharpening any edges that soften as the day wears on.
Glossy Black Cherry Lip
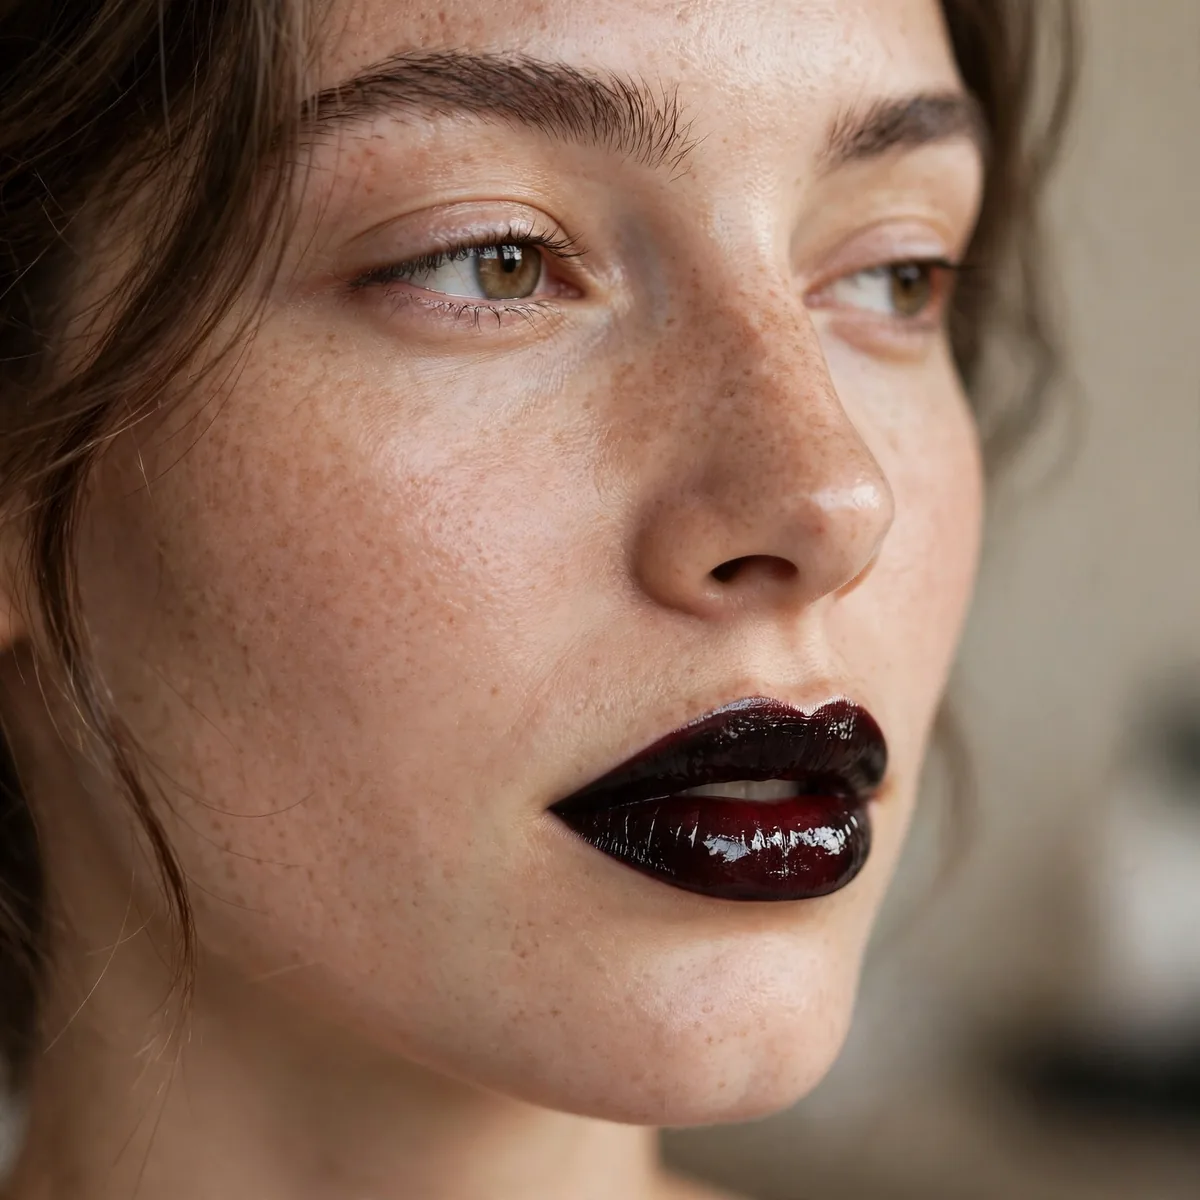
Glossy black cherry lips against fresh skin is darkness with shine: the deep, almost-black berry made reflective and dimensional with gloss. The gloss transforms the severity of dark lips into something luscious and modern. Vampy, but make it juicy. In photographs it reads even better than in the mirror, with a dimensional quality that flat, one-note makeup simply cannot replicate.
This suits those who love dark lips but find matte versions too severe. The gloss softens the edge while keeping the drama — it flatters all skin tones and works for nights out, concerts, and fall/winter events. The shine makes the dark color feel current. It suits minimalists and maximalists alike — dial the intensity up or down without ever losing the essential character.
Keep the face fresh and minimal: light base, groomed brows, defined lashes, maybe a soft brown in the crease. The glossy dark lip is the entire statement. The freshness around it is what makes the lip look modern rather than gothic. Choosing the right tools matters as much as choosing products here; dense brushes pack on color while fluffy ones diffuse it.
Layer a black cherry lipstick under a clear or matching gloss — the lipstick gives the color depth, the gloss gives the shine. Dark gloss migrates, so line the lips fully first. Keep the gloss for reapplication; glossy dark lips need maintenance through the evening. Reapplying strategically — lips after eating, powder only where shine appears — keeps the whole face looking freshly done.
Floating Crease Line
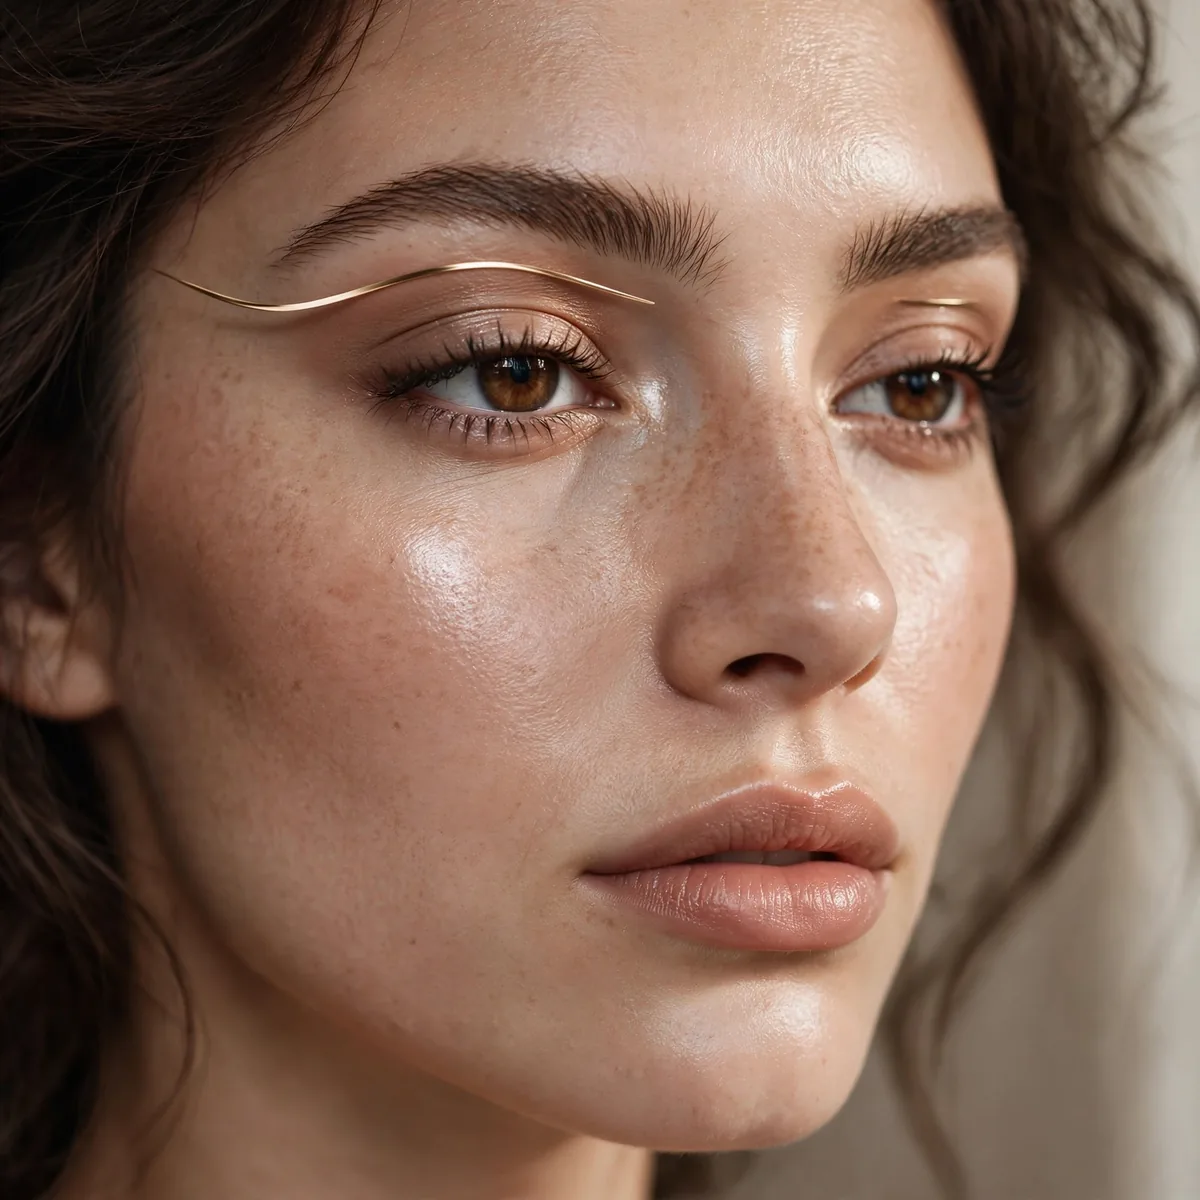
The floating crease line — a graphic line drawn above the natural crease, disconnected from the lash line — is contrast through negative space. The bare lid against the bold line creates an optical intrigue that is pure editorial. Minimal product, maximum concept. There is a quiet luxury to the finish — refined and intentional, far more interesting in real life than it first appears.
This suits the fashion-forward and those with lid space to showcase the float. It flatters all eye shapes when the line placement adapts — higher for hooded eyes, closer for deep-set. It is a statement look for creative events and photoshoots. For formal occasions, it holds its own beside elegant attire without ever crossing into costume territory.
Keep the lid bare or with a wash of neutral shadow, then draw the floating line in black, white, or a bold color above the crease. The line should be crisp and deliberate — wobbles ruin the graphic effect. The rest of the face stays minimal; the line is the art.
Map the line with the eye open, looking straight ahead — the placement must work with the eye open, not closed. Use a waterproof liquid liner for crispness. Check symmetry obsessively; floating lines expose imbalance instantly. This is precision as aesthetic. This routine becomes second nature quickly, taking noticeably less time with each wear as the steps turn familiar.
Sun-Kissed vs. Snatched
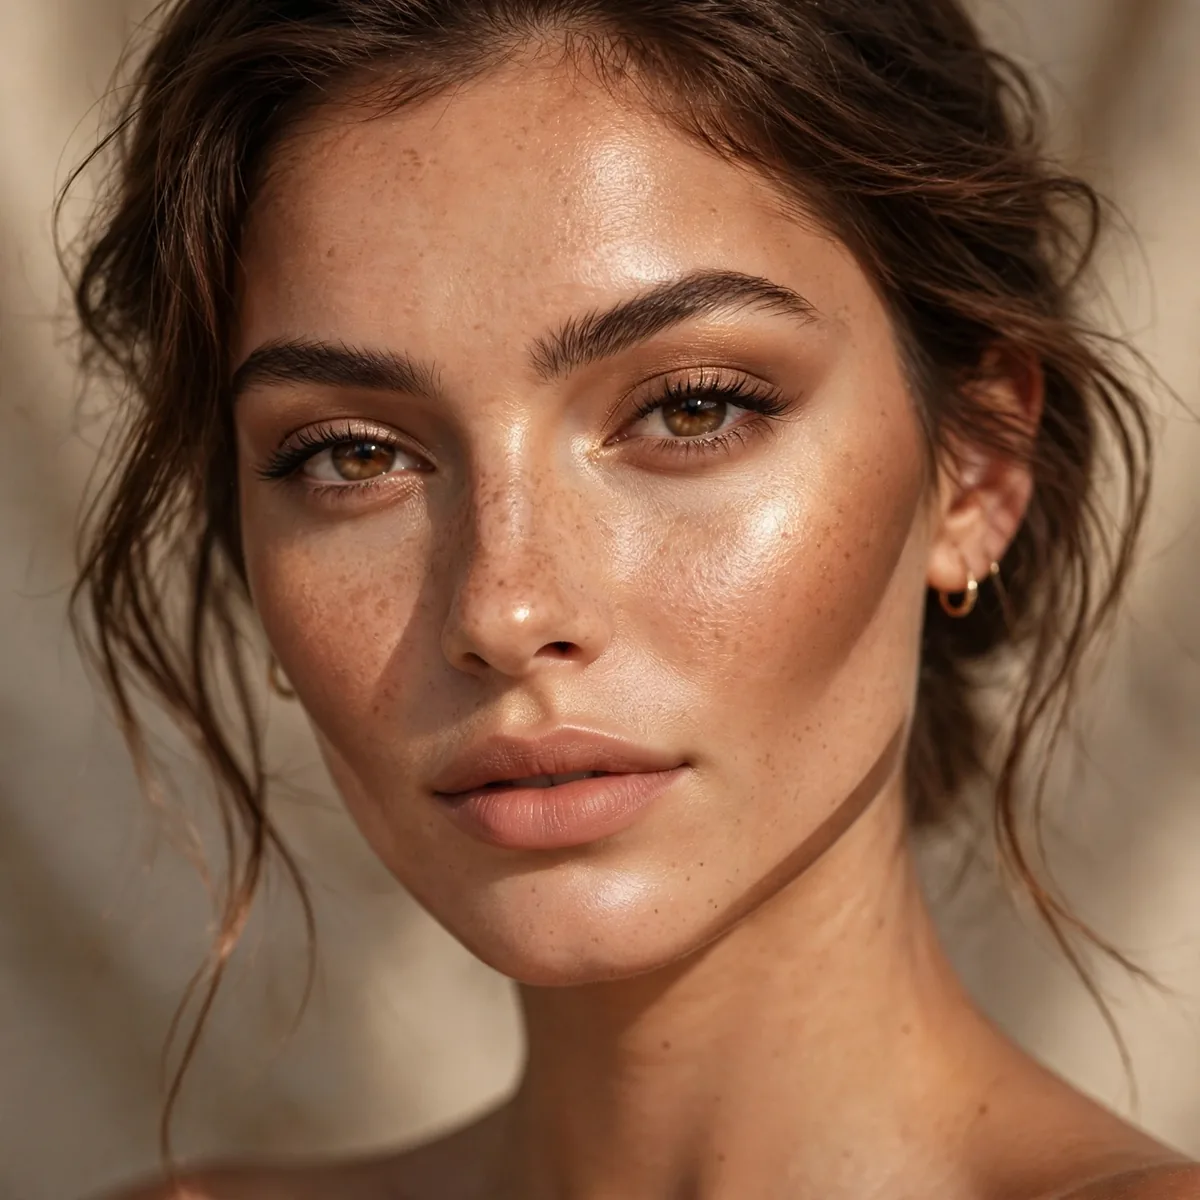
Sun-kissed glow meets snatched contour: bronzed, radiant warmth combined with sharp, lifted sculpting. It is the contrast of soft sunshine and hard architecture on one face — beachy and editorial at once. Two aesthetics, perfectly balanced. The color payoff is rich without ever turning loud, giving the whole look a depth that quietly draws people in.
This suits those who want both warmth and structure. The bronzed glow flatters warm undertones and summer skin; the sharp contour adds the definition glow alone lacks. It works for events where you want to look both radiant and sculpted — the best of both worlds. Younger wearers love the freshness of it, while the solid technique underneath gives the result genuine staying power.
Build the glow with cream bronzer, liquid highlighter, and warm blush, then carve sharp contour lines beneath — under the cheekbone, along the jaw, at the temples. The contour should be precise; the glow should be diffused. Together they create a face with both light and shadow. Building in thin, gradual layers rather than one heavy application gives a smoother and noticeably longer-lasting result.
Apply the glow first, then carve the contour over it — the sharp lines need to sit on top of the radiance. Blend contour edges just enough to avoid stripes while keeping the sculptural effect. The balance is the artistry; neither element should overwhelm. Tested against humidity and long nights, the structure of this look is genuinely built to survive real life.
Metallic vs. Matte Eye
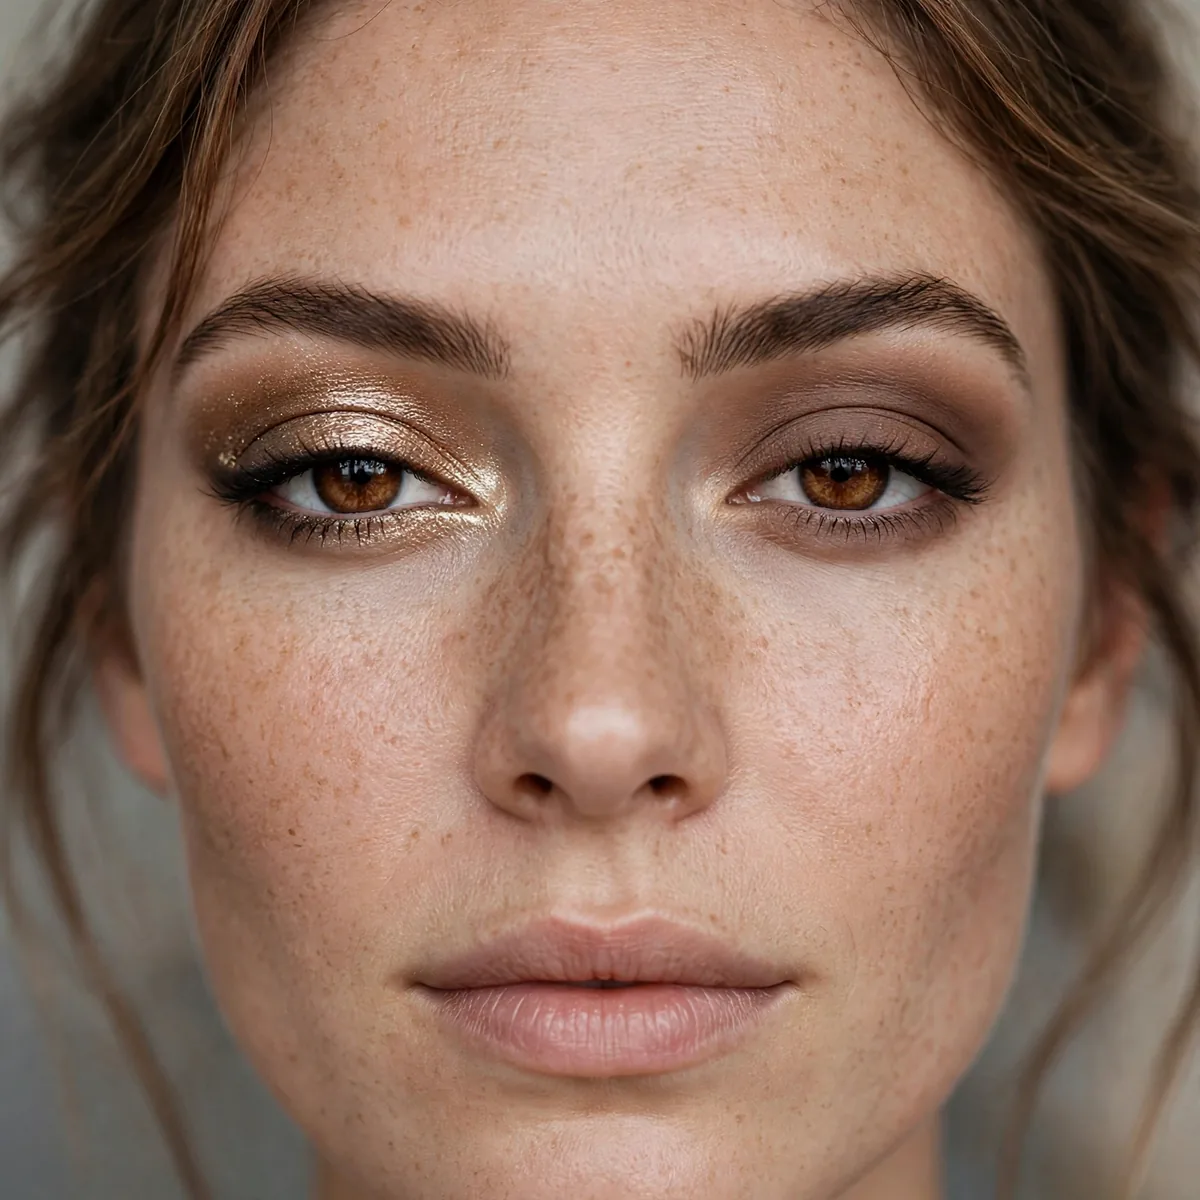
Metallic lid against matte crease is texture contrast within a single eye look: flat, velvety depth around a reflective, luminous center. The opposition makes the metallic look more molten and the matte look deeper. Dimension through texture alone. It carries that effortless quality that looks simple at first glance but actually relies on thoughtful, careful layering underneath.
This suits everyone — it is the most universally flattering contrast technique. The texture play adds dimension without requiring bold color, making it ideal for those who want interest without drama. It works for all occasions, day to night. It is especially flattering in photographs, where the balanced, harmonious tones read as healthy and naturally radiant.
Blend matte shadows through the crease and outer corner — warm browns, taupes, plums — then press metallic shadow onto the center of the lid. The boundary should be blended, not harsh; the contrast comes from the finishes, not a line. Defined lashes complete the dimension. A primer matched to your skin type underneath makes every single product applied on top perform significantly better.
Apply the metallic over a tacky primer for maximum reflectivity — the contrast depends on the metallic truly shining. Keep the matte shades well-blended; patchy mattes ruin the effect. This is a technique that elevates any color palette instantly. A full trial run before any major event lets you fine-tune the intensity and confirm the wear time suits your plans.
Bold Brow + Bare Eye
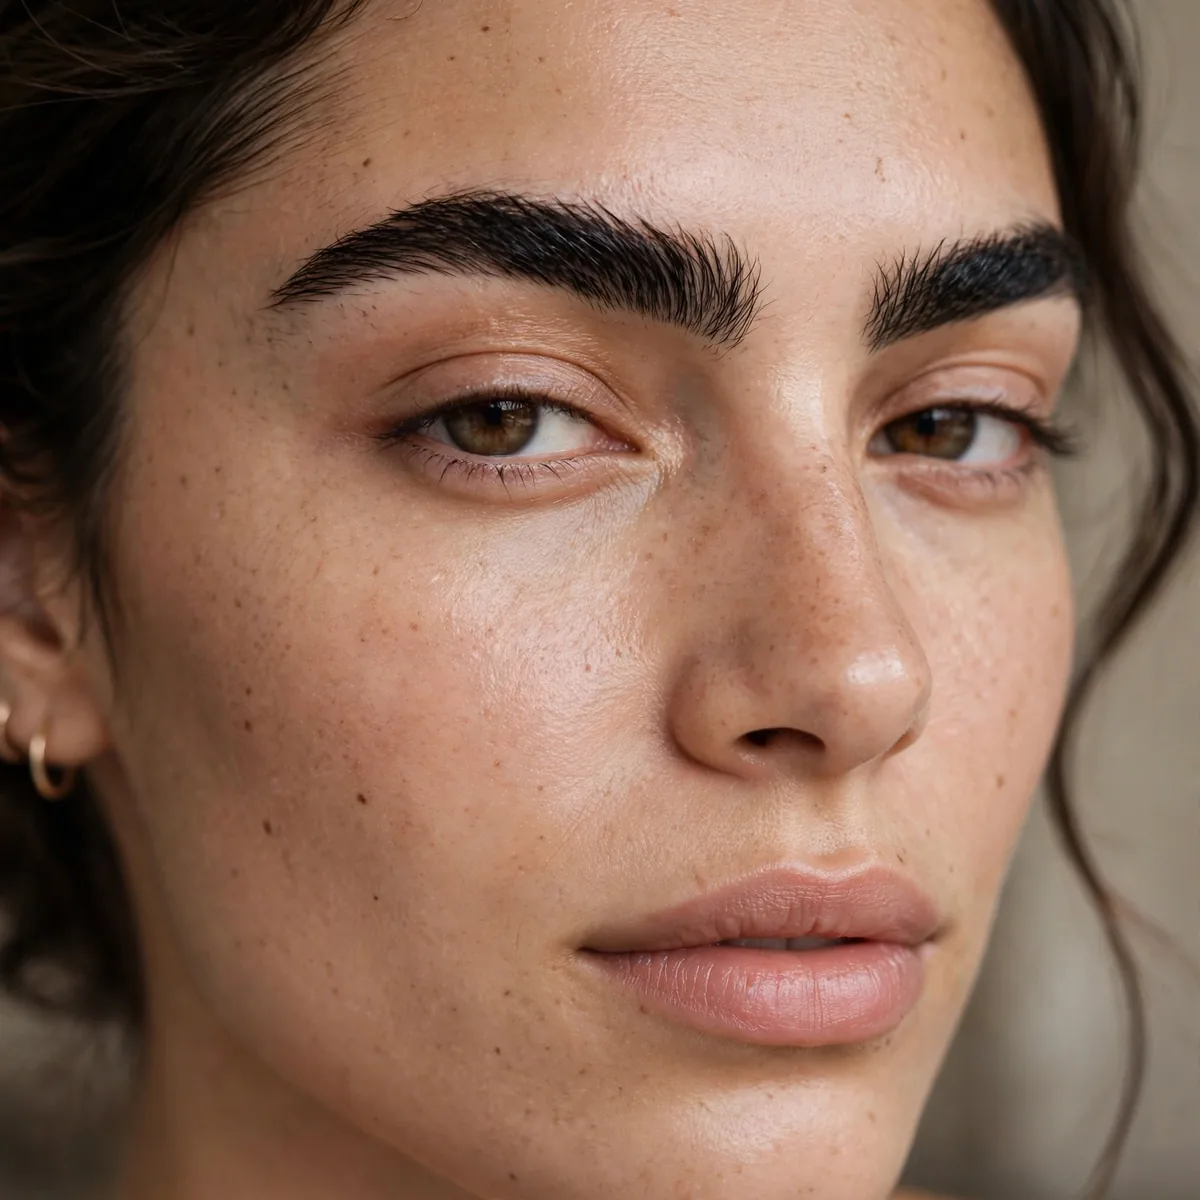
Bold brows against a bare eye is contrast through framing: strong, dark, defined brows with nothing on the lids. The brows become the architecture of the face — the lids' emptiness makes them look even more powerful. Brows as the entire eye look. From a distance it reads soft and pretty, while up close the detail work reveals genuine artistry in the blending.
This suits those with naturally strong brows or the skill to build them. The bold brow flatters all face shapes — it frames and lifts — while the bare eye keeps it modern rather than heavy. It is ideal for minimalists who still want a strong beauty signature. The versatility is the real victory here — it pairs effortlessly with everything from casual denim to full evening glamour.
Build the brow with precision: fill, define the shape, set with gel. Keep the lids truly bare — maybe just curled lashes and clear mascara. The skin should be fresh, the lips nude. The brow is the statement; everything else is silence. Finish with the lightest press of translucent powder only where truly needed, so the dimension you built stays alive.
Brow precision is everything — strong brows with mistakes look unkempt, not bold. Take time with the shape, checking symmetry. The bare lids must look intentional, not forgotten — groomed, hydrated, with healthy lashes. The contrast only works when both sides are deliberate. Toss the key products into a small pouch so any necessary touch-ups take seconds rather than requiring full reapplication.
Electric Blue Lower Line
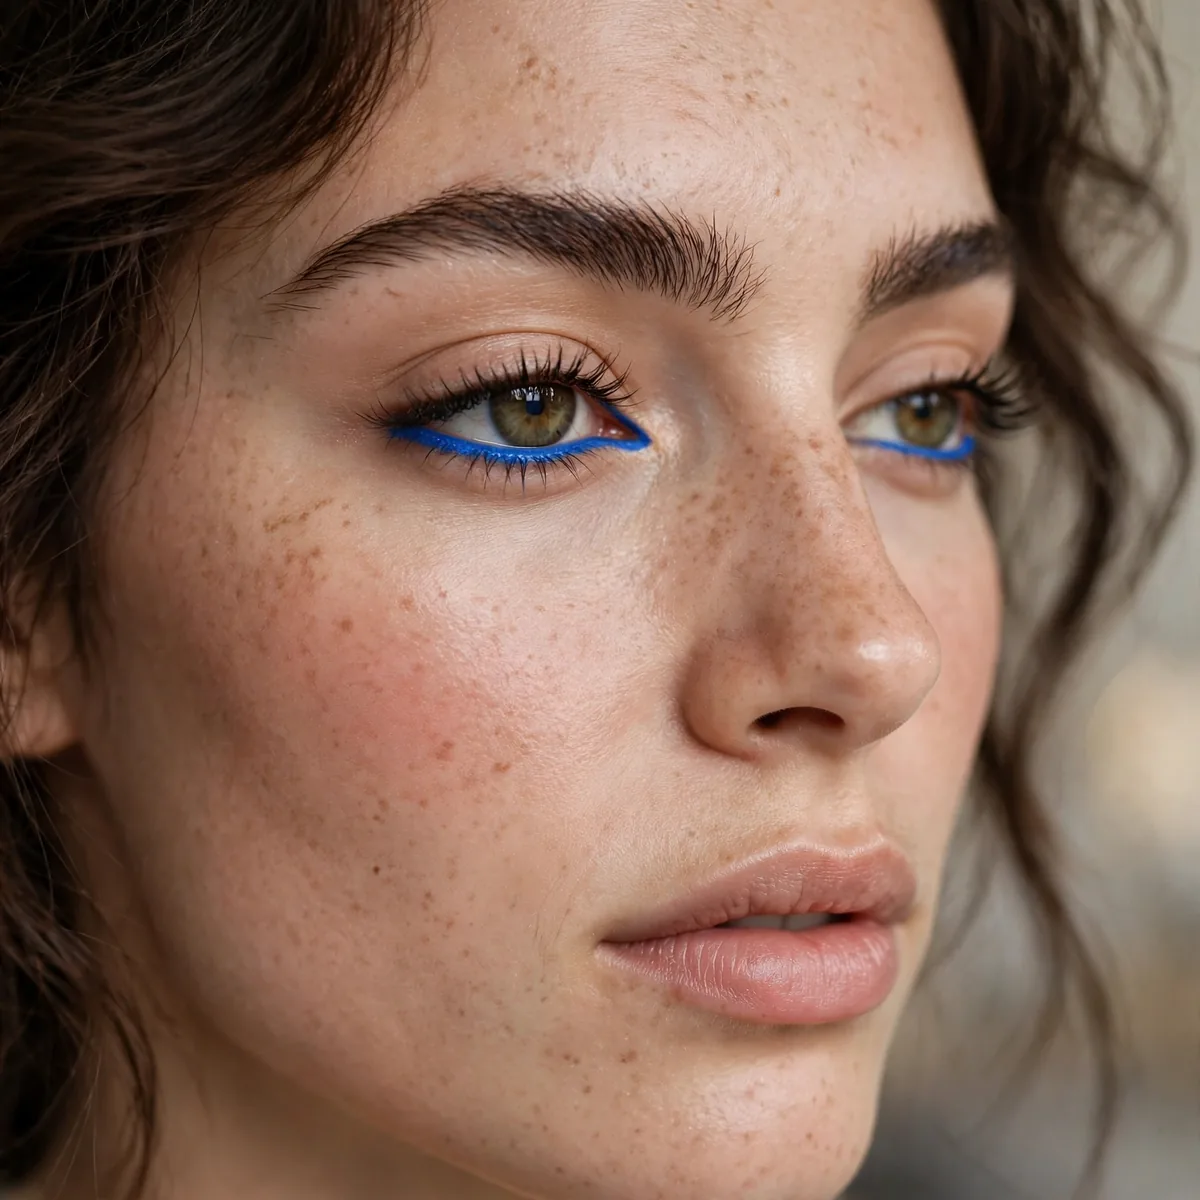
Electric blue on the lower lash line against a neutral upper eye is contrast through surprise: the expected neutral above, the shock of color below. It brightens the eye, adds edge, and remains wearable because the placement is contained. Rebellion with boundaries. The tones melt together so seamlessly that the eye travels across the face without catching on a single harsh line.
This suits those who want color without committing the whole lid. The blue flatters brown eyes especially, creating vivid contrast, but works on all eye colors. It is ideal for adding personality to work-appropriate makeup — the upper eye stays professional. Anyone nervous about bolder makeup will find this a welcoming entry point that still delivers a real transformation.
Keep the upper eye neutral — soft browns, defined lashes — and apply the electric blue precisely along the lower lash line. The precision matters; a wobbly blue line looks messy rather than intentional. Pair with nude lips and fresh skin. A damp beauty sponge pressed gently over the finished base melts every layer together for a truly skin-like effect.
Use a waterproof pencil or gel liner for the lower line — the waterline area challenges wear. Set with a matching blue shadow for longevity. Keep the line crisp and close to the lashes; diffusing it loses the graphic contrast that makes it striking. A final veil of setting spray is the real difference between makeup that survives hours and makeup that survives all day.
Pale Lid, Dark Socket
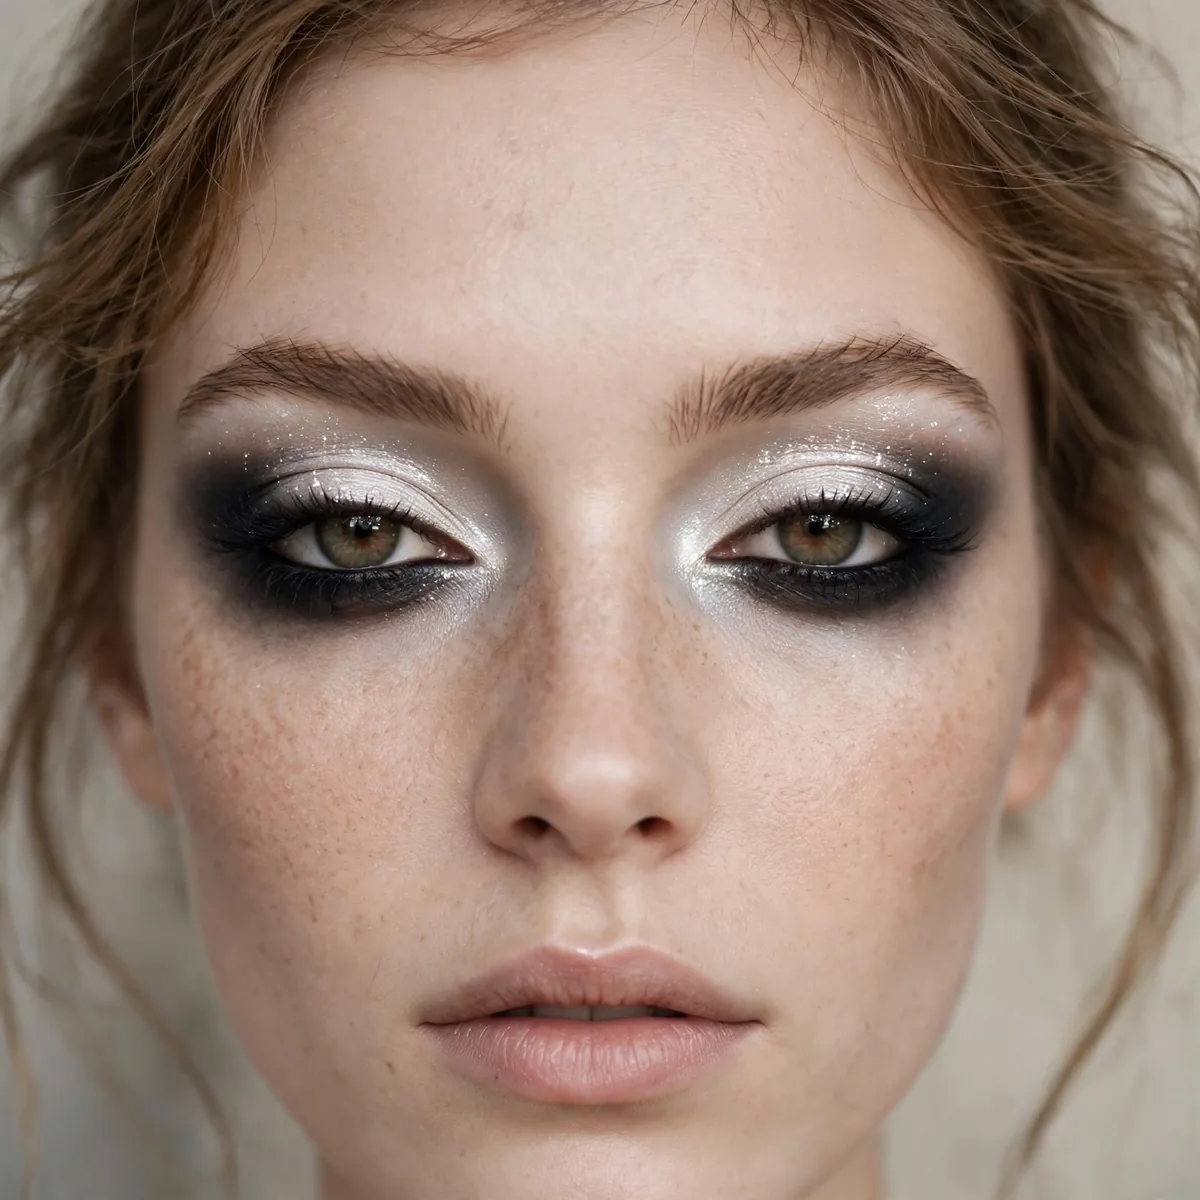
Pale lid against dark socket reverses the usual smoke: light, shimmering lids surrounded by deep shadow in the crease and outer corner. The inversion creates eyes with haunting depth — the light center draws you in, the dark surround adds mystery. The reverse smoke. It is the kind of look that earns compliments from people who cannot quite put their finger on what exactly changed.
This suits deep-set and hooded eyes especially, where the light lid brings the eye forward. The technique flatters all eye colors — the pale center makes every iris look more vivid. It works for evening events where the drama can be appreciated in low light. It also transitions beautifully from day to evening, needing only a deeper lip shade or one extra coat of mascara.
Press pale shimmer onto the mobile lid, then smoke dark shadow — black, deep brown, plum — through the crease, outer corner, and along the lower lash line. The boundary should be blended; the contrast comes from the tones, not a harsh line. Full lashes enhance the depth. For added dimension, tap a small amount of highlighter onto the high points of the face after everything else is set.
Keep the pale lid distinctly light — this is the focal point, and muddying it kills the effect. A sticky primer keeps the shimmer bright. Blend the dark surround thoroughly; harsh edges ruin the haunting quality. This is a look that rewards blending patience. Blotting papers pressed gently over the T-zone refresh the finish beautifully without disturbing the careful layers underneath.
Graphic White Waterline
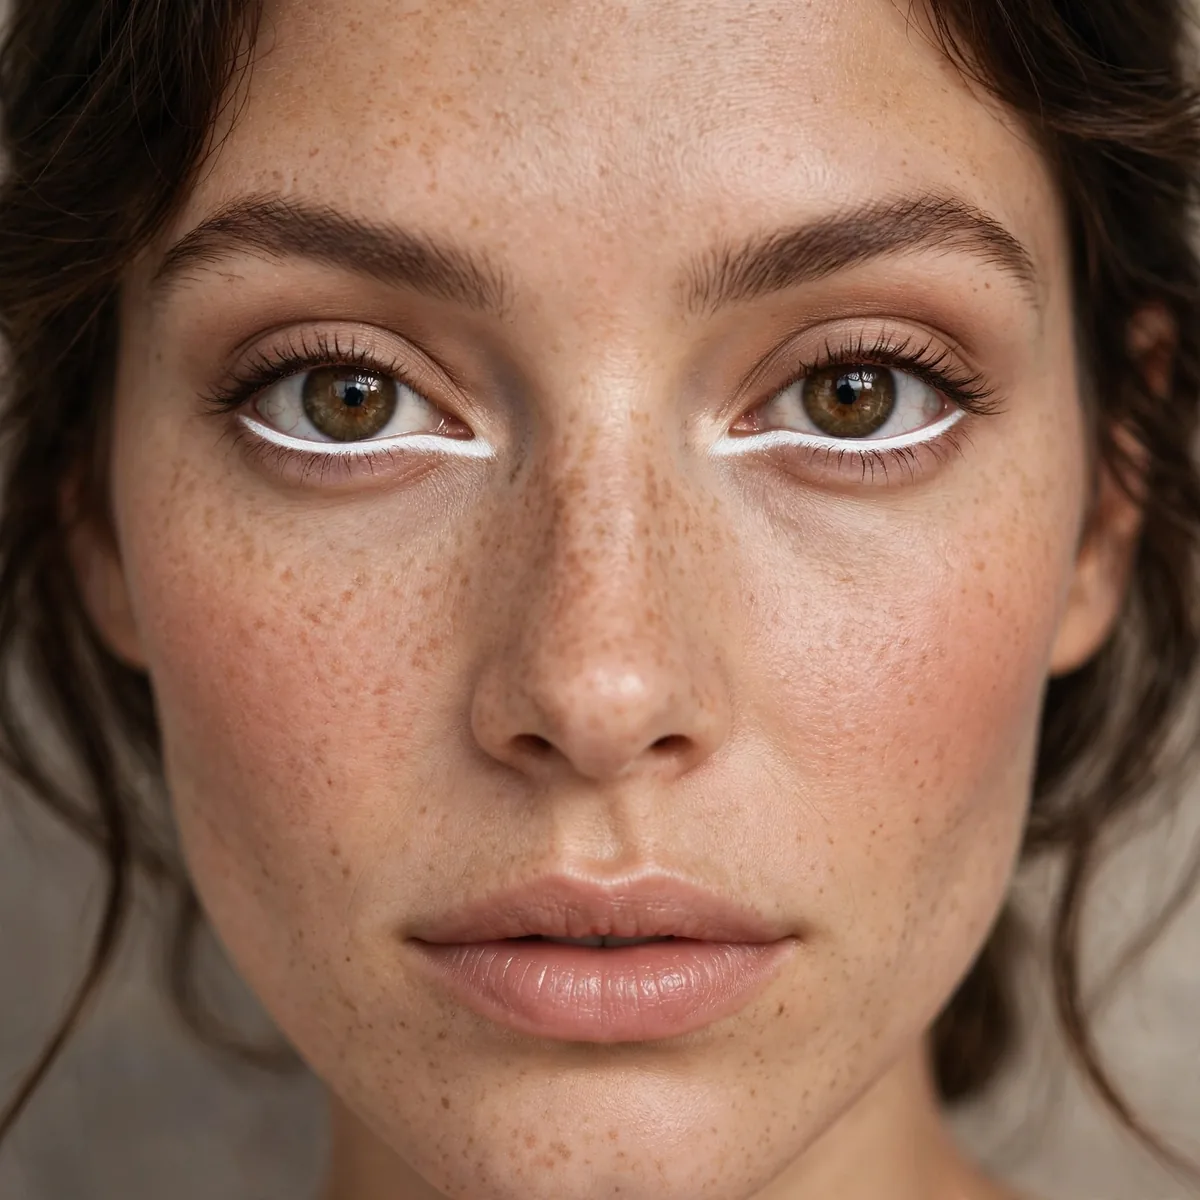
White on the waterline against dark outer definition is contrast that opens the eye: the bright inner line makes eyes look larger and more awake, while dark liner at the outer corners keeps the definition. The push-pull makes the eye look both bigger and more defined. In person, the finish catches light beautifully, shifting subtly as you move through different lighting over the course of the day.
This suits smaller or tired eyes especially — the white waterline is the oldest eye-opening trick. It flatters all eye shapes and works for daytime when full dark liner would be too much. The technique is subtle from a distance, transformative up close. Mature wearers will appreciate how forgiving the finish is, smoothing over texture rather than settling into it.
Apply white or nude pencil to the lower waterline, then define the outer corners with dark liner — a wing, a smudged outer third, or tightlined upper lashes. The dark-bright opposition is the technique. Keep the rest of the face fresh and natural. Cream formulas layered beneath their powder counterparts will effectively double the wear time of this entire look.
White pencil needs to be creamy and opaque — dry formulas skip and look grey. Set the outer dark liner well so it doesn't migrate into the white. The waterline needs reapplication through the day; keep the pencil handy. Nude is a softer alternative to stark white. For long events, this layering approach holds up remarkably well, asking only for one quick midday check.
Crimson Blush Draping
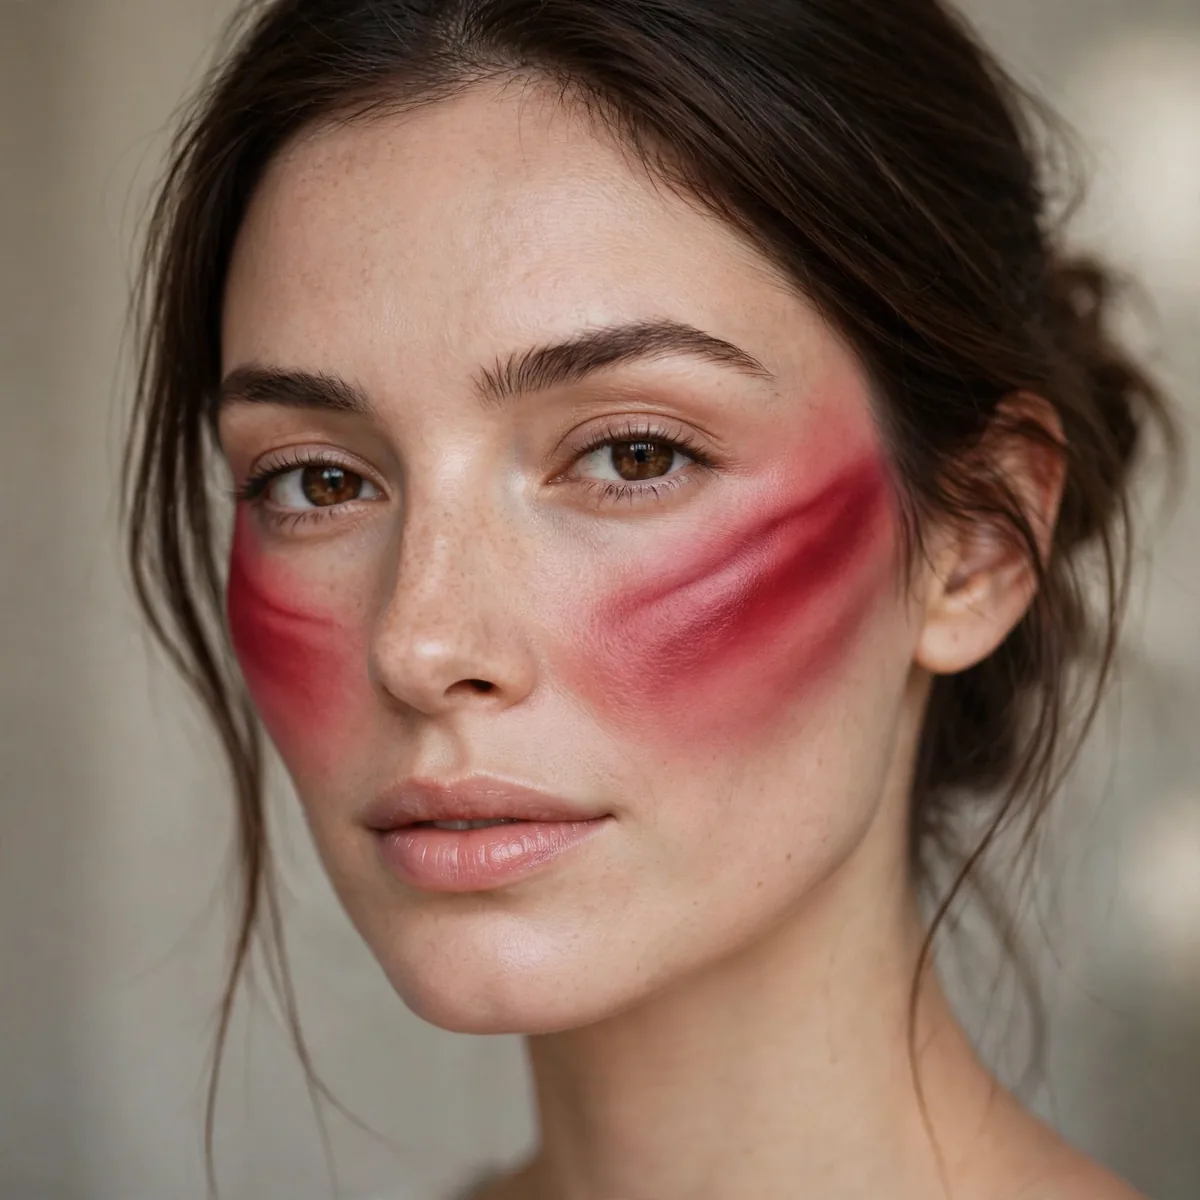
Crimson blush draping is color contrast on the cheek: bold, almost-red blush swept dramatically against otherwise neutral skin. The intensity of the cheek against the quiet of everything else creates a flush with real drama. Blush as the statement. Up close, the texture looks genuinely expensive — smooth, even, and deliberately placed rather than heavy or obvious.
This suits the bold and the editorial — it is a statement cheek, not a natural flush. The crimson flatters warm undertones and medium to deep skin where the pigment shows true. It works for fashion events, photoshoots, and anyone whose blush has always wanted to be louder. It photographs reliably in both natural daylight and artificial light, which matters enormously for events with mixed lighting.
Sweep crimson blush from the apples upward toward the temples in a dramatic drape, keeping the eyes soft and the lips nude. The cheek is the entire color story. The skin should be flawless satin — bold blush over imperfect skin looks unbalanced. Keep a clean fluffy brush within reach to soften any edges — diffused, seamless application is what reads as professional.
Build the intensity gradually — crimson blush goes from beautiful to clownish quickly. Use a light hand and build in layers, checking in natural light. Cream under powder gives the intensity longevity. The edges must be diffused; harsh blush edges ruin the effect. The genuine secret is thin layers — heavy, thick application breaks down faster regardless of how good the products are.
Neon Green Graphic Line
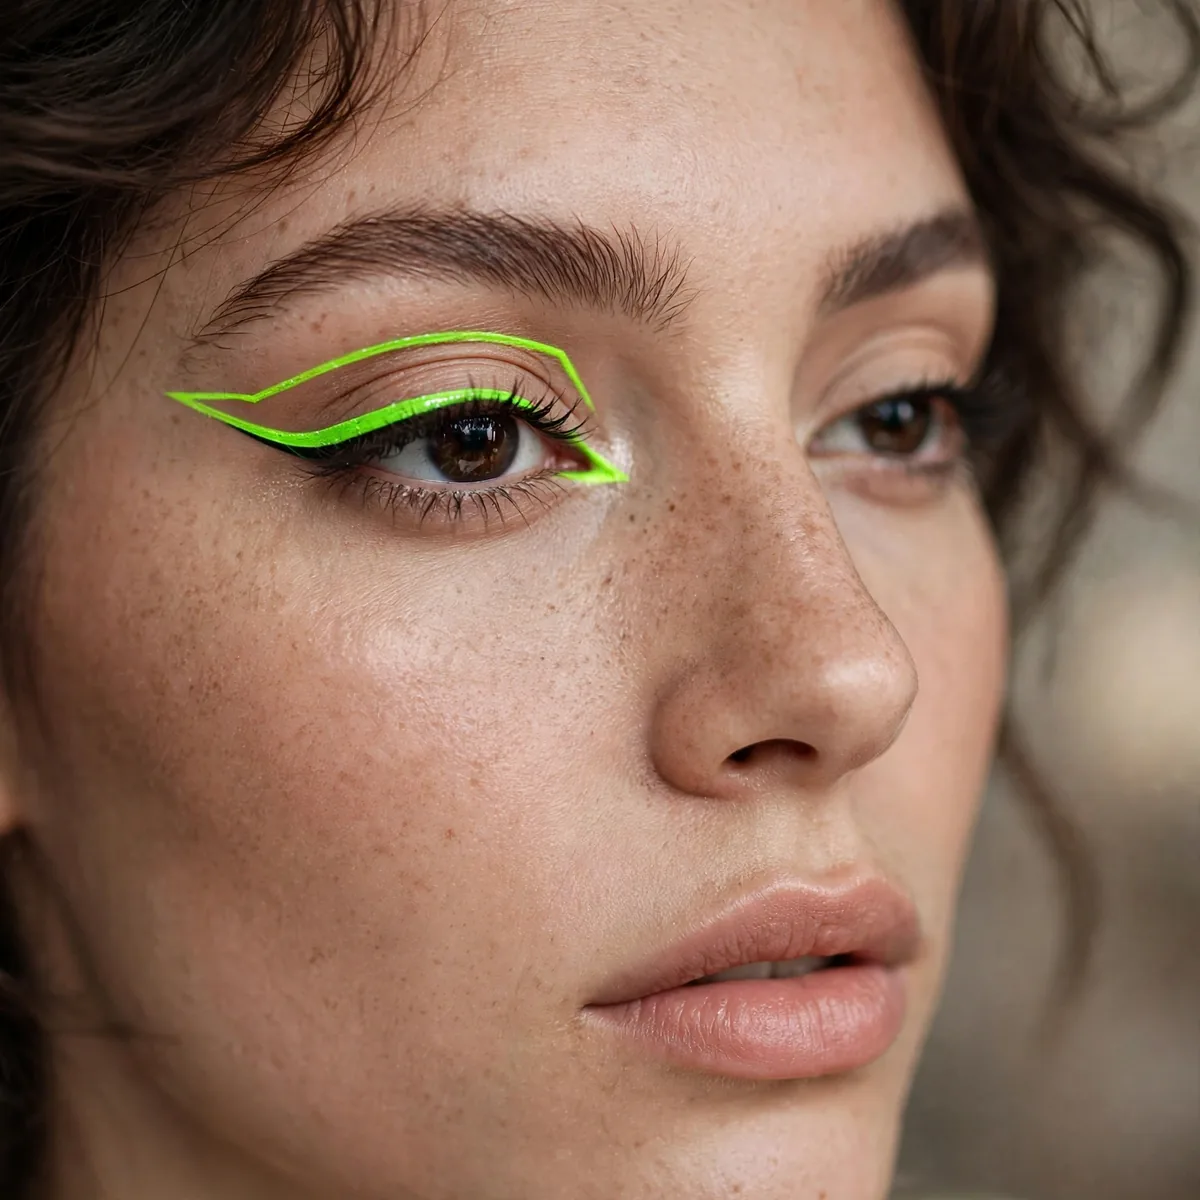
A neon green graphic line against bare skin is contrast at its most electric: one vivid line, nothing else. The shock of the green is amplified by the quiet of the bare face — futuristic minimalism with a jolt of acid color. Not for the subtle. The overall effect is polished without ever feeling overdone, striking that rare balance between noticeable and completely natural.
This suits the bold and the fashion-forward — editorial shoots, festivals, nights out. Neon green flatters all skin tones; the brightness is the point regardless of complexion. It works best on those comfortable being stared at, because this line demands attention. The look adapts easily across seasons too, requiring only a simple shade swap to feel right for spring or fall.
Keep the face genuinely bare: light base, groomed brows, clear lip balm. Draw the neon line with precision — a floating crease line, a bold wing, or a graphic lower line. One placement, executed flawlessly. The restraint around it is what makes it shocking. A fine mist of setting spray between layers locks each step in place and helps prevent any midday breakdown.
Neon needs a white base for full brightness — layer white shadow or liner underneath. Use a highly pigmented waterproof formula; sheer neon looks pastel and loses the contrast. Precision is everything; a wobbly neon line looks messy rather than intentional. Keep a cotton bud lightly dipped in micellar water nearby for sharpening any edges that soften as the day wears on.
Dark Cherry Stain + Glass Skin
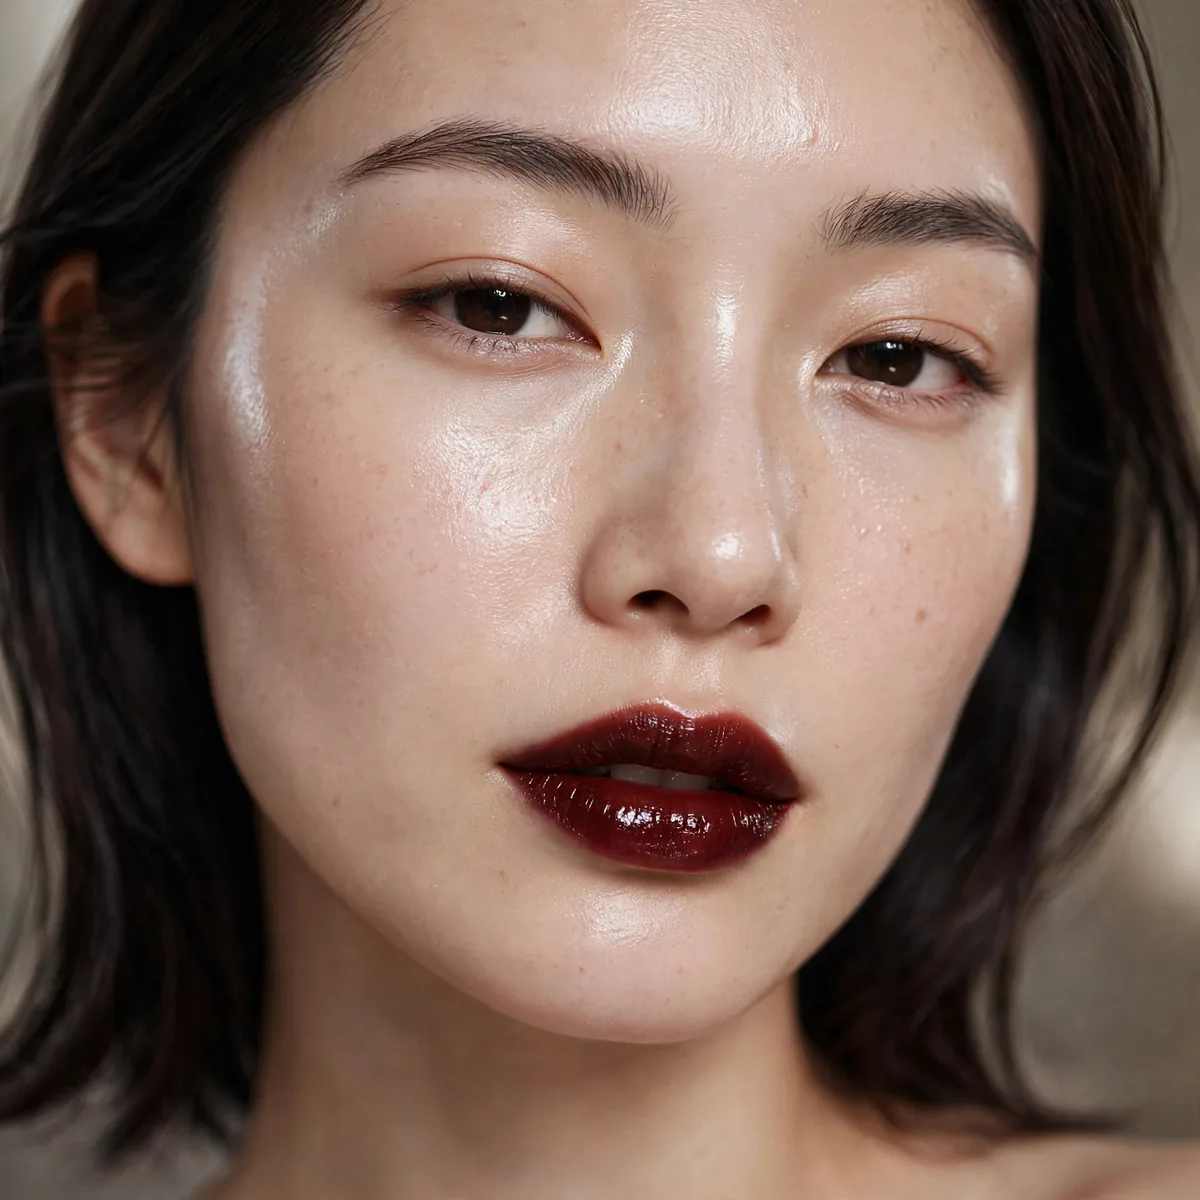
Dark cherry stained lips against glass skin is contrast through finish: deep, bitten color on the lips with an almost wet-looking luminous base. The dark stain looks even richer against the light-reflecting skin — moody meets radiant in perfect opposition. In photographs it reads even better than in the mirror, with a dimensional quality that flat, one-note makeup simply cannot replicate.
This suits those who love dark lips but want a modern, fresh context. The stained finish is more wearable than full opaque dark lipstick — it fades gracefully and looks effortless. The glass skin keeps it current rather than gothic. All skin tones wear this beautifully. It suits minimalists and maximalists alike — dial the intensity up or down without ever losing the essential character.
Build the glass skin with hydrating primer, luminous foundation, and liquid highlighter on the high points. Apply the cherry lipstick, then blot most of it away for the stained effect. Keep the eyes minimal — groomed brows, one coat of mascara. The lip-skin contrast is the look. Choosing the right tools matters as much as choosing products here; dense brushes pack on color while fluffy ones diffuse it.
The stain technique is forgiving — blotting hides application imperfections. Layer the stain twice for depth that lasts. Keep the glass skin controlled with light powder only at the perimeter; the center should stay luminous. Reapply the stain after eating. Reapplying strategically — lips after eating, powder only where shine appears — keeps the whole face looking freshly done.
Ultimate Contrast Finale
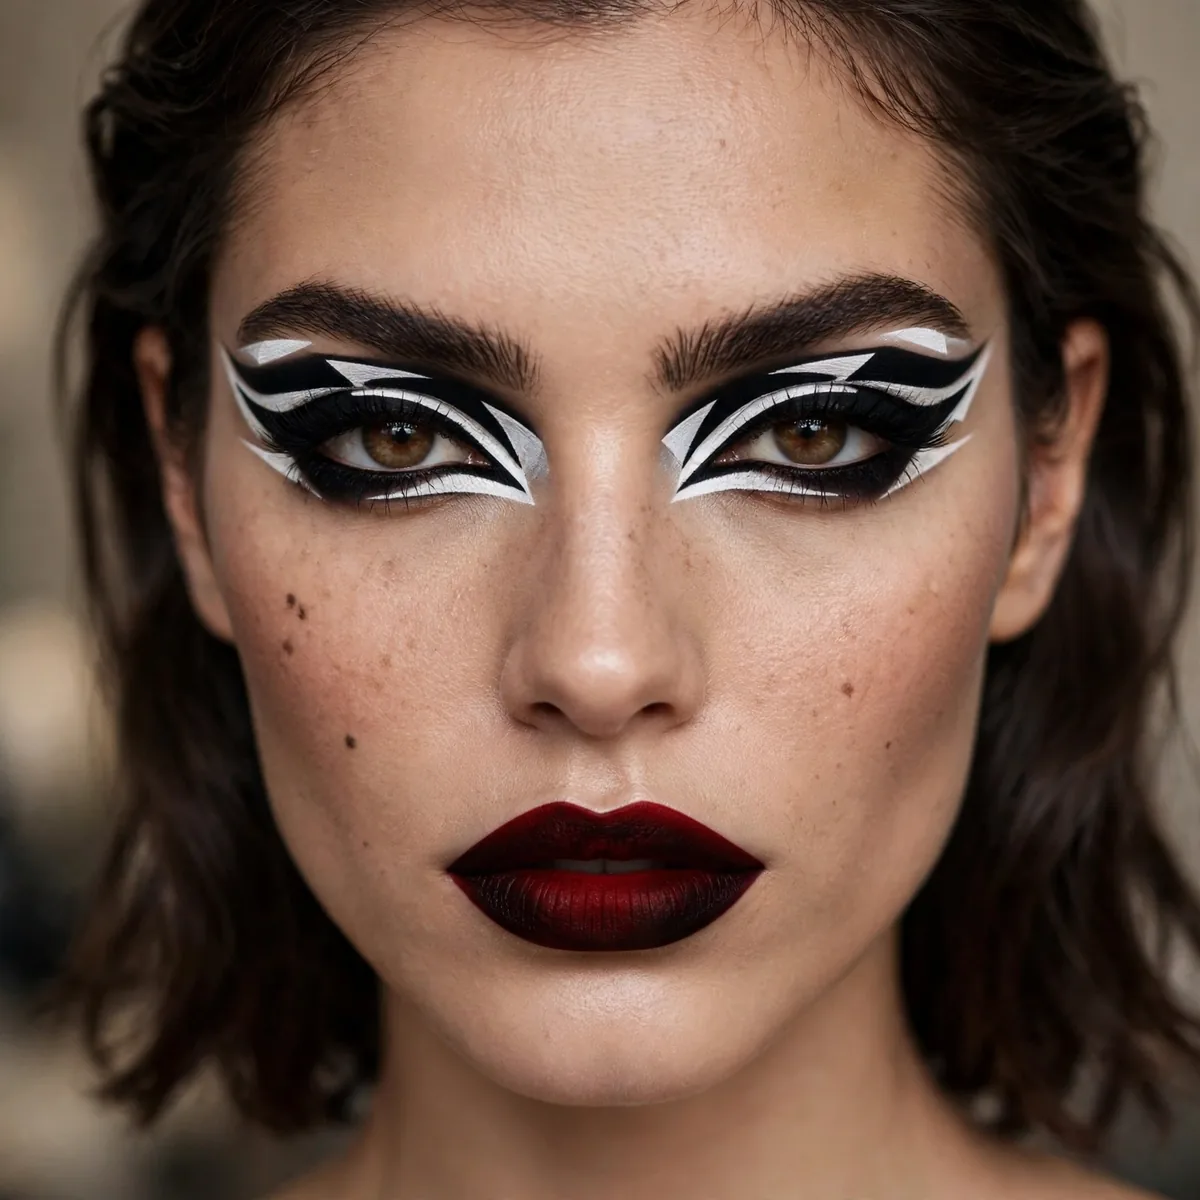
We close with the ultimate contrast: bold graphic eyes AND a bold lip — the rule-breaking combination that works when the contrast is the point. Sharp black liner, vivid red lip, pale flawless skin. Every element at maximum, balanced by precision. Contrast without apology. There is a quiet luxury to the finish — refined and intentional, far more interesting in real life than it first appears.
This suits the truly bold — those who have never believed in the one-statement rule. It works when every element is flawless, because high contrast exposes every flaw. Evening events, photoshoots, and personalities that fill rooms. This is not a shy look. For formal occasions, it holds its own beside elegant attire without ever crossing into costume territory.
The key is precision everywhere: sharp liner, perfect lip lines, flawless base. When both eyes and lips are bold, the skin must be perfect — it is the canvas that lets the contrast sing. Brows need definition; undefined brows plus bold everything looks unfinished. If the intensity ever feels like too much, sheer it back with a damp sponge instead of removing everything and starting over.
Take time with every step — this look cannot be rushed. Perfect the base, nail the liner symmetry, execute the lip flawlessly. Then wear it with the confidence it demands. Ultimate contrast is not for everyone, but for the right person, nothing else compares. This routine becomes second nature quickly, taking noticeably less time with each wear as the steps turn familiar.
Pin the boldest contrast looks to try — and if you prefer softer definition, see our low-contrast makeup ideas, or go bolder with bold lip looks for a night out.




