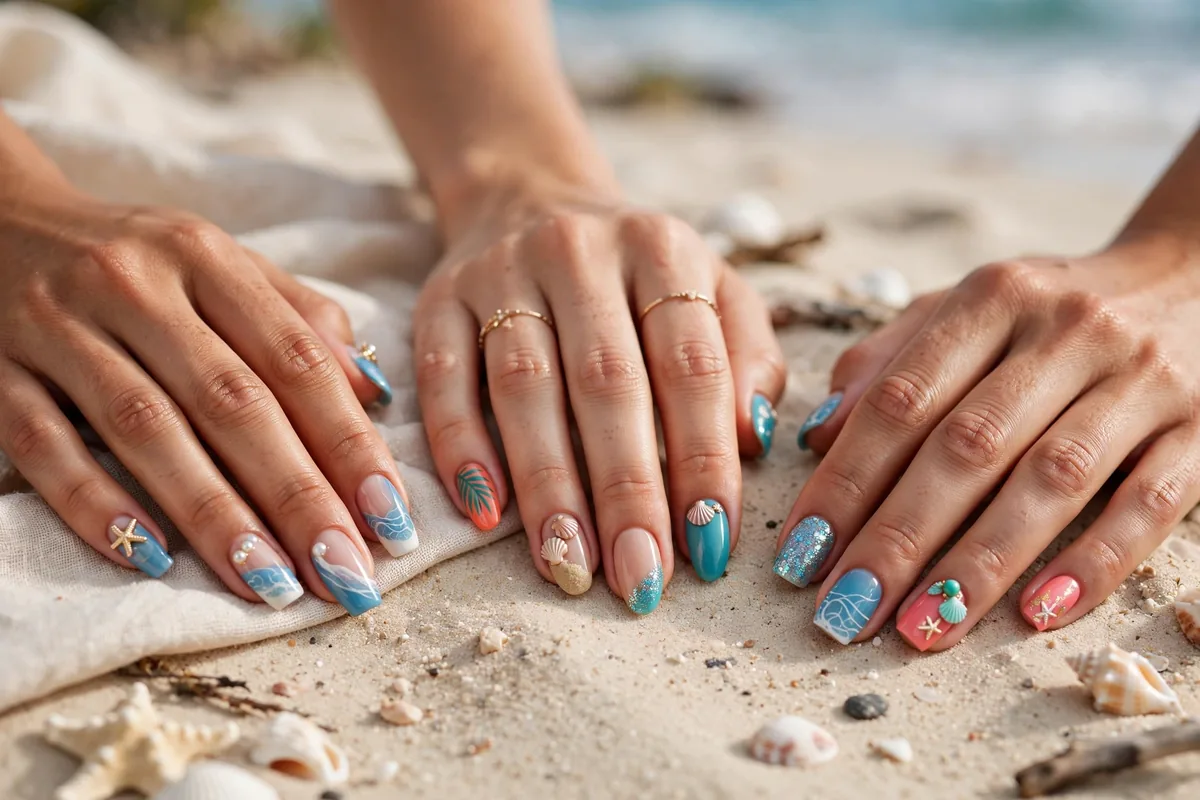
Beach nails are vacation in a manicure — ocean waves, sandy neutrals, and tropical details that scream getaway.
The beach palette: turquoise, sandy nude, coral, and sunny accents. Designs lean tropical — waves, palms, shells, and sunsets.
These 20 ideas are your boarding pass.
Here’s your vacation manicure. Let’s get into it.
Ocean Wave Marble
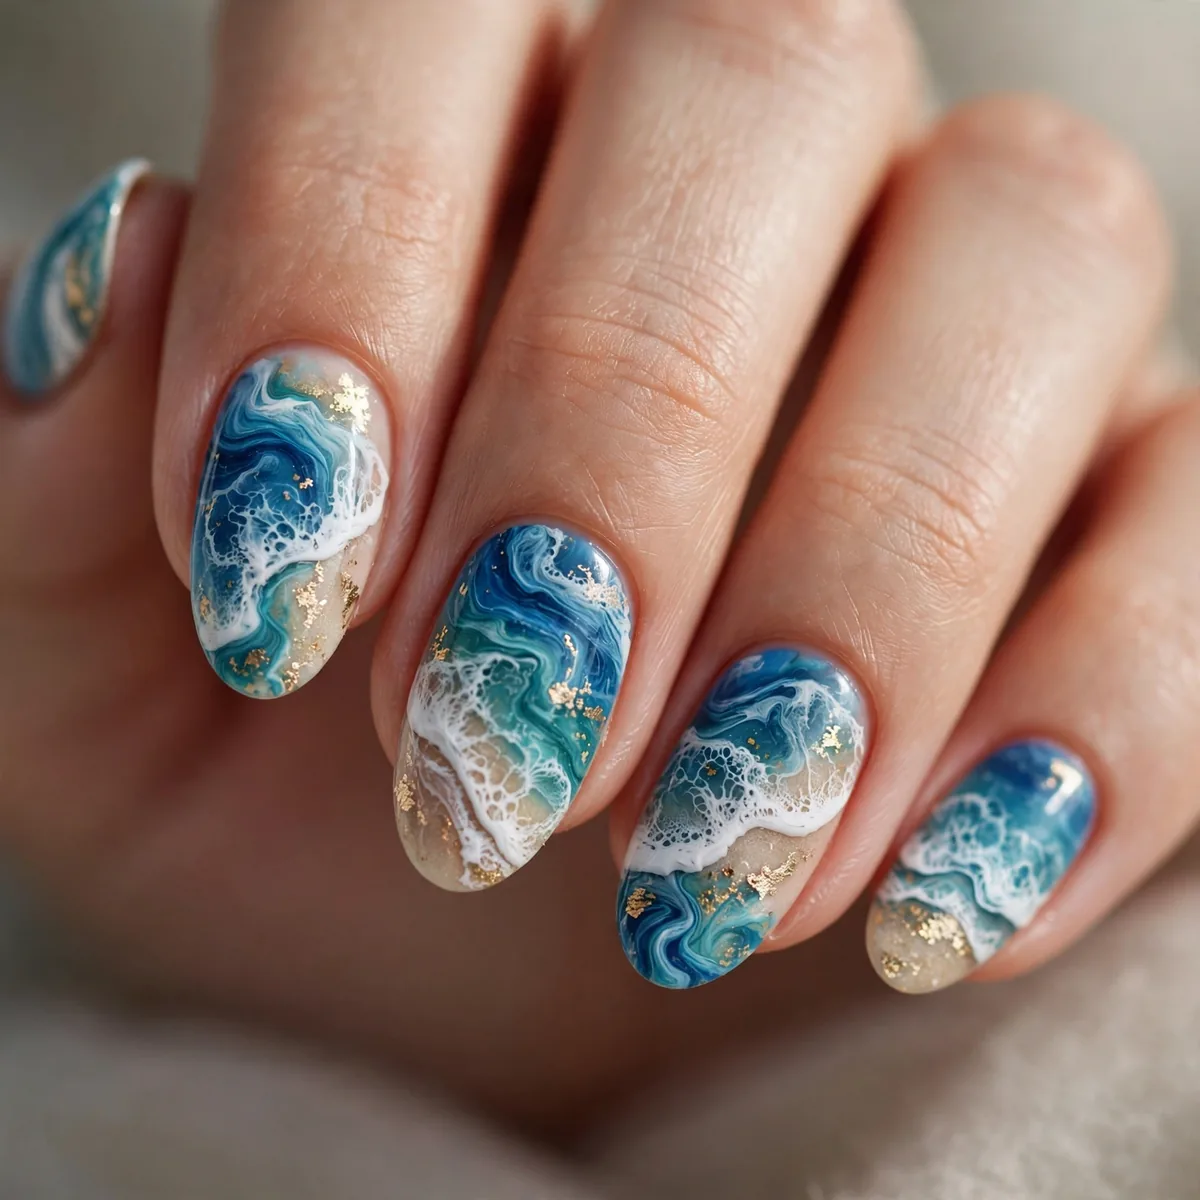
Marbled blues like rolling waves — the sea itself.
Best for: the essential beach. Waves ARE the ocean nail.
Marbled water effects start with a white base so the blue and teal swirls stay luminous rather than muddy. Drop two or three polish colors onto a silicone mat, swirl once with a toothpick, and lift the pattern with a stamper — you control placement far better than freehand swirling. Sealing with a glossy top coat melts the colors into one glassy surface, giving that wet-surf look.
Marble nails suit almond and oval shapes best because the elongated canvas lets the swirls stretch and flow like real currents. Short squoval nails can still carry the design, but keep the marble to accent nails and paint the rest a solid ocean blue. Because every nail marbles differently, chips are less obvious — the pattern hides wear beautifully, so this manicure can easily last through a full week of swimming and sunscreen.
Palm Tree Sunset
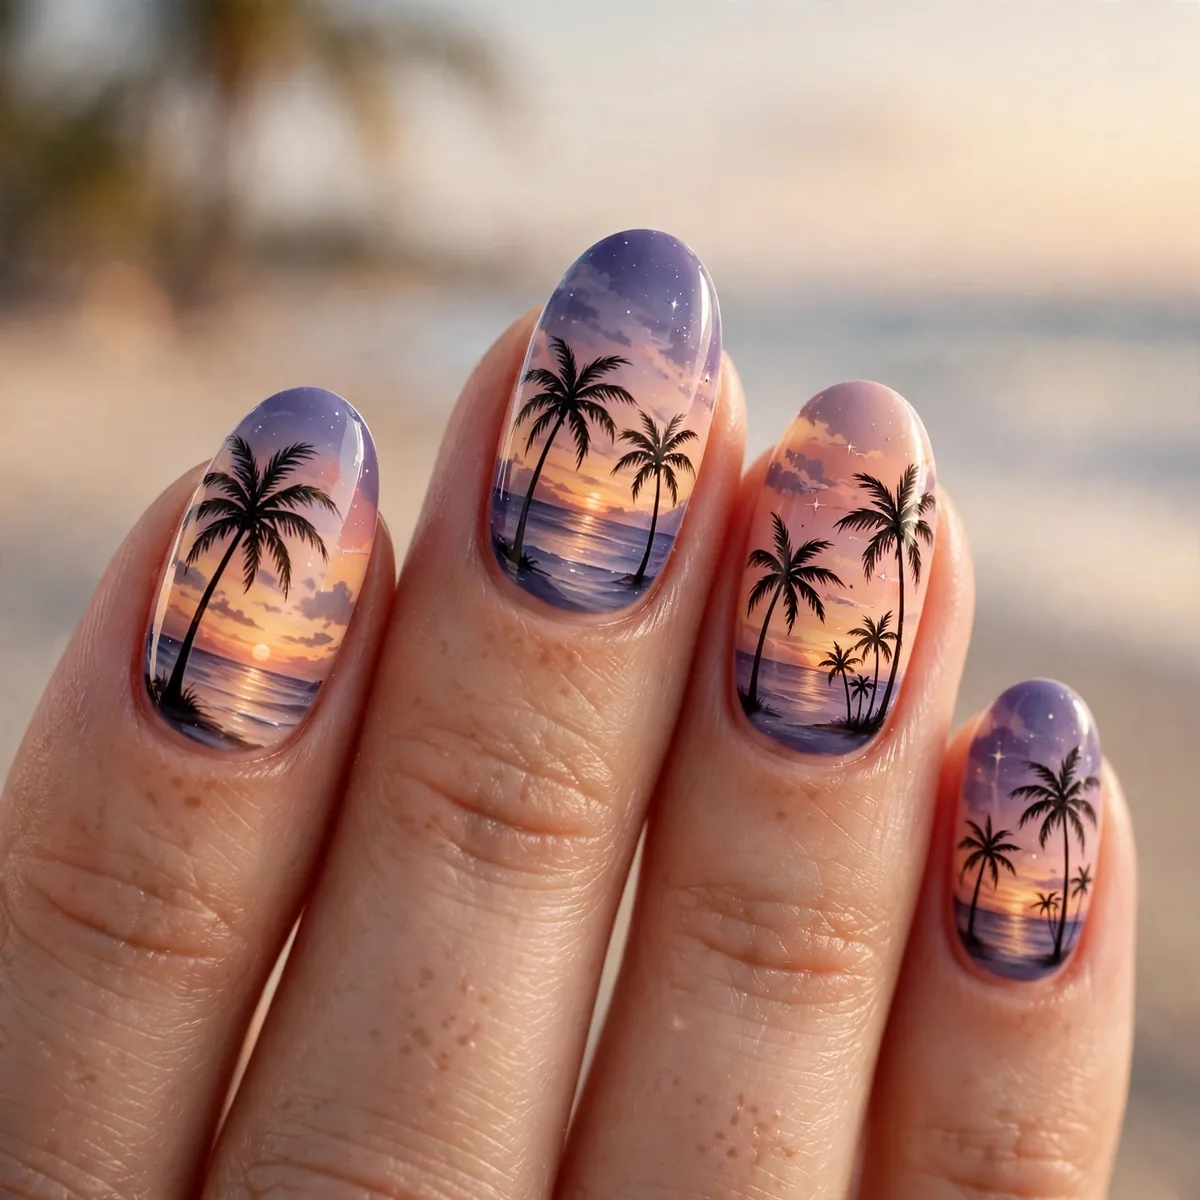
Palms silhouetted on sunset — the vacation postcard.
Best for: the iconic. This design IS vacation.
Painting sunset gradients works best with a makeup sponge rather than a brush — stipple coral, tangerine, and magenta in horizontal bands so they melt together without streaks. Once the gradient dries completely, paint the palm silhouettes with a fine liner brush and jet-black gel polish; waiting is essential, because wet gradient layers will bleed into the trees. Seal everything with a high-shine top coat to deepen the sunset colors like real dusk light.
Silhouette art is most forgiving on medium to long nails where the palm trees have room to stand tall. Keep your cuticles pushed back and the nail bed prepped with a sticky base coat, since dark silhouette polish will stain if it floods the sidewalls. This design photographs beautifully at golden hour, making it a favorite for vacation posts — just reapply top coat mid-trip, because pool chlorine can dull the gradient gloss faster than you expect.
Sandy Nude Base
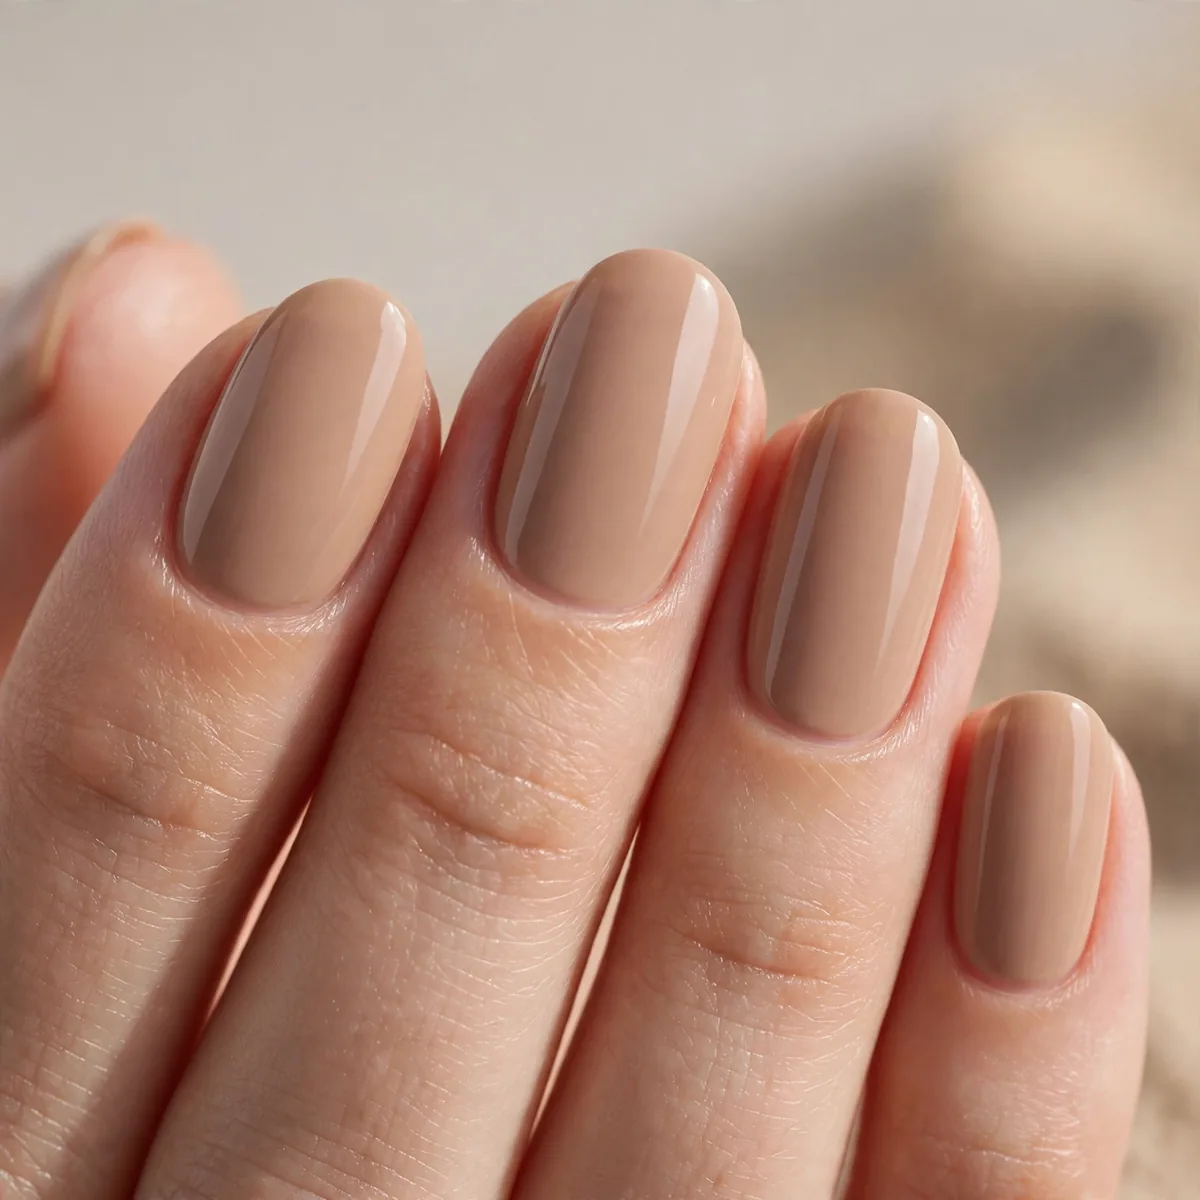
Warm sandy nude — the beach neutral.
Best for: the understated. Sand goes with every swimsuit.
Sandy nude polishes look best in warm, beige-leaning tones that flatter sun-kissed skin rather than chalky pinks that wash out a tan. Apply two thin coats over a ridge-filling base — nudes show every ridge, so surface prep matters more here than with bold colors. A satin or matte top coat gives that sun-baked sand texture, while glossy keeps it office-friendly after the trip ends. Clean up the cuticle line with a flat brush and acetone for crisp edges.
Nudes are the most versatile length choice, flattering both short active nails and long coffin shapes without skewing the look. The risk with sandy shades is the mannequin-hand effect — pair the color with gold jewelry and bronzed skin so it reads beachy, not bland. Wear time is excellent since regrowth is nearly invisible, making this the ideal low-maintenance vacation manicure for travelers who would rather snorkel than touch up polish.
Turquoise Bright
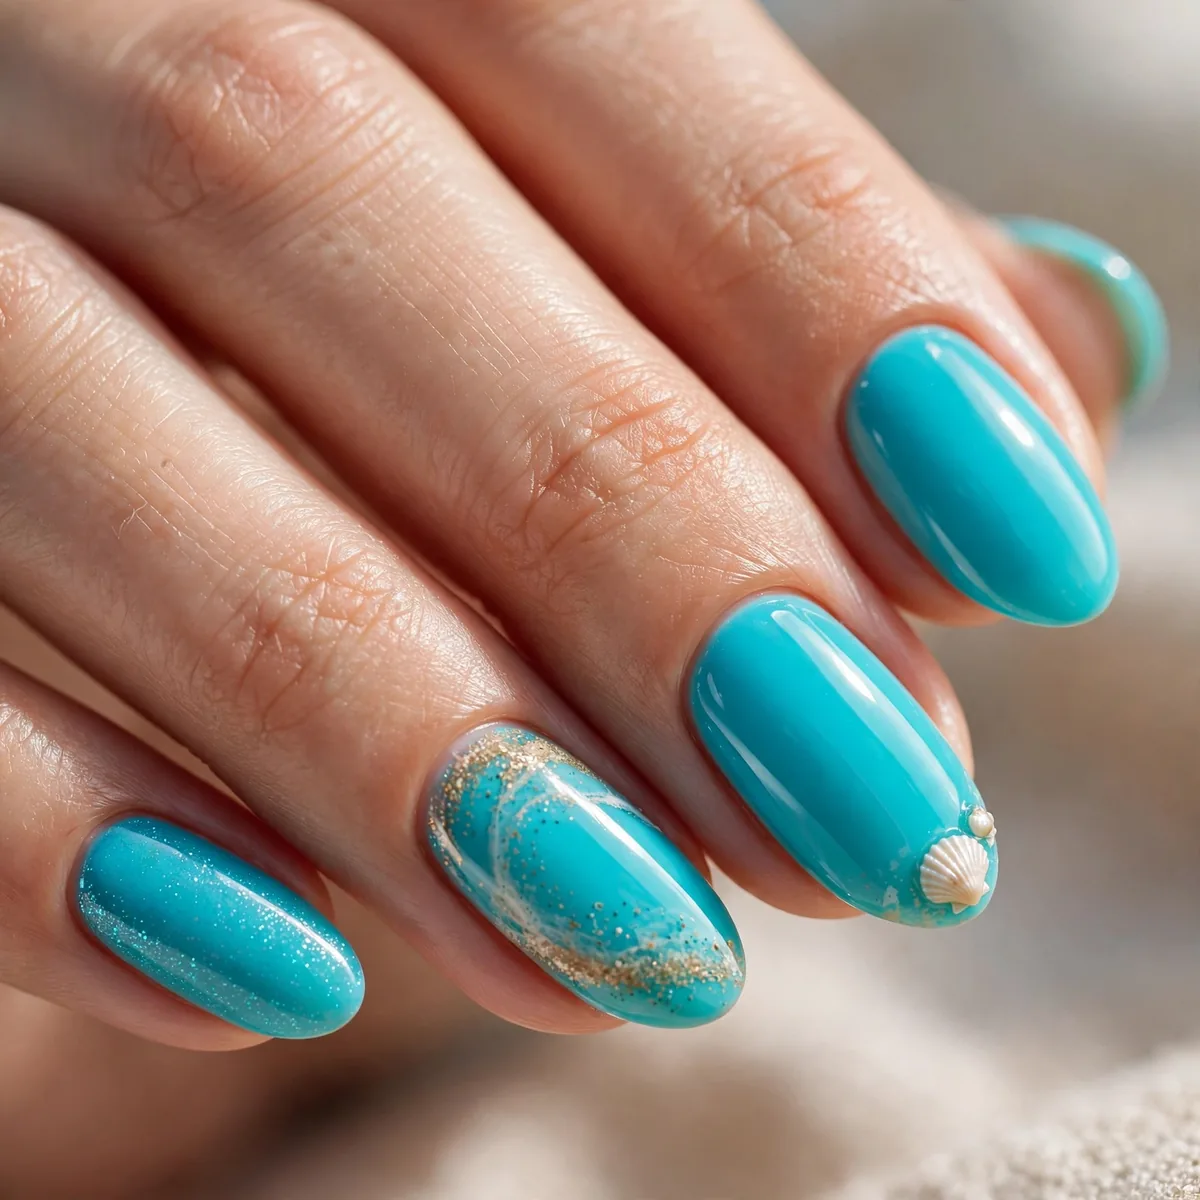
Vivid turquoise — tropical water captured.
Best for: the vibrant. Turquoise pops against tanned skin.
True turquoise sits between blue and green, and it can go neon-bright or teal-deep depending on your mood — test the bottle on a nail wheel first, since many shades pull greener once cured. For maximum punch, layer it over a white base coat to intensify the color instead of applying four coats. Finish with a glassy gel-effect top coat; turquoise needs that wet shine to read tropical rather than crafty. Two coats is the sweet spot for opacity.
This shade flatters every skin tone but sings loudest against a tan, which is exactly why it dominates resort wear. Almond and coffin shapes show off the color’s depth best, while short nails keep it playful and sporty. Turquoise is also a swim-friendly pick — unlike pale pastels, it won’t look washed out in chlorine water or under harsh midday sun. Reapply sunscreen carefully around the nail bed to protect the manicure’s shine.
Seashell Accents
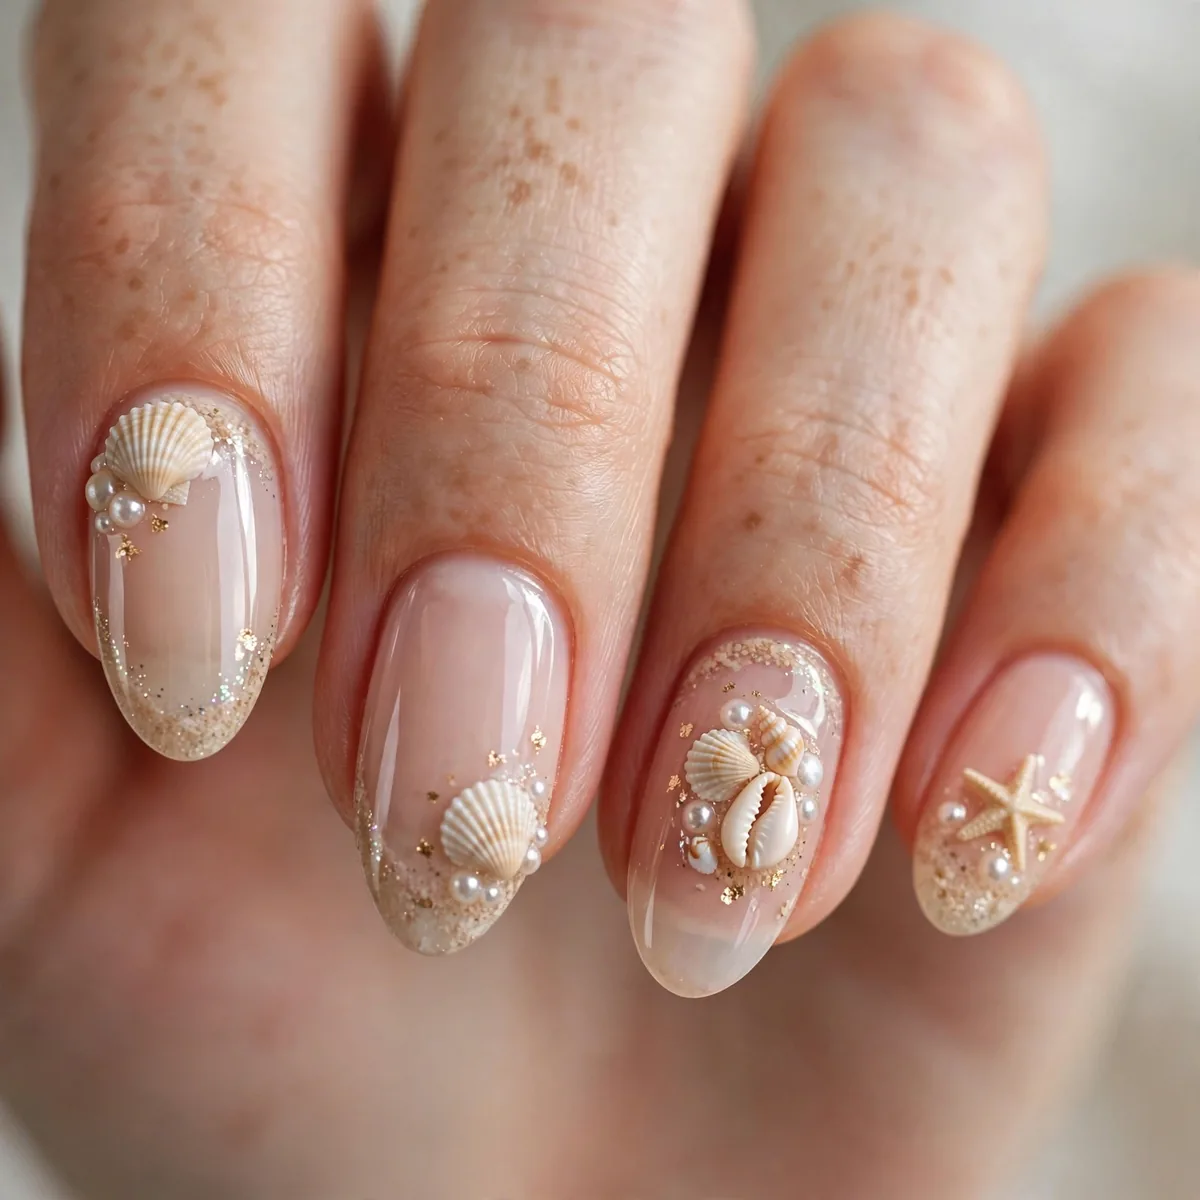
Tiny shells and starfish — the beachcomber’s nail.
Best for: the detailed. Shells are the beach’s jewelry.
Shell charms adhere best to a tacky builder-gel layer over regular polish. Press each tiny shell into the uncured gel, cure it, then float a thin layer of clear gel over the edges to lock them down without burying the detail. Flat-back stickers are the low-commitment alternative — seal them under two coats of top coat and they will survive a week of sand and salt. Keep charms to one or two accent nails for balance.
Textured 3D nails demand shorter lengths and rounded shapes, since long sharp tips plus protruding charms snag on everything from swimsuits to zippers. The seaside-curio look pairs beautifully with layered bracelets and barefoot beach walks, though it leans too playful for formal events. Carry a mini brush to dust sand from crevices, and avoid picking at charms; a dab of nail glue repairs any that loosen mid-vacation.
Coral Reef Pop
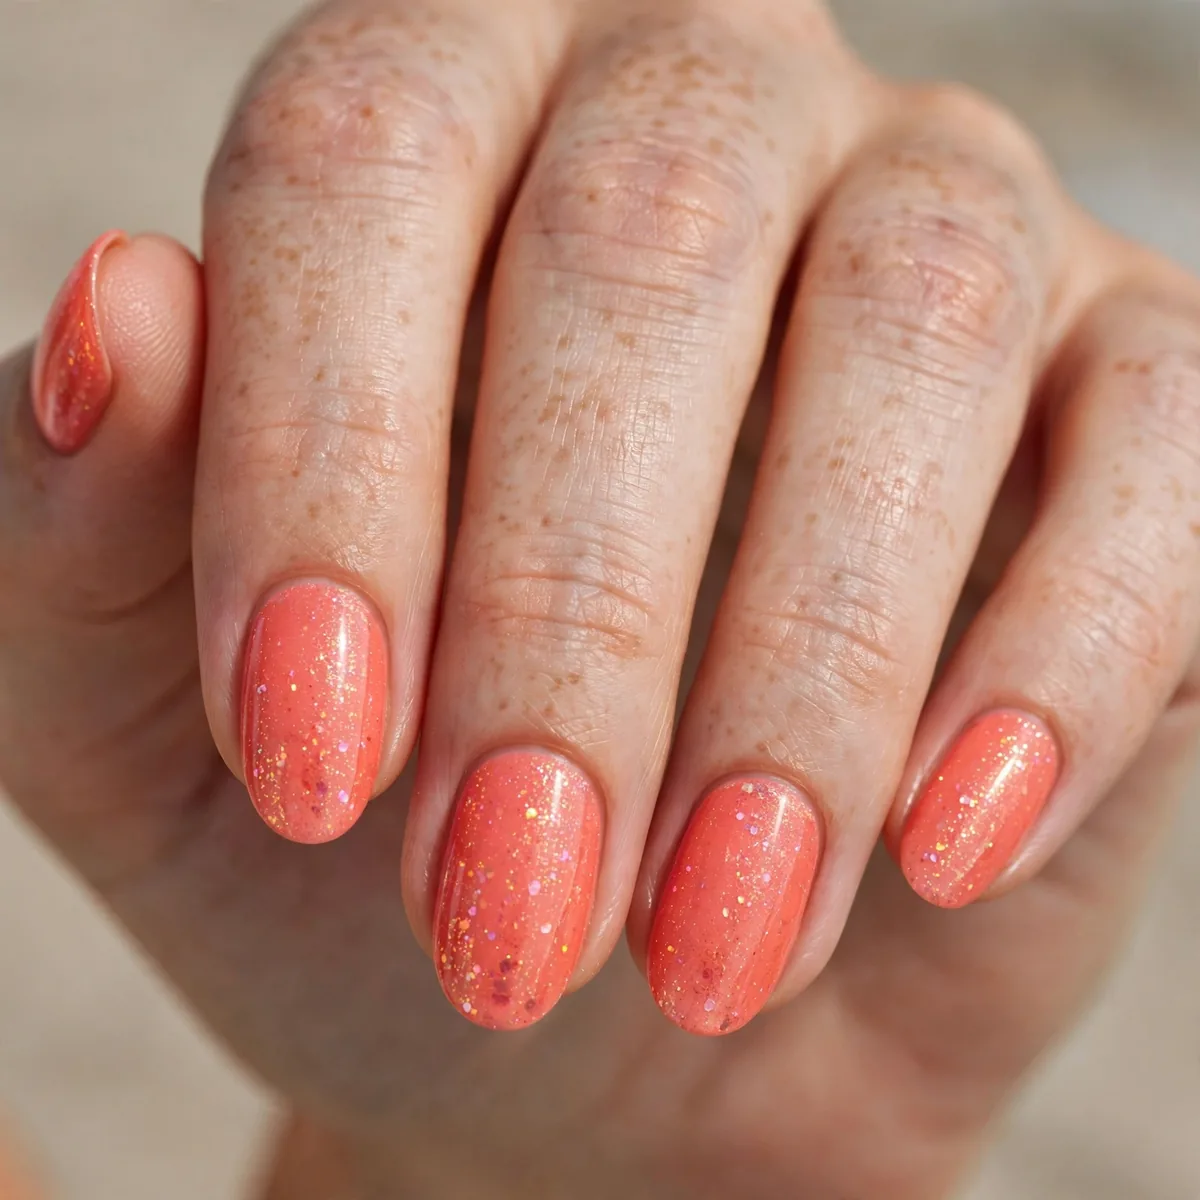
Bright coral — the reef’s color.
Best for: the cheerful. Coral is vacation joy.
Coral polish lives or dies by its undertone, so swatch against your wrist: warm golden corals flatter olive and deep skin, while pink-leaning corals suit fair tones. Apply over a sheer pink base to enrich the pigment, then two coats of the coral crème for that juicy, opaque finish. A glossy top coat is non-negotiable — coral looks flat and chalky without shine. This is one shade where cheap formulas actually perform well.
Because coral is so saturated, it makes nails look shorter than they are — elongate the effect with an almond or oval shape. The color photographs brilliantly against white swimsuits and linen dresses, which is why it photographs like pure joy on vacation feeds. Wear time rivals reds since the pigment is strong, though prolonged sun exposure can fade the brightest corals; a UV-protective top coat helps preserve that fresh-from-the-bottle intensity through the whole trip.
Sunset Ombre
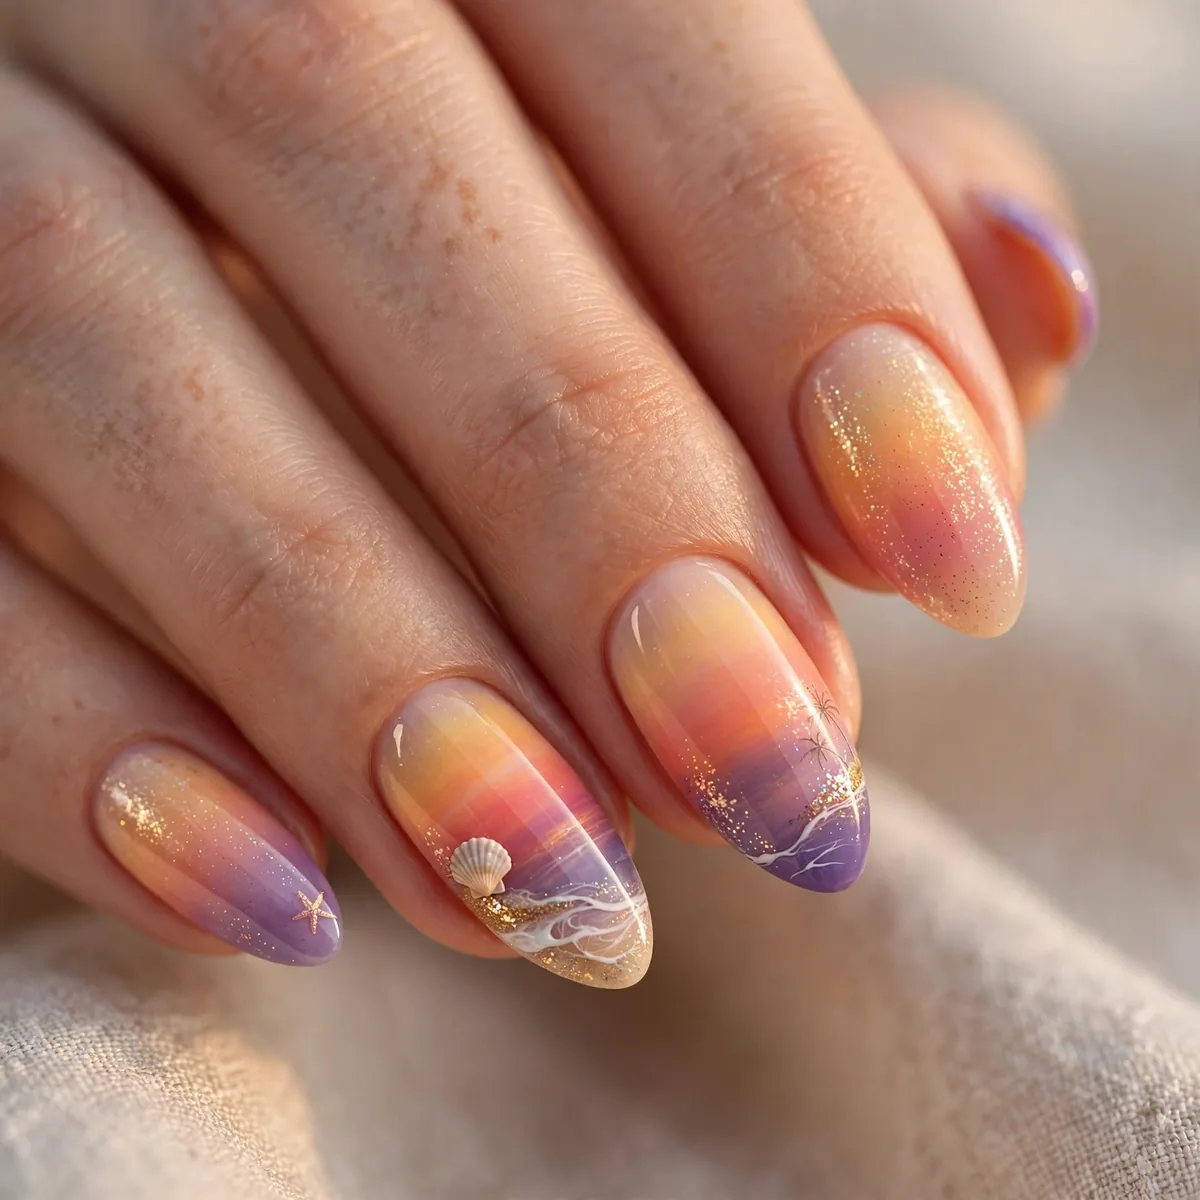
Orange to pink ombre — golden hour daily.
Best for: our sunset guide has 18 golden variations.
Sponge gradients need the polish slightly tacky, not wet — dab the coral and tangerine onto a damp makeup wedge, then bounce it onto the nail in light layers, letting each pass dry a minute. Finish by cleaning the cuticle line with an angled brush dipped in remover, since sponging always bleeds past the nail. A milky white base underneath makes sunset shades glow instead of looking murky. Top with a smoothing gloss to unify the texture.
Sunset ombré looks most dramatic on longer nail beds where the color transition has room to unfold — coffin and stiletto shapes are ideal canvases. On short nails, run the gradient vertically from cuticle to tip instead of horizontally for a flame-like effect. This is a high-compliment manicure that draws the eye at poolside, but the sponge texture can trap sand; keep a nail brush handy and refresh the top coat halfway through your vacation for that lit-from-within glow.
Pineapple Charm
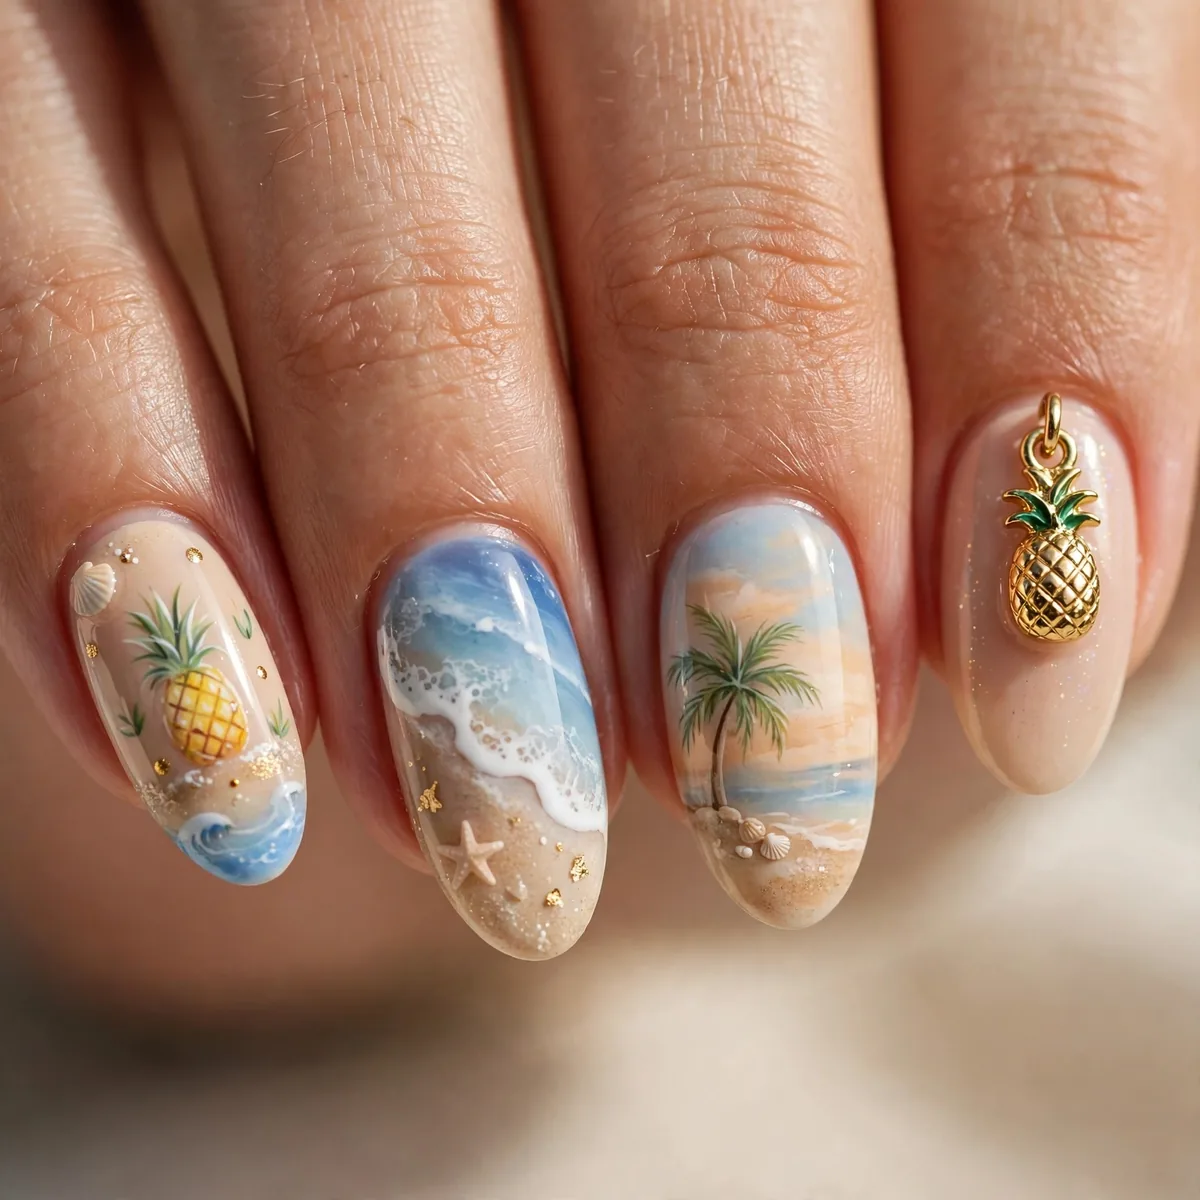
Tiny pineapples — the tropical welcome.
Best for: the playful. Pineapples mean vacation.
Pineapple art is all about the grid — paint the yellow body first, let it dry fully, then crosshatch the diamond texture with a striper brush in a slightly deeper gold. The crown leaves need just three confident flicks of green gel polish; hesitate and they look like grass. Seal with a matte top coat on the body and glossy on the leaves for a subtle mixed-finish detail that elevates the whole design.
Playful fruit nail art works best as a single statement nail paired with solid turquoise or sunny yellow on the rest — full sets of pineapples read costume rather than chic. Short to medium almond nails keep the design cute and proportional; oversized fruit on long coffins looks cartoonish. This is the perfect manicure for tropical destinations and poolside parties, and it doubles as a conversation starter. Keep a dotting tool in your travel kit for quick fixes.
Aqua Shimmer
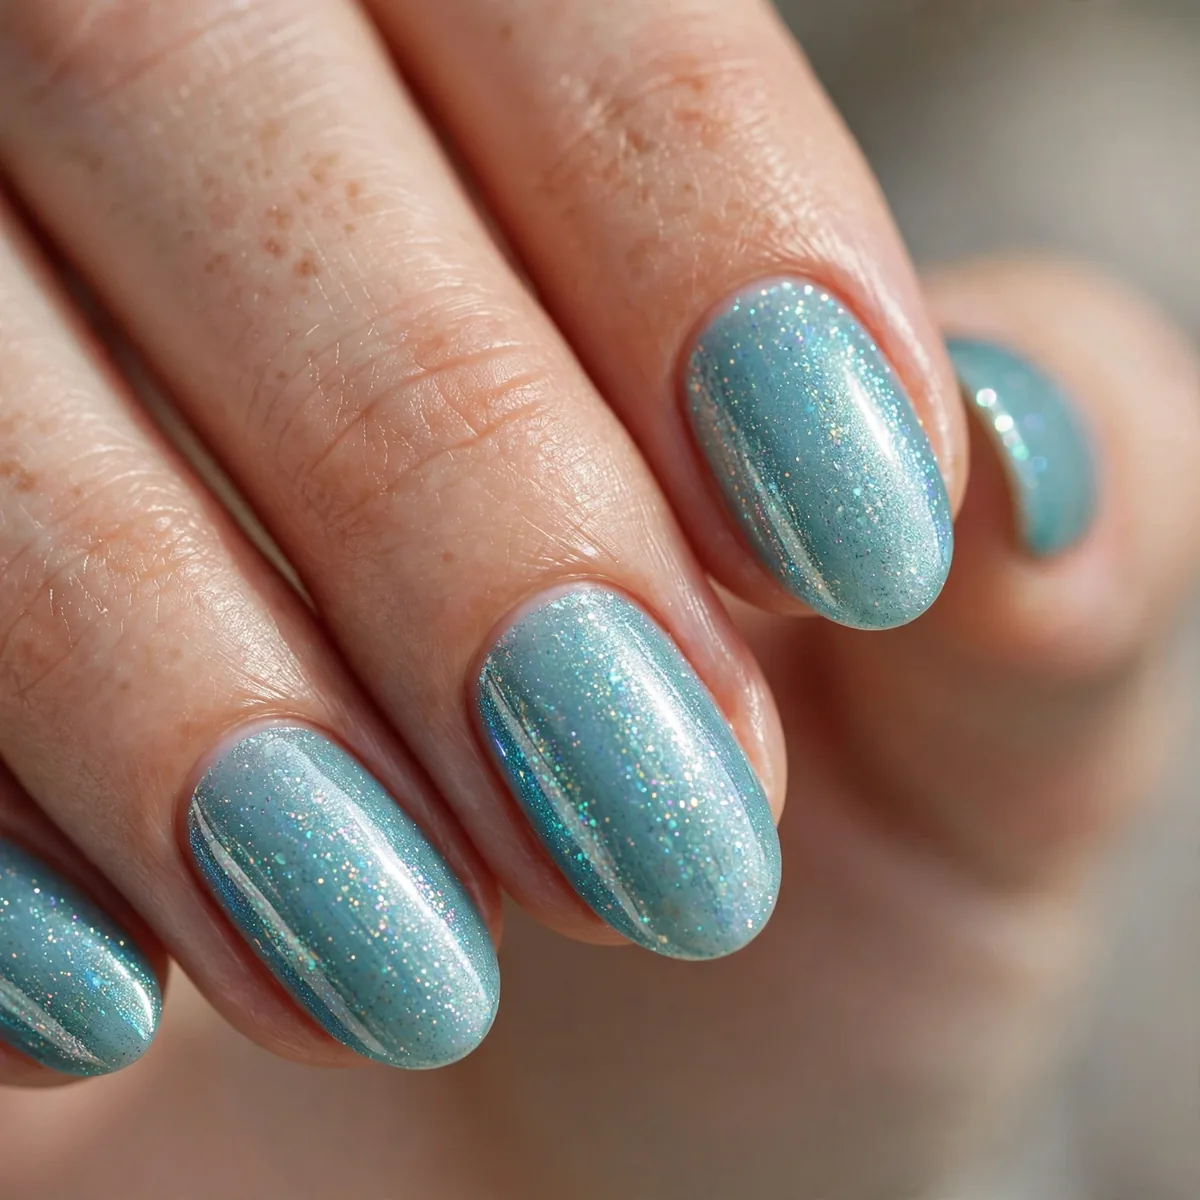
Shimmery aqua — mermaid vacation.
Best for: the magical. Aqua shimmer glows in sunlight.
Aqua shimmer polish is really a jelly base loaded with micro-glitter, so it needs three thin coats for full coverage — thick coats pool at the cuticle and look streaky. Apply over a white or pale blue base to make the shimmer particles pop like sunlight on water. Skip matte top coat entirely; the whole point is light reflection, so finish with a glass-effect gloss. An extra top-coat layer mid-week revives the sparkle.
Shimmer finishes forgive imperfect application, which makes aqua glitter the easiest vacation manicure for beginners. They also camouflage tip wear brilliantly — glitter disguises chips that would ruin a crème. Oval and almond shapes catch the light beautifully as your hands move, enhancing the mermaid glow. One caution: fine glitter is stubborn to remove, so wrap nails in acetone-soaked foil for ten minutes rather than scrubbing, which damages the nail surface.
Beach Umbrella Stripes
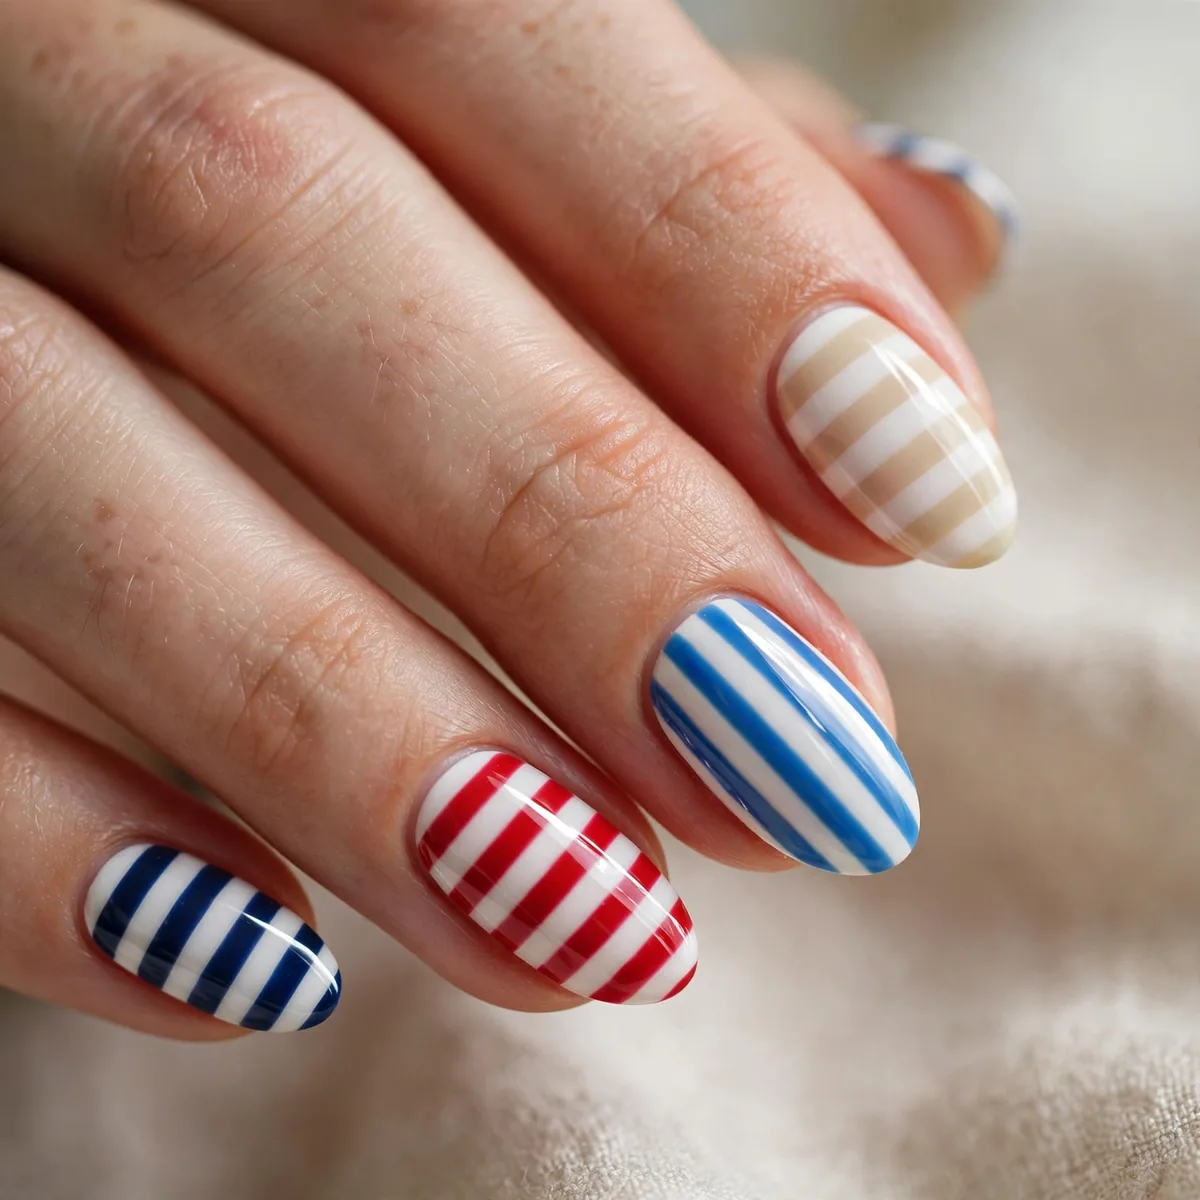
Colorful umbrella stripes — the resort pattern.
Best for: the cheerful. Stripes are pure resort.
Striped umbrella art demands a steady hand or striping tape — lay thin tape lines over a white base, paint each section a different bright crème, and peel the tape while the polish is still slightly tacky for crisp edges. A liner brush touch-up fixes any bleeding. Alternate the stripe widths slightly for that hand-painted resort charm rather than mechanical precision. Glossy top coat makes the colors look freshly painted.
Graphic stripes look best on medium-length nails with a squoval shape, since the straight edge mirrors the linear pattern. This design is unapologetically cheerful, so it pairs perfectly with bold swim prints and oversized sunglasses. The multi-color application does take time, so it is a weekend-project manicure rather than a quick polish change. To extend wear, cap the free edge with top coat — stripes near the tip are the first to chip.
Starfish Detail
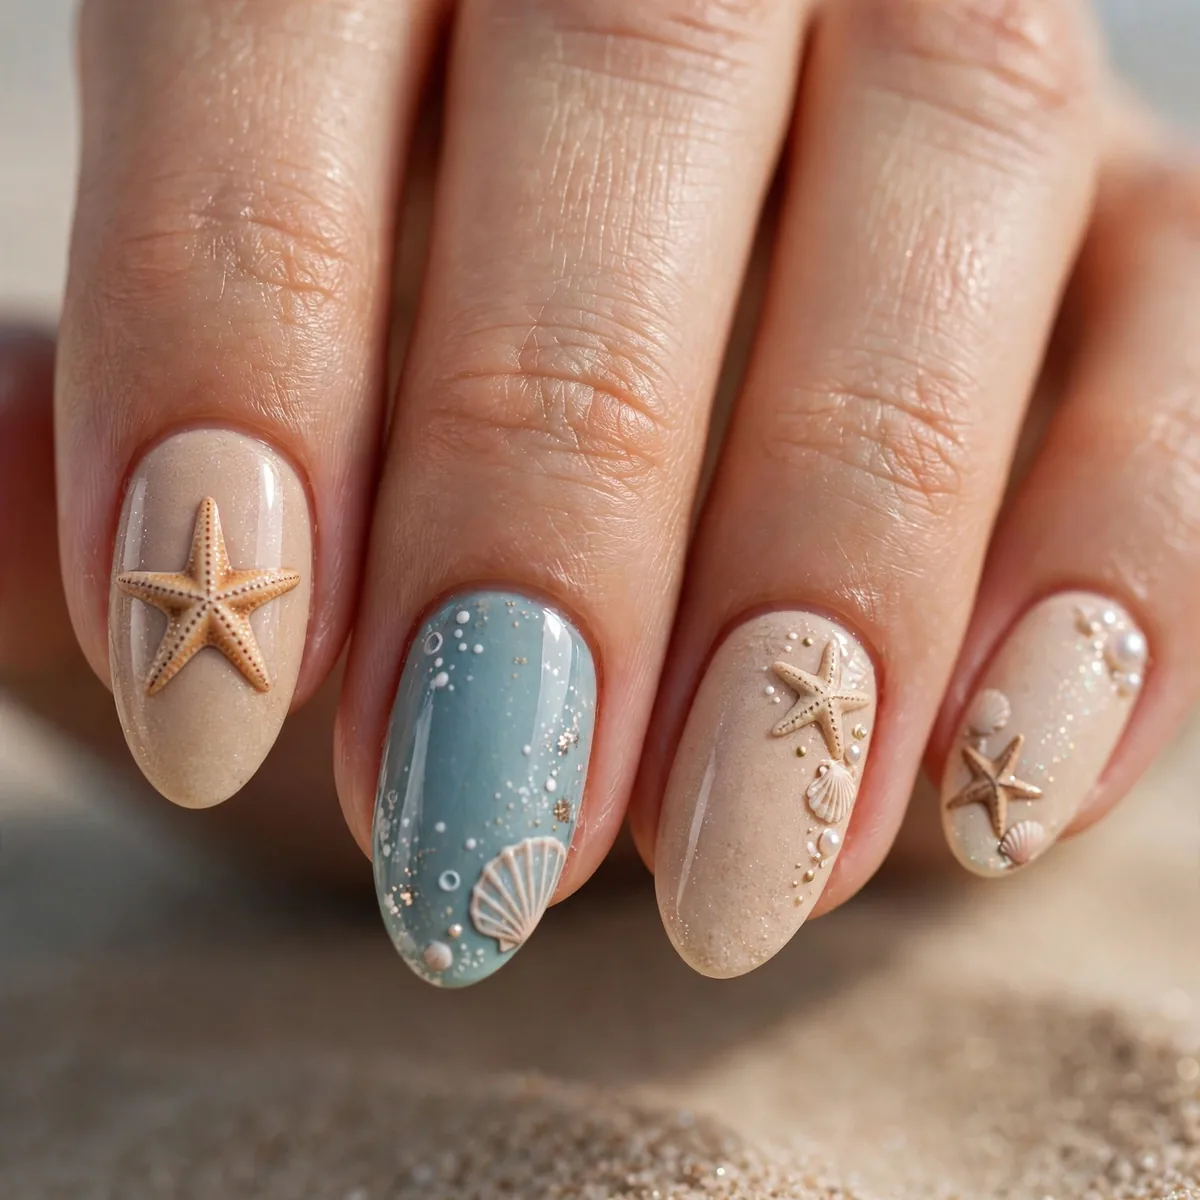
Delicate starfish — the tide pool treasure.
Best for: the intricate. Starfish are beach delicacies.
Starfish nail art rewards patience with a detail brush — build the shape from a small center dot, then pull five tapered legs outward with light pressure so each arm thins naturally. Use a warm terracotta or sandy orange crème over a nude base, and add a tiny darker dot at the center for dimension. A fine-tipped dotting tool places the texture spots without smudging. Let the art cure fully before the glossy seal.
Intricate sea-life designs need a real estate — medium to long nails give the starfish room to spread without looking cramped. Keep the art to one or two accent nails; a full set of starfish overwhelms the hand. This is gallery-level nail art that draws close-up admiration, perfect for beach weddings and sunset dinners. Because the design sits on a neutral base, regrowth stays discreet and the manicure ages gracefully.
Coconut White
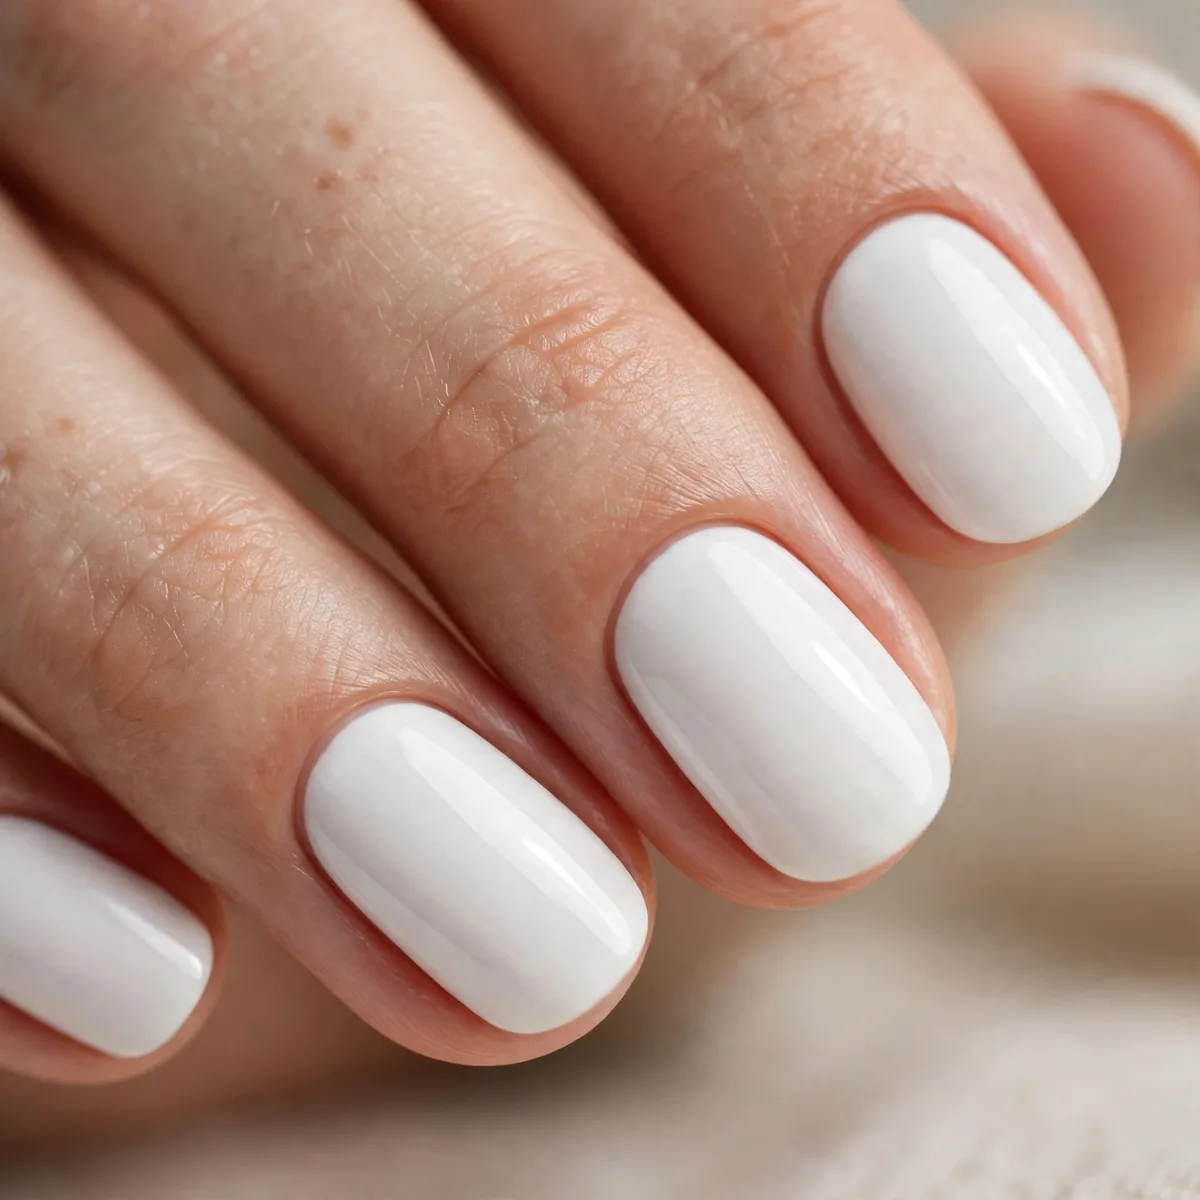
Crisp coconut white — the striking beach neutral.
Best for: tanned skin. White pops hardest at the beach.
Coconut white is the trickiest neutral to apply — it streaks mercilessly, so use a ridge-filling base and three whisper-thin coats rather than two thick ones, letting each layer dry completely. A slightly milky off-white is more forgiving than stark paper white and looks less harsh against very pale skin. Clean the sidewalls meticulously, since white magnifies every flood. High-gloss top coat keeps it crisp and fresh.
White polish makes every nail shape look longer, but it also shows chips instantly, so keep nails at a practical length for beach activities. The payoff is maximum contrast against bronzed skin and vibrant swimwear — white is the undisputed vacation-neutral champion. Refresh the top coat every couple of days to fight sunscreen yellowing, and carry the bottle for tip touch-ups. Matte white offers a modern twist with slightly better chip camouflage.
Flamingo Fun
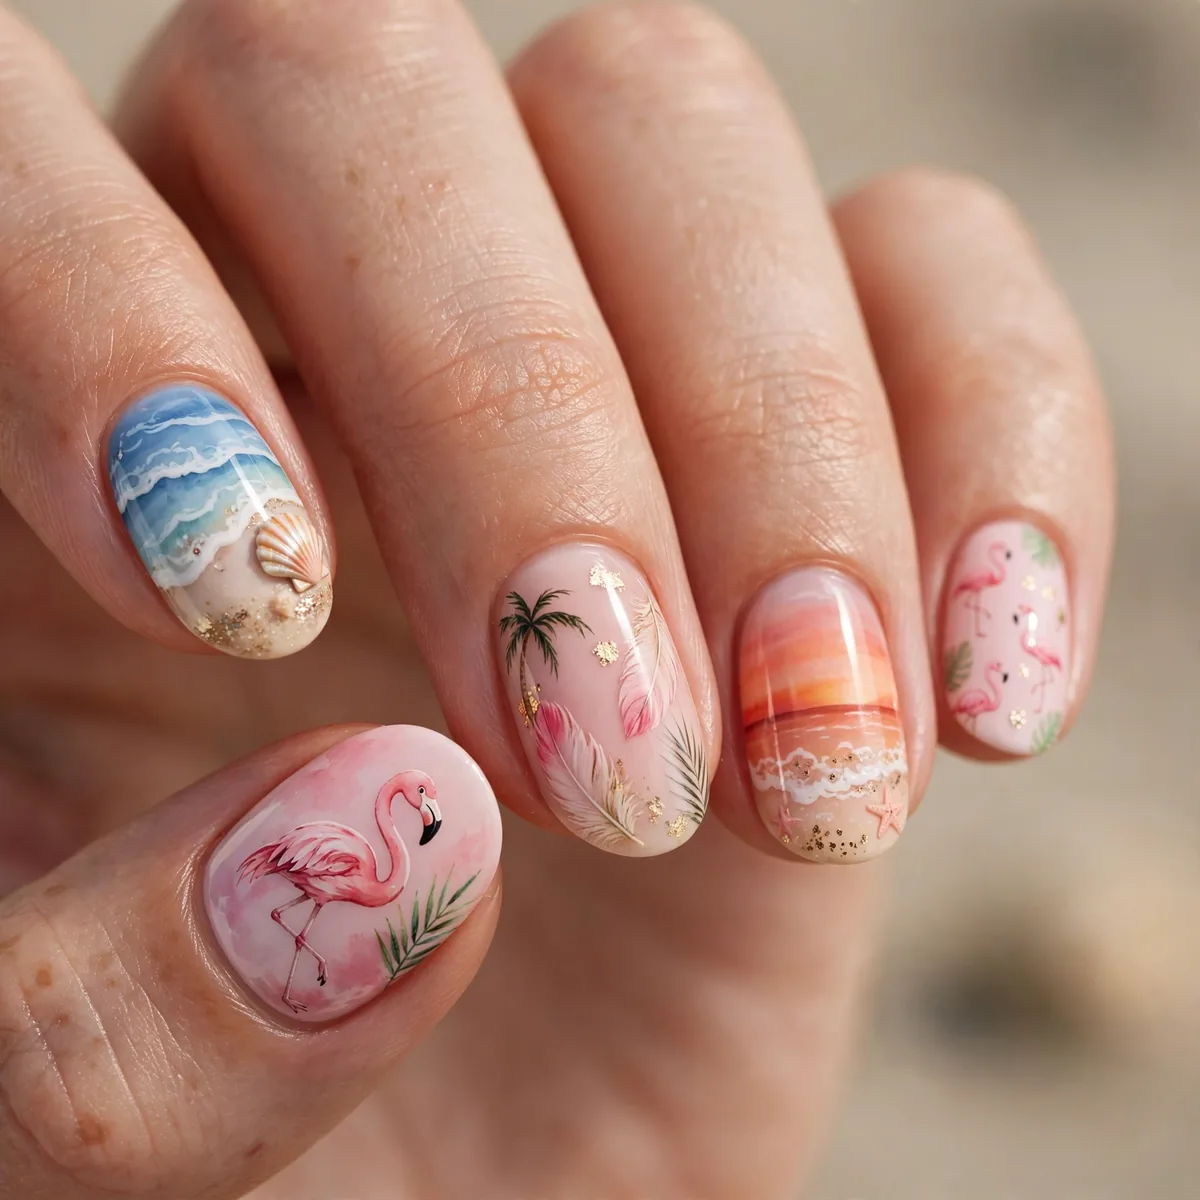
Pink flamingos — the tropical icon.
Best for: the fun. Flamingos are vacation’s mascot.
Flamingo nail art starts with a soft pink base — paint the body as a loose S-curve rather than a perfect bird, since stylized reads cuter than realistic at nail scale. The beak is one black teardrop, the eye one white dot with a black pupil; less is more. Long legs crosshatch in black liner polish against a pale aqua background for that lagoon feel. Practice the curve on a nail wheel first.
Quirky flamingo designs shine on almond or stiletto nails where the bird’s elegant neck echoes the nail’s curve. This is unapologetic vacation maximalism — ideal for tropical resorts, pool parties, and anyone whose style runs playful rather than polished. Pair with simple gold jewelry so the nails stay the star. The hand-painted look means no two nails match perfectly, which is exactly the charm.
Wave French Tips
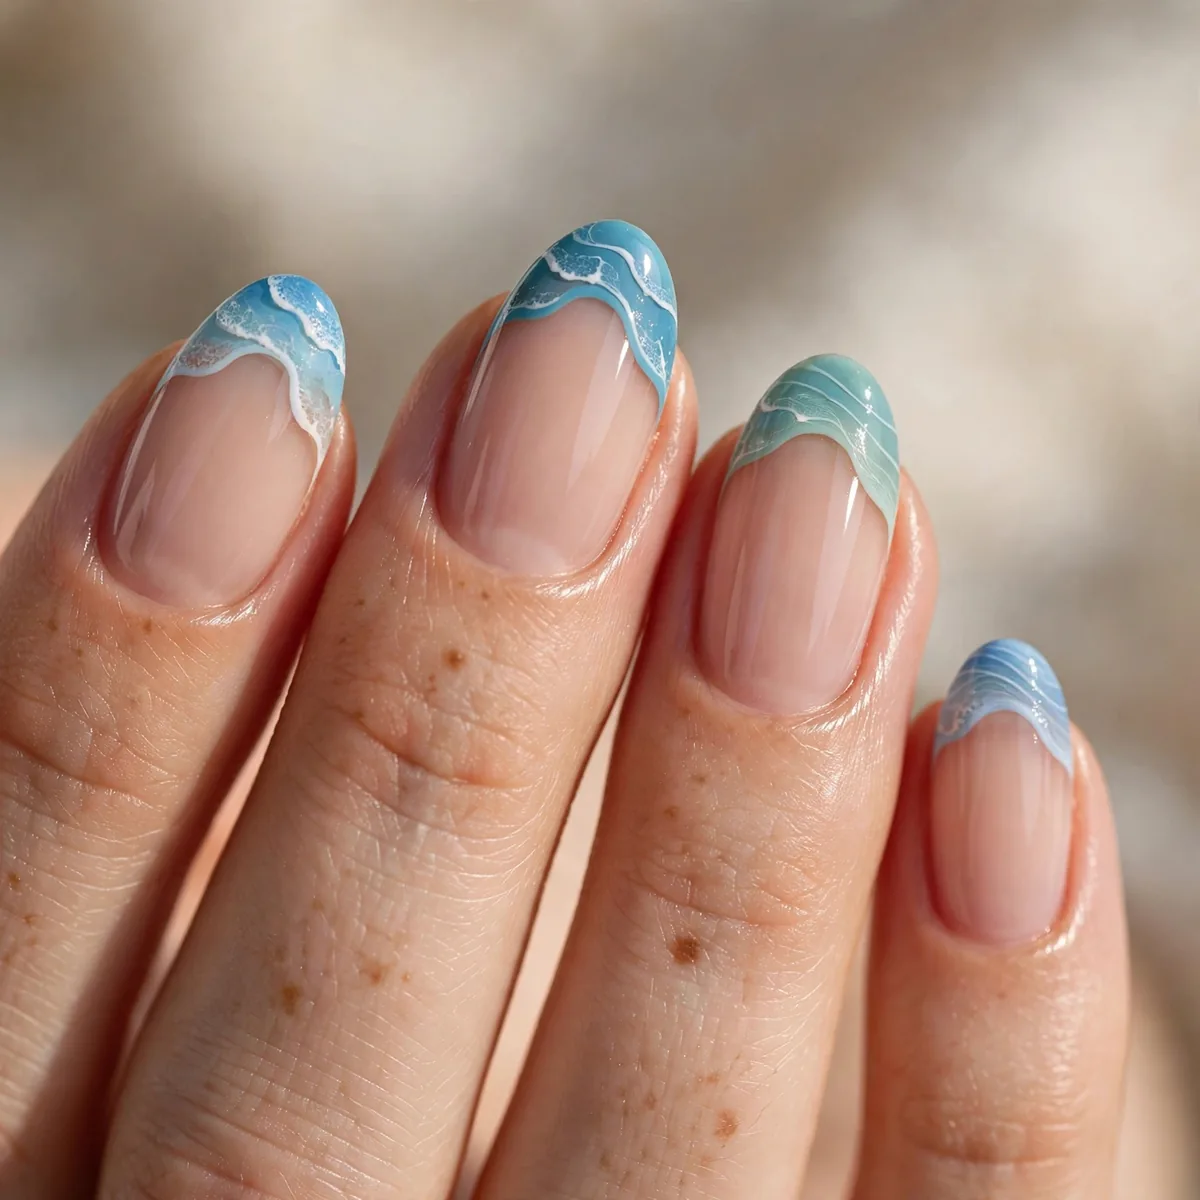
French tips with wave patterns — the coastal French.
Best for: French lovers. Waves update the classic beachside.
Wave French tips modernize the classic by replacing the straight smile line with an undulating edge — paint the white tip freehand with a striper brush, following a gentle S-motion across the nail. A nude-pink base keeps it elegant, while the wavy line in cobalt or teal signals the ocean theme. Tidy the wave with a cleanup brush and acetone for a professional finish. Gel polish helps the fine line self-level.
This design flatters every nail length, but short to medium squoval nails wear it most effortlessly — it reads polished without trying too hard. It is the beach manicure for people who usually avoid nail art, bridging classic French elegance with a whisper of coastal fun. The subtle design also transitions seamlessly back to work after vacation. Reapply top coat regularly, since the tip edge takes the most wear from sand and typing.
Sand Dollar Accent
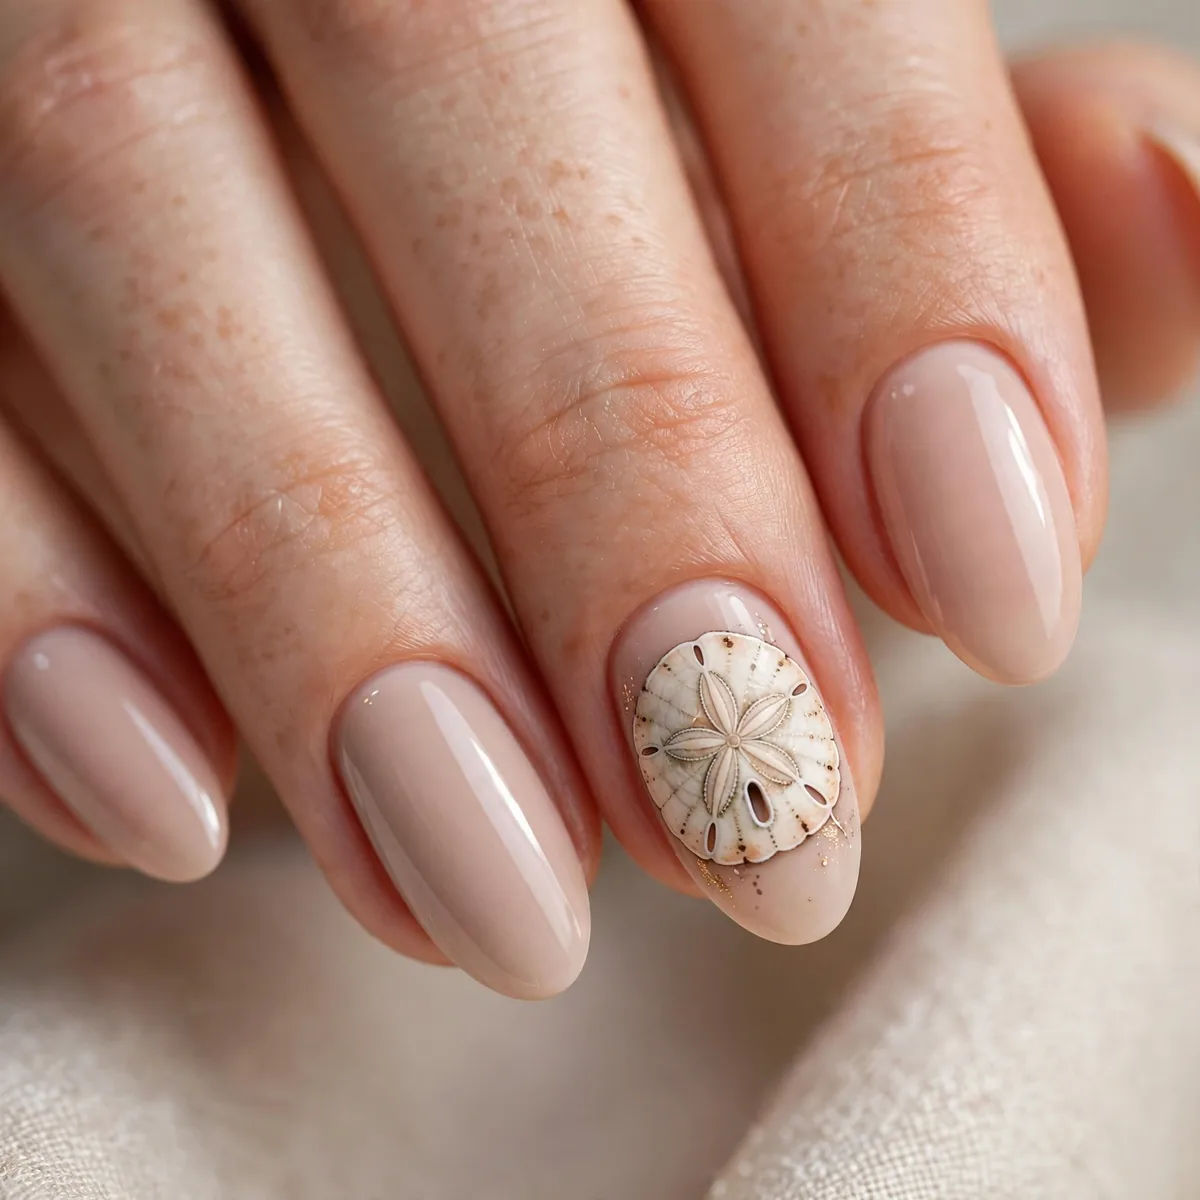
Single sand dollar accent — the beachcomber’s find.
Best for: the subtle. One treasure among neutrals.
A single sand-dollar accent works because of restraint — paint the accent nail in a soft cream crème, then stamp or hand-paint the sand-dollar motif in pale gold or white shimmer. Stamping plates made for coastal themes give the cleanest result; freehand versions should stay simple, just the circular outline with five petal markings. Keep surrounding nails in sandy nude or sheer beige so the treasure stands out.
Minimalist accent designs suit any nail shape, but oval nails echo the sand dollar’s organic roundness beautifully. This is the quiet-luxury beach manicure — sophisticated enough for a resort dinner yet relaxed for barefoot mornings. Because only one nail carries art, touch-ups are quick if it chips. It also photographs elegantly against linen and straw accessories, making it a favorite for understated vacation style.
Tropical Flower
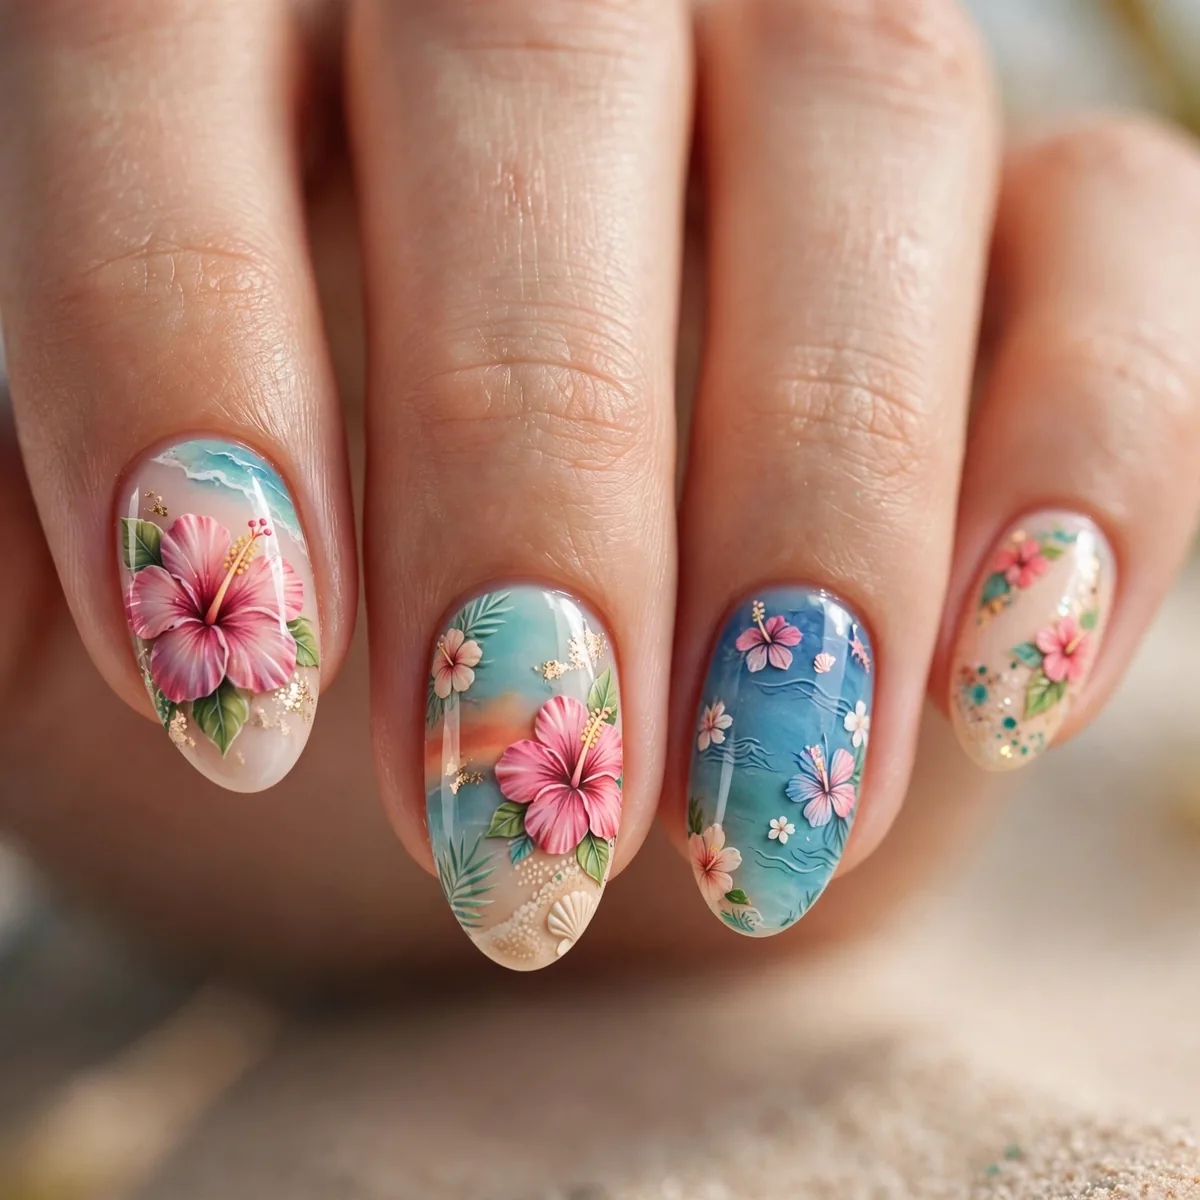
Hibiscus blooms — the island flower.
Best for: the lush. Hibiscus is tropical luxury.
Hibiscus flowers are genuinely beginner-friendly nail art — each bloom is five oval petals placed in a circle with a striper brush, a darker center dot, and one curved stamen line. Work wet-on-wet for soft petal edges: place the petals while the base color is slightly tacky so they blend naturally. Classic red-pink petals on a white or pale yellow base pop the hardest. Seal with gloss to make the petals look dewy.
Tropical florals look lushest on longer nail beds where the bloom can open fully — coffin and almond shapes are ideal. This design pairs beautifully with flowing sundresses and tropical-print swimwear, completing the island look. The bold petals also camouflage minor application imperfections, since the eye reads the flower, not the edges. It is a high-impact manicure that still feels feminine and classic rather than trendy.
Deep Sea Blue
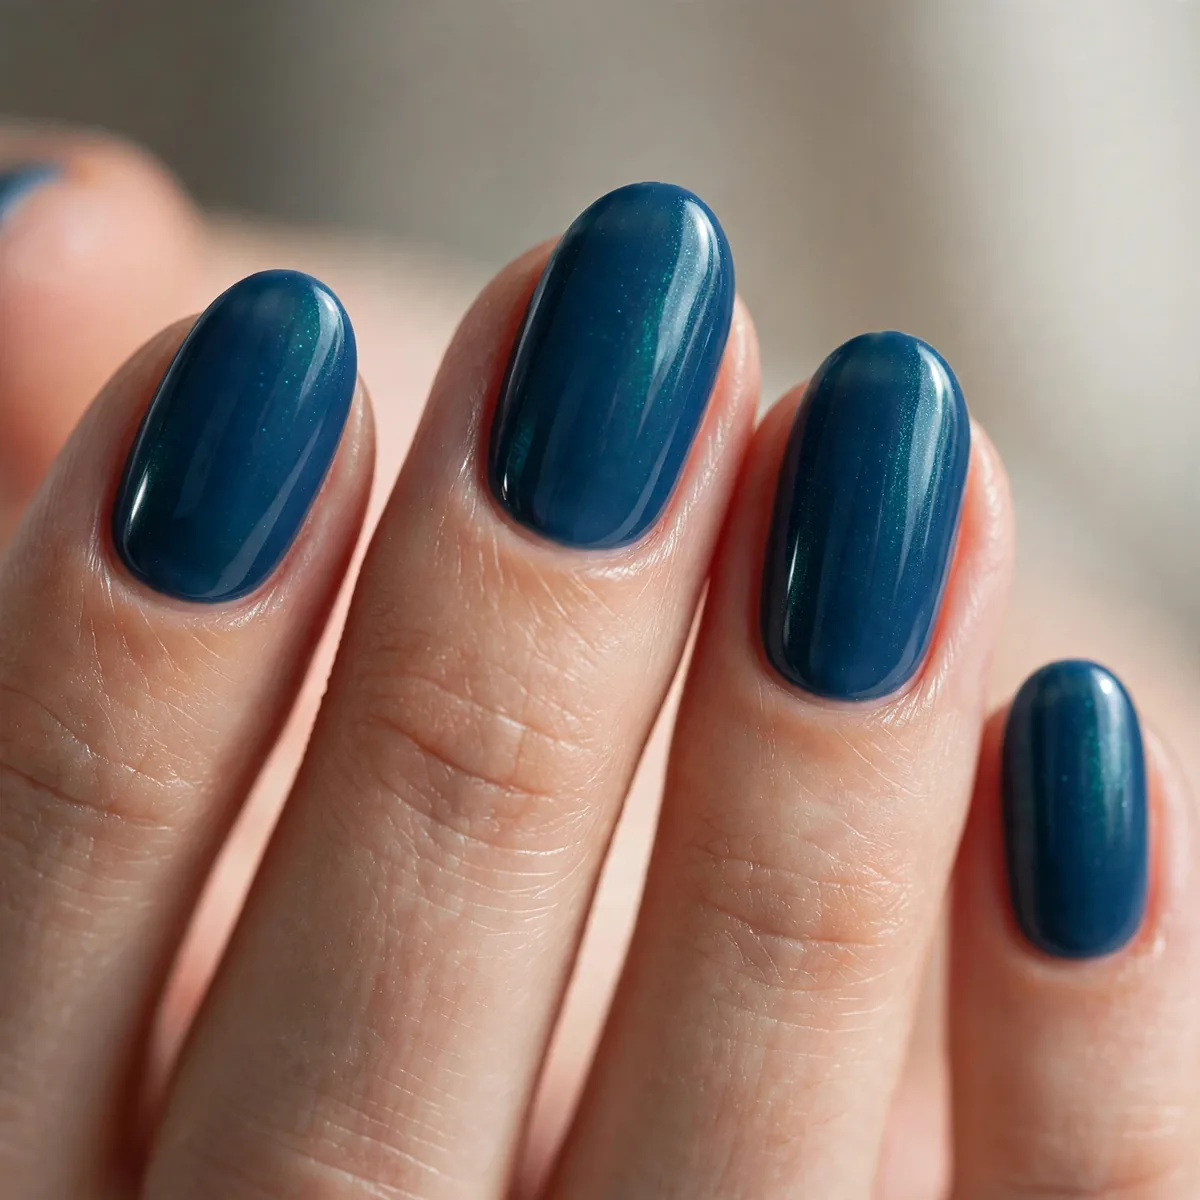
Dark ocean blue — the deep end.
Best for: the moody beach. Deep blue is the ocean’s mystery.
Deep ocean blue demands flawless prep — dark crème shades magnify every ridge and bump, so buff gently and use a ridge-filling base coat. Two thin coats give that fathomless, almost-black depth; a third coat adds richness on longer nails. Glossy top coat is essential — matte deep blue looks flat, while gloss creates that wet, mysterious ocean surface. Clean up carefully, since dark polish stains cuticles instantly.
Moody navy and midnight blues elongate the fingers dramatically, especially on almond and coffin shapes. This is the beach manicure for evening — it looks stunning with silver jewelry and after-sunset cocktails, offering edge instead of the usual cheerful brights. Dark shades also hide regrowth and minor chips better than lights. For daytime contrast, add a single gold-foil accent nail that catches the sun like treasure.
Mermaid Scale
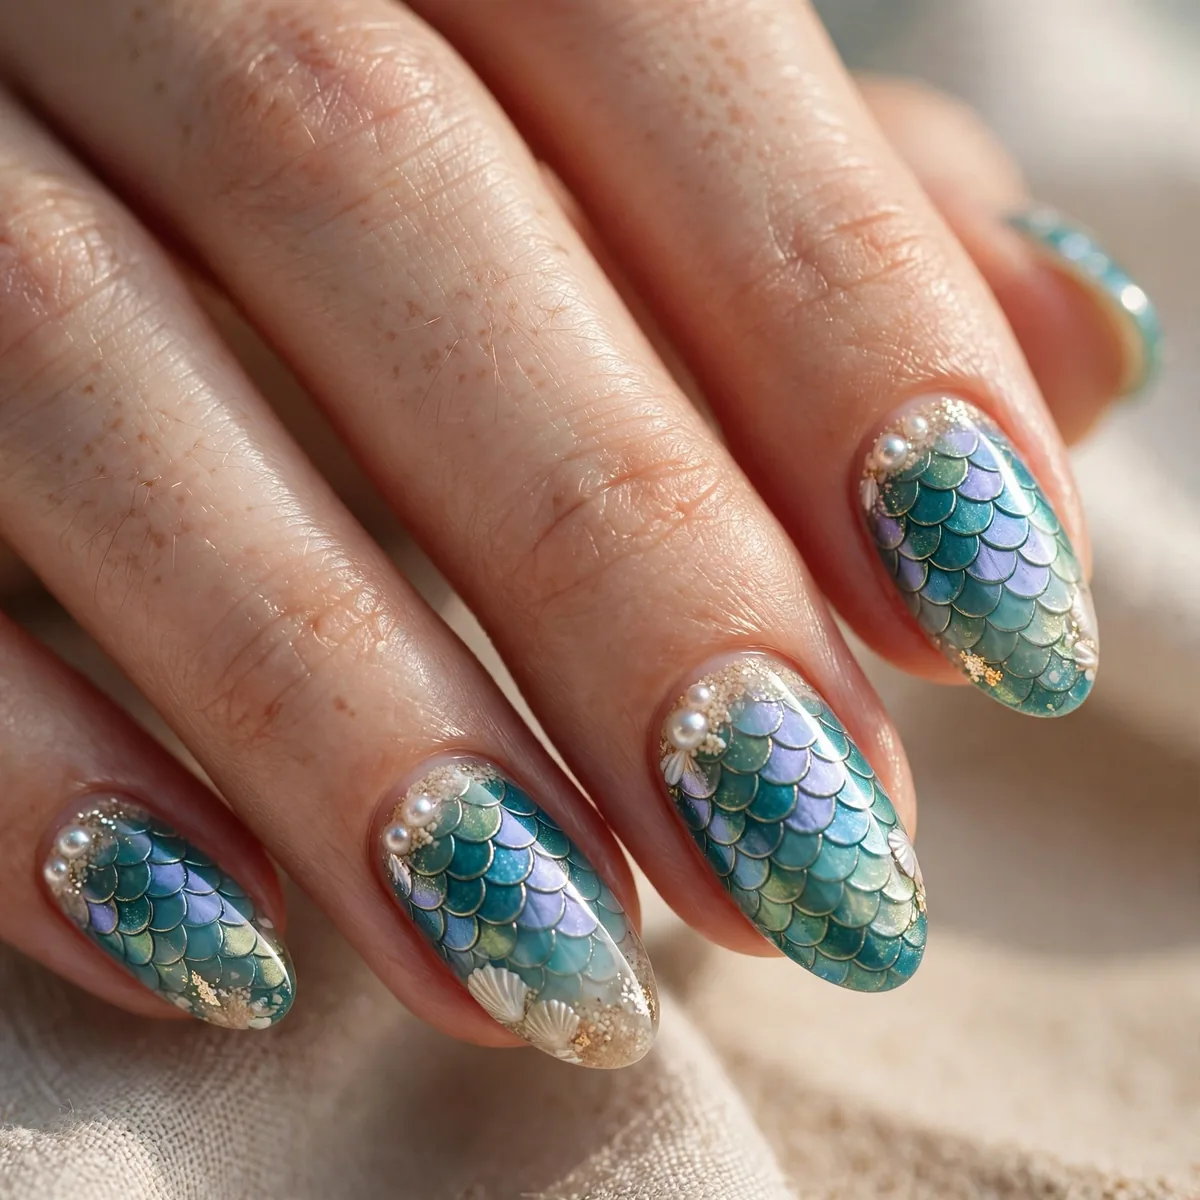
Scale patterns in aqua — the mermaid fantasy.
Best for: the magical. Fishnet stencils create perfect scales.
Mermaid-scale designs are easiest with fishnet stencils — paint the base in aqua or teal, lay the stencil flat, and sponge a deeper blue or purple over it, lifting the stencil while still tacky for crisp scale edges. Layer a duochrome or iridescent top coat afterward; the color-shift shimmer is what sells the mermaid fantasy. Work one nail at a time so the stencil doesn’t slide. Glossy finish maximizes the magical effect.
Scale patterns need enough surface to read clearly, so medium to long nails work best — short nails make the pattern look busy rather than enchanting. This is pure fantasy nail art, perfect for beach parties, festivals, and anyone embracing their inner siren. The dimensional shimmer photographs beautifully in sunlight and pool water. Reapply the iridescent top coat mid-trip, since chlorine dulls specialty finishes faster than standard polish.
Sunshine Yellow
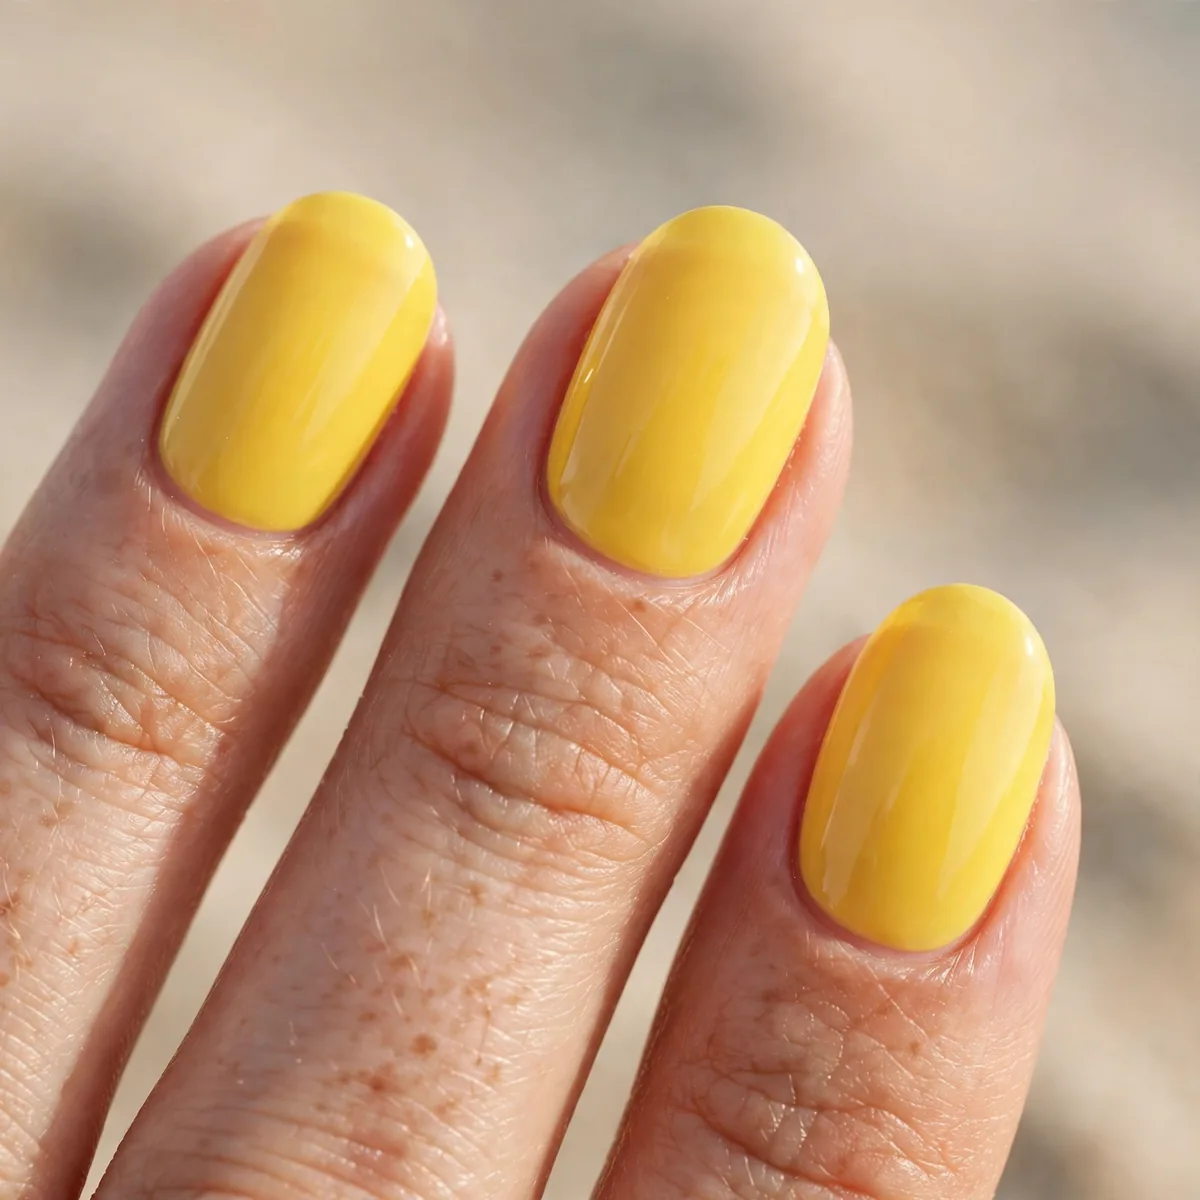
Bright sunny yellow — the beach sun.
Best for: the cheerful. Yellow is vacation happiness.
Sunshine yellow is high-maintenance to apply — the pigment is sheer, so three thin coats over a white base are the standard for that juicy, opaque finish. A slightly warm, golden yellow flatters more skin tones than lemon, which can look neon-harsh on fair skin. Let each coat dry fully to avoid dragging, and cap the free edge carefully since yellow chips show dramatically against tanned skin. Gloss top coat deepens the color.
Yellow nails are pure dopamine — they look incredible against denim, white linen, and every shade of blue water. Short to medium almond nails keep the brightness chic rather than overwhelming; very long yellow nails can read costume. This is the happiest vacation shade, ideal for travelers who want their manicure to radiate energy. Carry the bottle for quick chip repairs, and refresh top coat often to maintain that sunlit glow.
The Vacation Capsule
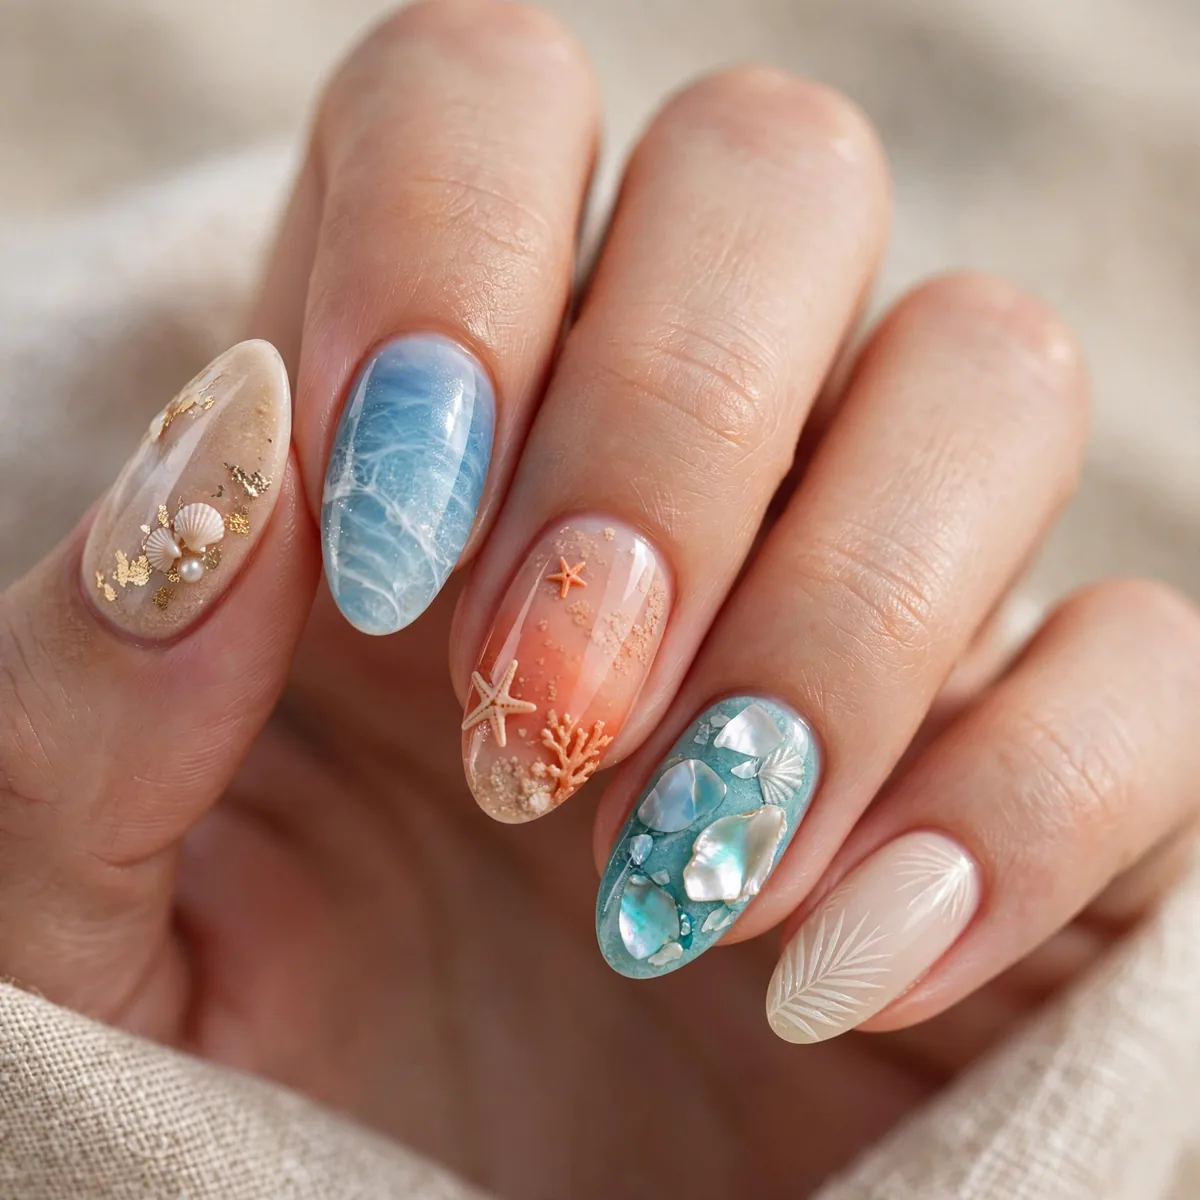
Turquoise, coral, nude, white — the four-bottle getaway.
Best for: the trip. Four shades, endless vacation.
A vacation capsule of four polishes — turquoise, coral, nude, and white — covers every mood without overpacking your toiletry bag. Plan a rotation: solids for travel days, turquoise-and-white accent art mid-trip, coral for dinners out. Choose mini bottles or decant into small containers to save luggage space. A single quality base and top coat completes the kit; never skip base on vacation, since sun and salt stress nails.
Packing a curated shade edit is smarter than a dozen random bottles — these four colors mix and match across French tips, ombré, and accent art. Stick to one brand family if possible so formulas layer compatibly without bubbling. This approach also keeps nails photo-ready for the whole trip with minimal touch-up time. Toss in a cuticle oil pen too; salt water and sun dehydrate nails fast, and oiled cuticles make any manicure look freshly done.
Pack your sunscreen and your polish. Save your vacation manicure — and for sunny-day shades, see our summer nails and sunset designs.