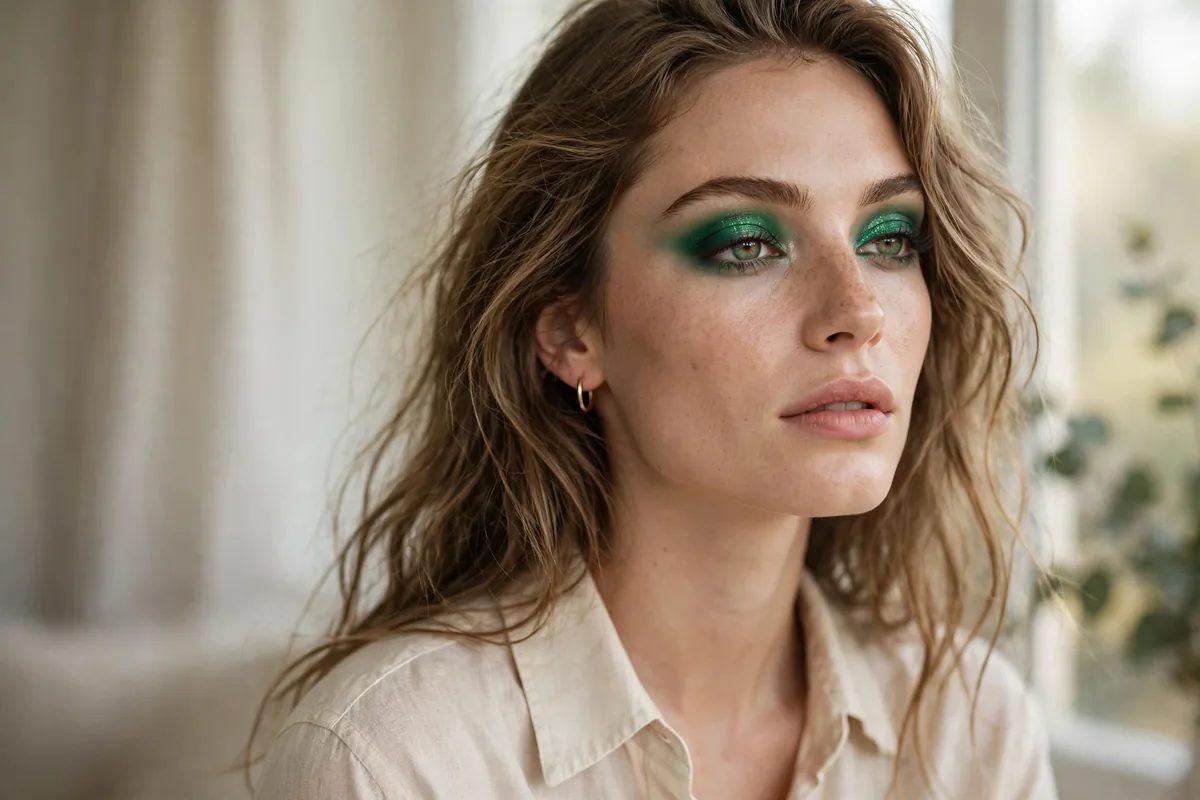
Green eyeshadow used to be the risky choice. Now it’s the interesting one.
Emerald flatters brown eyes most dramatically — green against brown creates a contrast that makes both look richer. But hazel, green, and even blue eyes can wear it beautifully with the right placement.
The modern way to wear emerald is controlled: one area of green (lid, liner, or lower lash line) with everything else neutral. Restraint is what makes it chic.
Here are 18 ways to pull it off. Let’s get into it.
Jewel-Toned Emerald Lid
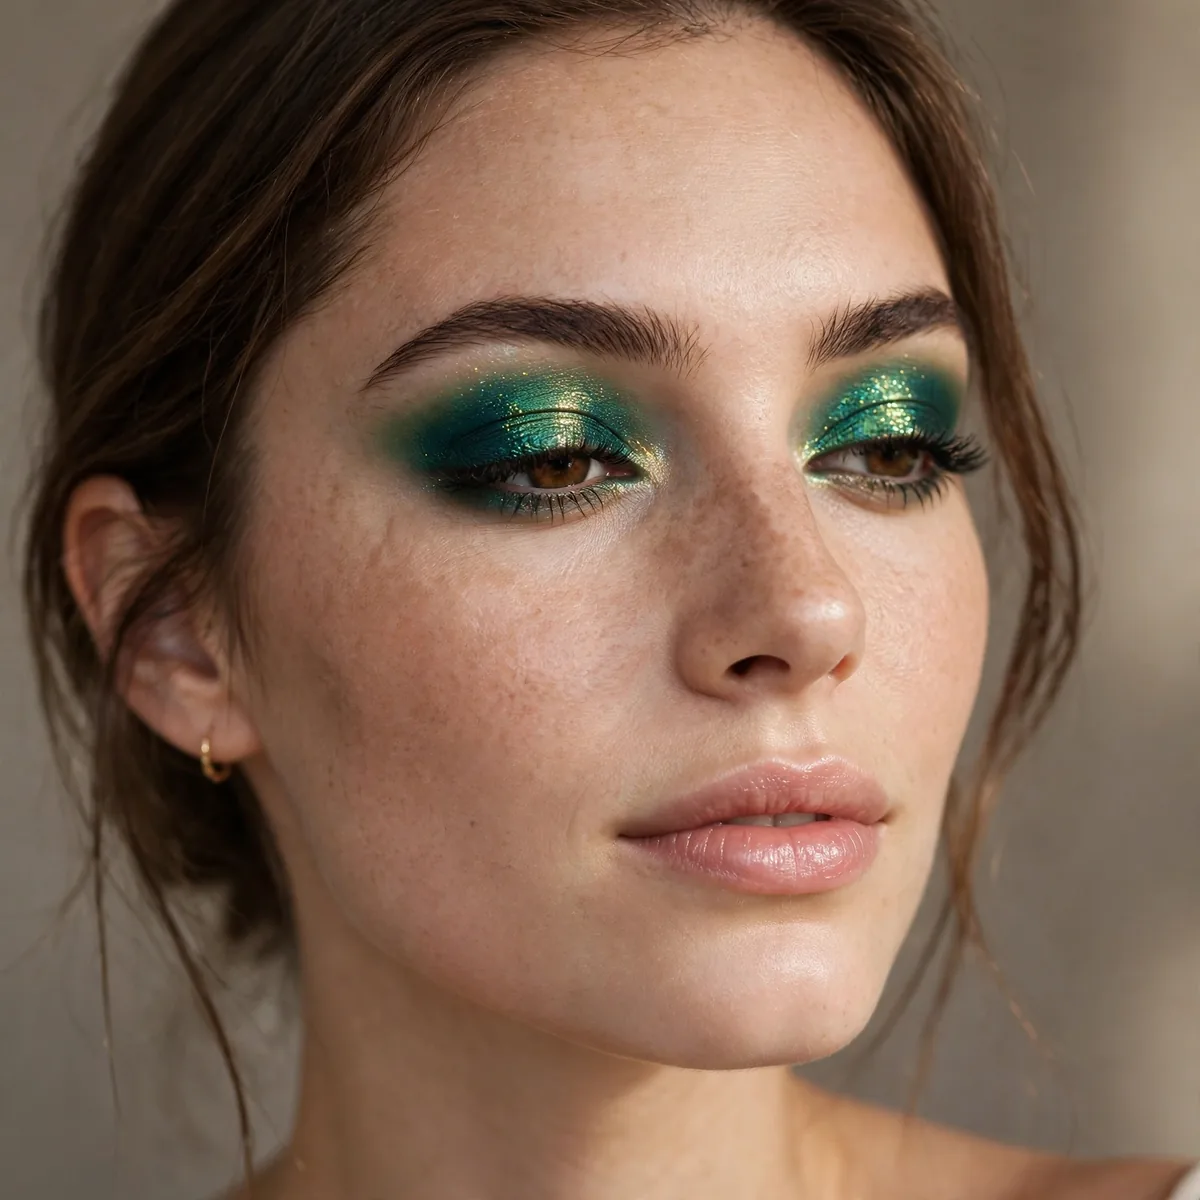
A rich emerald pressed across the whole lid — saturated, glossy, unapologetic. The statement in its purest form.
Keep the crease neutral brown so the green has a frame. Mascara, nude lip, done.
Prime the lids first — emerald pigment creases fast on oily lids without a grip layer. A tacky eye primer or a thin wash of concealer set with translucent powder gives the green something to hold onto. For all-night wear, mist a damp brush with setting spray before packing on the shadow; wet application deepens the pigment and locks it down through dinner, dancing, and everything after.
Emerald flatters nearly every eye color, but it truly ignites brown and hazel eyes through complementary contrast. Warm undertones should lean toward yellow-green emeralds, while cool undertones shine in blue-green teals. Because the lid is doing the heavy lifting, keep everything else quiet: groomed brows, one coat of lengthening mascara, and a nude lip. Gold jewelry echoes the jewel tone and completes the look.
Emerald Smokey Eye
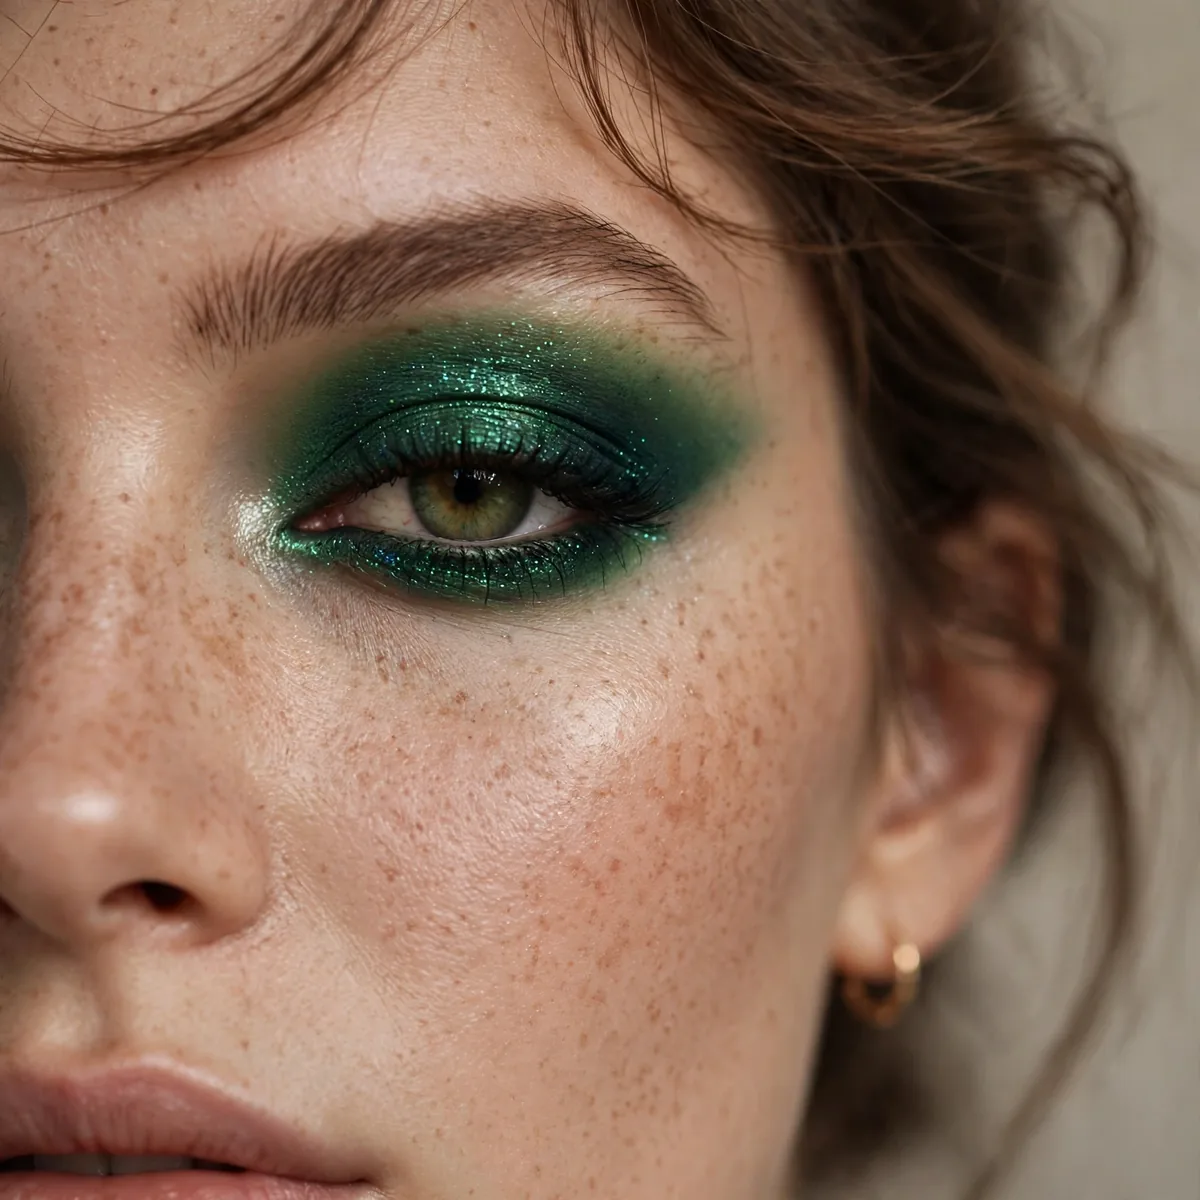
The smokey eye, but make it jewel-toned. Emerald smoked out with black in the outer corner is evening drama at its best.
Blend, blend, blend — harsh edges ruin a colored smokey faster than anything.
The biggest mistake is reaching for pure black to deepen the outer corner — it swallows the green and turns everything muddy. Instead, layer a deep espresso or charcoal over the emerald, keeping black to the tightest outer edge only. Tap excess off your brush before blending to control fallout, and work in small circular motions. The green should stay visible and luminous, not buried under darkness.
For daytime, sheer the emerald out with a fluffy brush and skip the black entirely — a soft wash of green reads polished, not theatrical. When evening comes, deepen the outer corner and add a second layer of mascara to take it up a notch. Lips should stay in the nude-to-brick family; a berry or red lip fights the green for attention, while warm neutrals let the eyes stay the star.
Deep Forest Crease
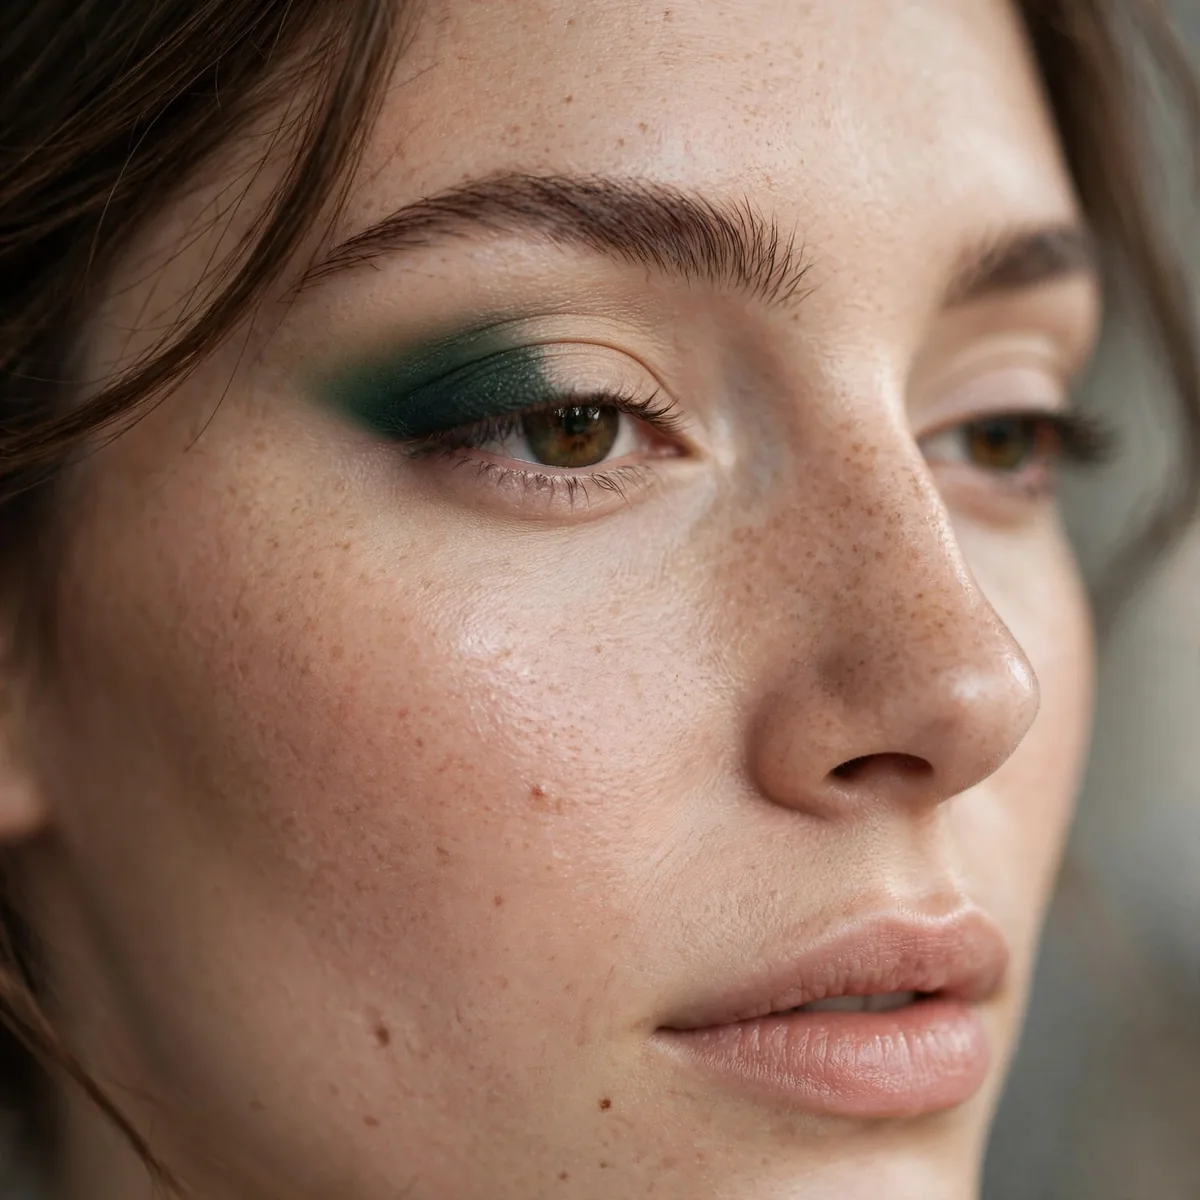
Forest green worked through the crease with a neutral lid — all the intrigue, none of the commitment.
The most wearable emerald on this list. It reads as "interesting neutral" from a distance.
This placement is a gift for hooded and deep-set eyes, since the color sits where the lid folds and stays visible when eyes are open. Hazel and brown eyes gain incredible depth against forest green, and medium to deep skin tones wear it without the color looking stark. If your eyes are close-set, concentrate the green on the outer half of the crease to create the illusion of width.
Use a fluffy blending brush and work the shadow through the crease in windshield-wiper motions, starting sheer and building slowly. The outer third should carry the most depth — press a little extra product there with a smaller brush, then diffuse the edges. Keep the lid itself clean with just primer or a skin-tone base so the contrast stays crisp. Two thin layers always beat one heavy one.
Emerald Winged Shadow
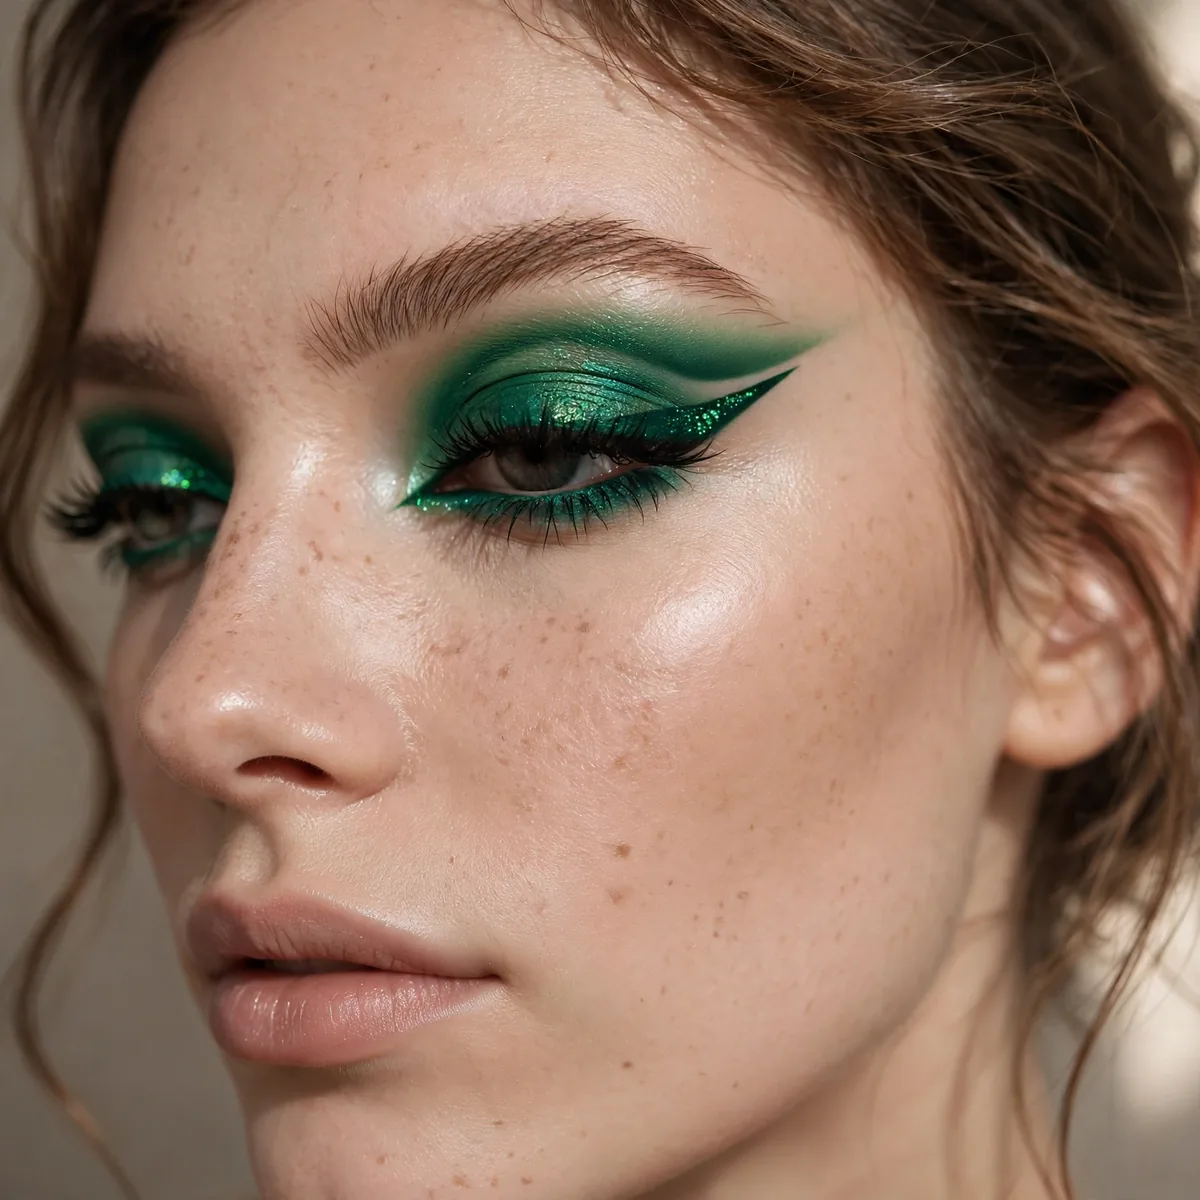
Wing out emerald shadow instead of black liner. Bold, graphic, and somehow more wearable than you’d expect.
A damp angled brush gives the sharpest edge. Build in thin layers for control.
The classic error is winging downward or extending too far past the outer corner, which drags the whole eye down. Follow the angle of your lower lash line upward as your guide, and stop the wing where it meets an imaginary line from your nostril. A small piece of tape as a stencil gives a razor edge — press it on, apply shadow, and peel away while the product is still fresh.
This is a holiday-party hero — striking in photos, festive without glitter overload. New Year's Eve, cocktail events, and nights out are its natural habitat. Since the wing is graphic, keep cheeks softly sculpted with bronzer rather than heavy blush, and choose a satin nude lip. Let the green wing be the single bold element; competing color elsewhere dilutes the impact.
Shimmering Teal-Emerald Blend
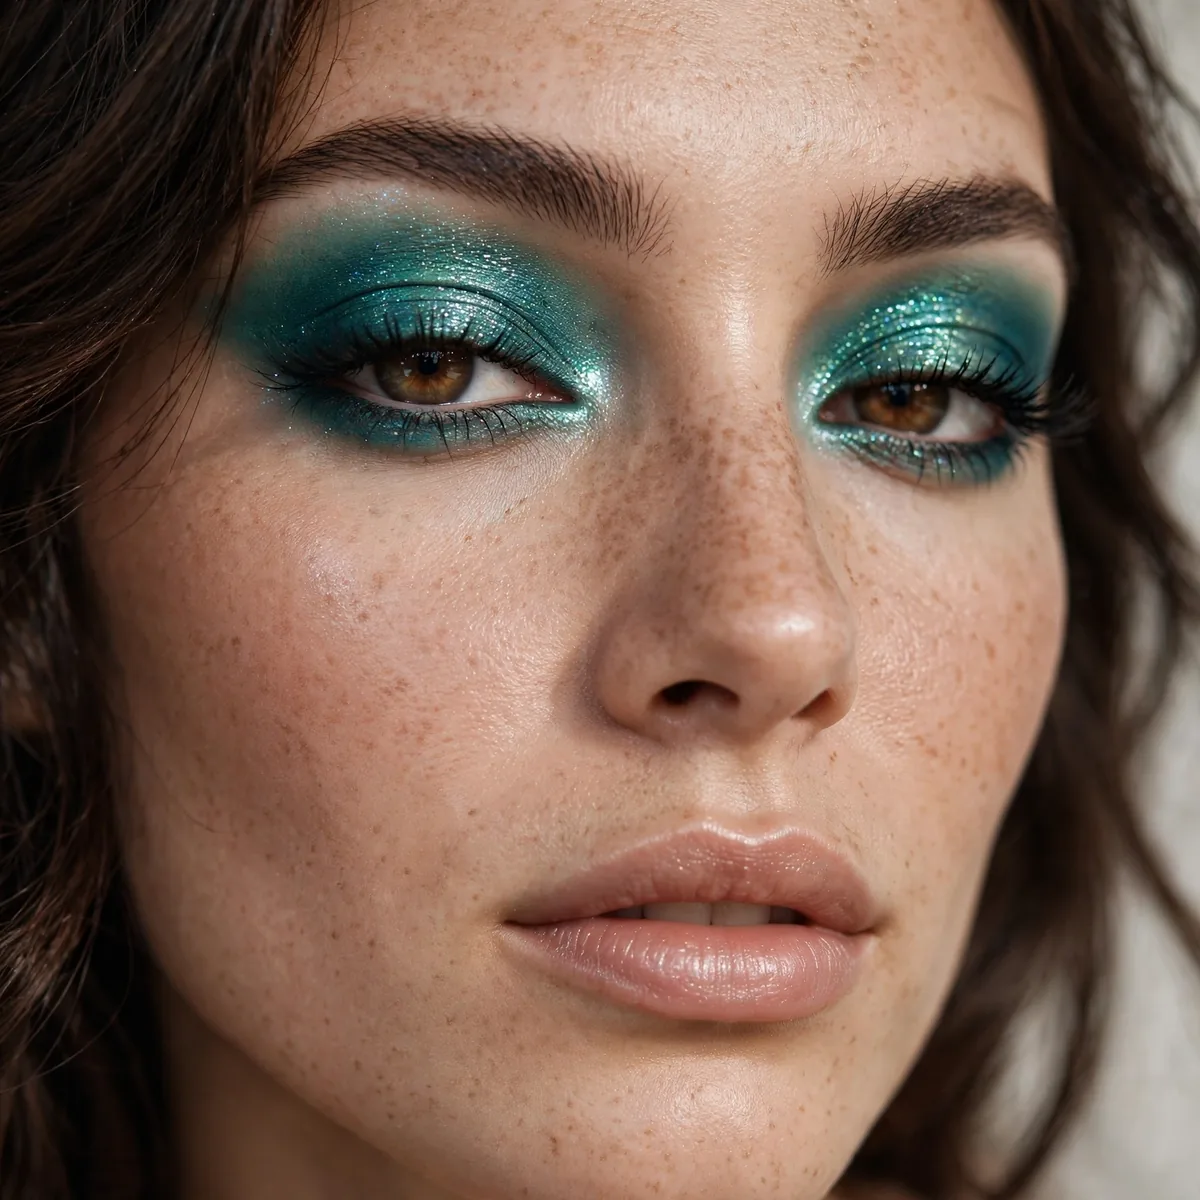
Where emerald meets teal: a shimmering blend that shifts in the light. Mermaid-adjacent, in the best way.
Best for blue and green eyes — the blue undertones make them look electric.
Layering order matters: lay the teal down first across the inner two-thirds of the lid, then melt emerald into the outer third where they meet. A damp flat brush intensifies both shades and helps them fuse without a visible seam. Blend only at the boundary — over-blending the whole lid turns the duo into one muddy green. Finish with a whisper of champagne shimmer at the inner corner to keep the look luminous.
Shimmer this intense demands a proper removal routine, or you will find teal sparkle on your pillowcase for a week. Soak a cotton pad in micellar water or an oil-based remover, press it over the closed lid for twenty seconds, then sweep gently outward — no scrubbing. For stray glitter, press fresh tape lightly over the skin and lift. Always follow with moisturizer, since removers can leave the delicate eye area dry.
Emerald Halo Eye
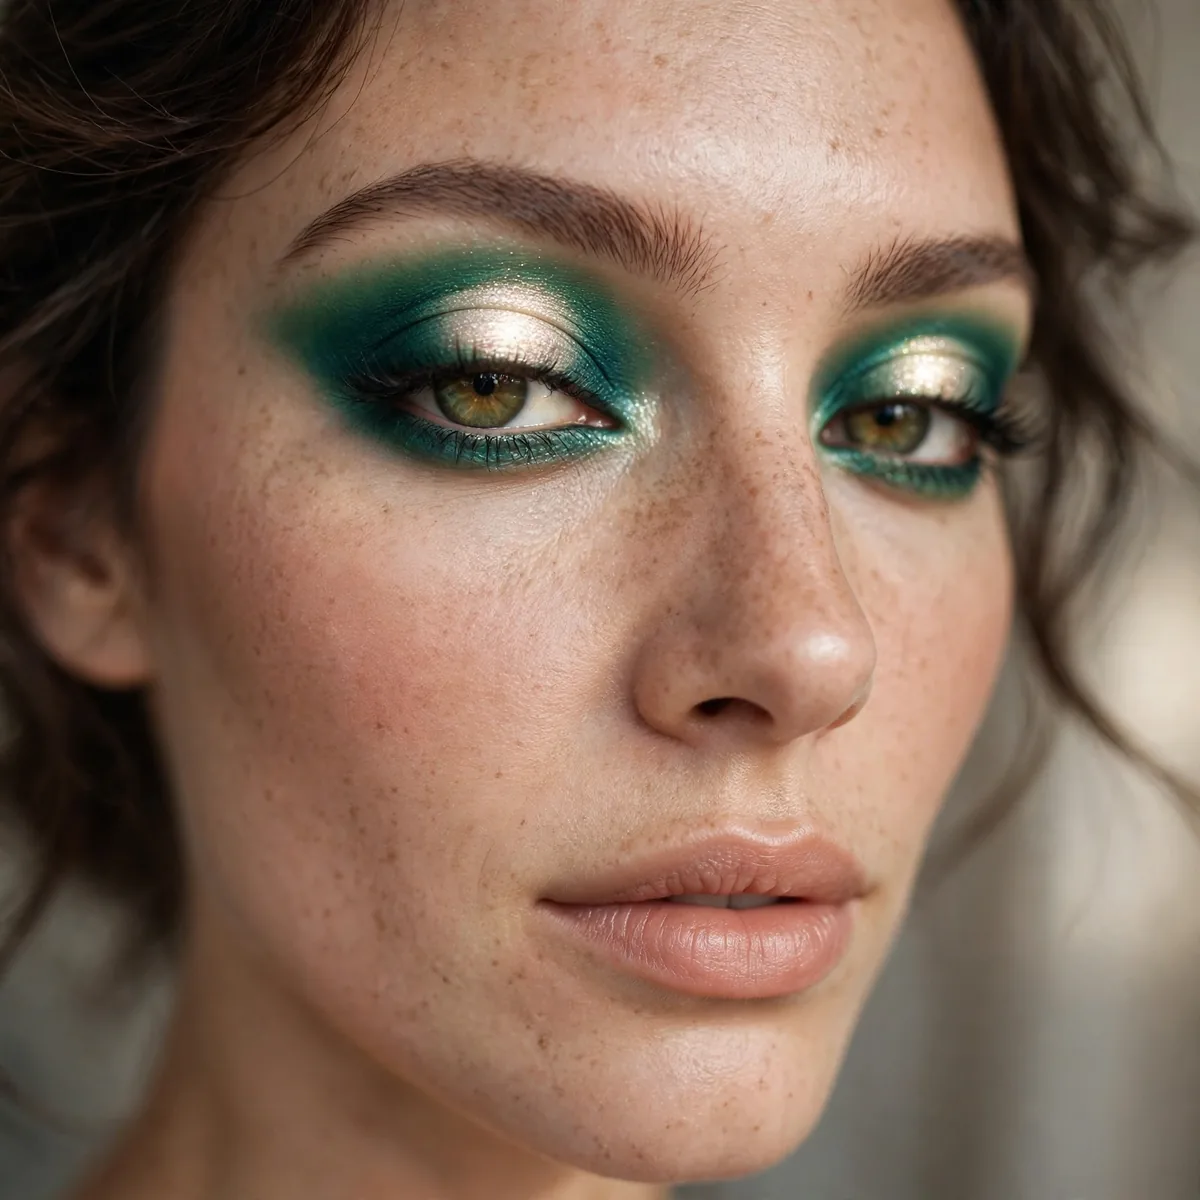
Dark emerald on the edges, bright shimmer in the center — the halo shape makes eyes look bigger and rounder.
Gold or champagne center works beautifully against the green.
Halo eyes are magic on small or deep-set eyes because the bright center pushes the lid forward visually. Almond and round eye shapes wear it most naturally. Hooded eyes can still join in — just place the light center slightly above the natural fold so it stays visible when the eye is open, and keep the dark edges tight to the lash line so the hood does not swallow the shape.
Reach for two brushes: a pencil brush to smoke the dark emerald into the inner and outer thirds, and a flat shader to pat the shimmer dead-center. The contrast between tools creates the contrast in the look. A light spritz of setting spray on the shader brush before applying the center shade turns shimmer into near-foil intensity. Clean up any fallout under the eyes before moving on to complexion.
Dark Emerald Outer V
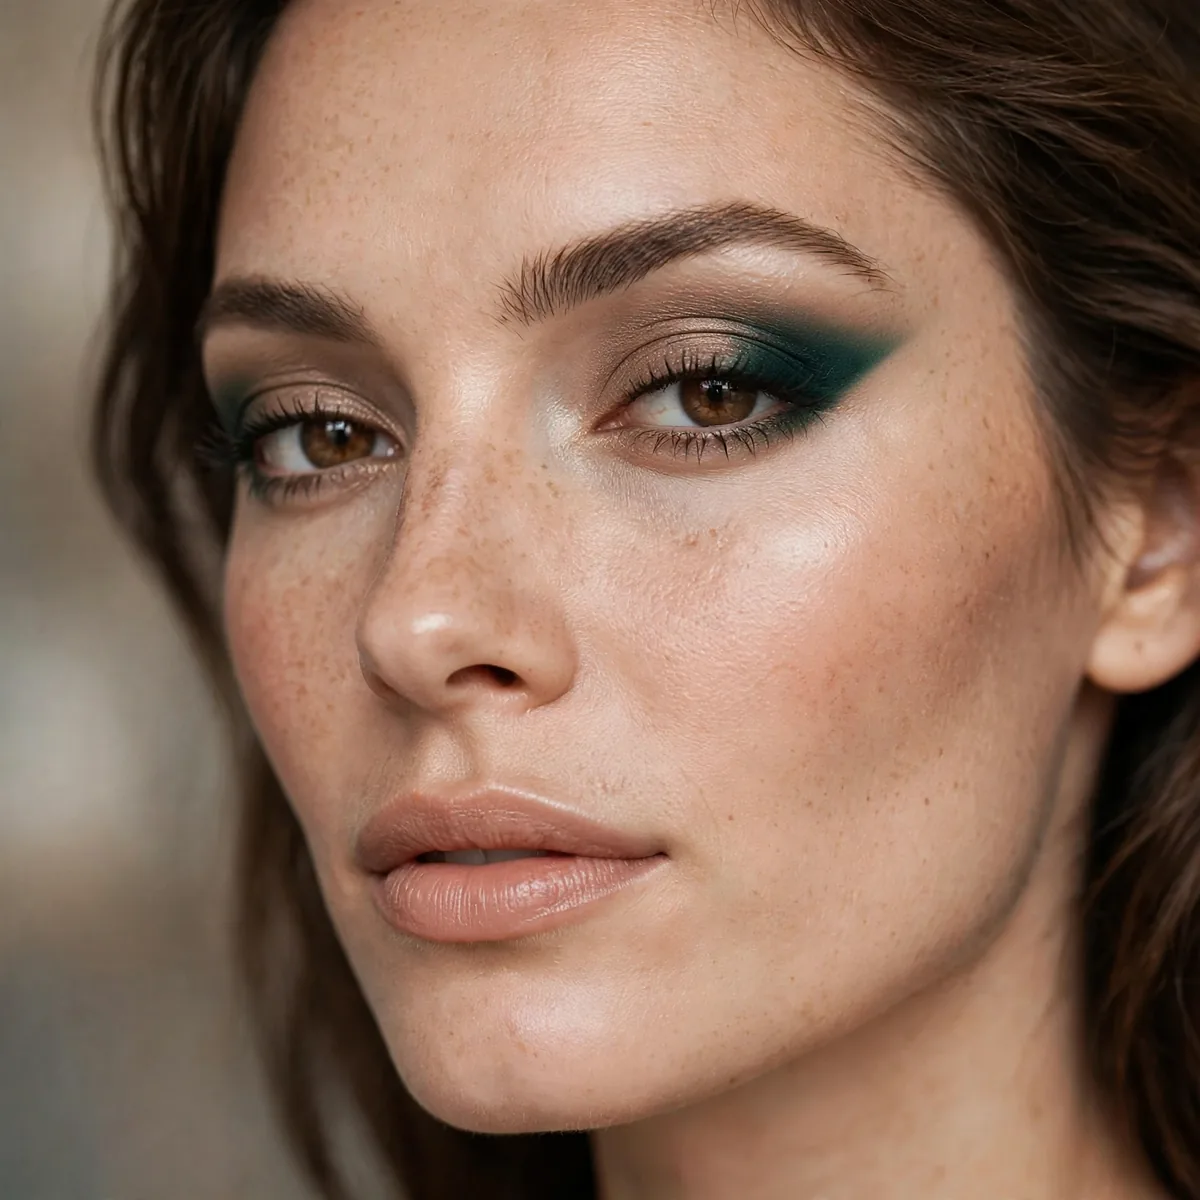
Keep the lid light and deepen just the outer V with emerald. Definition with a twist.
This is the "I want to try green but I’m scared" entry point — and it looks genuinely chic.
Draw a small sideways V at the outer corner — one stroke along the lash line, one sweeping up into the crease — then blend the interior of the V inward toward the center of the lid. A small, dense brush gives the most control; fluffy brushes blow the shape out too far. Build the depth in two passes rather than loading the brush heavily once, which risks harsh edges and fallout.
The outer corner is where shadow migrates first, thanks to blinking and natural oils collecting there. Lock this look in with primer, then press a touch of translucent powder over the V after blending — it acts like a seal. Carry a clean fluffy brush in your bag; a quick buff at the outer corner mid-evening revives the shape without adding more product or disturbing the rest of your makeup.
Emerald and Bronze Duo
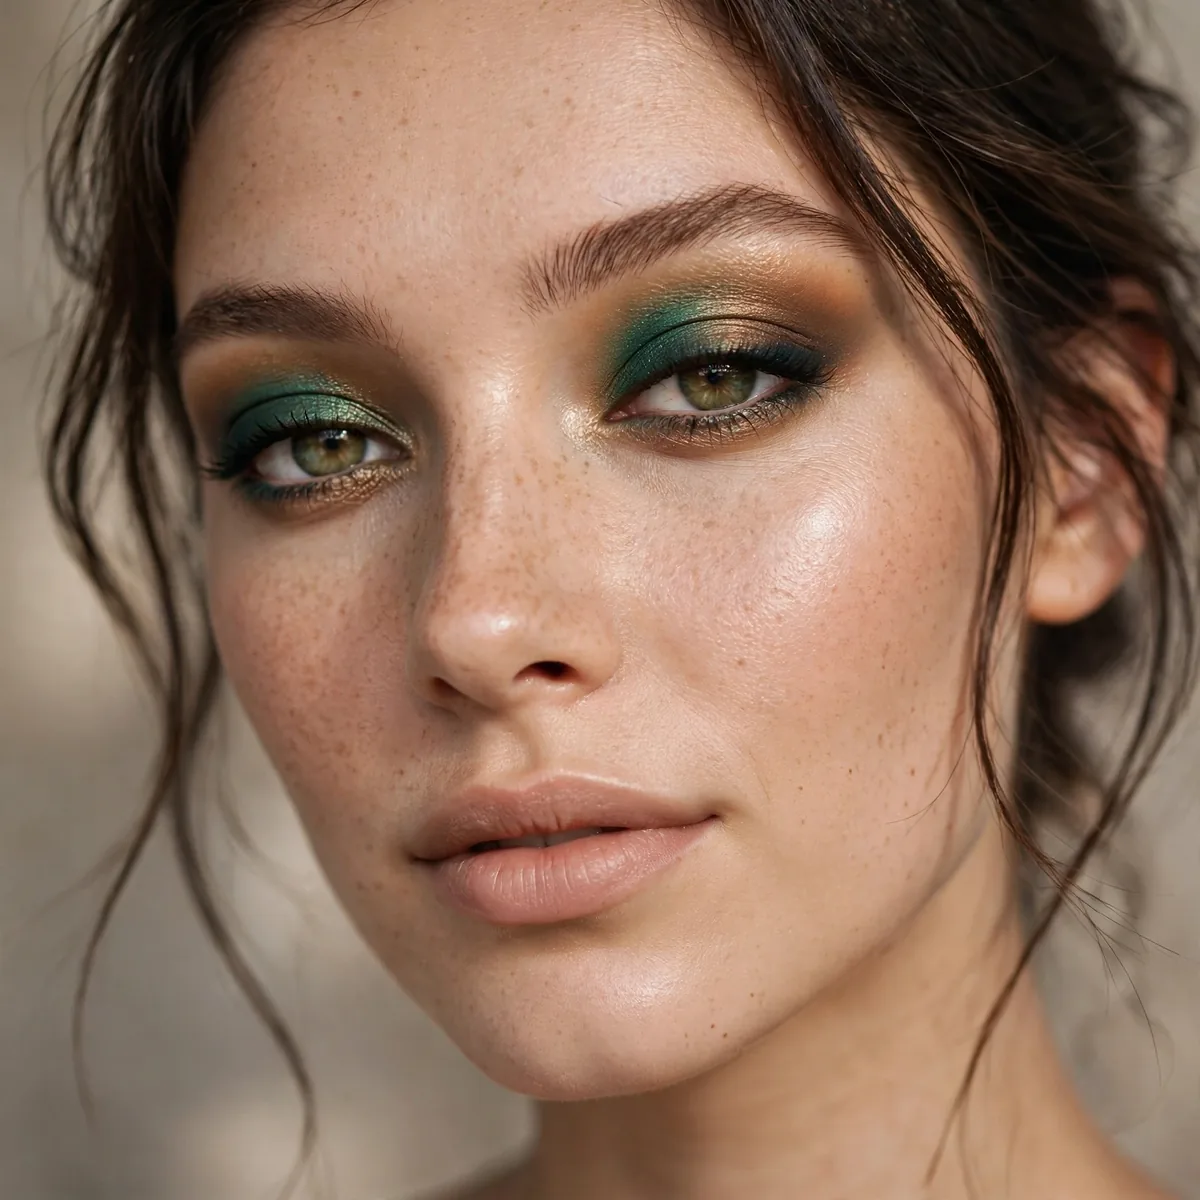
Emerald lid, bronze crease — warm meets cool in the most flattering way. Brown eyes were made for this.
The bronze warms up the green so it never looks harsh. Blend the transition well.
Beyond brown eyes, this pairing loves hazel eyes — the bronze pulls out their golden flecks while the emerald deepens the green ones. Warm and neutral undertones wear it most harmoniously. It is also a beautiful choice for fall weddings and evening events, where candlelight makes the bronze glow and the emerald smolder. The warm-cool tension photographs gorgeously, giving dimension that flat single-shade looks lack.
Treat the rest of the face as a warm supporting cast. A soft bronzer through the hollows of the cheeks echoes the crease shade, while a peachy-nude lip keeps the palette cohesive. Skip cool pink blush — it clashes with the bronze and makes the whole look feel disconnected. Finish with a champagne highlight on the high points of the face to tie the metallic elements together seamlessly.
Soft Sage-Emerald Wash
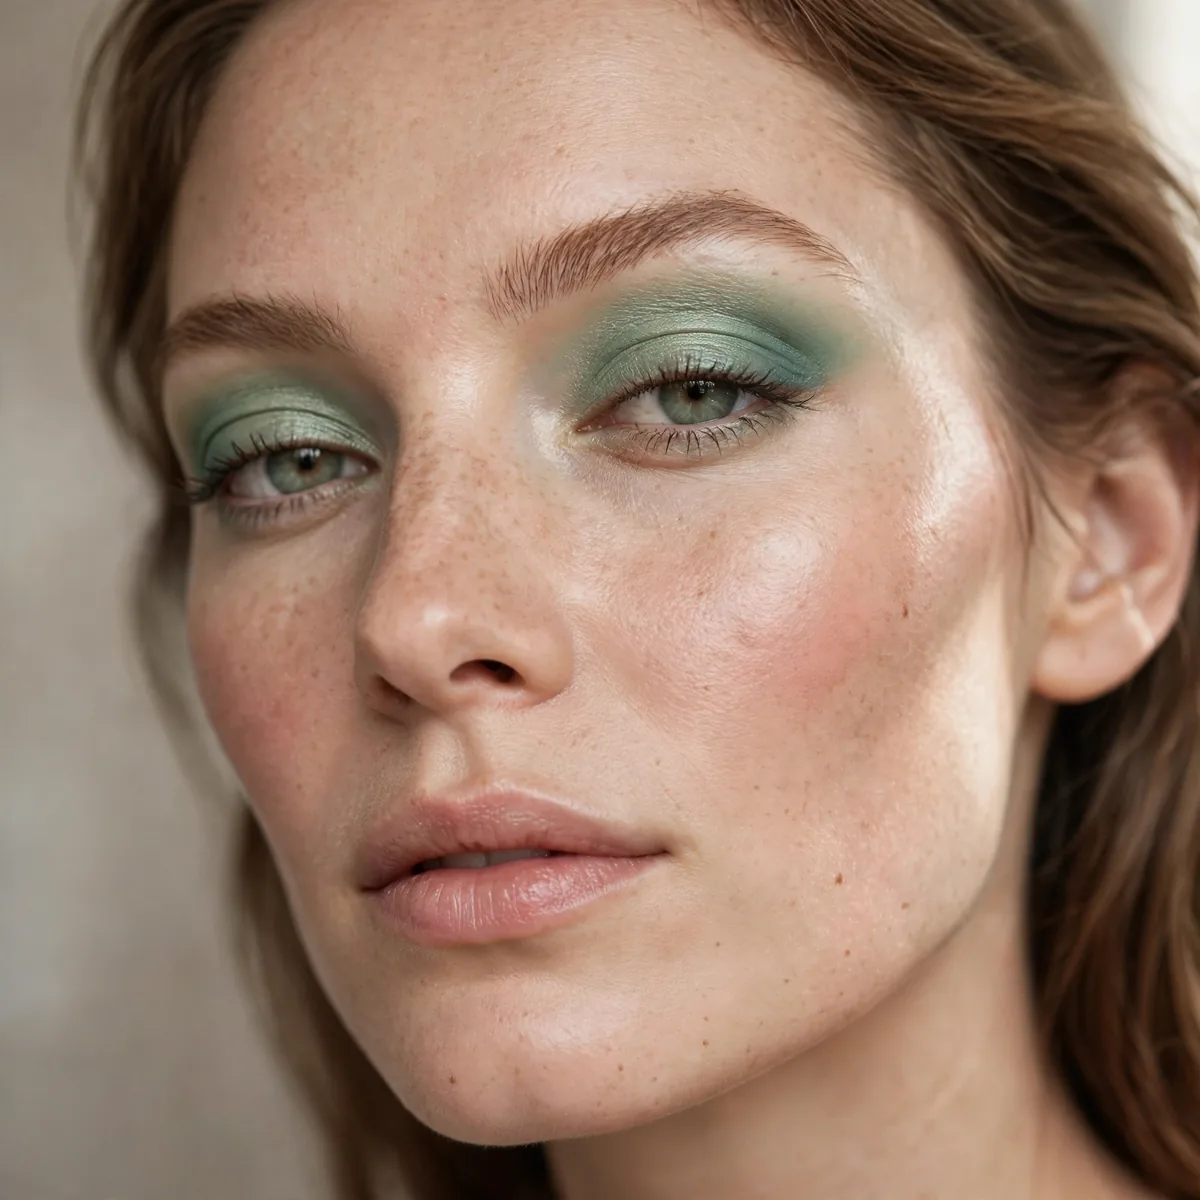
A muted sage-green wash for the green-curious. Soft, earthy, surprisingly neutral.
Best for daytime. It reads as an interesting neutral rather than a color statement.
A wash should look like a watercolor, not a stamp — use the fluffiest brush you own and barely touch the pan. Sweep the sage across the lid in one or two passes, letting your natural skin show through at the edges for that diffused effect. Cream formulas work beautifully here too; warm a dab between your fingers and press it on. Skip primer if you want extra sheerness, since grip deepens pigment.
Mature lids adore this look — the matte finish never settles into crepey texture the way shimmer does, and the softness is forgiving. Pair it with a tinted moisturizer, cream blush, and a balm-like lip for an effortless five-minute face. On younger skin it reads fresh and editorial. Either way, keep liner minimal or skip it entirely; a wash this delicate gets bullied by heavy black liner.
Metallic Emerald Foil
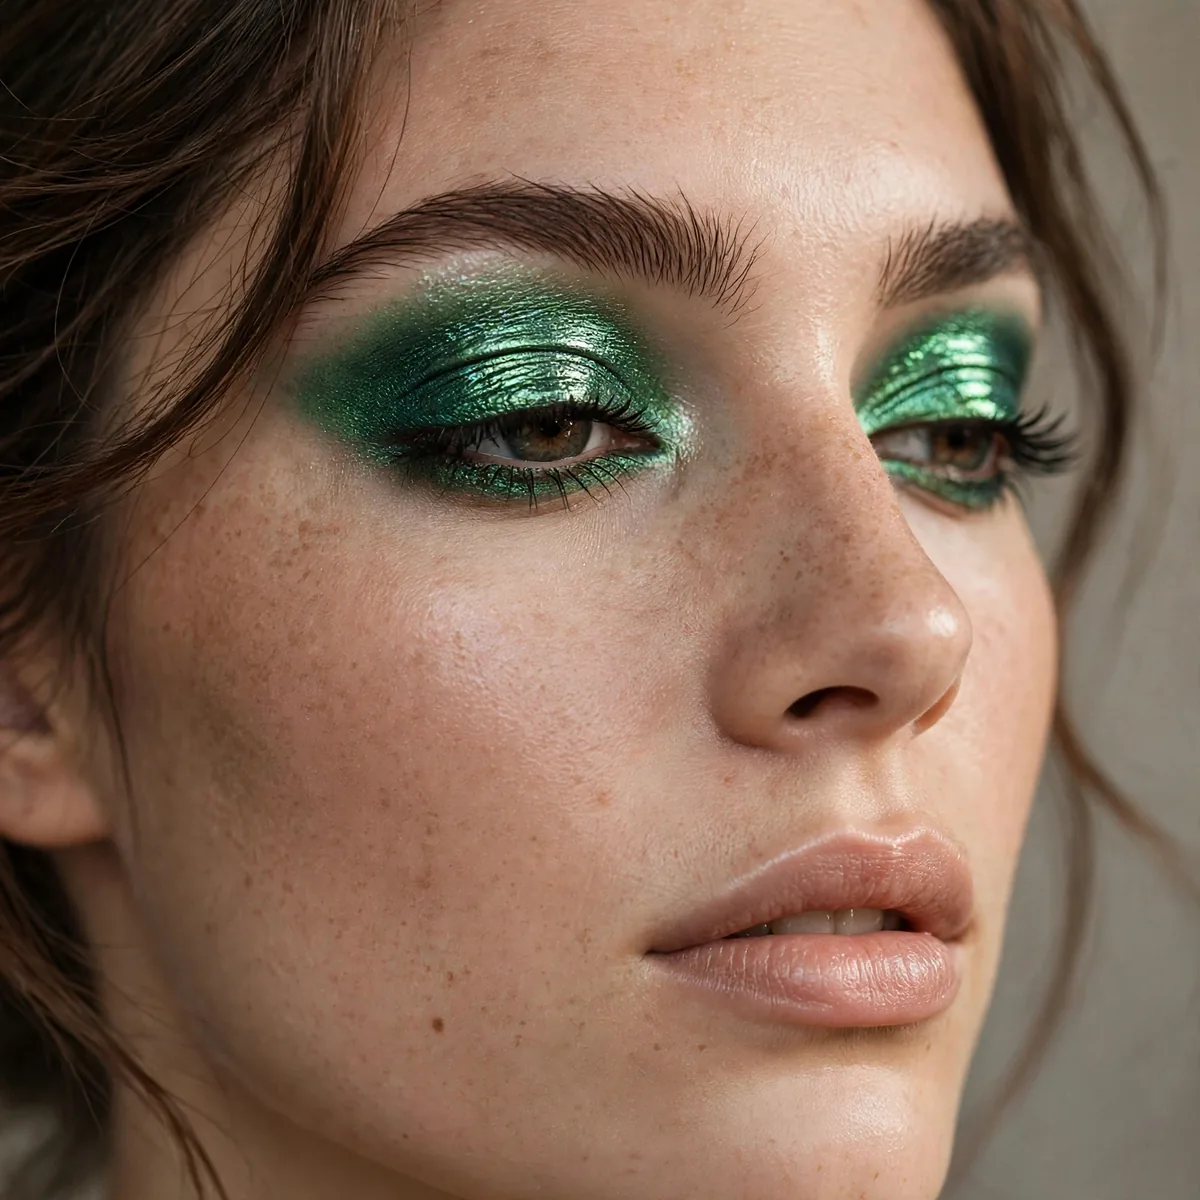
Foiled emerald with a mirror finish — the most high-impact green on this list.
Apply with a fingertip over glitter glue for foil that actually stays put all night.
The number one foil fail is working over a dry, powdery base — metallic pigment grabs unevenly and goes patchy. Lay down a creamy or tacky base first, then press the foil on in a patting motion; sweeping drags it into streaks. Work one eye at a time, because once glitter glue sets, it stops grabbing. If a spot looks sparse, add more glue to that spot only rather than layering dry shadow over dry shadow.
Foil this pigmented will not surrender to a makeup wipe alone — and scrubbing will irritate your lids. Saturate a cotton round with an oil-based or dual-phase remover, hold it over the closed eye for a full thirty seconds to dissolve the binders, then glide it away. Repeat rather than rub. A gentle micellar water pass afterward catches the last shimmer, and a dot of eye cream restores the skin barrier.
Emerald Lower Lash Pop
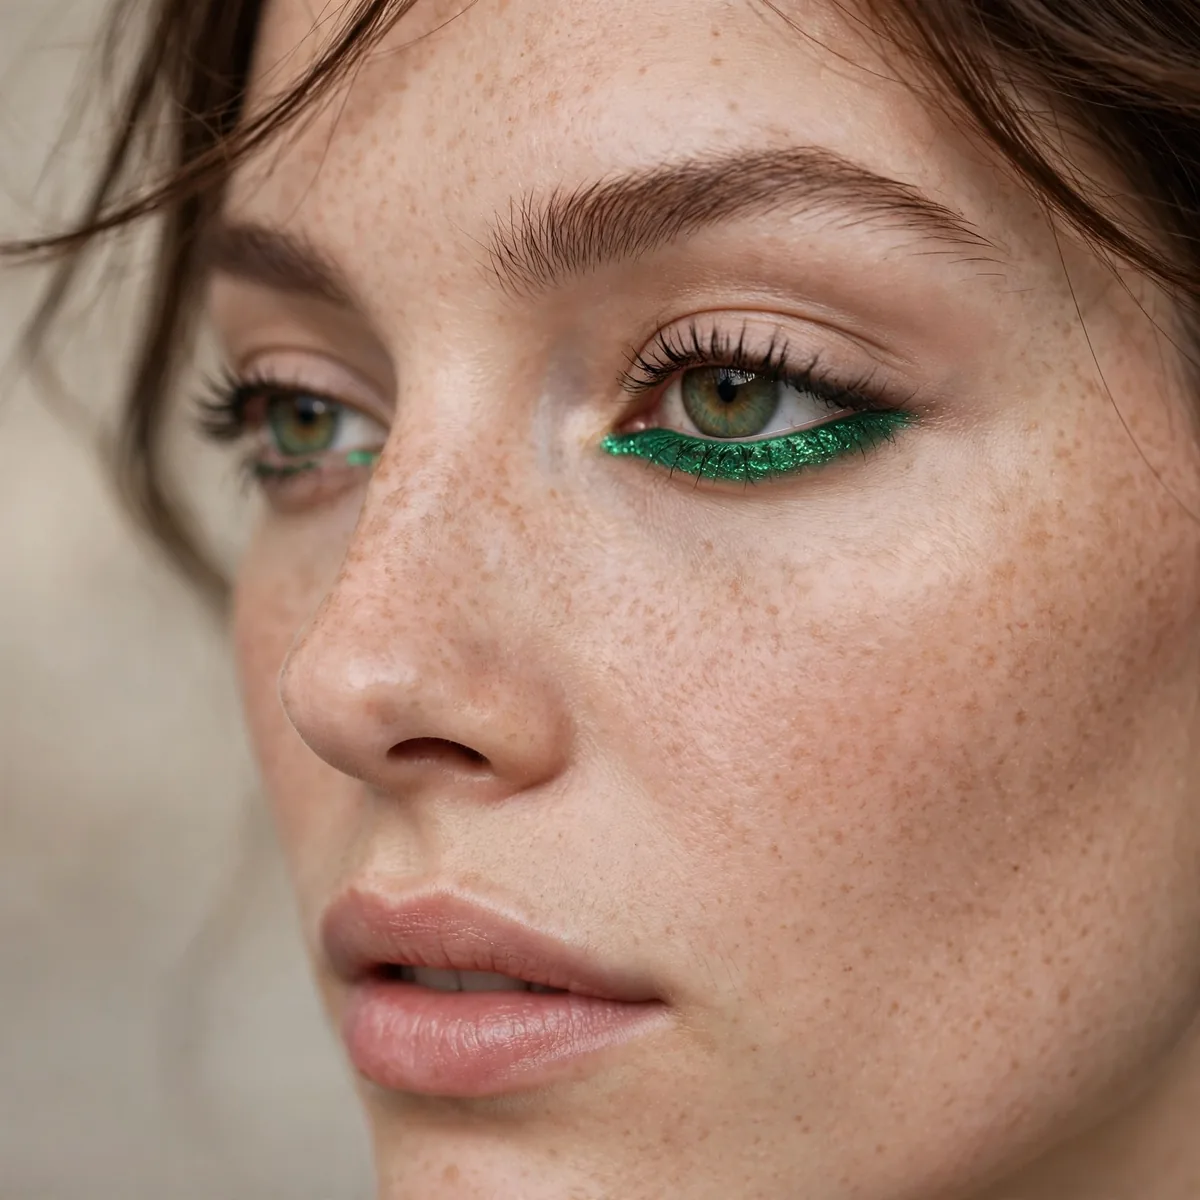
Neutral lids, emerald along the lower lashes. The cool-girl way to wear color.
Smudge well — a harsh line under the eye can read tired instead of chic.
Apply the emerald with a small pencil brush right against the lower lash line, then immediately smudge the lower edge with a clean fluffy brush so there is no hard line. Connect the color to the outer corner of the upper lid for a cohesive finish. Setting the cream or pencil base with a matching powder shadow on top locks the color in and stops it from migrating downward through the day.
Large, round eyes carry this look best, since lower-lash color emphasizes eye size. If your eyes turn downward at the outer corners, keep the emerald on the outer two-thirds only and angle it slightly upward — this lifts instead of accentuating the droop. Close-set eyes should concentrate the pop at the outer third to create width, while wide-set eyes can bring the color further inward toward the inner corner.
Smudged Emerald Kohl
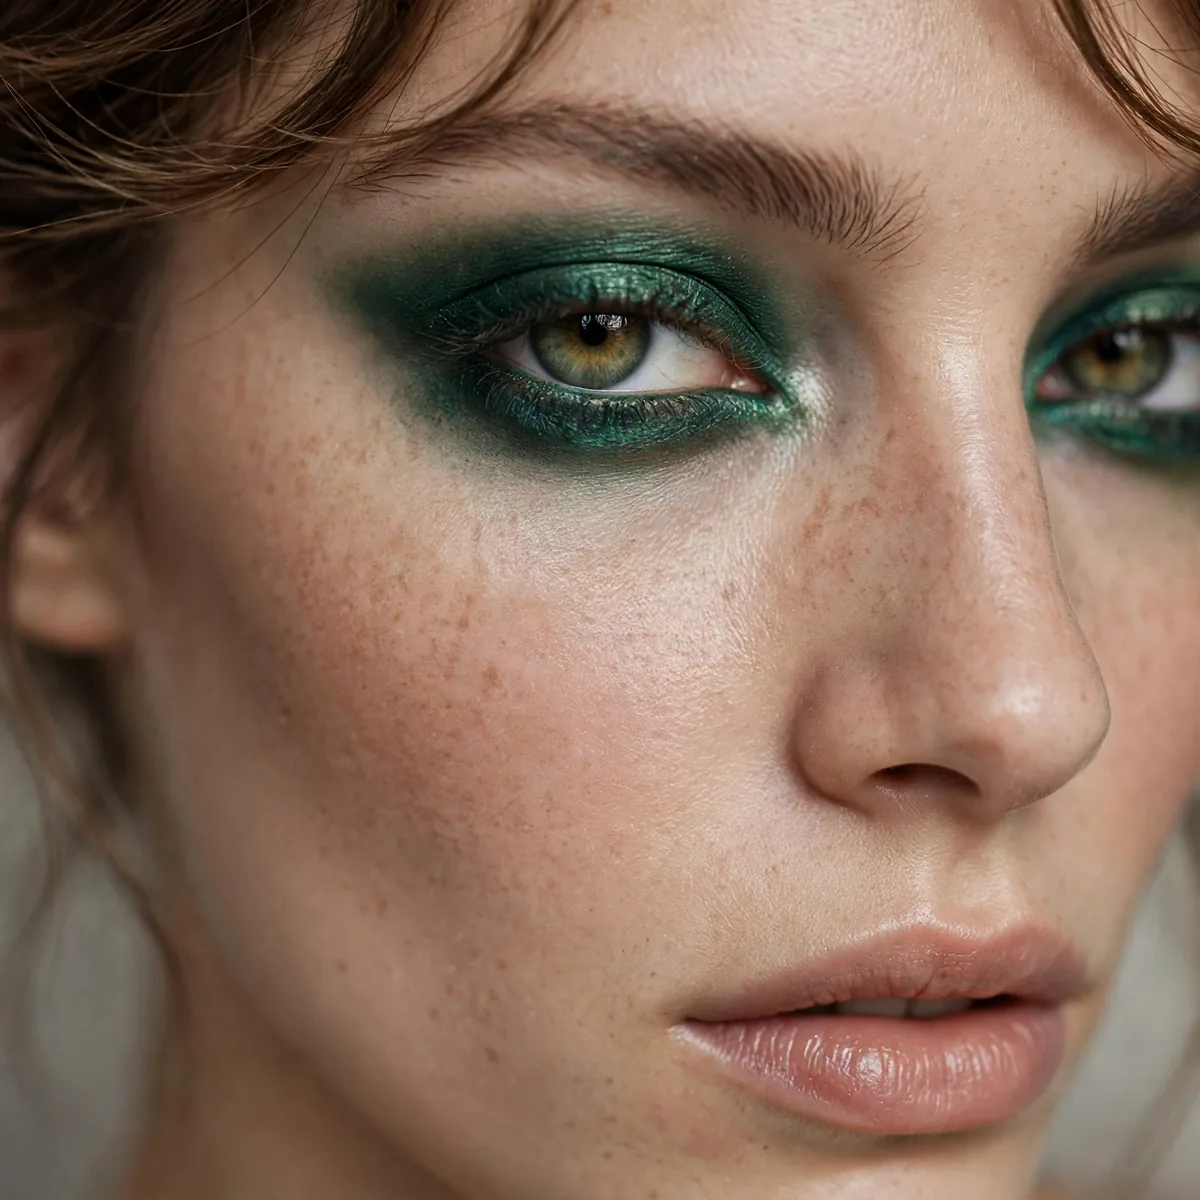
Emerald kohl pencil smudged along the upper lash line — lived-in, rock-and-roll, effortless.
The smudging is the whole point. Precision would ruin it.
A true kohl — soft, creamy, blendable — is essential; a waxy waterproof pencil will set before you can smudge it. Draw short, sketchy strokes tight to the upper lash line, then blur them immediately with a smudger brush or cotton swab while the formula is still mobile. Work in small sections across the lid rather than lining the whole eye first, so nothing sets before you get to it.
Oily lids will eat a smudged kohl by noon unless you set it. After smudging, press a matching emerald powder shadow over the line with a flat brush — it locks the cream in place and deepens the color simultaneously. Choose a waterproof or long-wear kohl formula if your eyes water easily. A final dusting of translucent powder just below the lower lash line catches any migration before it becomes panda eyes.
Emerald Cut Crease
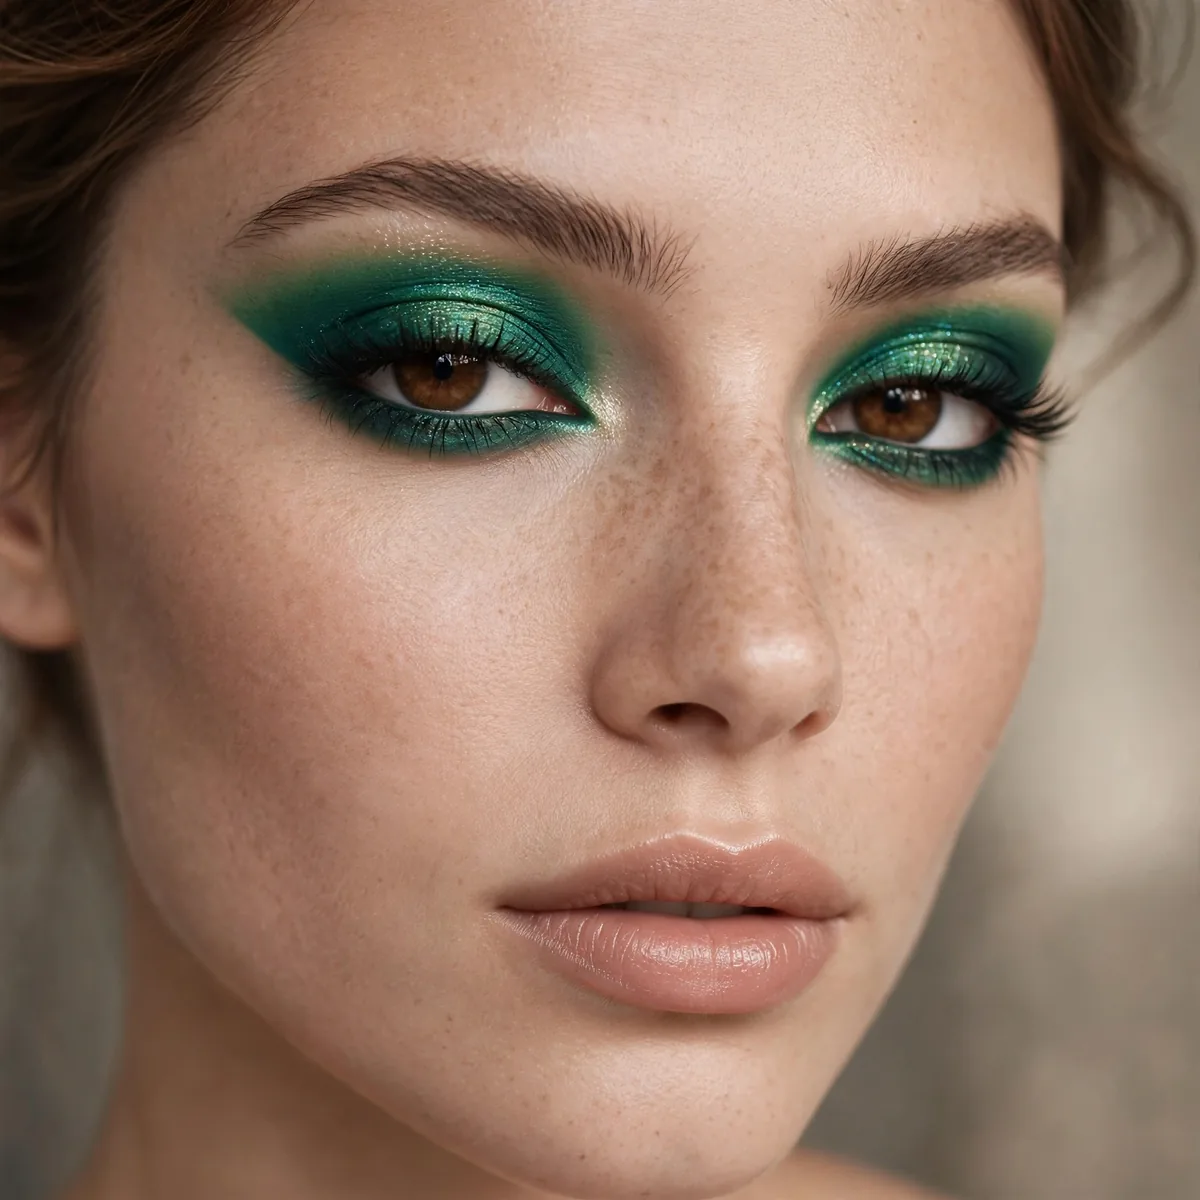
A sharp emerald cut crease is editorial and bold — not for the faint of heart, perfect for the bold of eye.
Carve with concealer first, then pack on the green. Clean lines make or break this look.
The most common error is carving the crease too high above the natural fold, which looks costume rather than editorial. Follow your actual crease line, extending it only slightly at the outer corner for lift. Match your carving concealer to your skin tone exactly — too-light concealer creates a harsh halo around the green. Set the concealer with translucent powder before packing on shadow so the emerald adheres evenly.
Reserve this look for moments that deserve drama — editorial shoots, fashion events, Halloween, or a bold night out. Because the eyes are so architectural, the rest of the face must stay quiet: skin-like foundation, softly defined brows, and a nude or muted lip. Competing blush or bold lips turn striking into busy. Photograph the look in good light first — cut creases reward precision and punish rushing.
Muted Olive-Emerald Blend
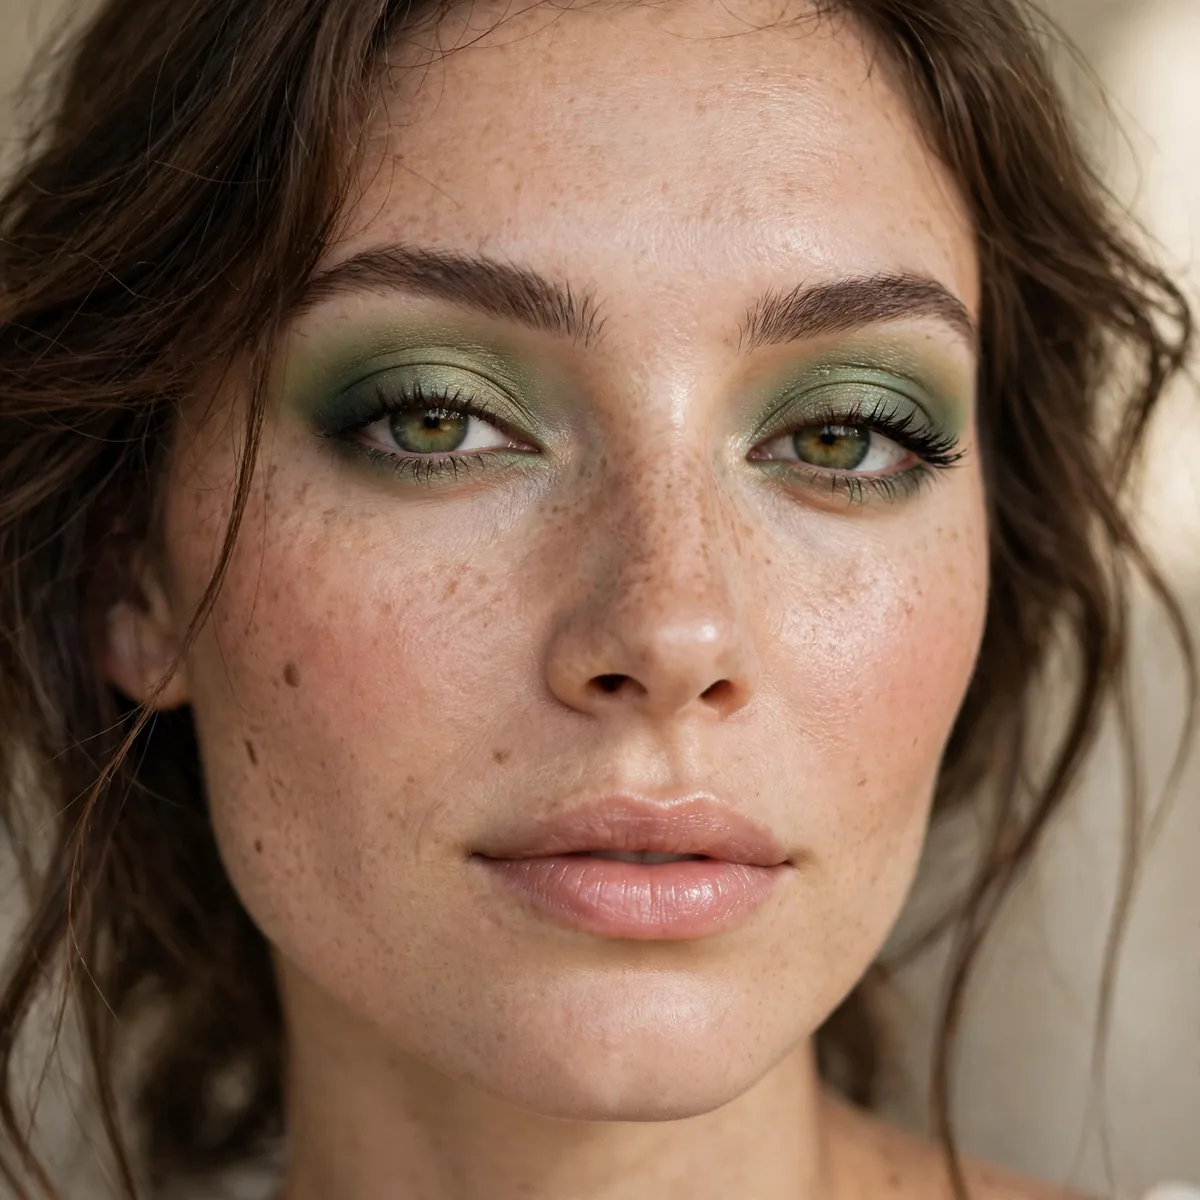
Olive and emerald blended together — earthy, sophisticated, very wearable.
Best for warm skin tones. The olive keeps it grounded and natural.
This is autumn in eyeshadow form — it pairs beautifully with camel coats, olive knits, and burgundy scarves. The earthy blend suits the golden light of fall and the warm palettes of the season's wardrobe. It transitions into winter effortlessly too; just deepen the outer corner and swap the lip to oxblood. Spring and summer can still work if you sheer the olive out and keep the emerald to the lash line.
Deep-set eyes benefit most here, since the olive tones recede naturally and the emerald adds dimension without heaviness. Keep shimmer away from the brow bone — on deep-set eyes it emphasizes the socket. Instead, place any luminosity on the center of the mobile lid only. Blend the olive well past the crease for a seamless gradient, and tightline in dark brown to define without the harshness of black.
Emerald Glitter Accent
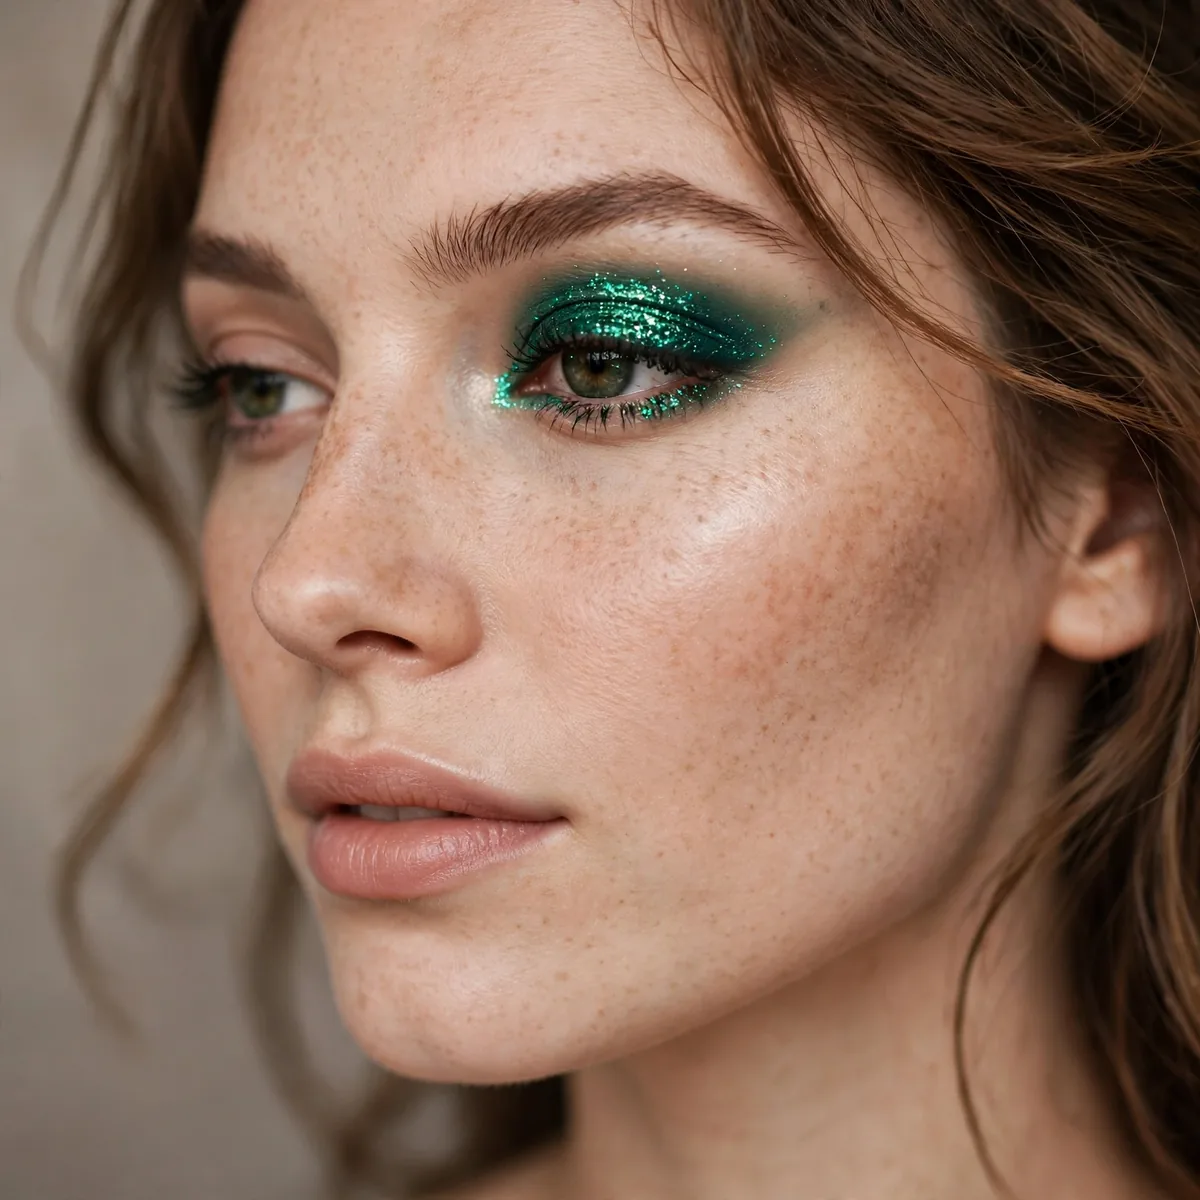
A touch of emerald glitter over a matte green base — party-ready in one step.
Keep glitter to the center of the lid. All-over glitter migrates; centered glitter stays.
Pat glitter on with a flat, damp brush — never sweep, which scatters sparkle across the whole face. A dedicated glitter primer grips far better than standard eye primer; press it onto the center of the lid, wait thirty seconds for it to get tacky, then press the glitter over it. Work over a tissue held under the eye to catch fallout, and do eyes before foundation when wearing glitter.
For daytime, swap the glitter for a finely-milled shimmer in the same emerald tone — you keep the light-catching effect without the party connotation. Come evening, press the glitter over the existing base; it adheres beautifully to the day's shadow and instantly elevates the look. Keep one small pot of the glitter in your bag for the transition. The rest of the face needs no changes at all.
Deep Emerald Tightline
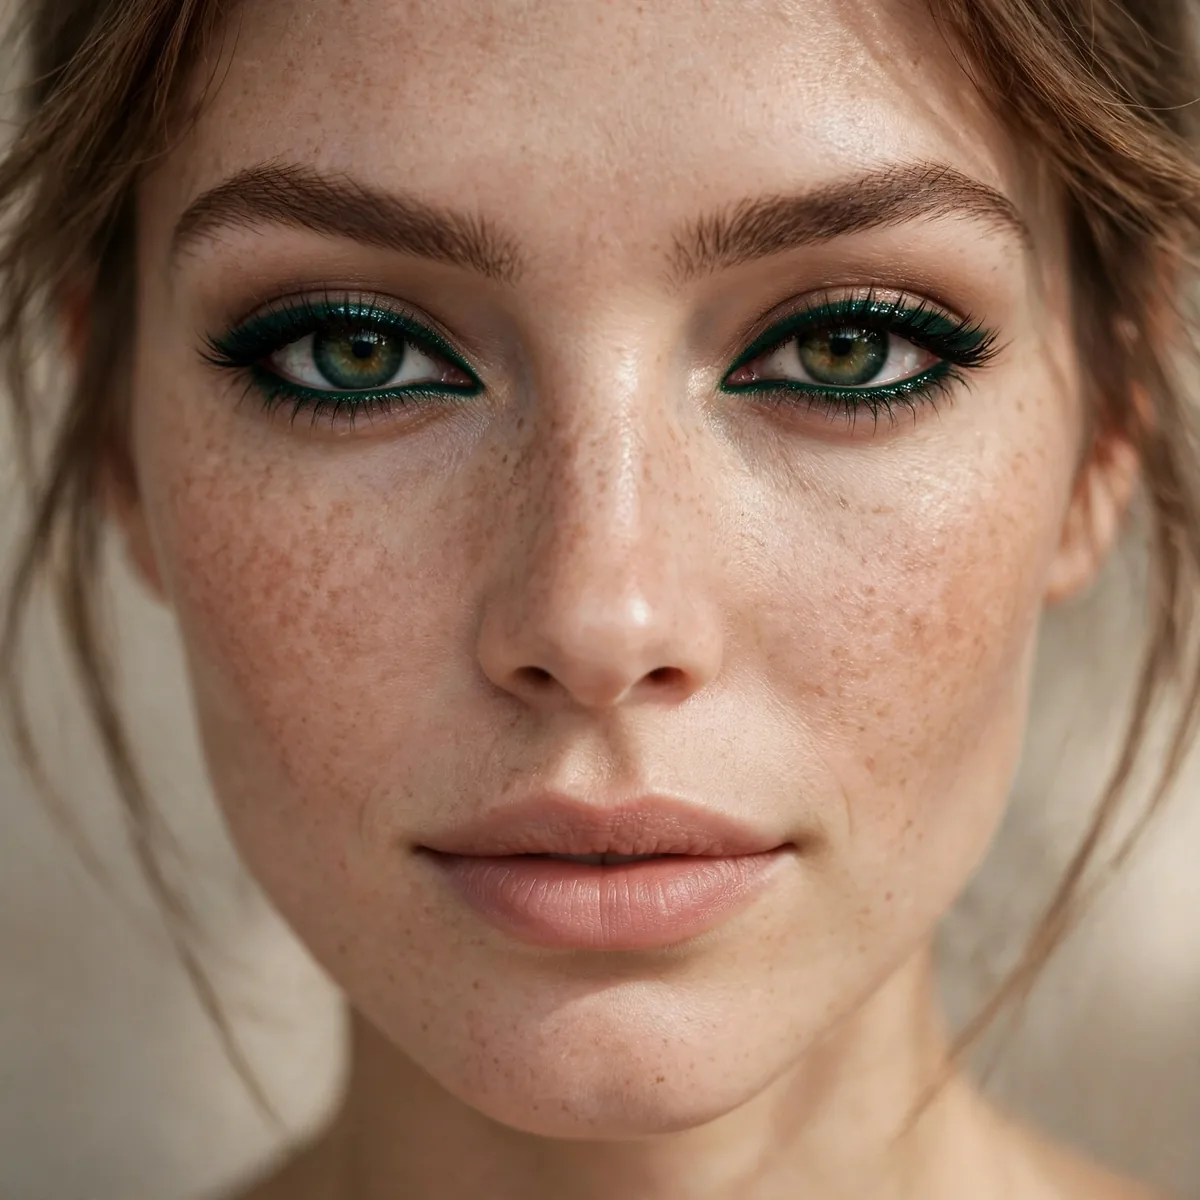
Tightline in deep emerald for lash definition with a hidden twist of color.
Only visible up close — your secret. Pairs beautifully with our tightlining tips for a full technique breakdown.
Tilt your chin down and look up into the mirror so the upper waterline is exposed, then wiggle a slim waterproof pencil between the lash roots — not on the waterline itself, which irritates. Short, gentle strokes deposit color without tugging. The goal is filling the gaps between lashes, not drawing a visible line. Finish by curling lashes and applying mascara, which melds with the tightline for seamless density.
Sparse or fine lashes gain the most from this trick — the emerald fills gaps and makes the lash band look naturally fuller. Contact lens wearers should choose a creamy, ophthalmologist-tested formula and avoid sharpened wood pencils, whose shavings can migrate. If your eyes water easily, set the tightline with a matching powder shadow pressed in with an angled brush; it dramatically extends wear through teary or humid days.
Emerald Monochrome Moment
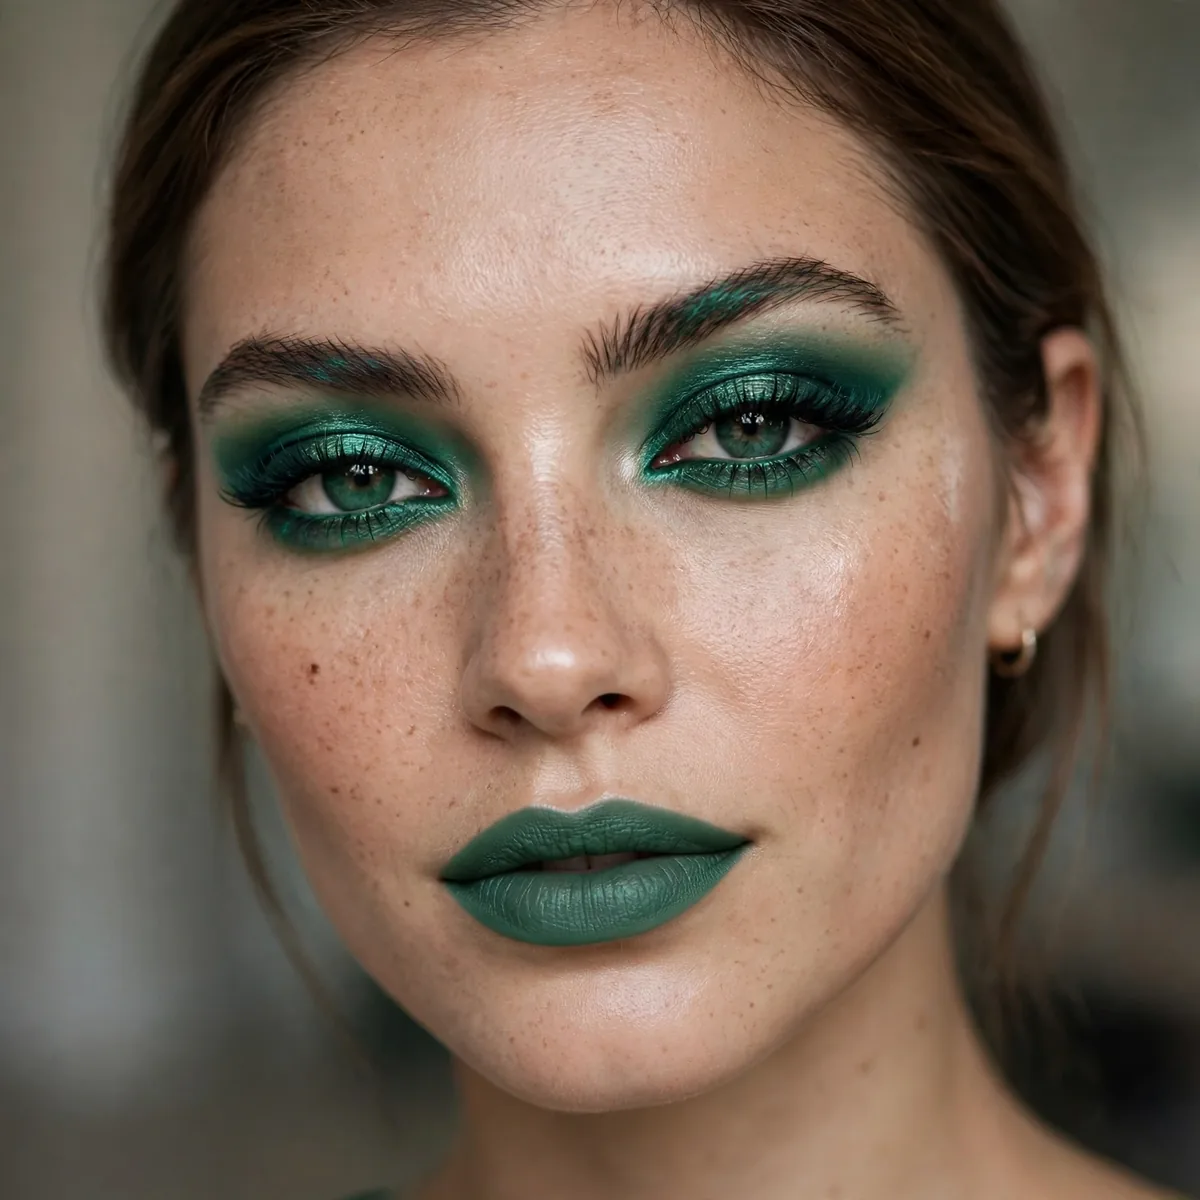
Emerald eyes with a hint of green-gold on cheeks — monochrome in jewel tones.
Keep the rest of the face minimal. The green is doing all the talking.
The trap is matching everything too literally — identical green on eyes, cheeks, and lips reads costume, not chic. Vary the tones: deep emerald on the eyes, a sheer green-gold shimmer on the cheeks, and keep lips in a neutral that leans warm. The monochrome should feel like a color story, not a uniform. Step back from the mirror and squint; if one area screams louder than the rest, sheer it back.
Wear this to fashion events, gallery openings, and creative-industry parties where bold beauty is the dress code. It photographs strikingly under event lighting, especially when the cheek shimmer catches the light. Keep hair simple — a sleek bun or smooth blowout — so the face remains the focal point. This is not an everyday office look; its power comes from being worn deliberately, on occasions that welcome a statement.
Icy Mint-Emerald Highlight
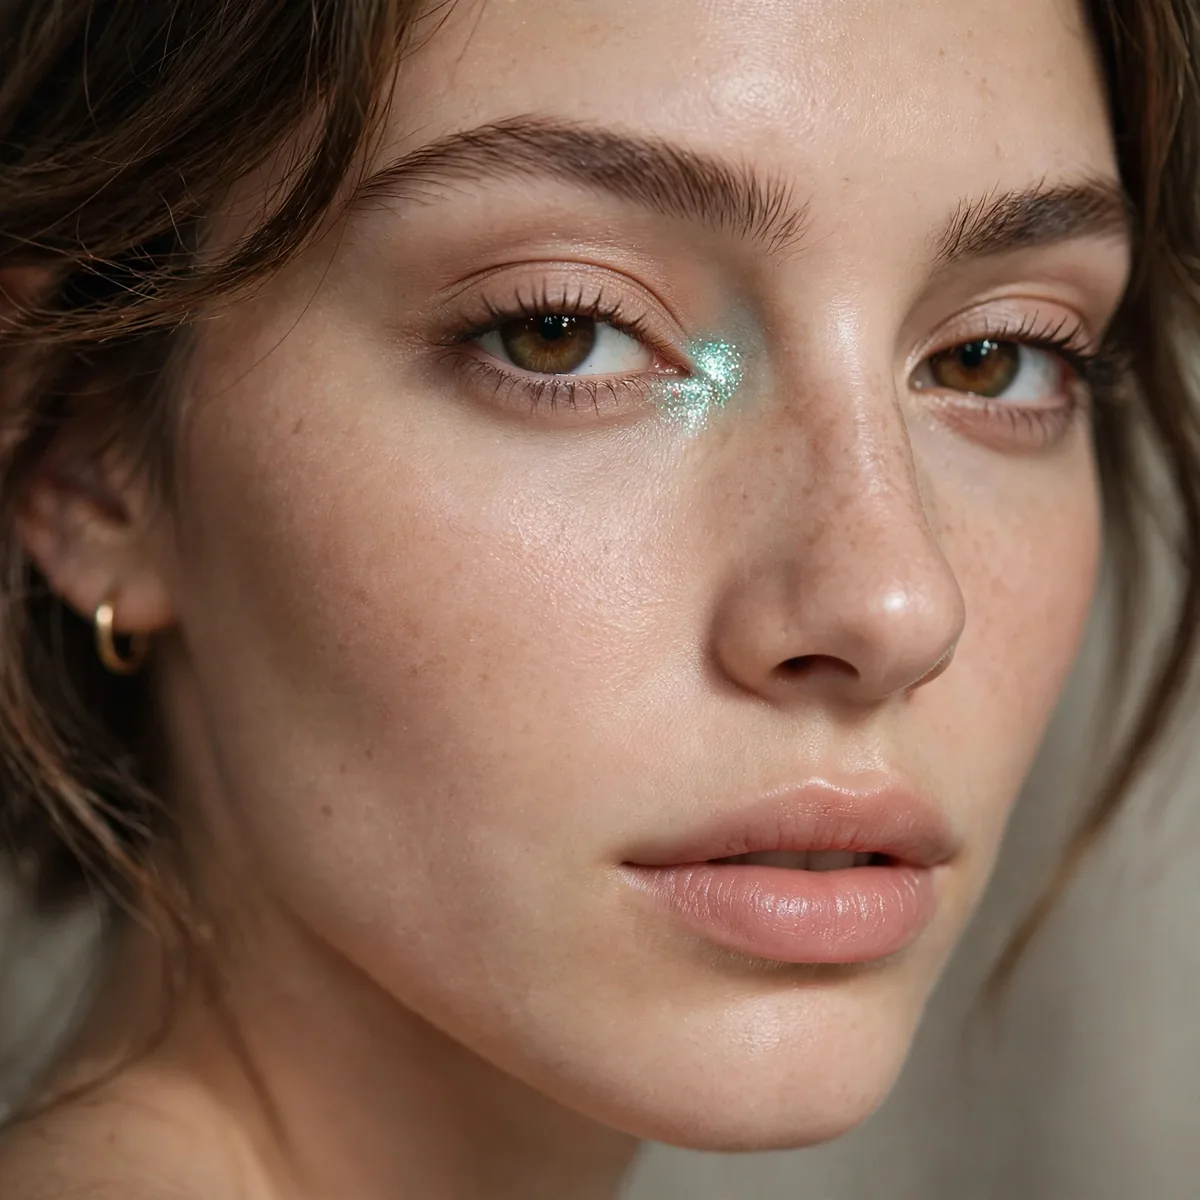
A pale mint-emerald at the inner corner over any green eye look. Brightens everything instantly.
The finishing touch that makes the whole look feel intentional and polished.
Use the very tip of a small detail brush and pick up barely any product — inner-corner highlight should be a whisper, not a flood. Tap off the excess, then press the mint into the inner corner and drag it just slightly along the first few millimeters of the lower lash line. Over-application here looks frosty and dated. The highlight should read as light, not as obvious shimmer.
This tiny step is the fastest cure for tired eyes in makeup — the pale mint reflects light into the inner corner and visually wakes up the whole face. It works over any green eye look, but it also rescues neutral smokey eyes and bare lids on no-makeup days. Pair it with curled lashes and a touch of mascara to amplify the wide-awake effect. On very fair skin, choose the palest mint so the contrast stays soft.
Emerald rewards the bold — save your favorites to Pinterest. For more jewel tones, see our burgundy eyeshadow looks, or go softer with navy eyeshadow looks.




