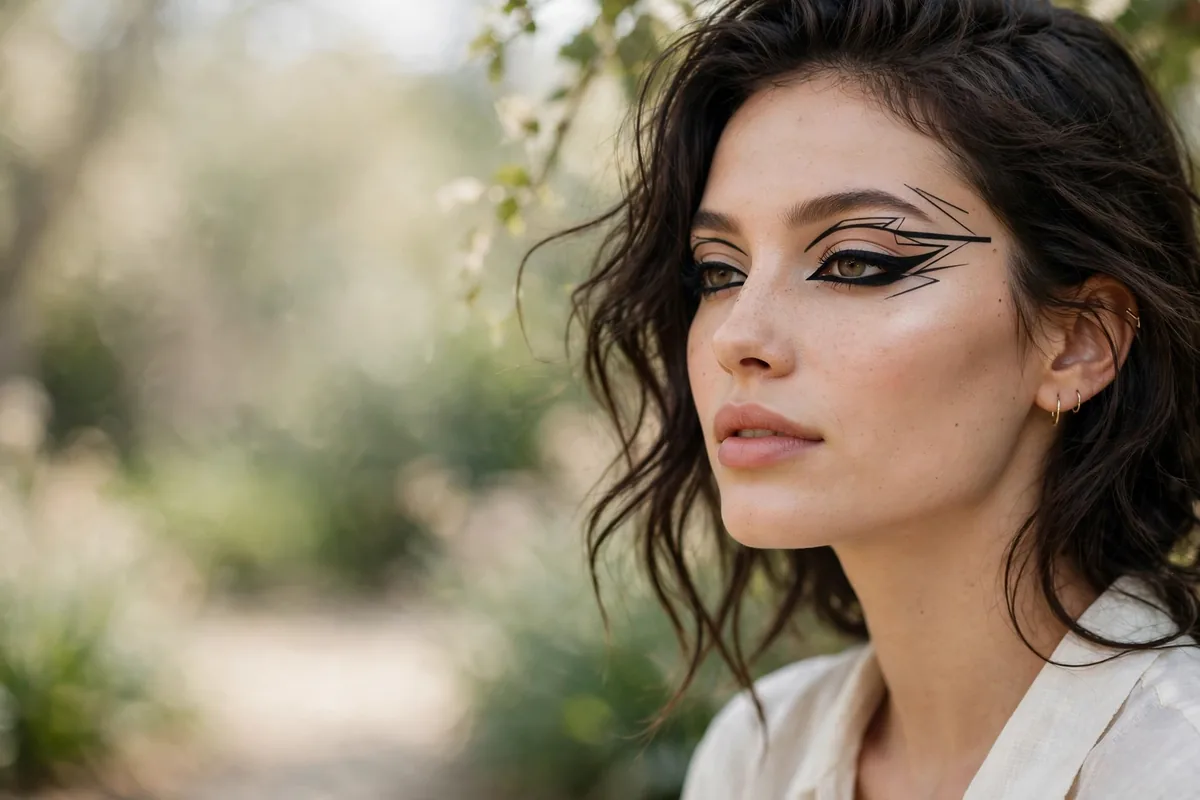
Graphic liner is makeup’s rebellious art form — and it’s more wearable than you think.
The key to wearable graphic liner: keep the rest of the face minimal. One artistic eye moment plus bare skin and nude lips reads as intentional, not costume.
Start with shapes that follow your eye’s natural lines, then push outward. Graphic doesn’t have to mean random.
Here are 18 ideas from subtle to striking. Let’s get into it.
Negative Space Wing
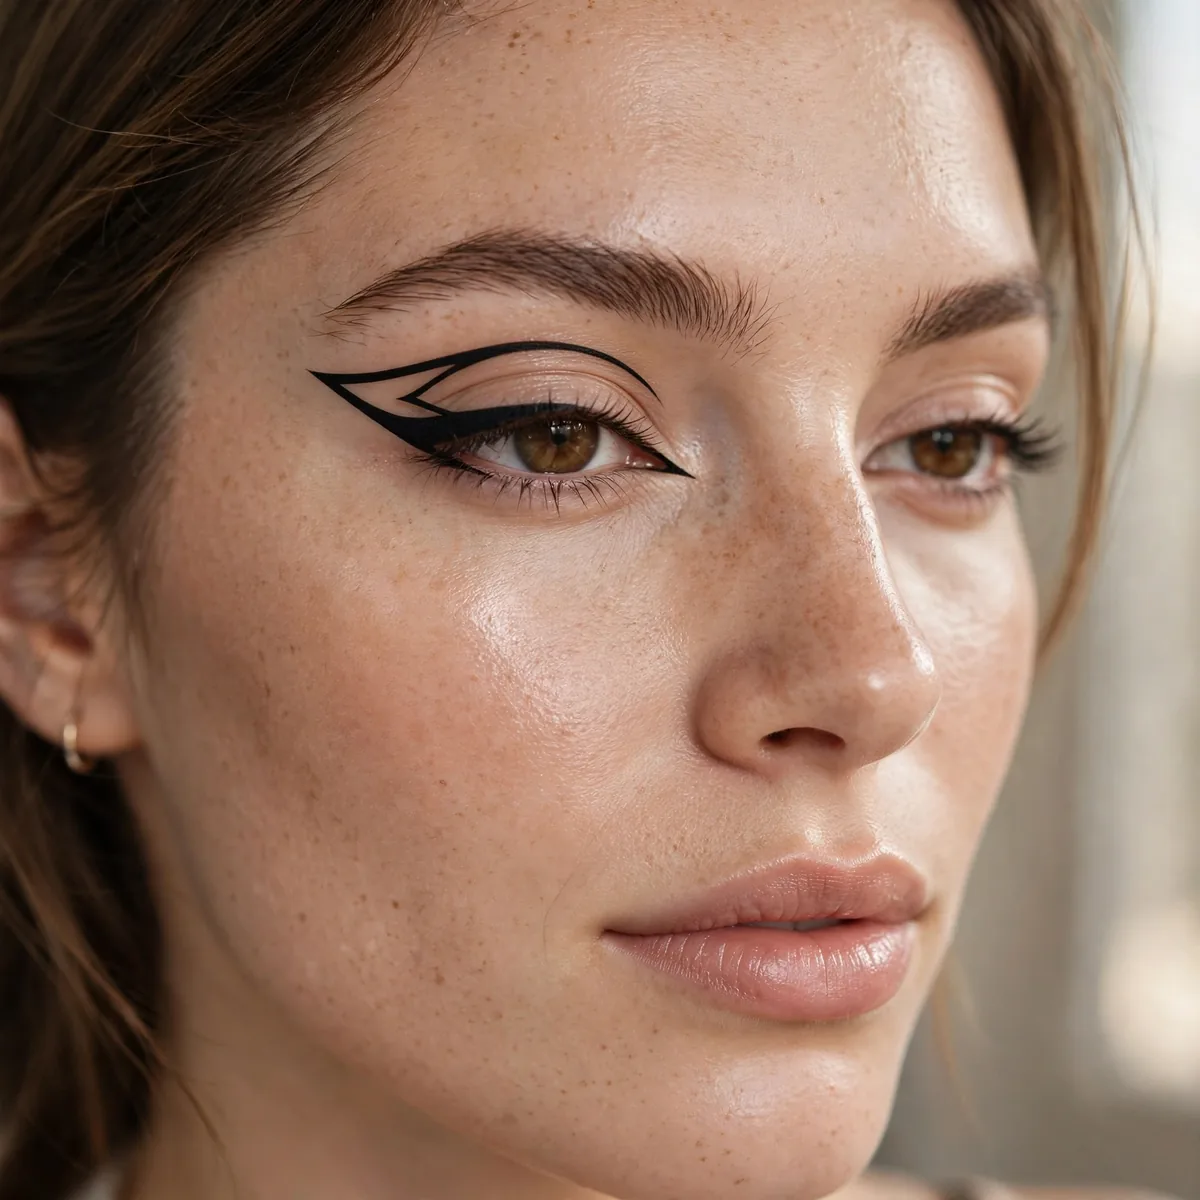
A wing outline with bare skin inside — the graphic look that started it all.
Draw the outline, leave the center empty. The negative space is the design.
The bare skin inside the outline keeps the look surprisingly flattering across eye shapes, since the negative space prevents the heavy effect a filled wing can create on hooded lids. Use a waterproof liquid liner so the fine outline survives blinking and humidity without transferring onto the lid. If one side wobbles, resist the urge to thicken both — that closes the space. Instead, steady your elbow on a table and redraw with eyes relaxed.
Pair it with a satin-finish shadow in a tone close to your skin, keeping shimmer away so the outline stays the hero. Finish with a single coat of lengthening mascara — heavy lashes compete with the graphic line. At day's end, an oil-based cleanser melts the waterproof formula without tugging the delicate outer-corner skin. This look ages gracefully into evening too, since the minimalist structure reads intentional under any lighting.
Double Floating Crease
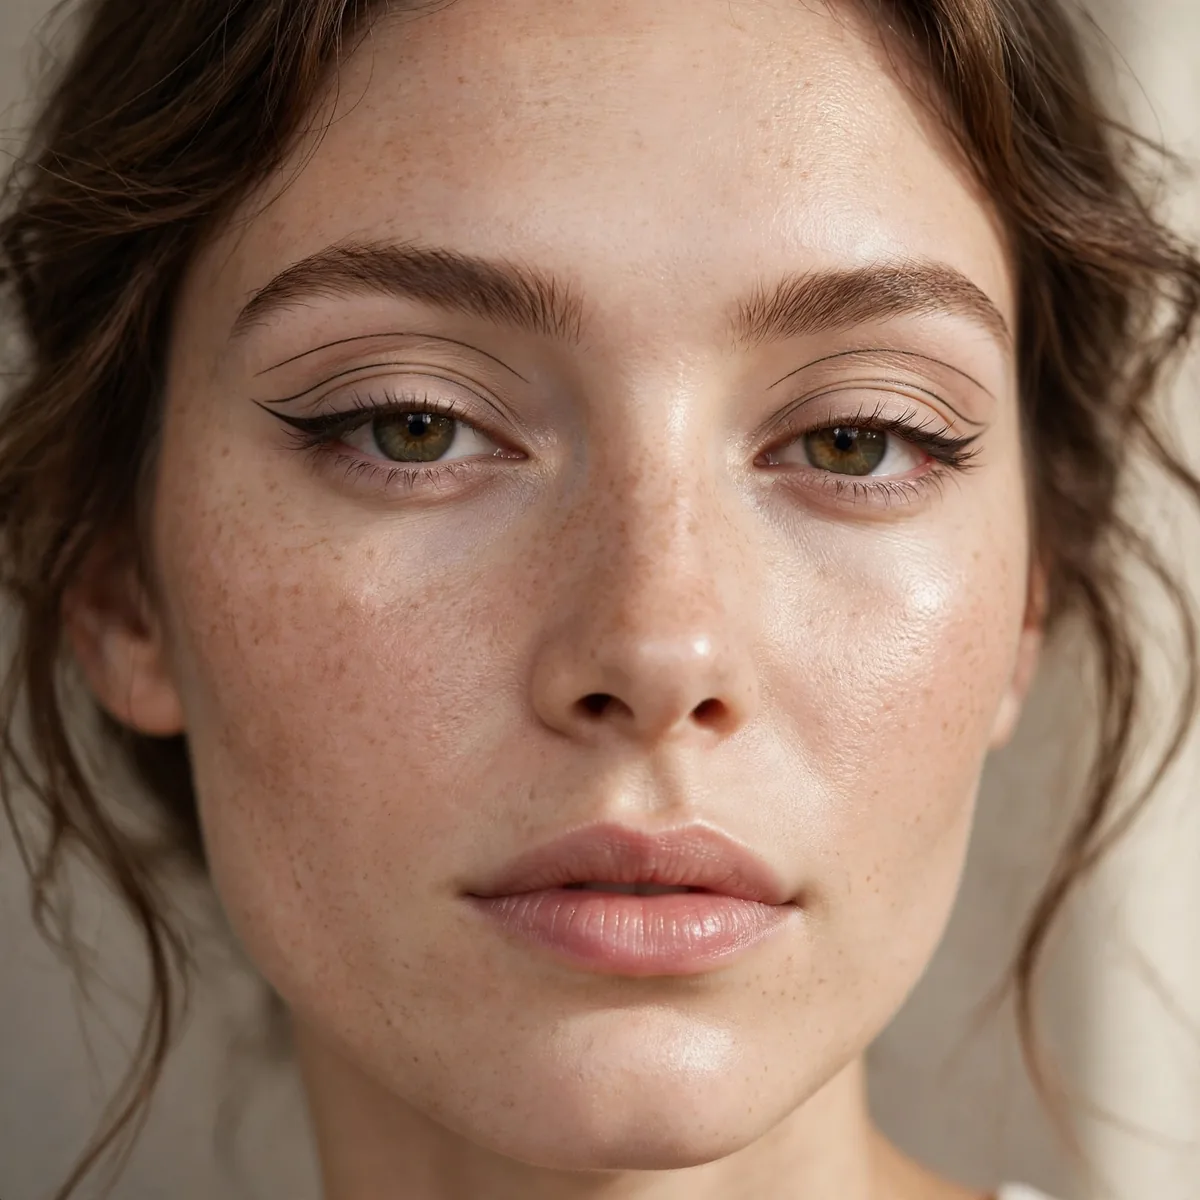
A line drawn above the crease, floating separate from the lash line — architectural and cool.
Draw with eyes open, looking straight ahead. The line must sit where it’s visible.
Map the line while your eyes are open and your face is relaxed — checking in a mirror held at chin level shows where the crease actually sits, not where it hides. A gel liner on a thin angled brush gives more control than a pen for this floating arc. Smudging the line slightly with a clean spoolie can soften the architecture into something wearable for daytime.
This design flatters almond and deep-set eyes especially well, since the visible arc adds dimension where lids recede. Keep the lid itself nearly bare — a wash of matte shadow in your skin tone is enough — so the floating line reads cleanly. For longevity, press translucent setting powder over the area first; oily lids will swallow the line within hours without that barrier. Common mistake: drawing it too high, which disconnects it from the eye entirely.
Graphic Lower Lash Line
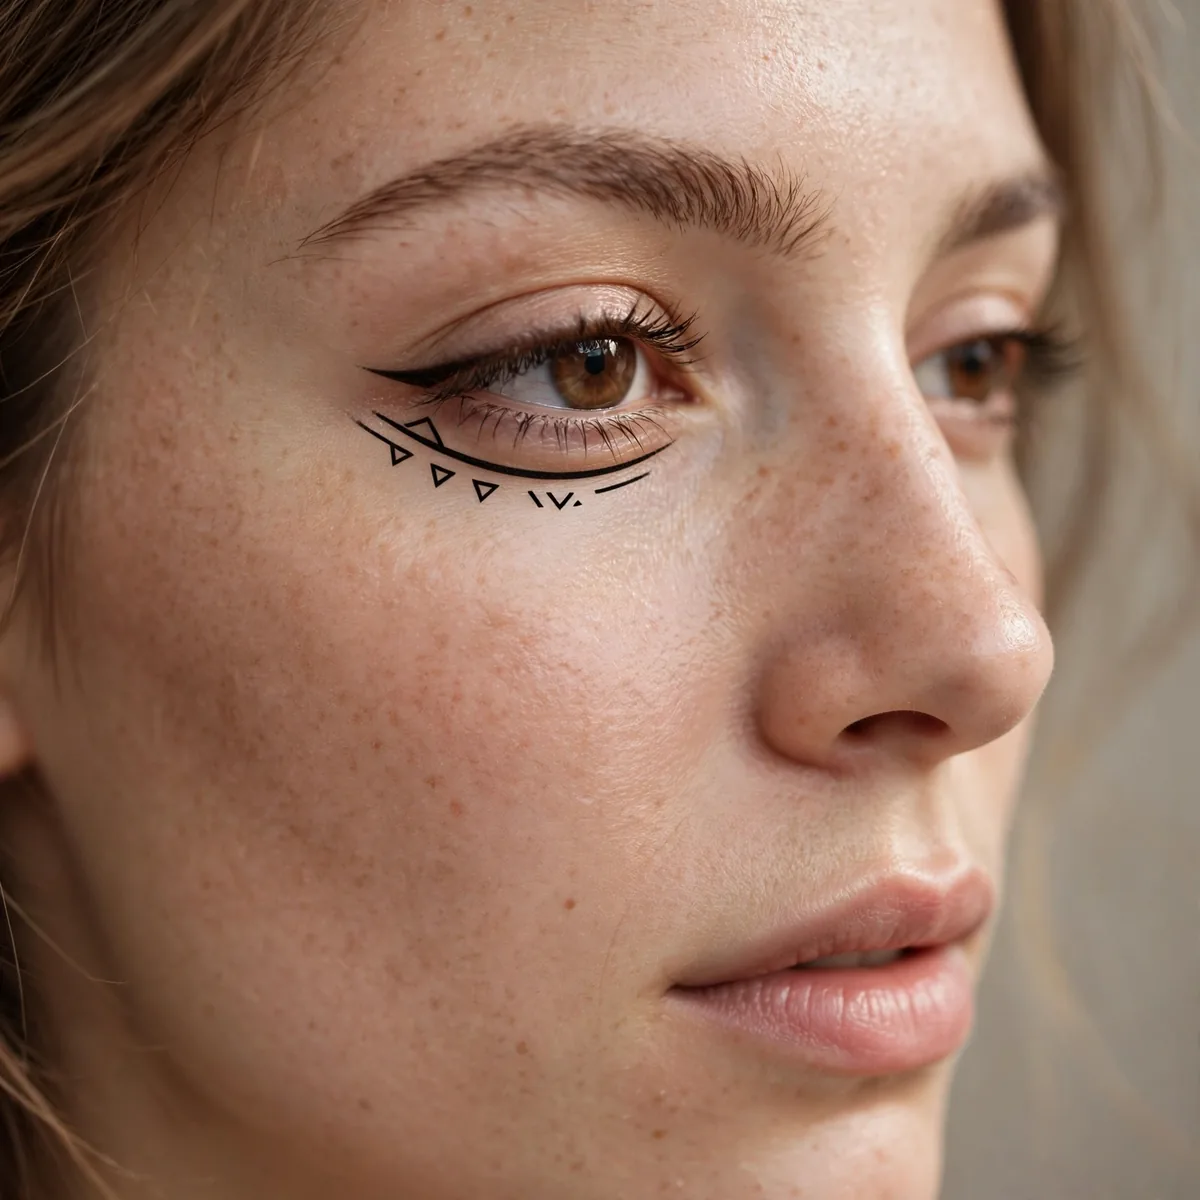
Bold graphic work along the lower lashes — unexpected and striking.
The lower lash line is underused territory. Graphic work here gets noticed.
Build the design with a cream liner on a small detail brush rather than a pen — the lower lid demands short, controlled strokes because the skin moves with every blink. Waterproof formulas are non-negotiable here, since tears and lower-lid moisture dissolve standard liner within an hour. Leave a whisper of bare skin between the graphic and your actual lash line; that gap keeps the art separate from smudged-mascara territory.
Skip heavy lower mascara when wearing this — darkened lower lashes blur the boundary of the design. Instead, tightline the upper lashes and add length only on top, letting the lower art breathe. If you wear this to an outdoor event, set the design with a matching shadow pressed over it with a flat brush; the powder layer locks the cream in against heat and humidity. Removal is simple: micellar water on a cotton bud, tracing the design gently away.
Outlined Wing
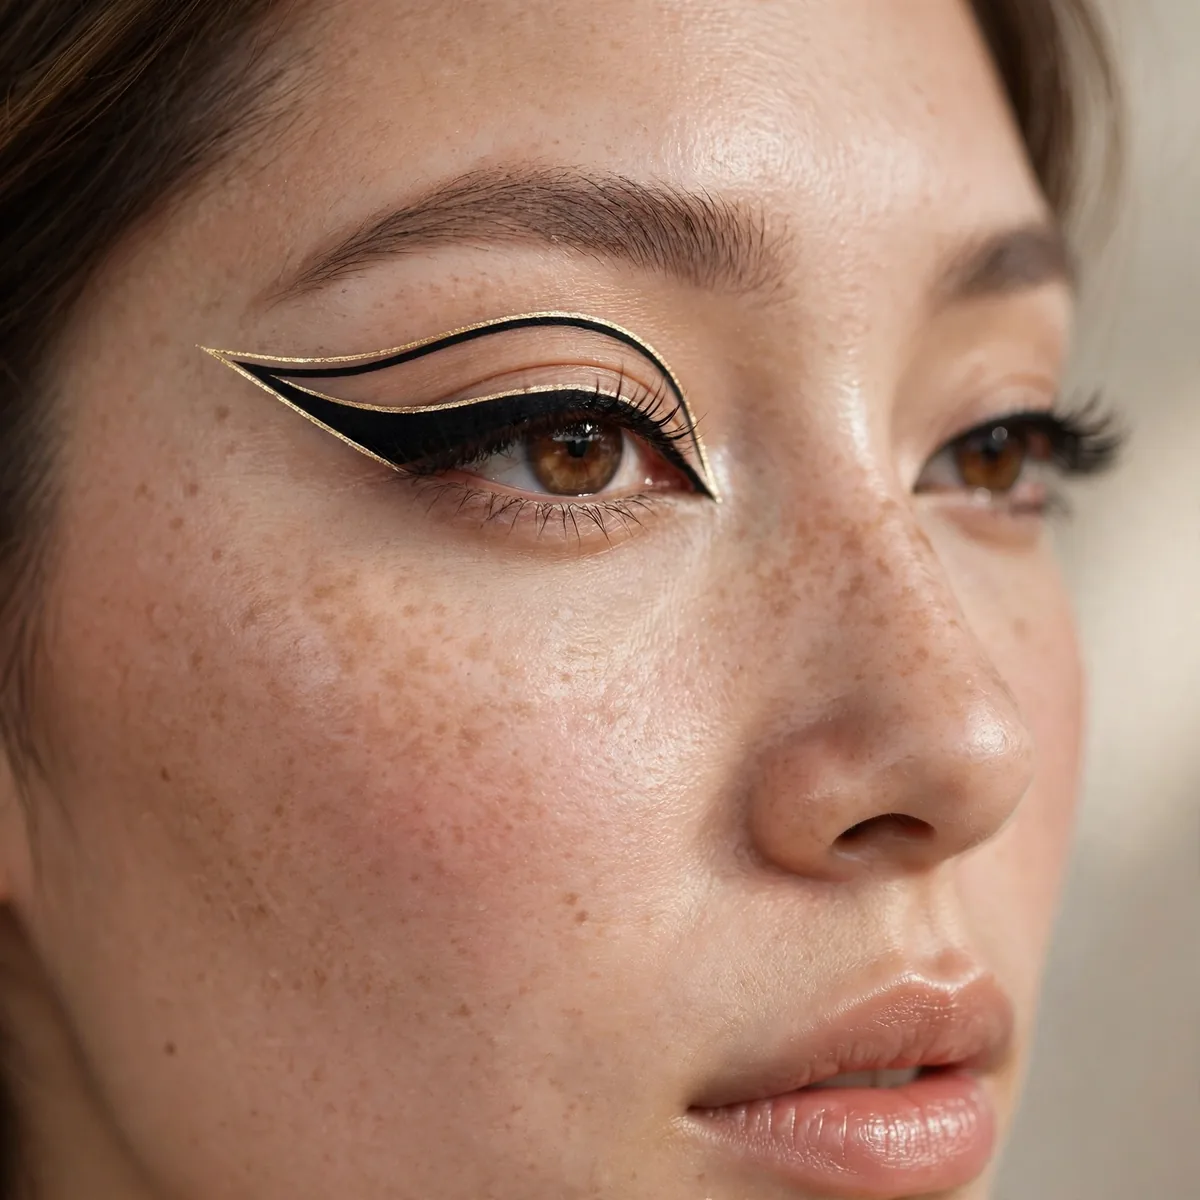
A wing drawn as an outline rather than filled — delicate but graphic.
Use a fine brush and take your time. Outlines demand steadier hands than fills.
The outline demands a featherlight touch, so banish tension from your drawing hand. Rest your pinky against your cheek as an anchor and draw in short segments rather than one continuous line. If the liner skips over textured skin, layer a thin coat of eye primer first — the smooth base lets the brush glide. Warm undertones suit brown-black liner for this delicate version; jet black can look harsh at outline weight.
Wear-time is the weak point of unfilled outlines, so seal the design with a waterproof setting spray applied on a small flat brush directly over the lines. This keeps the crispness through a full evening without the lines bleeding into the crease. For daytime wear, keep the rest of the eye whisper-quiet — bare lids, one coat of mascara — so the outline whispers rather than shouts.
Dot Accents
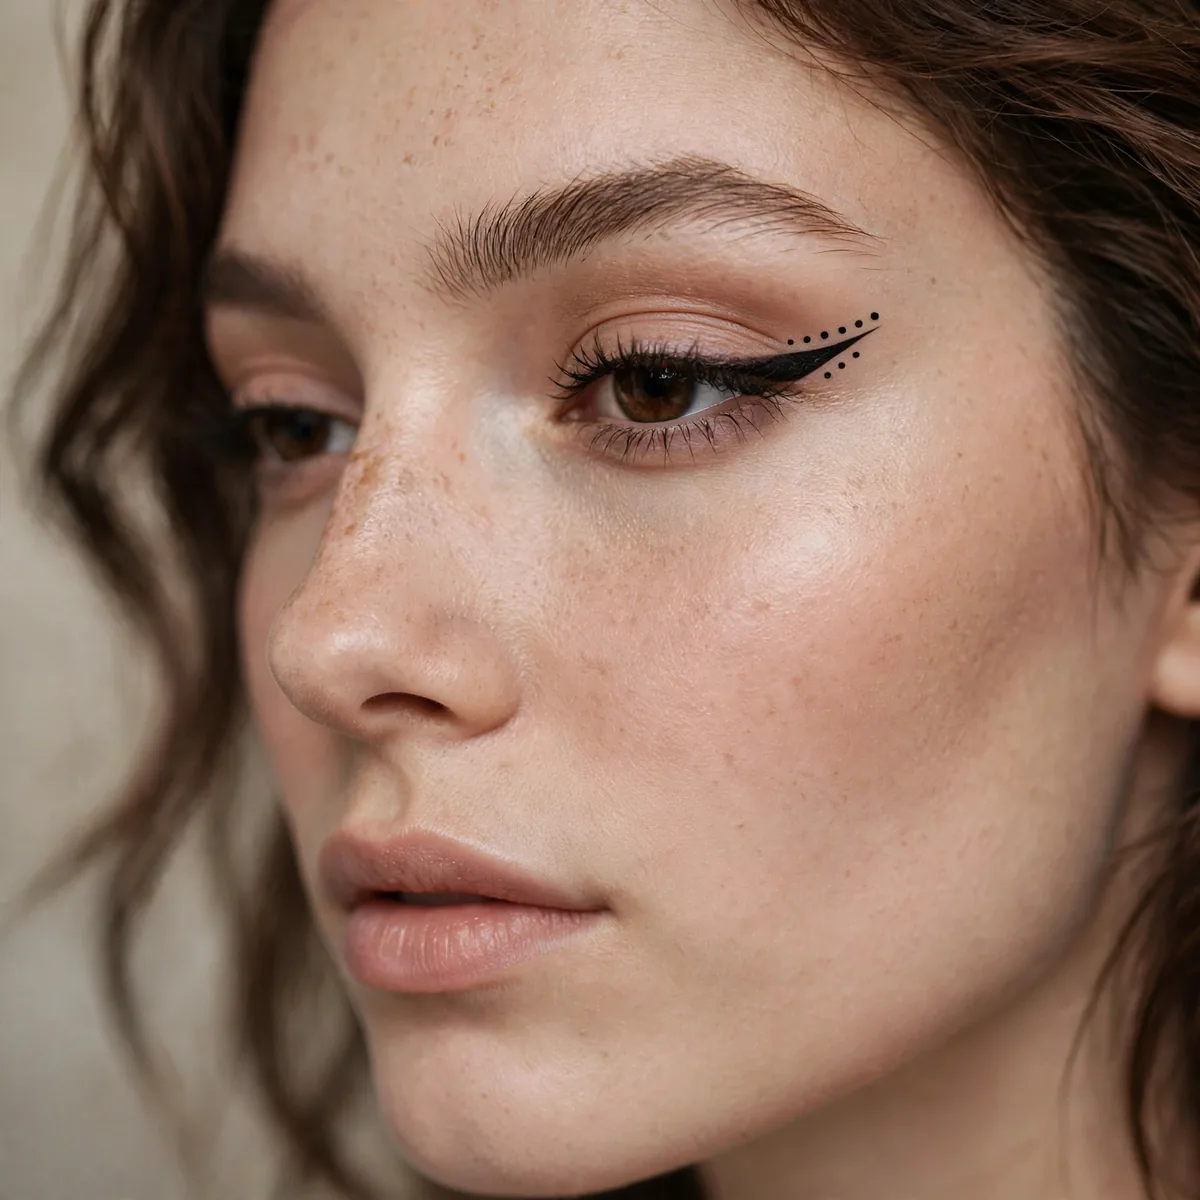
Small dots placed strategically — at the inner corner, under the wing, along the crease.
Dots are the easiest graphic element. One dot is an accent; three is a design.
The secret to crisp dots is loading product on the very tip of a dotting tool or brush handle, then pressing straight down without dragging — any sideways motion turns dots into smudges. Gel liner gives the roundest, most opaque dots; liquid pens work but dry fast on the tip, so re-dip often. Place dots while looking straight into the mirror to keep them level across both eyes, and step back to judge the overall composition before adding more.
Dots flatter every eye shape because they add interest without altering the lid's architecture — a gift for beginners nervous about wings. For day, keep dots tiny and near the inner corner; for night, enlarge them and trail a few down the temple like confetti. A shimmer or metallic dot catches light beautifully in photos. Set each dot with a dab of translucent powder on a small brush so they don't transfer when you blink.
Extended Inner Corner
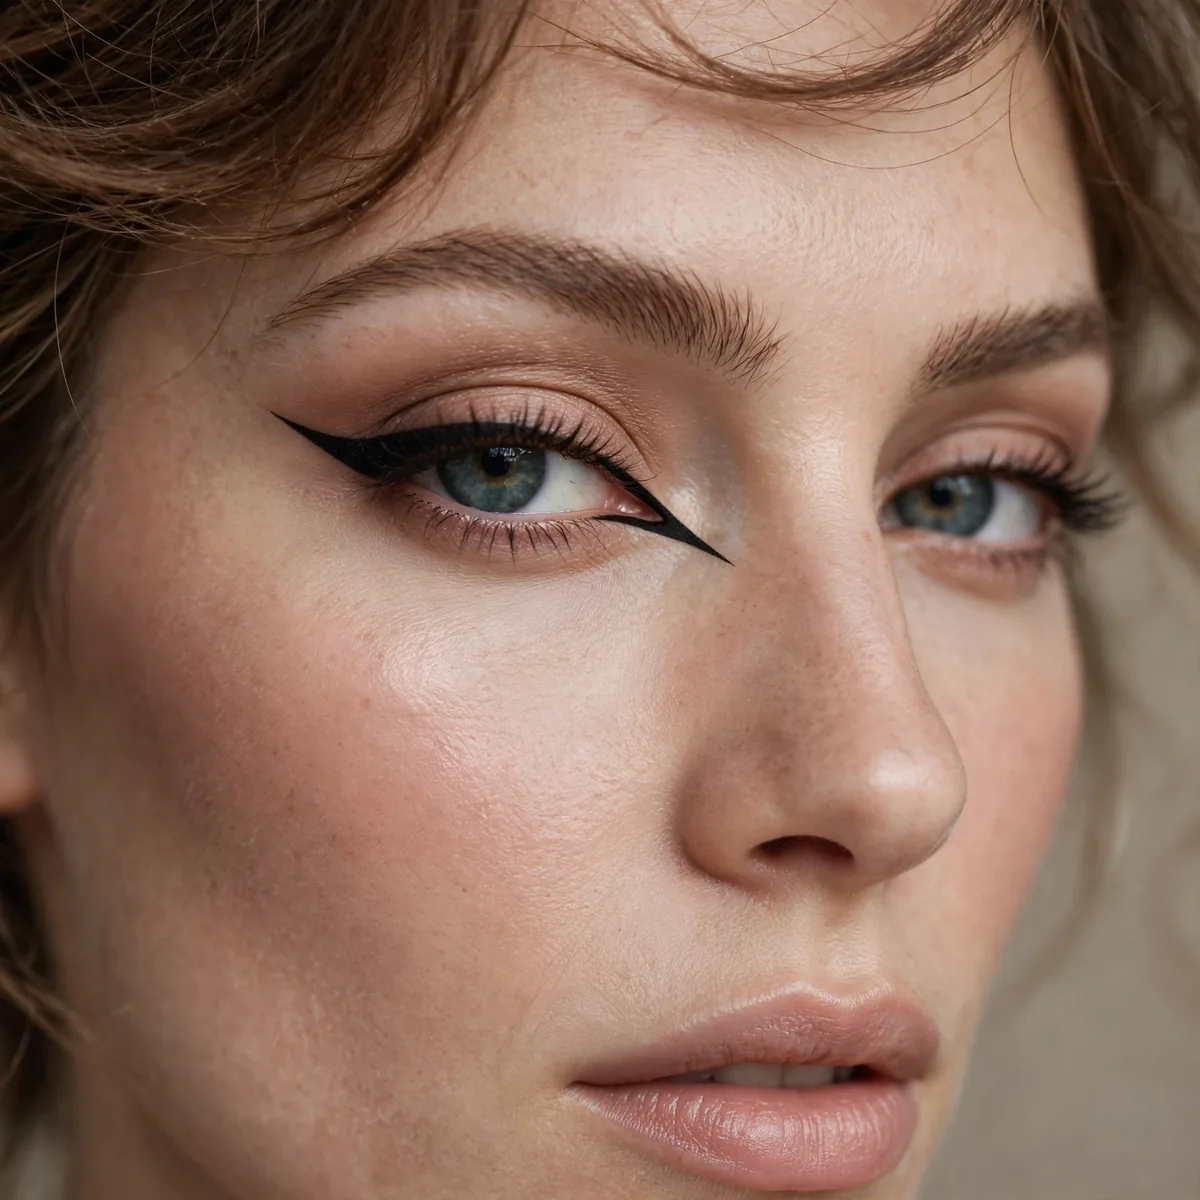
Liner extended into a sharp point at the inner corner — feline and dramatic.
The inner corner point elongates the eye. It’s the most face-changing graphic technique.
Start the point from the upper lash line and pull inward with the brush nearly flat against the skin, keeping the angle shallow so the point stays elegant rather than dagger-like. A felt-tip pen excels here because its firm tip carves a clean edge in one stroke. Rest your elbow and draw with your eyes half-open so you can see exactly how far the point travels toward the nose bridge — overextending it crowds the center of the face.
This technique suits wide-set eyes beautifully by drawing visual focus inward, and it balances round faces with its sharp geometry. Keep the rest of the eye soft — a diffused taupe wash and natural lashes — so the inner-corner point is the single sharp note. Because this area collects moisture from the tear duct, set the point with a waterproof formula and avoid layering cream concealer directly beneath it.
Color Block Liner
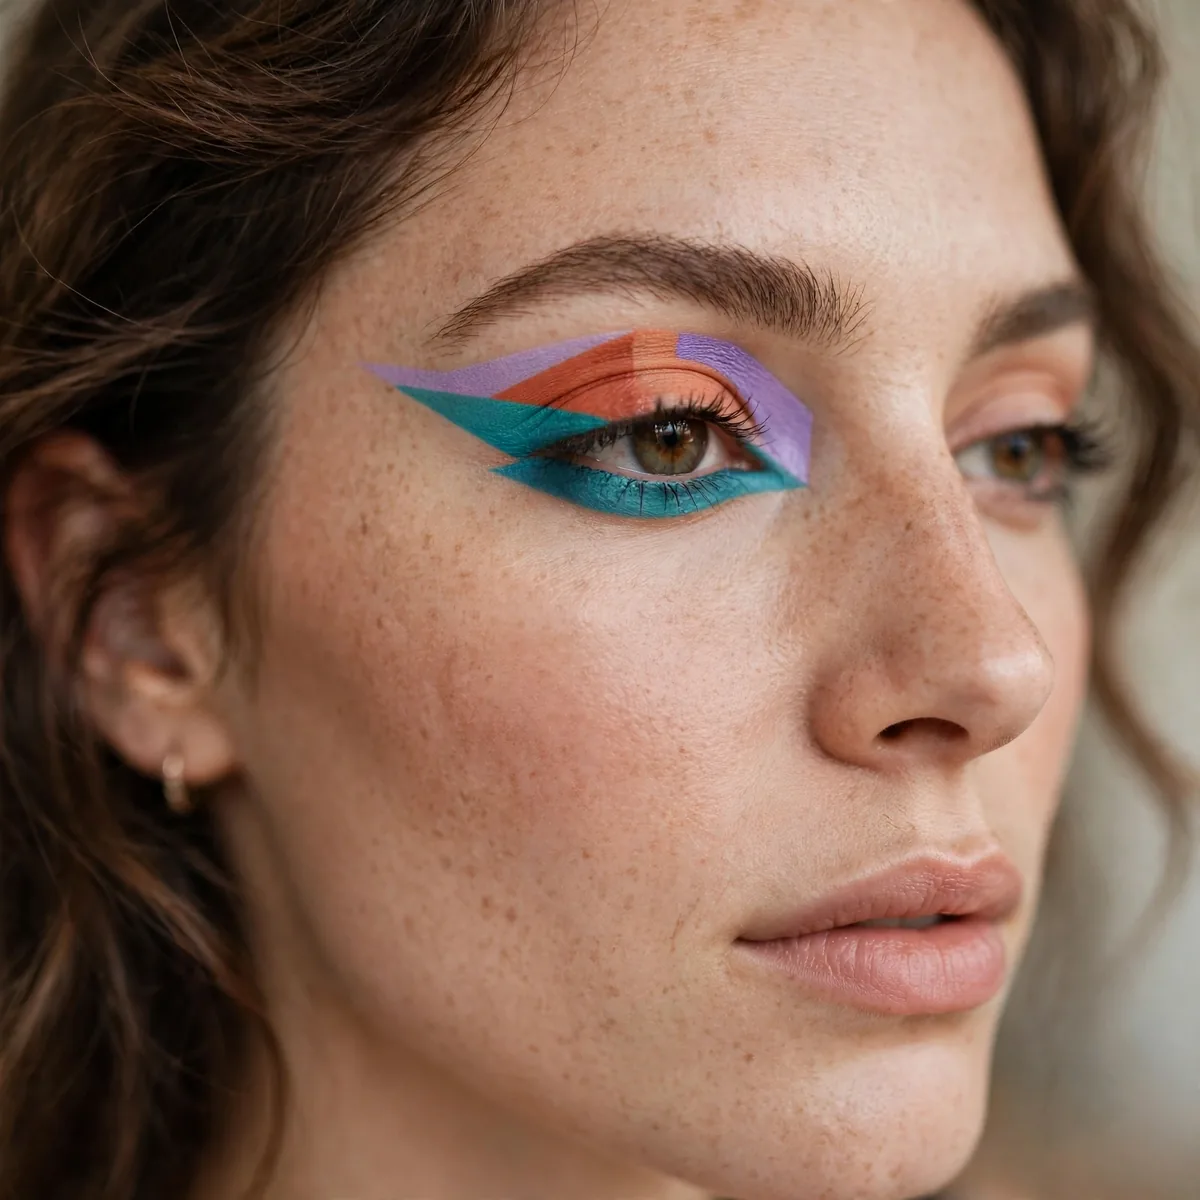
Bold blocks of color instead of lines — graphic liner’s painterly cousin.
Think shapes, not strokes. Blocks of cobalt, white, or neon.
Apply color blocks with a small flat synthetic brush using a stippling motion — pressing pigment in builds opacity faster than sweeping, which sheers the color out. Cream-to-powder eyeshadows or face paints give the most saturated blocks; layer twice, letting the first pass set for thirty seconds. Keep edges intentionally soft or razor-sharp depending on the mood — softened edges with a clean blending brush read artistic, while taped edges read architectural.
Choose block colors with your undertone in mind — cobalt and violet electrify cool undertones, while tangerine and chartreuse flatter warm ones. Neutrals like white, chocolate, and terracotta blocks make the technique office-appropriate if your workplace allows creative makeup. Because large color areas can fade at the edges by midday, press a matching powder shadow over the cream base to lock it. Pair with a nude lip and brushed-up brows so the color does all the talking.
Asymmetric Design
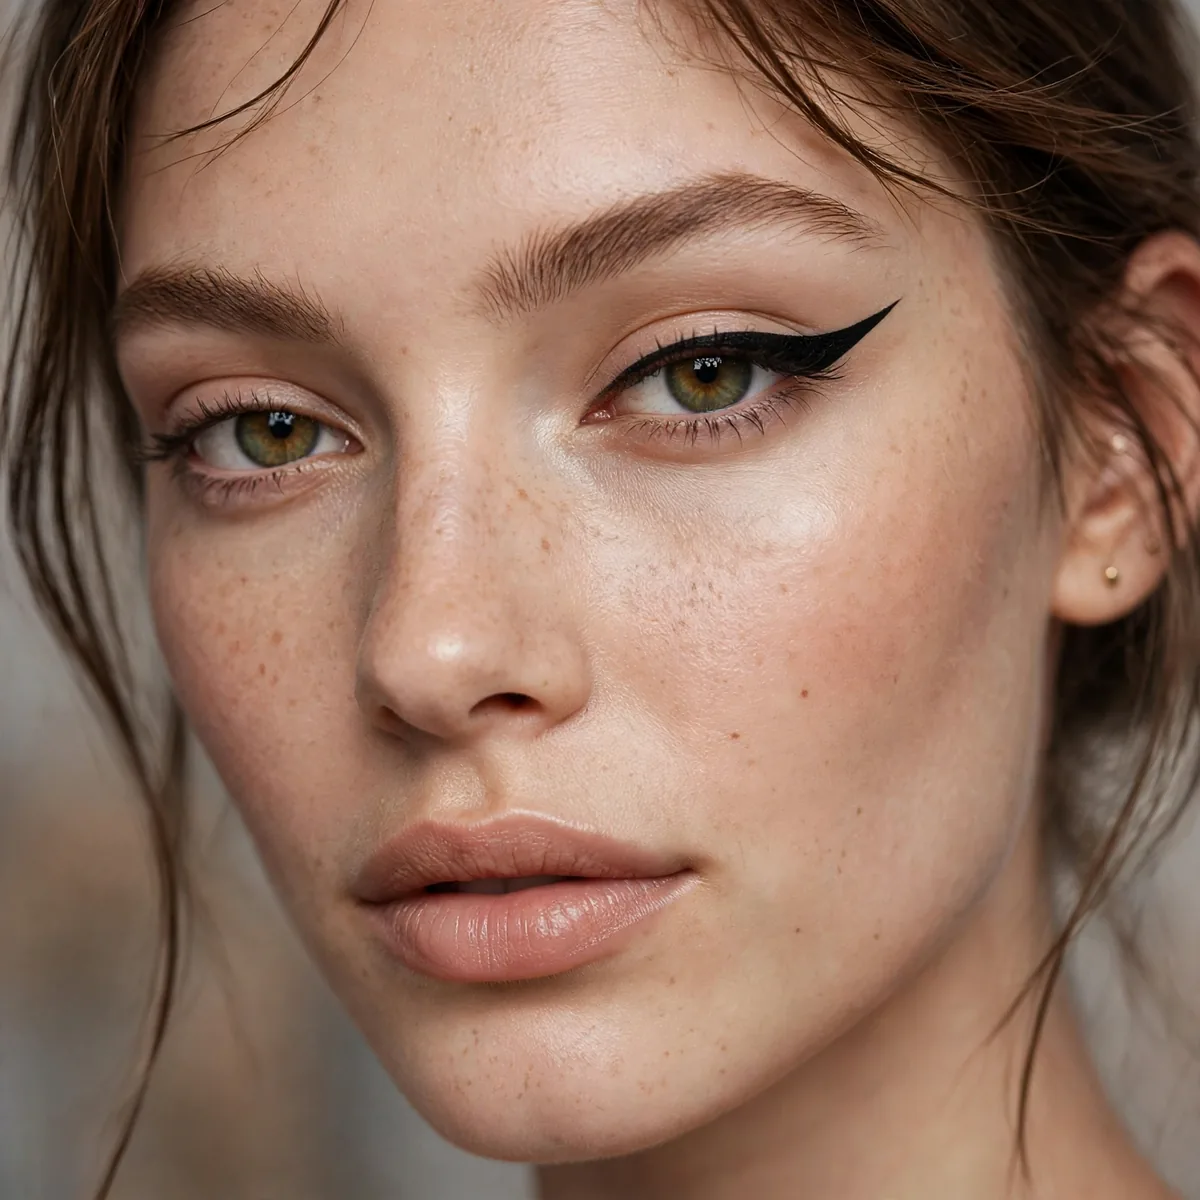
Different designs on each eye — the ultimate graphic statement.
Asymmetry is intentional here. It’s art, not a mistake. Own it.
Plan both eyes on paper first — a sketch stops the second eye from accidentally mimicking the first out of habit. Use one shared element, like the same color or a repeated dot, to tie the two sides together so the asymmetry reads deliberate. A waterproof gel liner keeps the designs intact all day; asymmetry draws extra attention, so smudging here is more visible than in a classic wing. Photograph the look in daylight to check the balance reads intentionally.
This look suits creative occasions — gallery openings, festivals, fashion events — where the makeup becomes a conversation piece. Keep the base skin polished and simple, since busy skin plus asymmetric eyes overwhelms the face. If one eye's design feels too bold for a workday, adapt it: a full wing on one side, a single floating dot on the other. The common pitfall is overworking the weaker eye; stop one stroke earlier than feels necessary and walk away.
Geometric Shapes
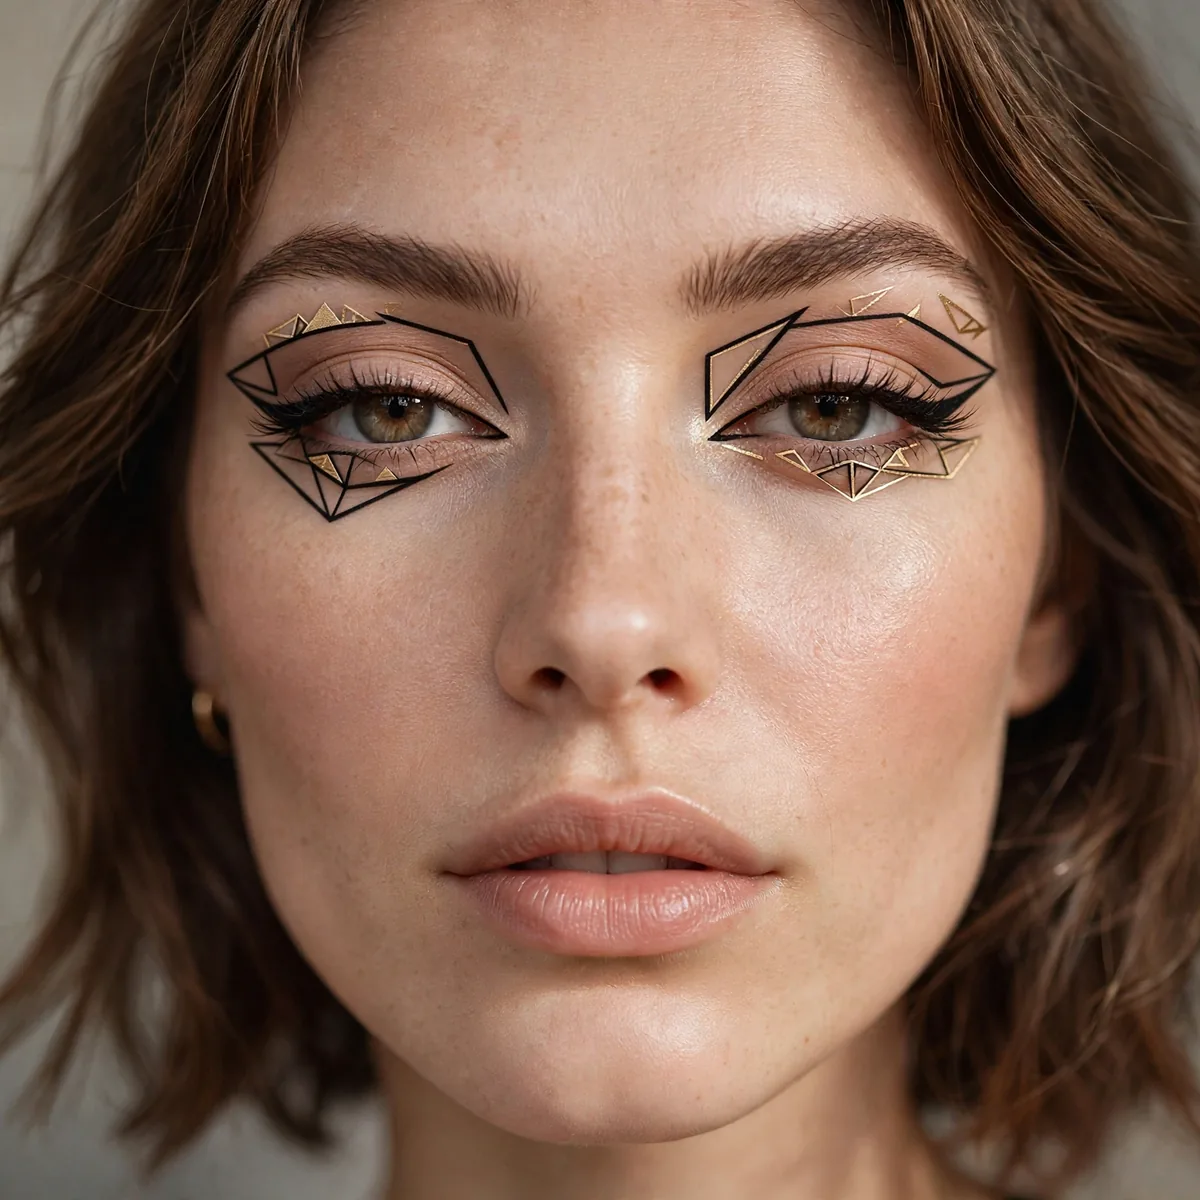
Triangles, lines, and angles around the eye — makeup as geometry.
Start with one shape. A single triangle at the outer corner is graphic enough.
Map your shapes with a white pencil first — it erases cleanly and lets you perfect the geometry before committing to color. A ruler held gently against the temple helps carve straight lines, and painter's tape cut into thin strips creates crisp edges for triangles. Work in short, confident strokes rather than sketching, since hesitant lines show most in geometric work. Steady your drawing hand against your cheekbone for control.
Triangles at the outer corner elongate round eyes. Keep the rest of the face minimal — groomed brows, nude lips — because geometric makeup needs visual quiet around it. For wear-time, set each shape with translucent powder; sharp edges blur fastest where skin is oiliest. If a shape misbehaves, remove just that element with a pointed cotton bud rather than starting the whole eye over.
White Graphic Liner
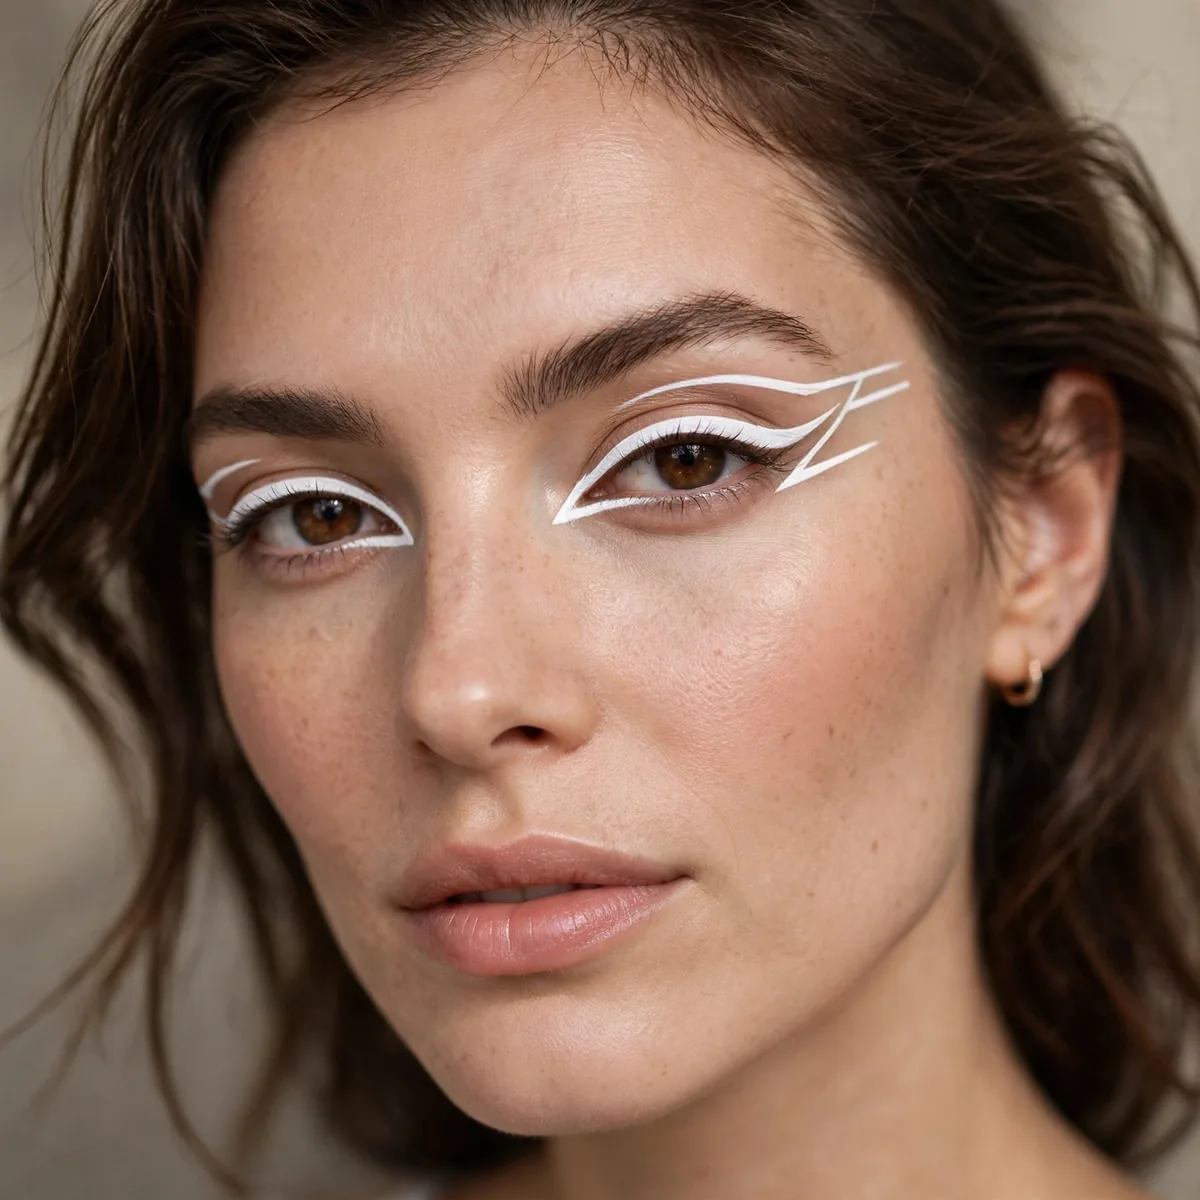
White liner in graphic shapes — stark, modern, unforgettable.
White shows every wobble, so keep shapes simple. Bold simplicity beats shaky complexity.
Layer white liner in two thin passes rather than one thick one — a single heavy stroke cracks as it dries, while thin layers bond smoothly to skin. A white gel formula over an eye primer base gives the most opaque, crack-free result. Keep shapes bold and minimal: a thick arc, a chunky wing, a bold bar. Tiny white details vanish against skin and only highlight every wobble, exactly the trap to avoid.
White graphic liner flatters deeper skin tones spectacularly — the contrast is striking and editorial — and brightens fair skin with an icy, modern edge. Keep the base skin luminous and even, since white liner draws the eye to any nearby unevenness. For evening, add a silver shimmer dot at the inner corner to echo the white; for day, leave the white unadorned. Set the liner with white shadow pressed over it so the brightness holds from morning to midnight.
Neon Accents
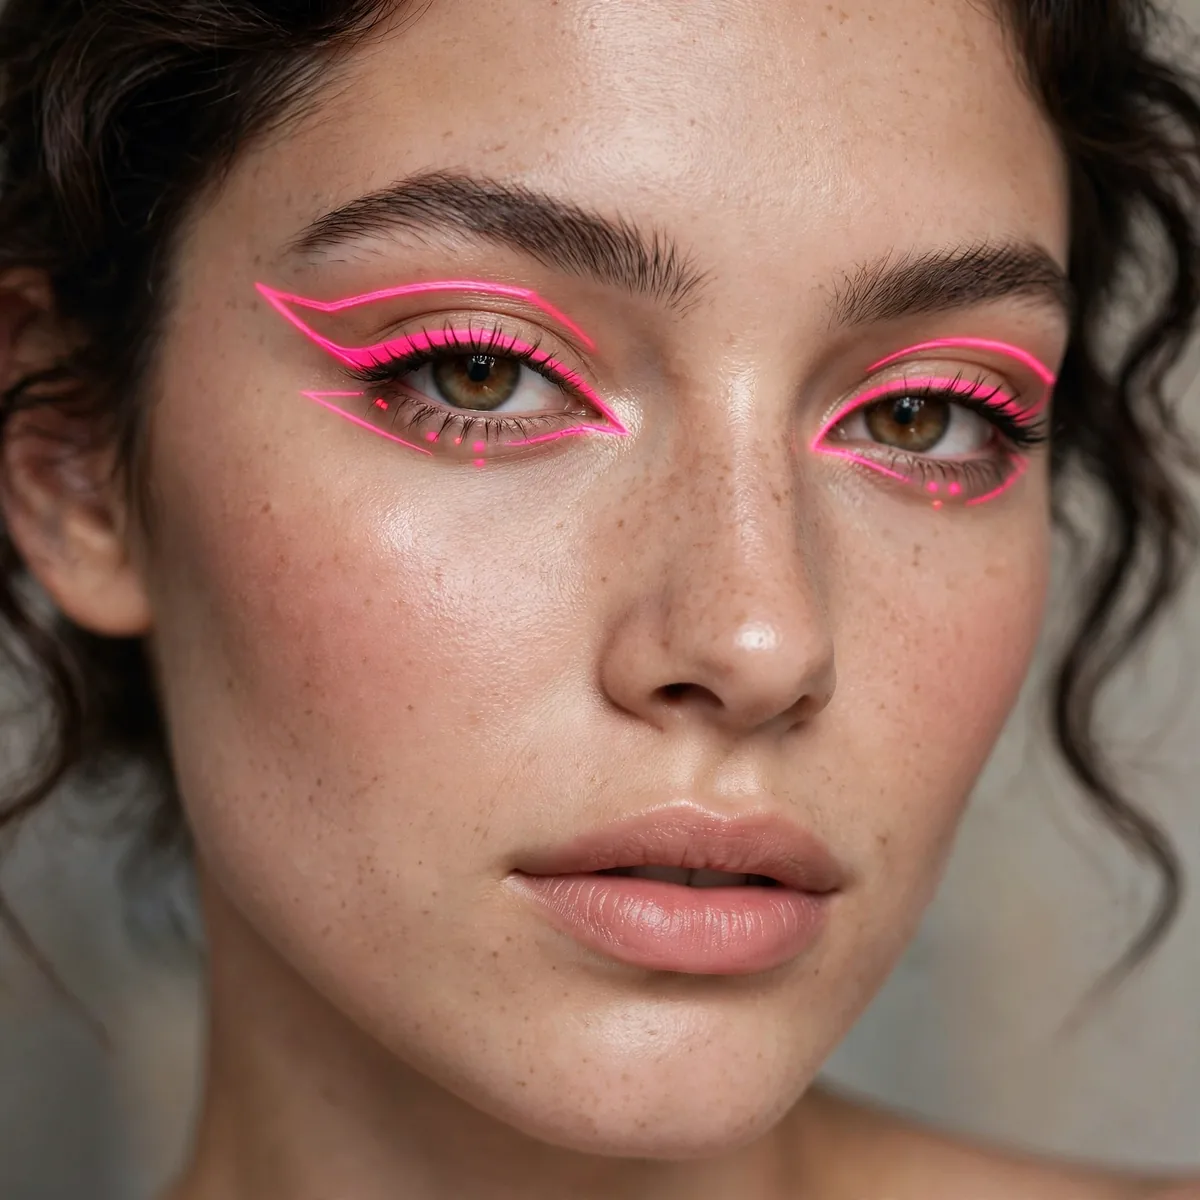
Neon liner accents over a neutral base — the party-ready graphic.
One neon element is enough. Neon everything is a different aesthetic.
Apply neon liner over a white base — the white underneath makes neon pigments pop twice as vivid, especially in evening light. A UV-reactive formula turns the accent into a party trick under blacklight. Keep the accent placement high on the lid or along the brow bone, away from the waterline where moisture dulls neon fast. Because neons stain slightly, do a patch check on your wrist if your skin reacts to bright pigments.
Neon accents suit festival season and summer nights best, when bold color feels at home rather than out of place. Balance the look with matte skin — dewy bases plus neon can read sweaty under flash photography. Keep lips neutral and let the neon be the single electric note. Removal needs an oil-based cleanser, since neon pigments cling; rub gently in circles rather than dragging across the lid. One accent per eye keeps it chic instead of costume.
Cut-Out Wing
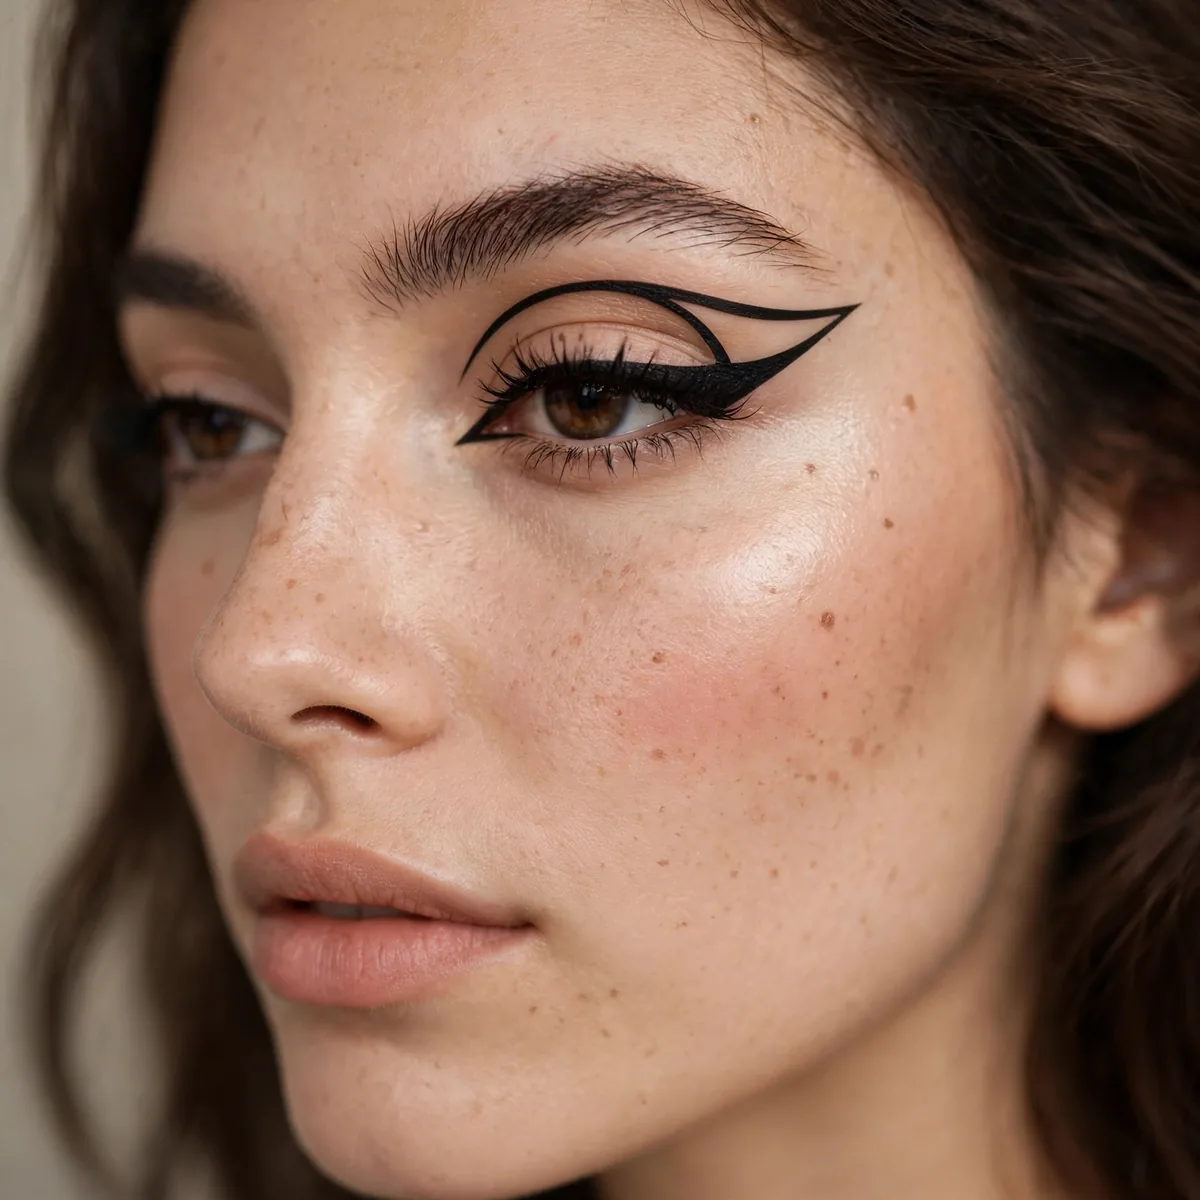
A wing with a section cut out — the graphic detail that looks complex but isn’t.
Draw the full wing, then remove a stripe with micellar water. Subtraction as design.
Draw the full wing with a waterproof liquid liner first, letting it dry completely — cutting into a tacky wing smears the edges. Then dip a flat synthetic brush in micellar water, wipe it nearly dry, and carve the stripe through the wing in one confident swipe. Thinner stripes look refined; wider ones read bolder. If the cut-out edge looks ragged, sharpen it with a pointed cotton bud dipped in concealer, tracing just along the carved line.
This technique flatters hooded eyes especially well, since the carved stripe creates dimension where a solid wing would disappear into the fold. Keep the stripe positioned over the lid's flattest area so it stays visible when the eye is open — test by looking straight ahead mid-process. Pair with a soft matte shadow in the crease to deepen the contrast around the cut.
Brow Bone Line
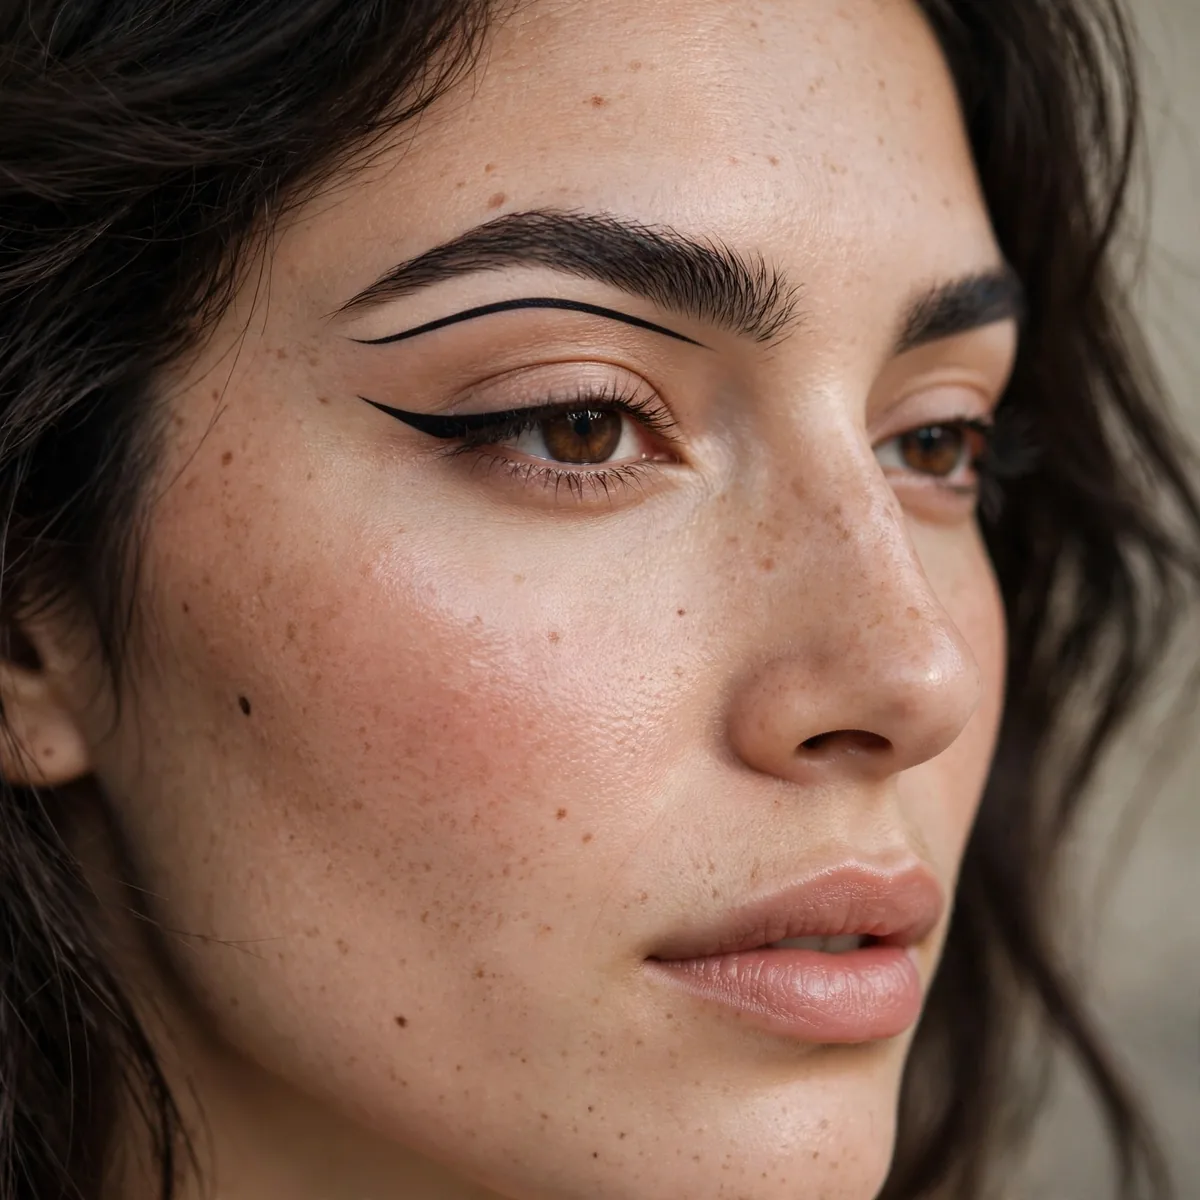
A graphic line along the brow bone — framing the eye from above.
Unexpected placement gets attention. The brow bone is graphic liner’s final frontier.
Draw the line following your natural brow arch, keeping it parallel about a finger's width above the brow — too close and it merges with the brow, too far and it floats disconnected. A gel liner on a fine angled brush gives the cleanest arc; liquid pens can skip on the slightly textured skin there. Sketch the arc with eyes open and brows relaxed, since raised brows shift the placement and the design drops once your face settles.
This placement suits editorial shoots and evening events best — it's striking in person and photographs beautifully from the front. Keep the actual brow groomed but soft, since a harsh brow competes with the graphic line above it. Pair with barely-there lids and a nude lip so the brow-bone line is the unmistakable focal point. A common mistake is drawing it too dark; a medium brown-black reads sophisticated, while jet black can look severe from across the room.
Mirrored Wings
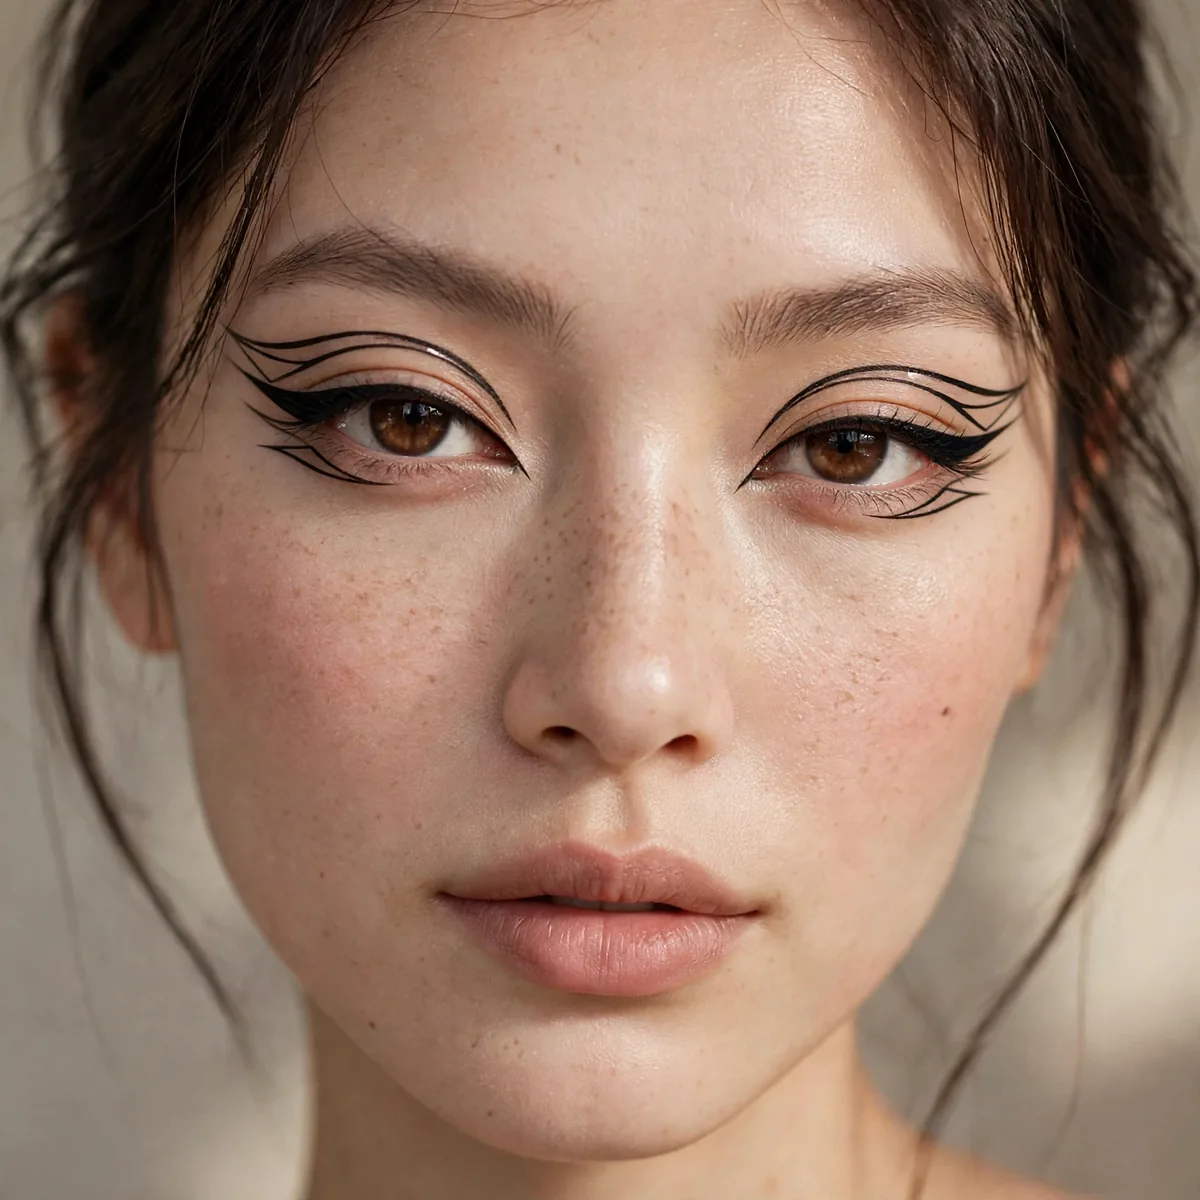
Matching dramatic wings taken to graphic proportions — bigger, bolder, symmetrical.
Symmetry matters more at graphic scale. Measure twice, draw once.
Work on both wings simultaneously, doing one stroke on the left then matching it on the right — alternating keeps the sizes honest before either side gets too far ahead. A felt-tip pen gives both eyes the same stroke weight; switching tools mid-look invites mismatch. Measure the wing angle against your lower lash line's trajectory — both wings should extend along the same diagonal. Stand back from the mirror frequently; close-up work lies about symmetry.
Graphic-scale wings suit almond and upturned eyes, where the elongated shape follows the eye's natural lift. Because the larger canvas shows every flaw, prime the lids first and set the finished wings with a matching powder shadow to prevent crease transfer. Keep cheeks soft and lips understated — the wings are the event. If symmetry still eludes you after two attempts, step away for five minutes; fresh eyes spot the difference your tired ones normalize.
Dotted Lash Line
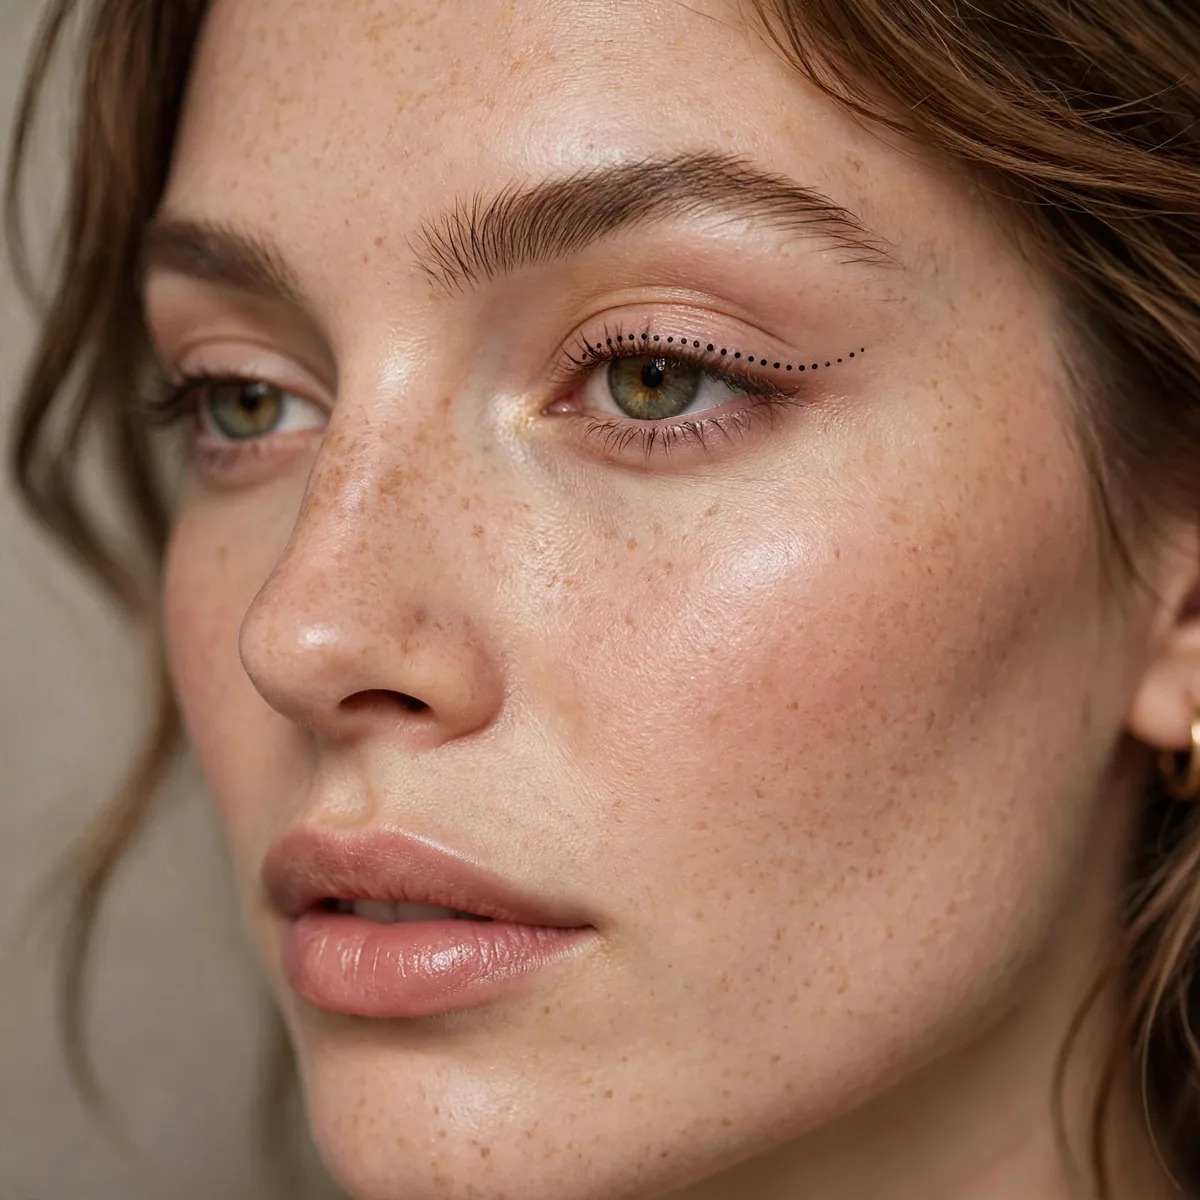
Dots along the lash line instead of a solid line — playful graphic minimalism.
For dotted precision tips, our tightlining guide covers the technique. Dots should be even — use the brush tip, not the side.
Size the dots to your lash line's taper — slightly larger at the outer third, smaller toward the inner corner — so the dotted line reads intentional rather than random. Use the brush tip pressed straight down, and reload product every two or three dots to keep them uniform. A gel liner gives the most consistent dots; liquid pens dry between dots and create uneven opacity. Work outward from the inner corner so your hand doesn't drag through wet dots.
This minimalist graphic suits deep-set and hooded eyes, since dots add interest along the lash line without needing lid space. Keep the rest of the eye clean — tightlined uppers and a single mascara coat — so the dotted rhythm stays visible. Set each dot with a touch of translucent powder on a detail brush; the dots sit close to the waterline's moisture and need that protection.
Arrow Details
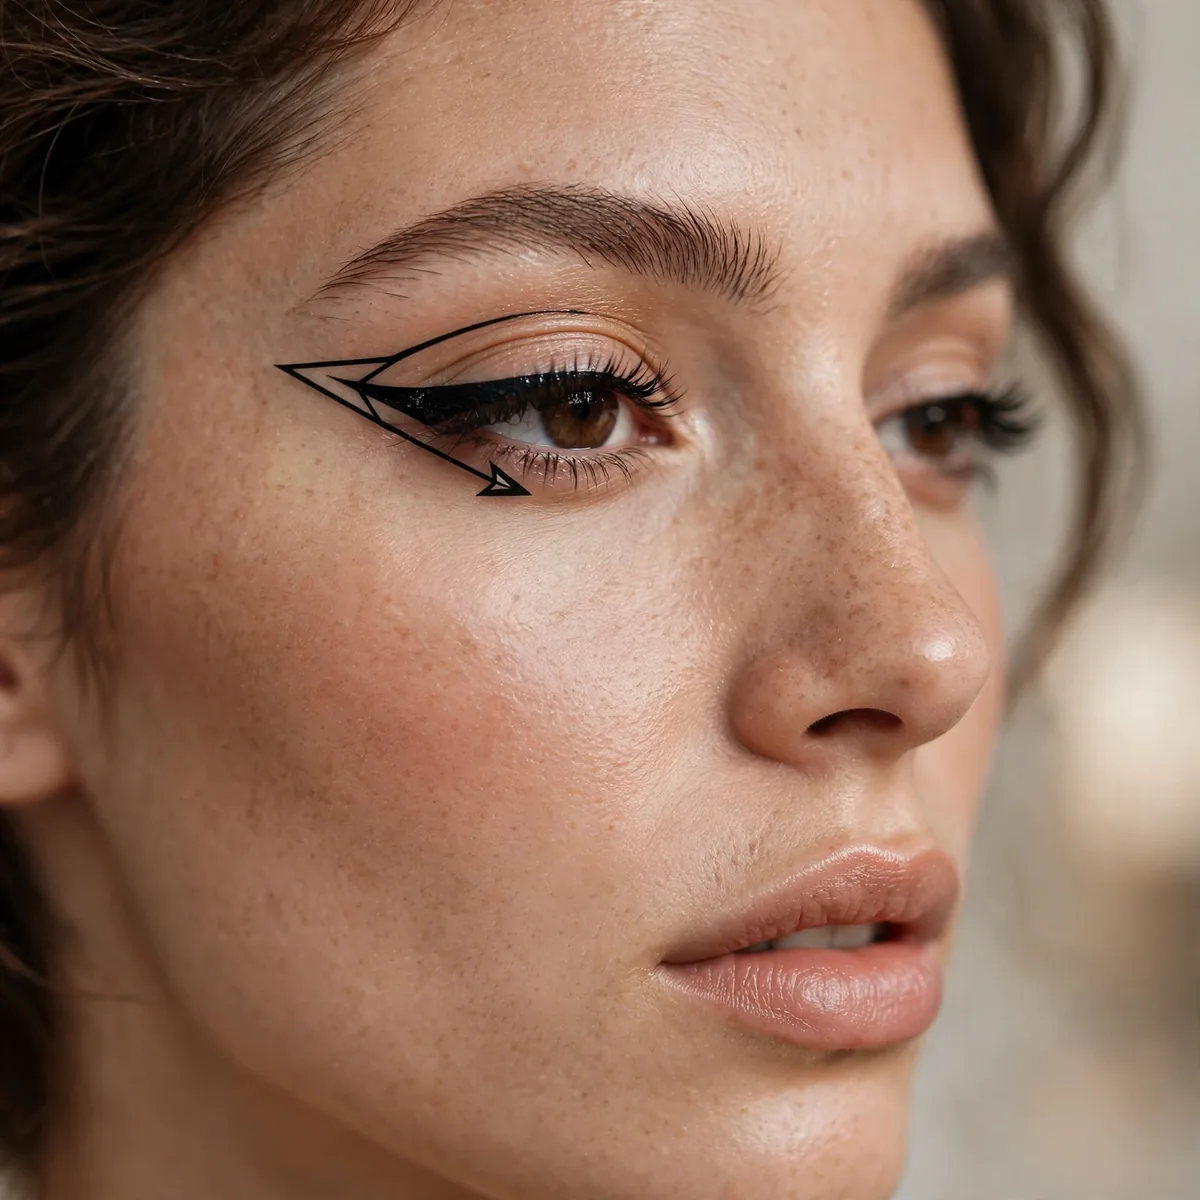
Small arrow shapes at the outer corner — graphic with direction.
Arrows point the eye outward, enhancing the lifting effect. Cute and clever.
Draw the arrow's shaft along your existing wing's lower edge, then add the arrowhead with two short flicks — keeping the head small keeps it graphic rather than cartoonish. A fine-tipped liquid pen gives the sharpest arrowhead points. Angle the arrow slightly upward for a lifting effect that flatters downturned eyes especially. Sketch the arrowhead first in the air above your hand to rehearse the motion; the confidence shows in the stroke.
Arrows suit playful, youthful makeup moments — brunch, concerts, workplaces — where the wink of direction feels fun rather than formal. Keep the base wing classic and crisp so the arrow reads as a deliberate accent, not a correction. Pair with flushed cheeks and a glossy lip for a cohesive playful face. A common mistake is oversizing the arrowhead; if it reads larger than your pupil, scale it down for balance.
Mixed Media Eye
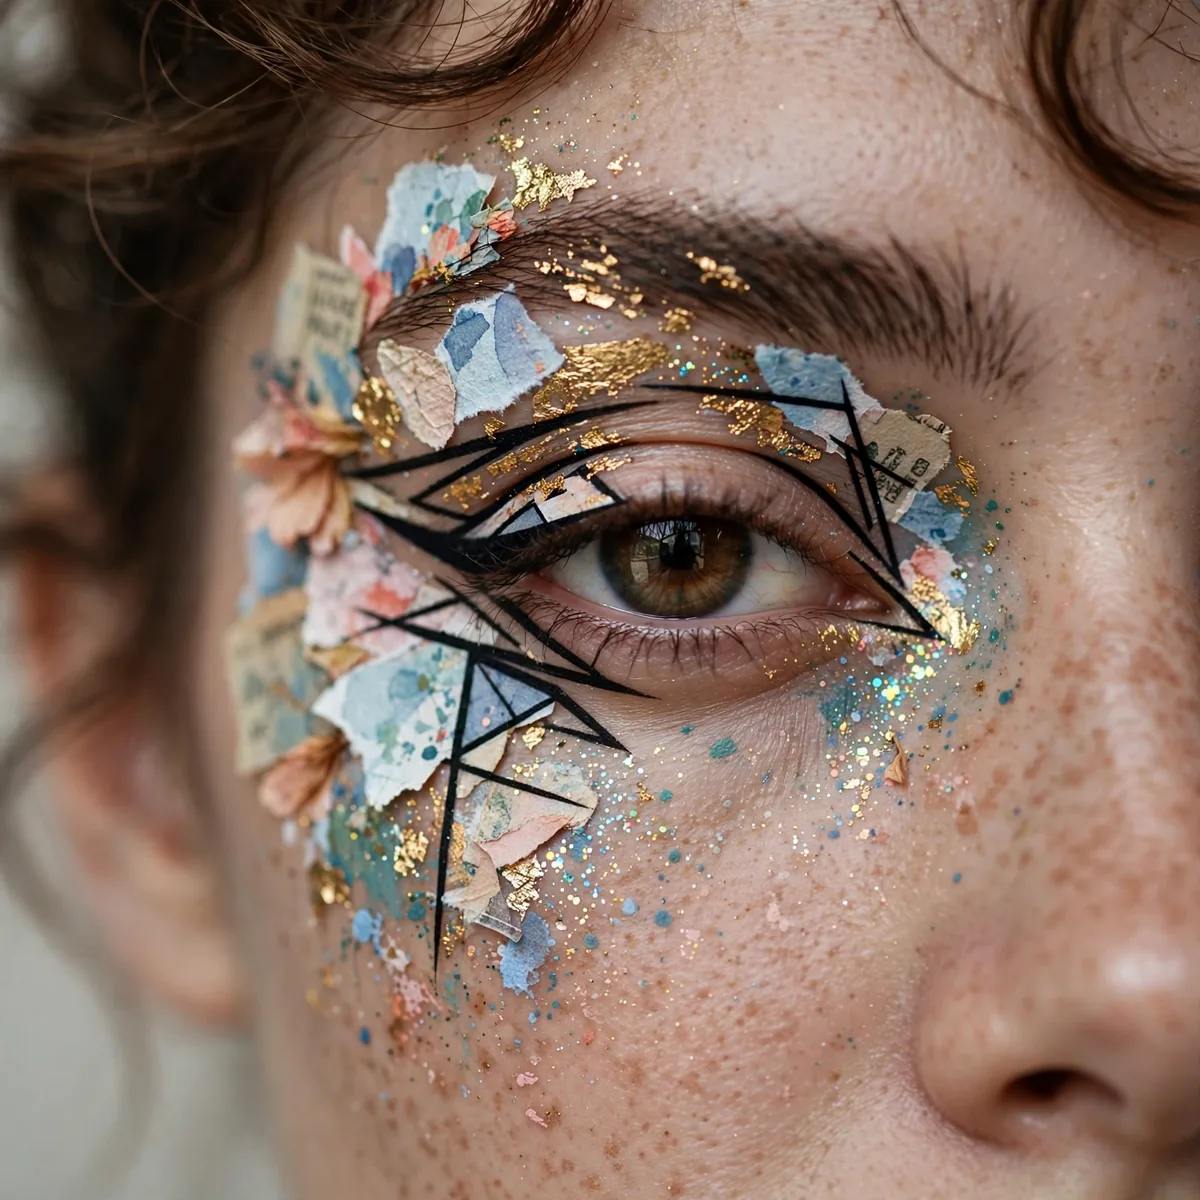
Liner plus shadow plus glitter — the everything eye.
Commit fully. Mixed media only works when you go all in.
Build in layers from wet to dry: cream liner first, then powder shadows, then glitter adhesive with pressed glitter last — reversing the order muddies everything. A glitter primer or tacky base is essential; without it, glitter migrates across the face by hour two. Use a flat synthetic brush to press glitter rather than sweep it, which scatters particles. Work one eye to completion before starting the other so adhesives don't dry out mid-design.
This everything-eye belongs to evenings, editorial shoots, and festivals — daylight hours dilute its drama. Because the look is inherently heavy, keep skin fresh and lips neutral to avoid a costume effect. Removal is a two-step job: press an oil-soaked cotton pad over the eye for thirty seconds to dissolve the glitter adhesive, then cleanse normally. Skipping the soak means scrubbing, and scrubbing means irritated eyes the next morning.
The Wearable Graphic
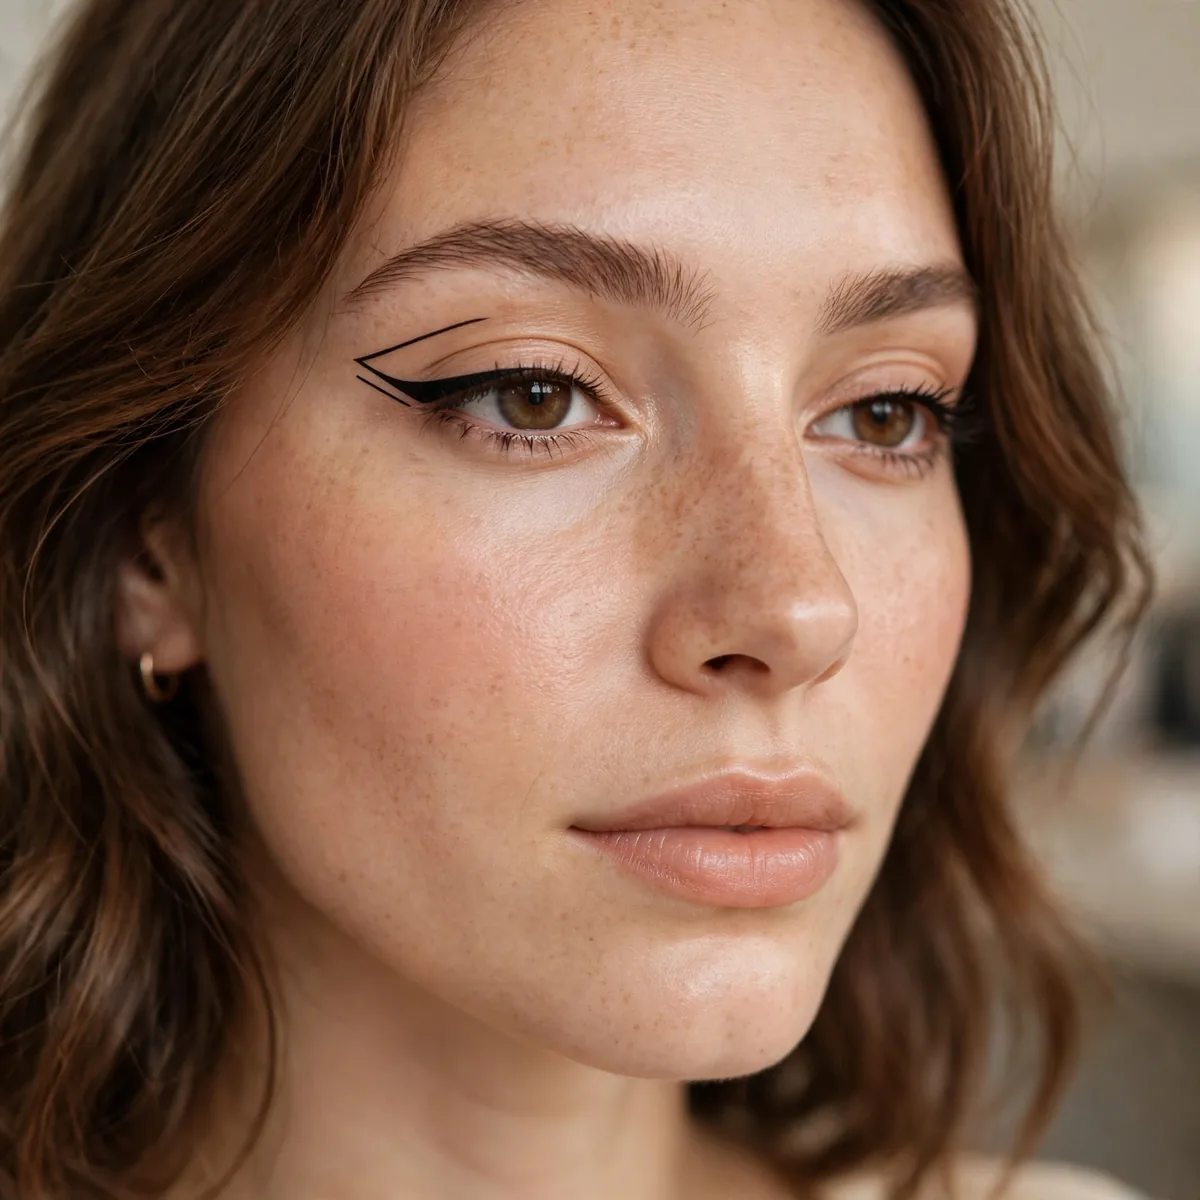
One graphic element (a dot, a small wing extension) on an otherwise classic eye.
The gateway graphic. It’s interesting without being intimidating — start here.
Choose one placement that suits your comfort zone: a single dot at the inner corner for minimalists, a small wing extension for wing-lovers, a short floating line for the adventurous. Apply it after your normal eye makeup so the graphic sits on a finished canvas. A brown-black liner makes the element feel softer for daytime; switch to true black for evening. This is the ideal first graphic — master one element before combining several.
Wearable graphics suit every age and eye shape because the single element adds interest without overwhelming the face — it's the rare graphic that works in conservative offices too. Keep the rest of your routine exactly as usual; the point is a twist on your normal, not a new face. For longevity, this lone element still needs waterproof formula and a primer base — small details smudge fastest because there's nothing around them to disguise it.
Art belongs on eyes too — save your favorites to Pinterest. For classic technique first, see winged eyeliner for beginners, or add color with colored eyeliner looks.




