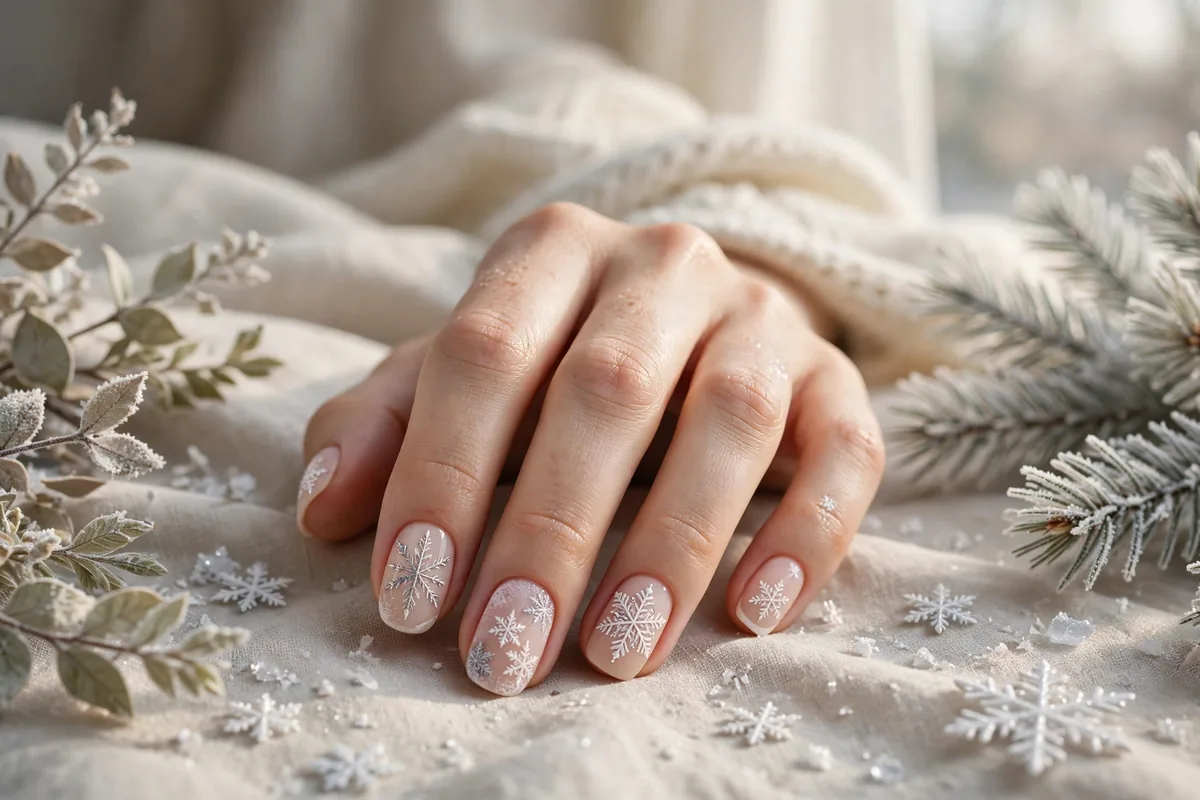
Snowflakes are winter’s most delicate motif — intricate, icy, and endlessly pretty on nails.
The snowflake formula: deep blue or nude bases, white or silver flake details, and a touch of winter sparkle.
These 15 designs range from single-flake minimalism to full blizzard.
Here’s your winter wonderland. Let’s get into it.
Single Flake Minimal
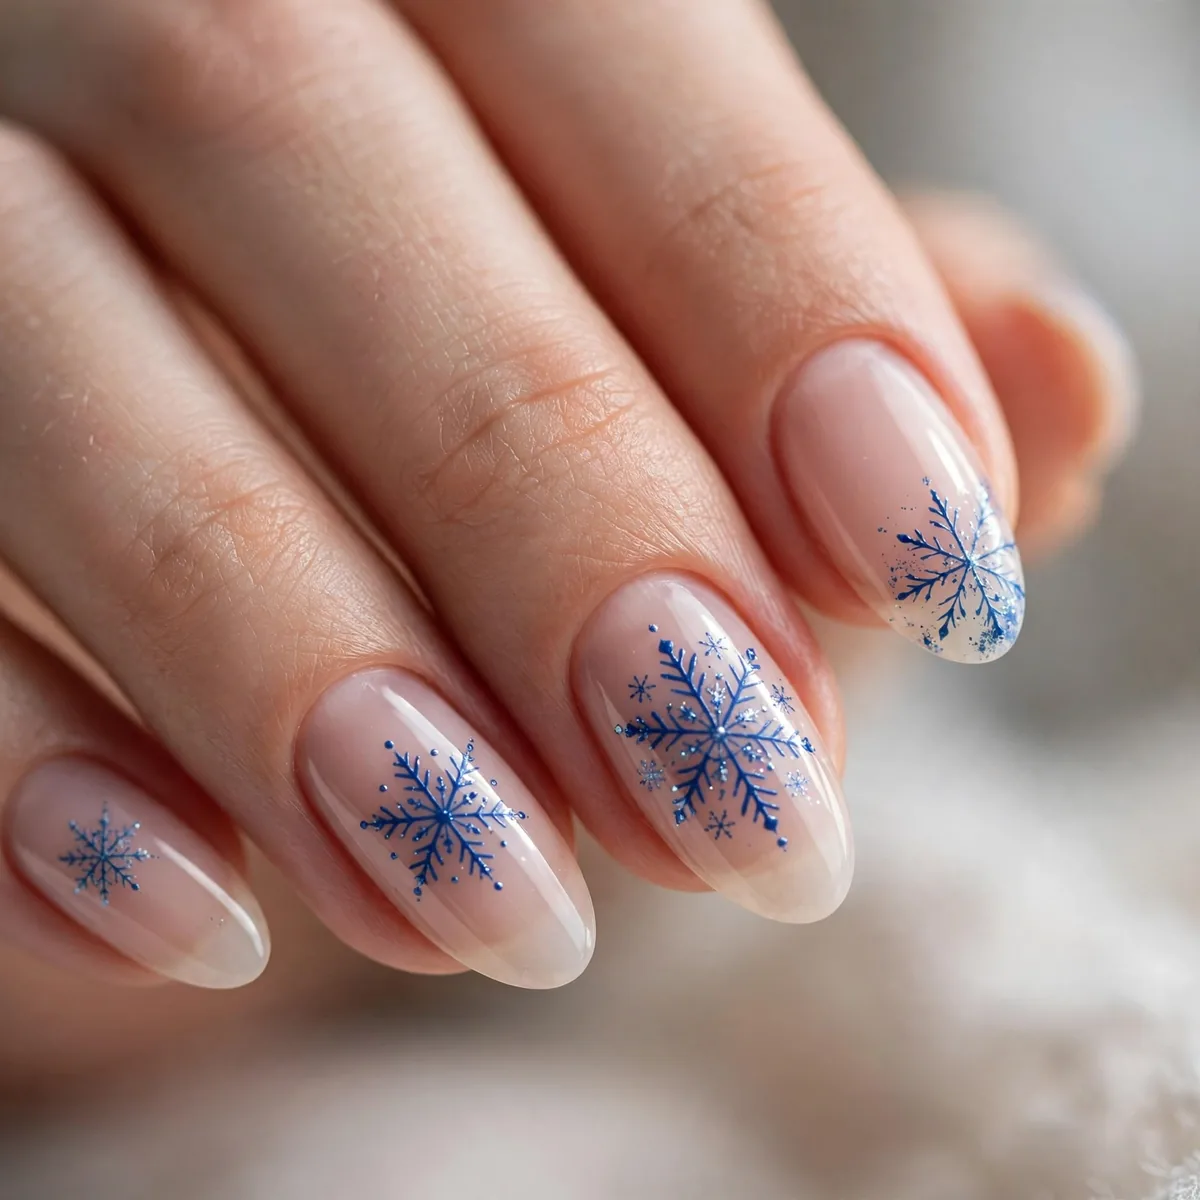
One delicate flake on a nude base — winter minimalism.
Best for: the understated. A single flake is perfect restraint.
A dotting tool gives the most delicate six-point flake on short nails: touch down once for the center, then drag six fine arms outward while the white is still wet. This design flatters round and squoval shapes best, where a single motif never overwhelms the nail bed. Keep the flake slightly above center so fingertips look longer.
Because the base is a sheer crème, regrowth blends invisibly and the manicure survives a full two weeks without looking tired. Seal the flake with two thin top coat layers so the delicate arms do not lift at the edges. It reads beautifully at holiday office parties — festive without clashing with a silk blouse or structured blazer.
Midnight Flake Contrast
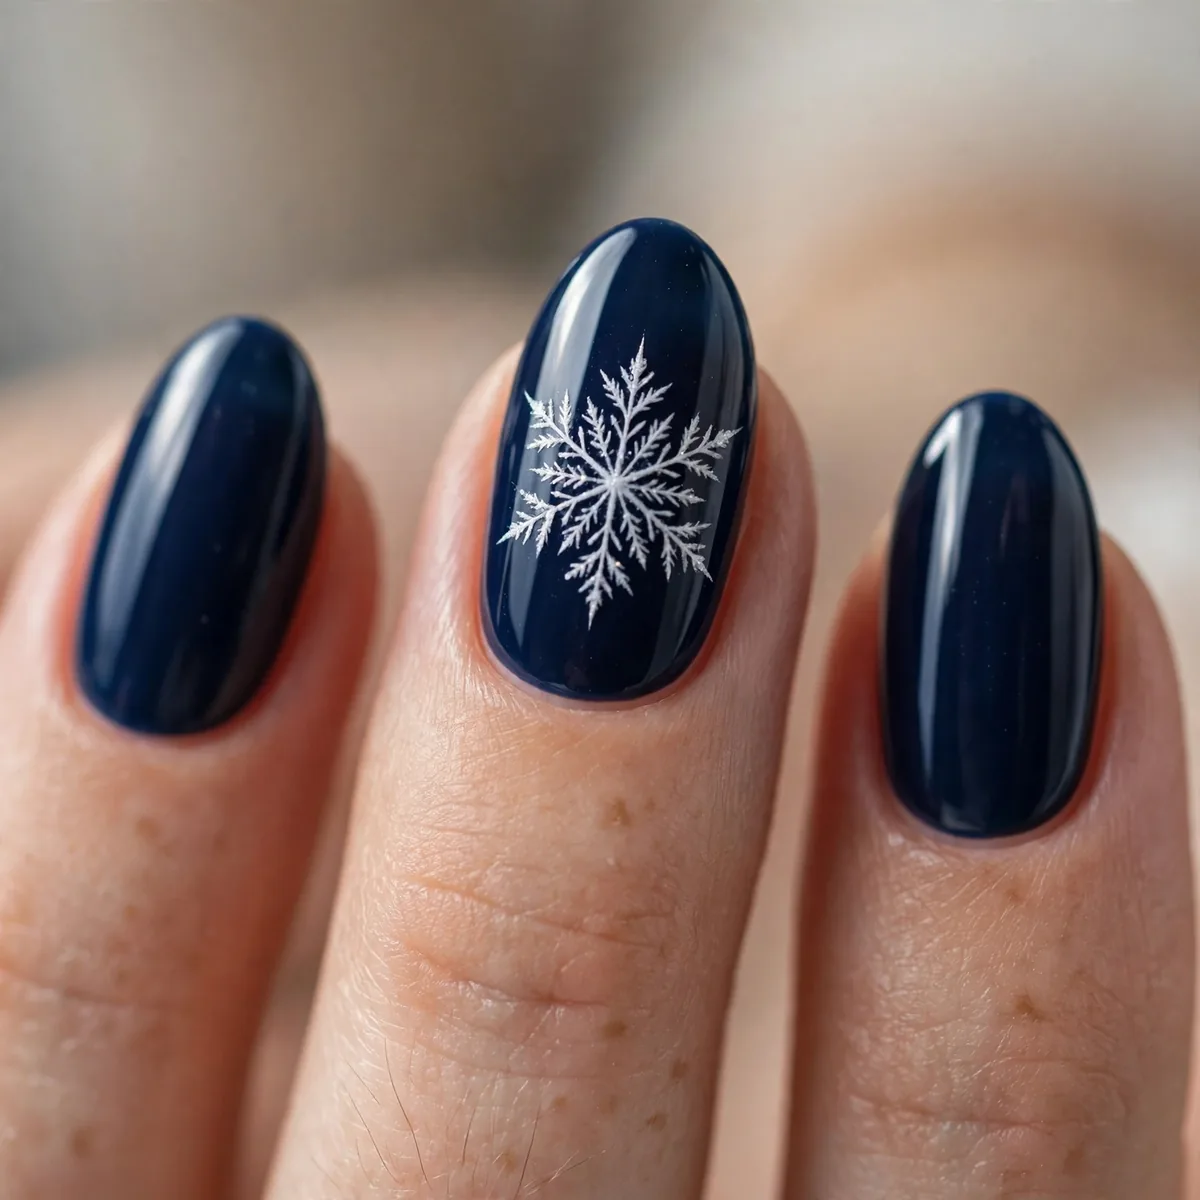
White flakes on deep midnight — the striking winter.
Best for: contrast lovers. White on midnight is winter’s boldest.
Midnight crème creates the highest contrast canvas, so flakes need almost no outlining to pop. Stick to a one-coat opaque navy with blue-black depth — true black bases make white flakes look clinical instead of wintry. A glossy finish is essential here; matte midnight absorbs light and dulls the flake detail.
Almond and coffin lengths give large flakes room to spread without crowding the sidewalls — on short nails, shrink the motif and use just three accent fingers. Hand-paint the flake arms with a detail brush loaded lightly; too much polish floods the lines and the snowflake loses its lacy precision. Perfect for December evenings out.
Icy Blue Base
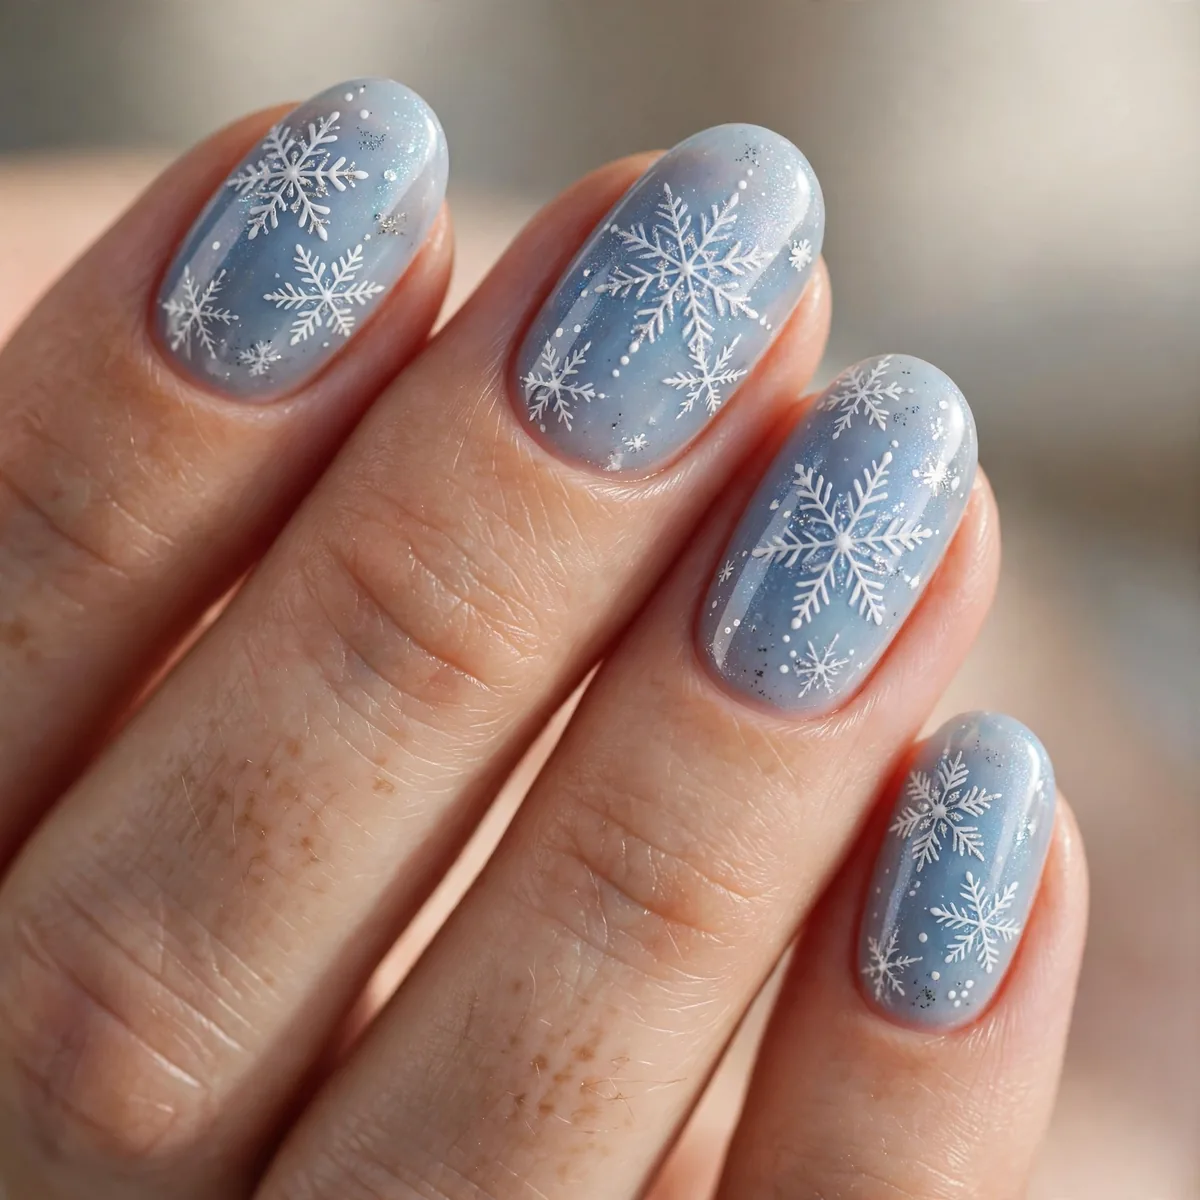
Pale icy blue with white flakes — the frozen wonderland.
Best for: our ice blue guide has 20 frosty variations.
Two thin coats of a jelly-finish icy blue build that translucent frozen look; thick crème layers read flat and chalky instead. Apply flakes while the second coat is tacky, then seal immediately — the polish grips the white detail better before it fully sets. Add micro glitter only at the cuticle for a frosted gradient effect.
Cool-toned blues flatter fair and porcelain skin most, while deeper skin tones look striking against a frostier, almost white-blue shade. Jelly finishes show tip wear faster than crèmes, so cap the free edge with every coat — that extra seal buys three to four more chip-free days. A winter wedding guest manicure that photographs beautifully.
Silver Glitter Flakes
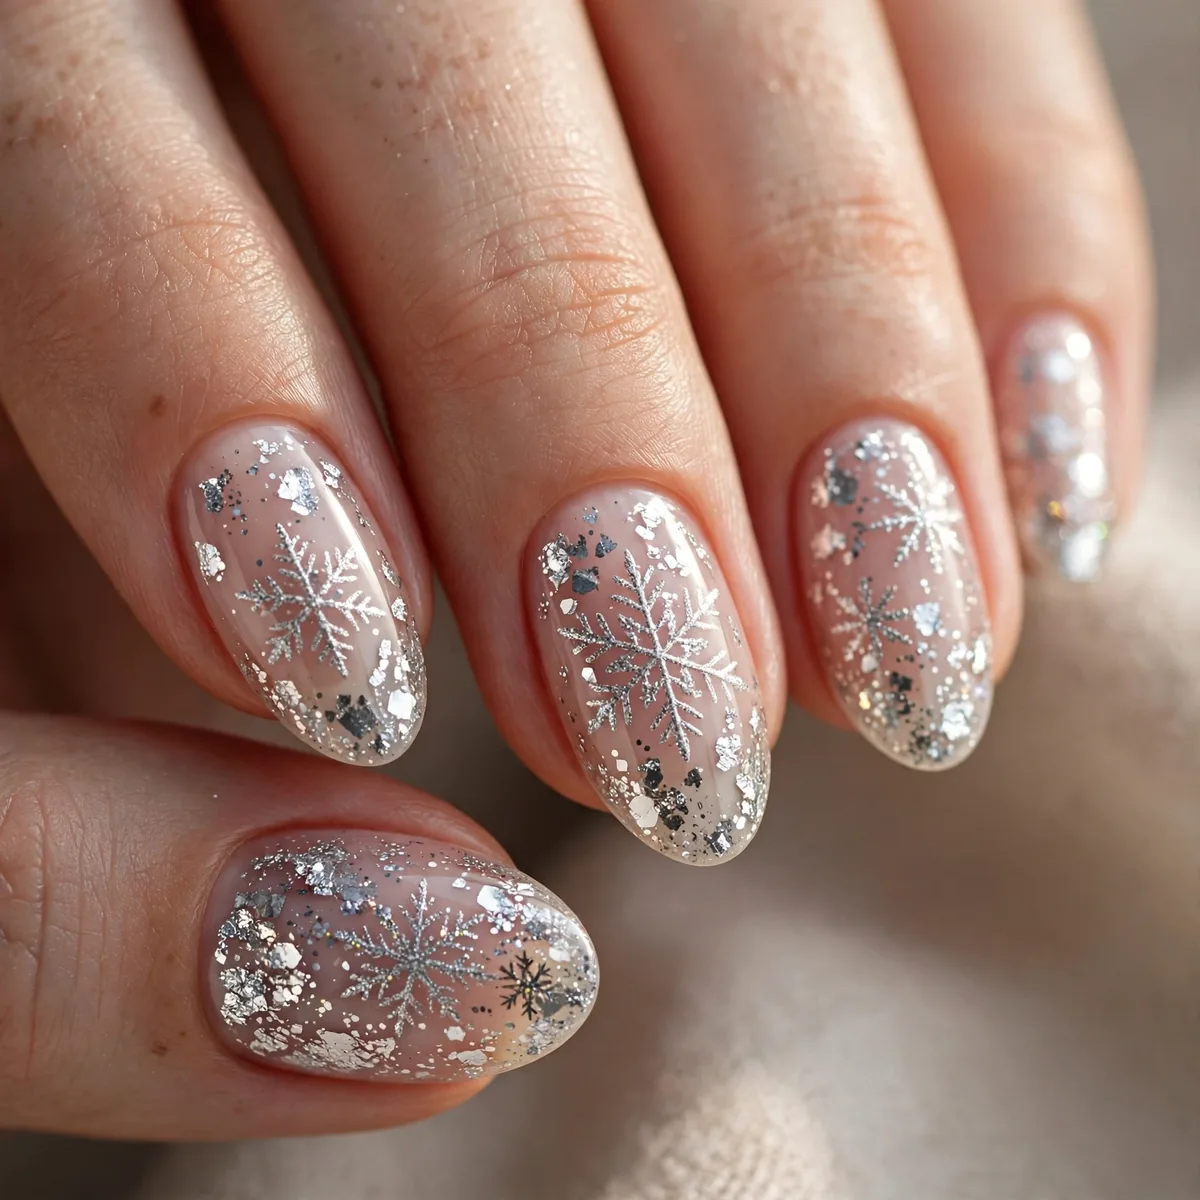
Silver glitter flakes — sparkle that snows.
Best for: the festive. Glitter flakes catch every light.
Glitter snowflake flakes go on cleanest over a fully dry silver or gunmetal base — stamping a glitter plate picks up the foil best with a firm, quick press. Press, do not drag, or the metallic arms smear. One generous glitter topper coat over the whole nail locks everything down and evens the texture.
Glitter polishes demand patience at removal — soak cotton in acetone, wrap each fingertip in foil for ten minutes, and the layers slide off without aggressive scraping that damages the nail plate. Wear this to New Year parties where flash photography makes every flake sparkle. Short squoval nails carry glitter best since chips show least.
Nude Flake Elegance
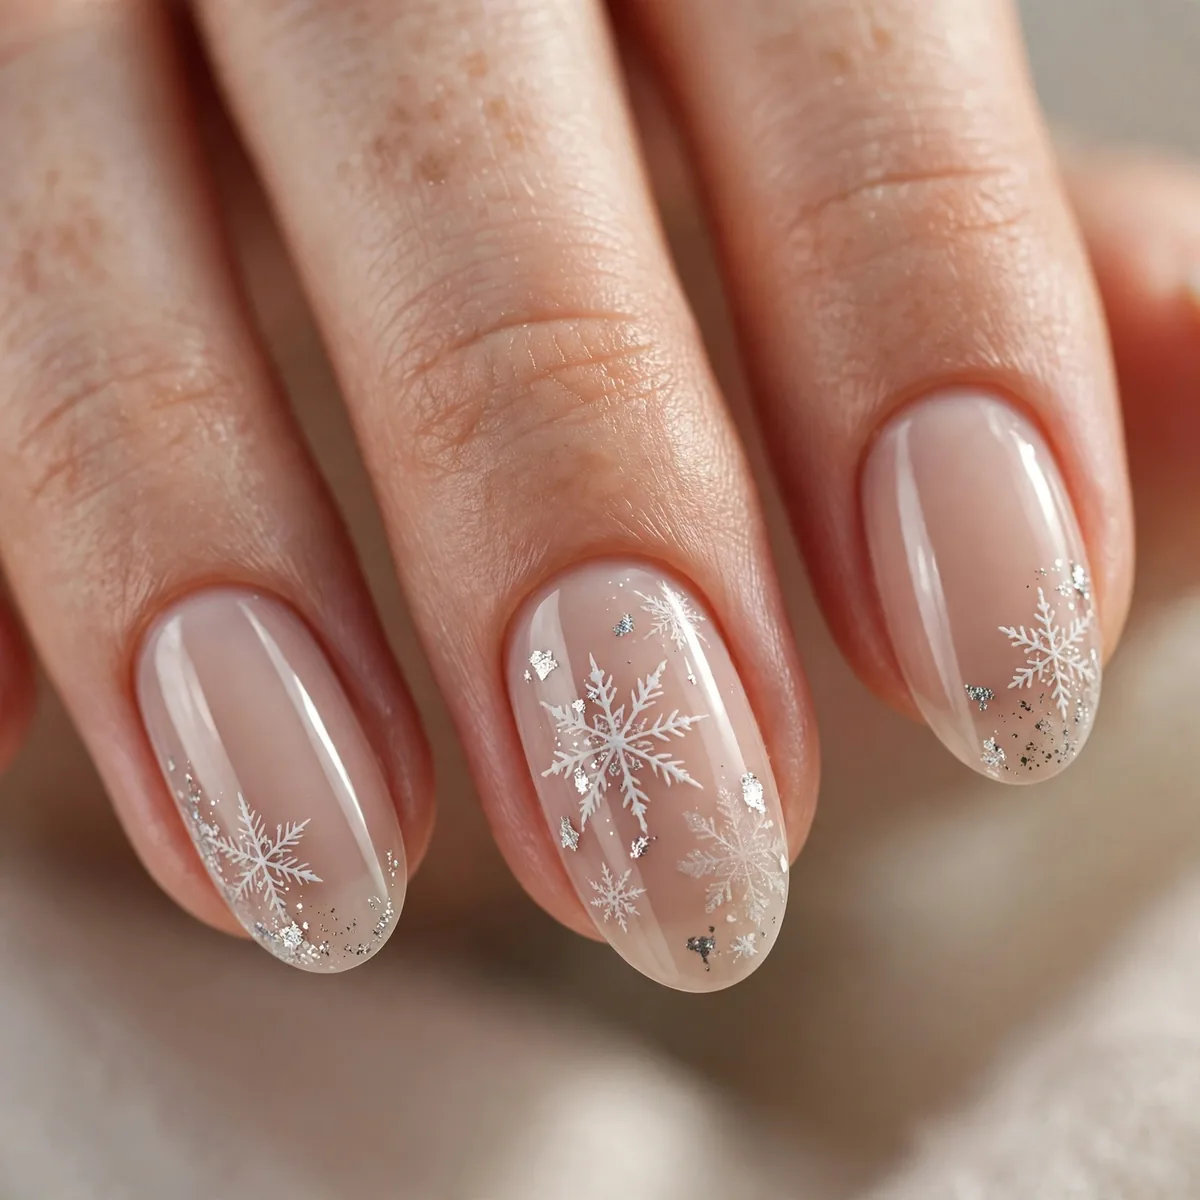
White flakes on sheer nude — the elegant winter.
Best for: professionals. Snowflakes can be office-appropriate.
For a hand-painted take, load a fine liner brush and paint the flake in six single strokes radiating from one dot — committing to fewer, confident strokes keeps the lace crisp. Place the motif on the ring finger only across both hands for a refined accent rhythm. Sheer nude bases forgive imperfect lines since contrast stays soft.
This is the longest-wearing snowflake option: nude regrowth hides for nearly three weeks, and white flakes sealed under gel top coat resist yellowing from hand soap and sunscreen. It suits job interviews and conservative offices where festive nails still need to look polished. Finish cuticles with jojoba oil nightly to keep the sheer base looking fresh.
Ombre Winter Sky
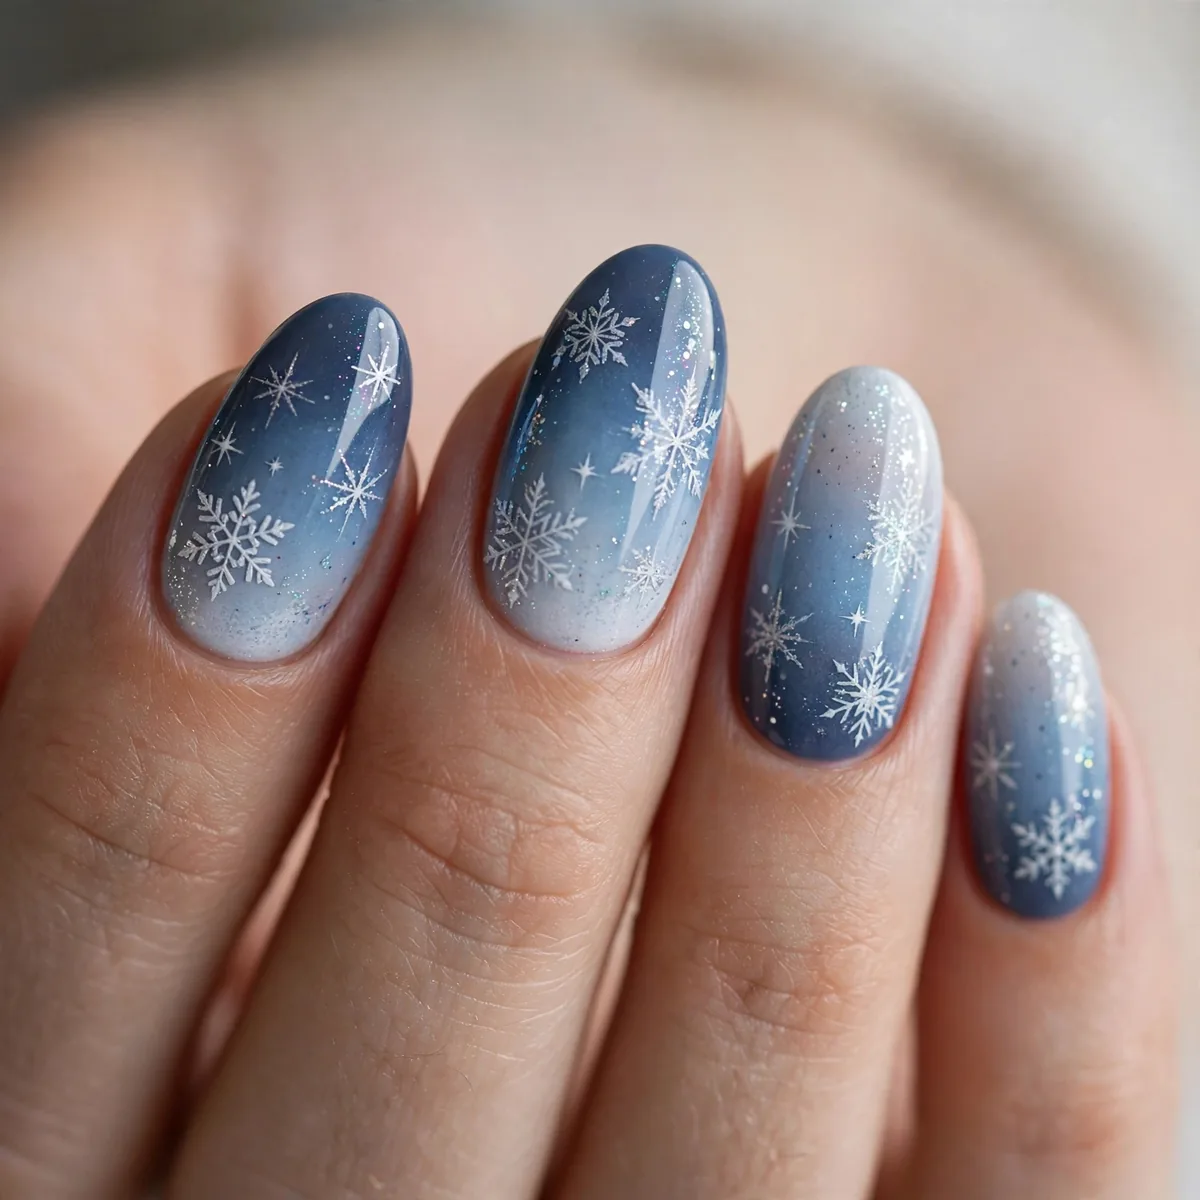
Flakes over a blue ombre — depth and delicacy.
Best for: the atmospheric. Ombre skies make flakes float.
Build the winter-sky ombre with a makeup sponge: paint horizontal stripes of deep navy, cobalt, and pale blue directly on the sponge, then dab onto the nail in three light layers. The flakes go on last, once the gradient is fully dry, so their white stays crisp instead of bleeding into the blue. Sponge away excess around cuticles with a cleanup brush.
Medium to long nails carry ombre gradients best — on short nails the color transition compresses and looks muddy. Keep flakes concentrated toward the free edge where the blue lightens, so they read as falling snow against a brightening sky. This pairs beautifully with silver jewelry and winter whites in an outfit.
Chunky Glitter Blizzard
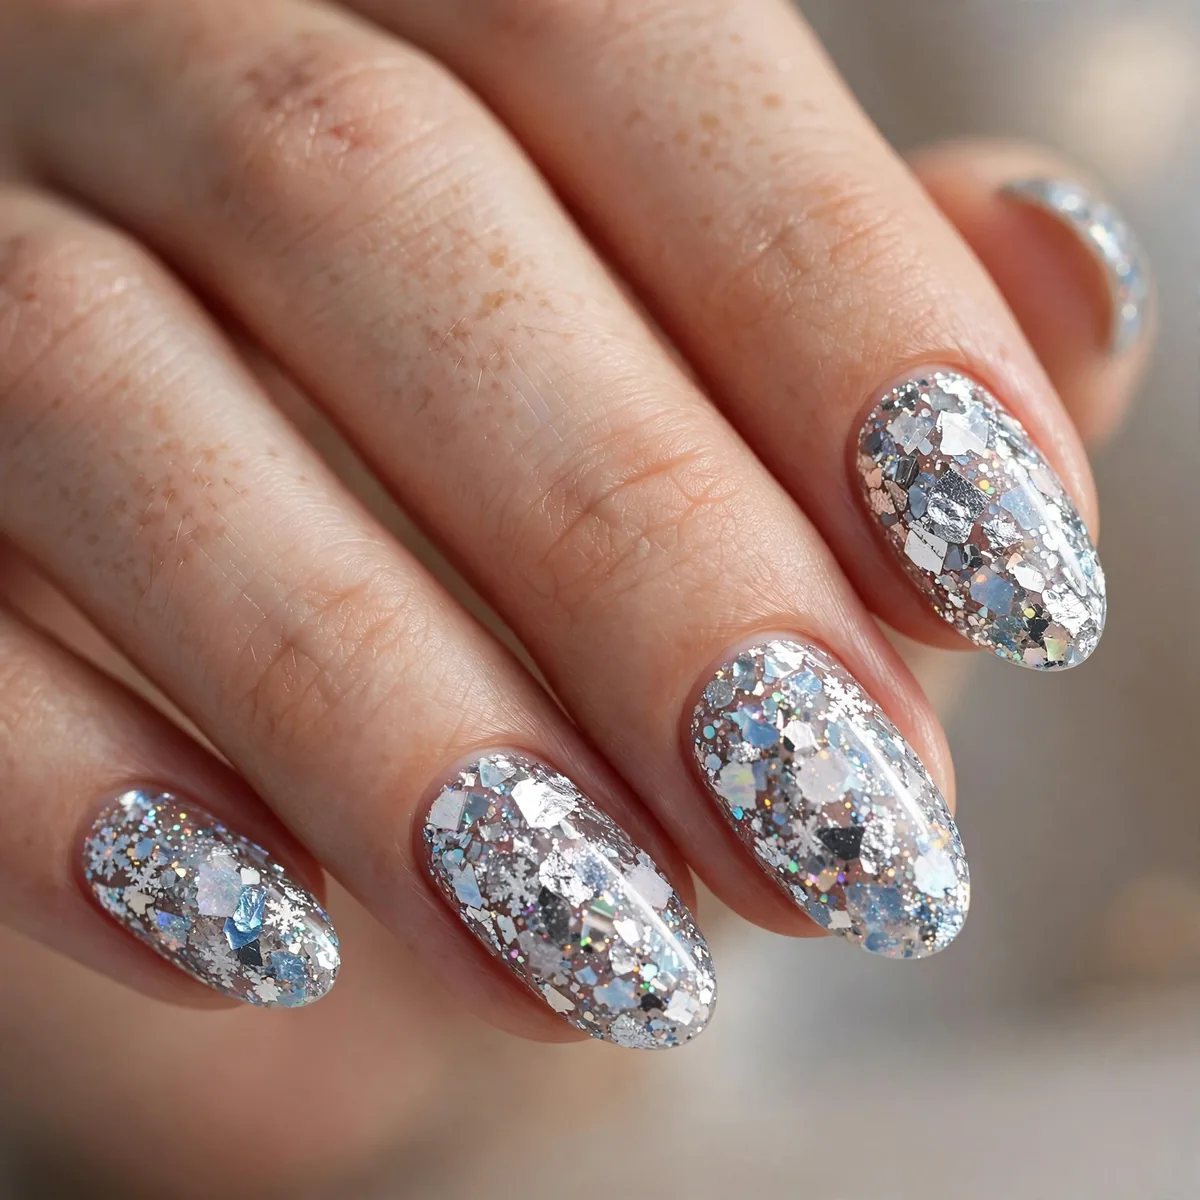
Chunky holographic glitter as snow — the blizzard.
Best for: maximum winter. Holographic reads as ice crystals.
Chunky holographic glitter needs a sticky base to grip — apply one coat of clear polish and place each glitter piece with tweezers while it is still tacky, larger hexagons near the cuticle and finer ones toward the tip. This deliberate placement reads as a blizzard; random sprinkling just looks messy. Seal with two thick top coats to smooth the chunky texture.
Expect slightly more tip wear with heavy glitter — the texture catches on fabric and hair, so reapply top coat on day five to refresh the seal. Coffin and stiletto shapes showcase the holographic shift best since longer nails catch more light. A statement manicure made for holiday parties and winter festivals.
Matte Flake Contrast
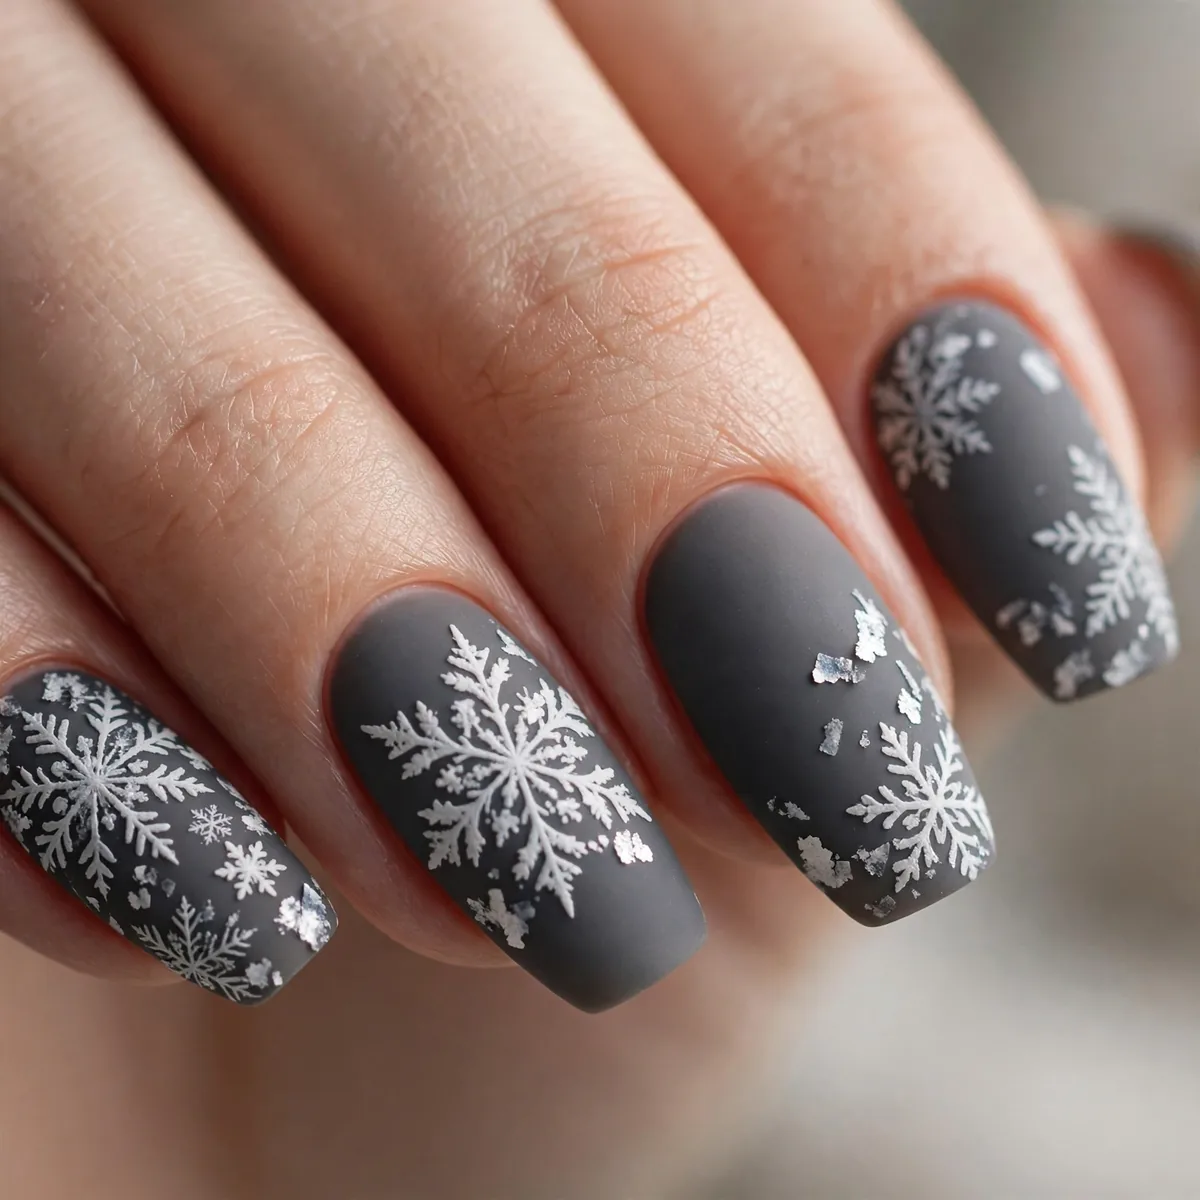
Glossy flakes on matte base — the texture contrast.
Best for: the modern. Matte + gloss is winter’s chic contrast.
The secret is order: apply flakes first on the color base, seal with glossy top coat, then paint matte top coat around the flakes with a detail brush — or place flakes after matting and seal them individually with gloss. The second method keeps edges crisper. Work one nail at a time since matte top coat sets fast and drags.
Matte top coats show oils and lint faster than gloss, so keep hands moisturized but wipe nails with a lint-free pad before photos. This texture contrast lasts best on oval nails where the glossy flake catches the most light. A modern, editorial look for winter fashion events — it photographs with real depth.
French Flake Tips
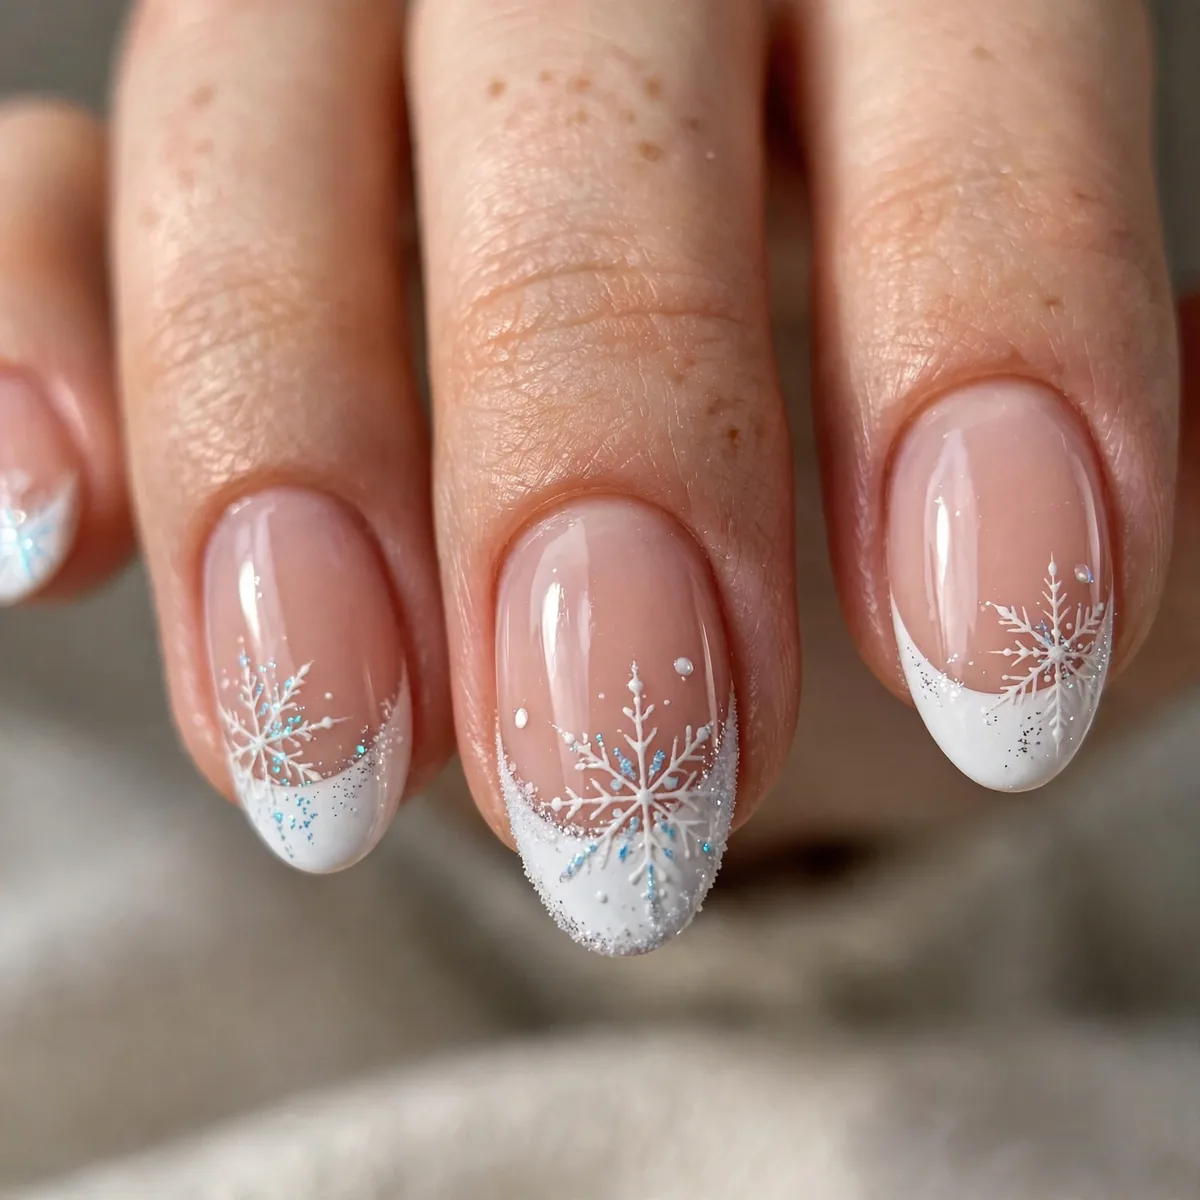
Flakes on French tips — the winter French.
Best for: French lovers. Flakes elevate the classic seasonally.
Paint the classic French smile line in crisp white first and let it cure fully before adding the flake — stamping over a tacky tip smears the smile line. Center one small flake on each tip so the design reads as part of the French, not pasted on top. Short to medium almond nails keep this proportion elegant.
A winter French transitions seamlessly from office to holiday dinner — the flake detail adds just enough festivity without breaking dress codes. White tips show chips fastest at the smile line, so float a thin top coat over the free edge and reseal midweek. Pair with a sheer pink base to keep the look soft and bridal-ready.
Deep Teal Frost
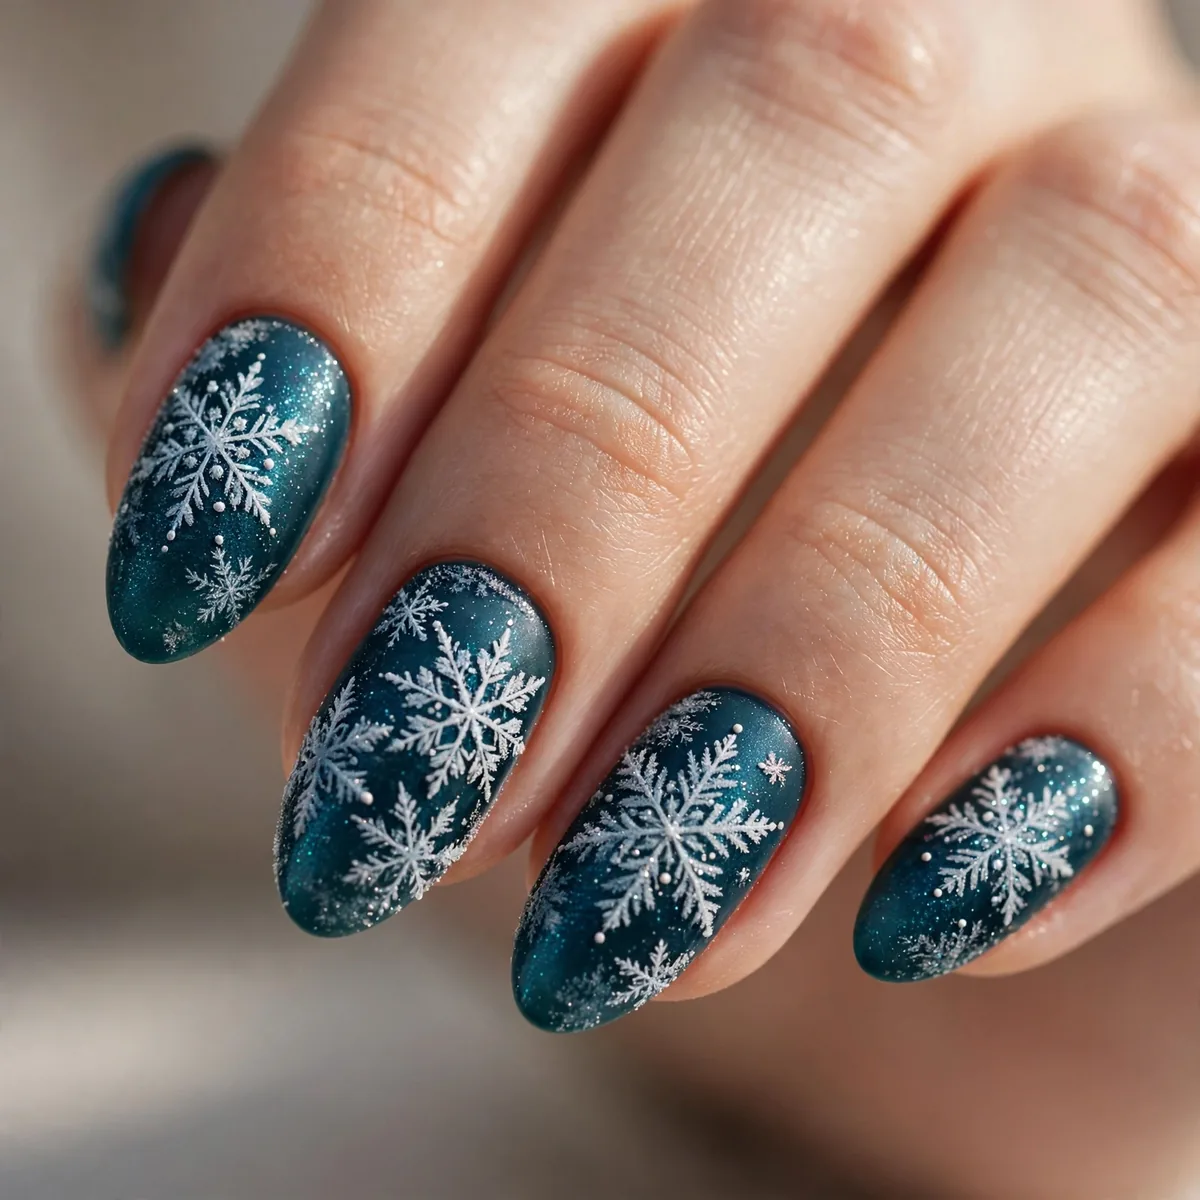
Flakes on deep teal — the unexpected winter.
Best for: the unique. Teal frost stands out beautifully.
Teal sits between blue and green, so silver flakes flatter it more than pure white — the metallic tone harmonizes with the green undertone instead of clashing. Use a crème teal at full opacity in two coats; sheers turn teal muddy. Add the flake to just the middle and ring fingers to keep the unexpected color the star.
Deep teal flatters warm and olive skin tones especially, where icy blues can look harsh. This shade carries a jewel-tone richness that suits evening events and winter galas. Since dark crèmes stain slightly at removal, protect nails with a double base coat and soak — never scrub — during takedown, keeping the nail plate stain-free.
Gold Flake Luxe
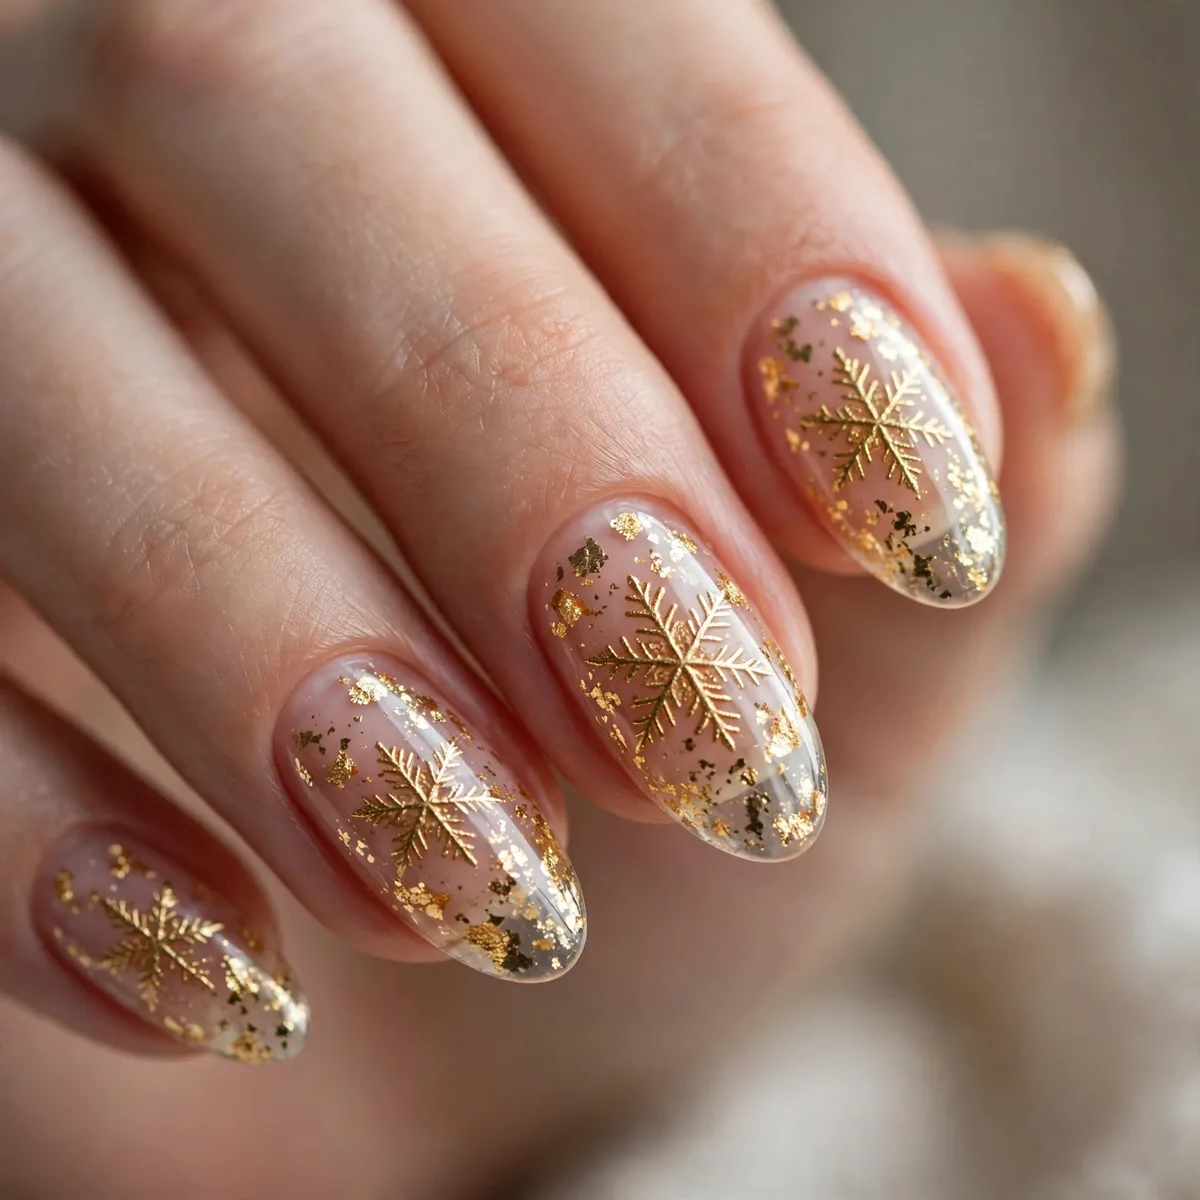
Gold flakes on deep green — luxe winter.
Best for: the glamorous. Gold flakes are winter jewelry.
Gold foil flakes apply best with a silicone-tipped tool on a tacky deep-green base — the foil grips instantly, so place it once and leave it alone. Tear the foil into small irregular shards rather than cutting; organic edges look like real gold leaf. Seal with two gel-effect top coats so the metallic texture lies perfectly smooth.
Deep green and gold is the manicure equivalent of velvet and brass — pure holiday luxury. It flatters every skin tone and pairs with gold rings and emerald earrings. Wear it to Christmas dinner and New Year countdowns. Metallic foils can snag on knitwear, so keep a clear top coat handy for quick edge repairs.
Watercolor Winter
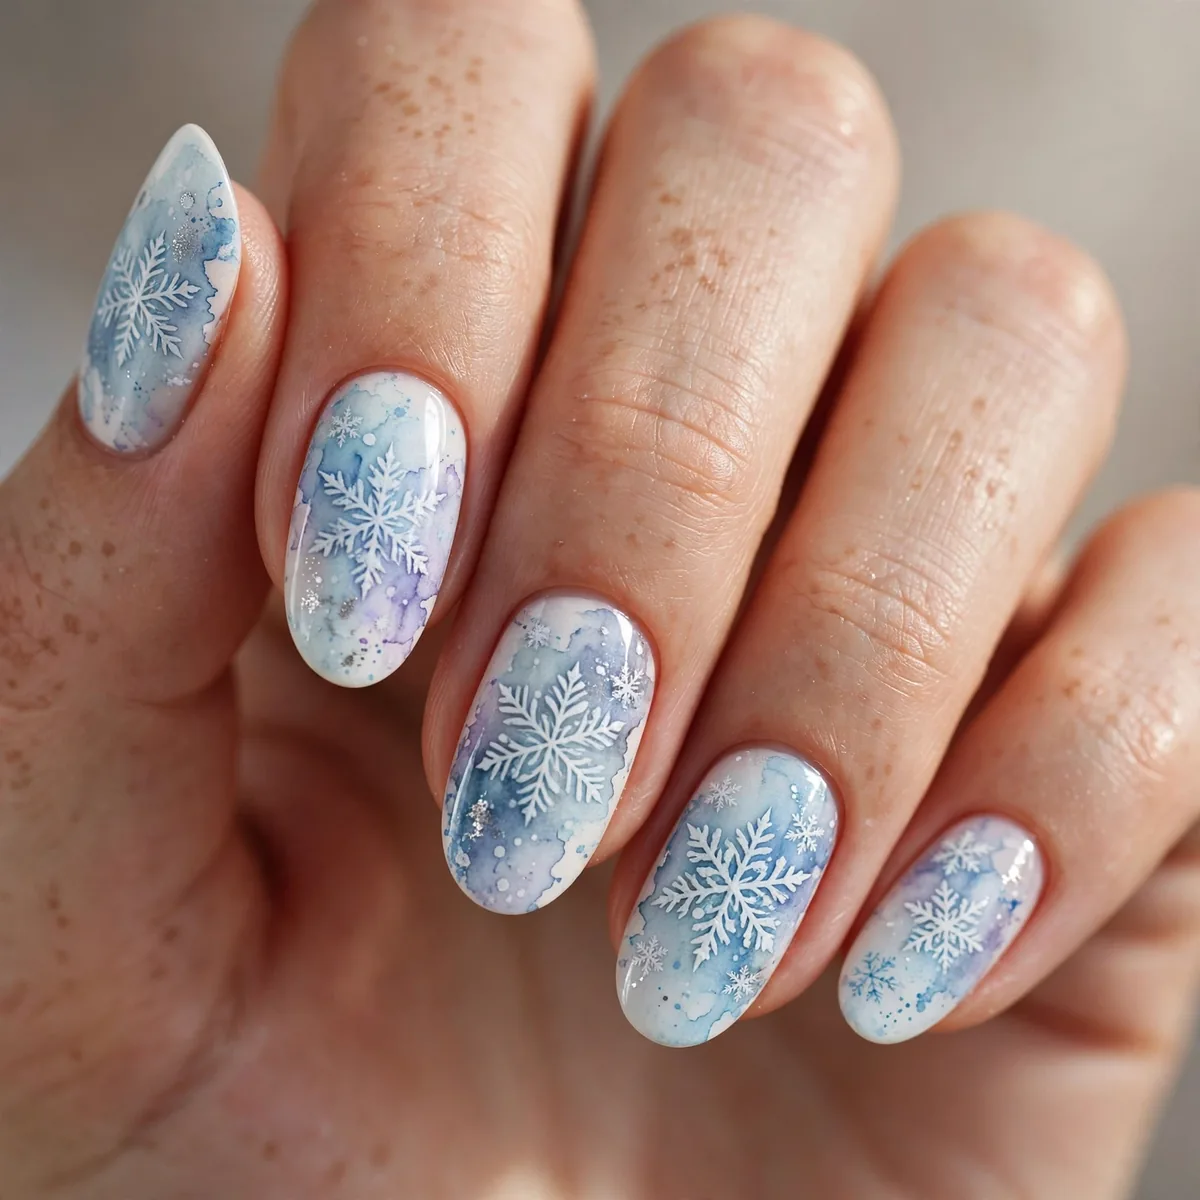
Soft watercolor flakes — the dreamy winter.
Best for: the artistic. Watercolor softens the flake motif.
The watercolor effect comes from diluting polish: drop icy blue and lavender onto a palette, add a drop of polish thinner, and wash the color on with a soft fan brush. Paint flakes loosely over the wash while it is still slightly damp so edges melt together. No two nails match — that is the charm, not a flaw.
Long oval nails give the wash room to bloom, but medium lengths work if you keep the watercolor to the lower two-thirds and leave the tip cleaner. This dreamy finish suits winter brunches and art-gallery afternoons better than high-glam evenings. Mistakes blend beautifully here — beginners should start with this forgiving style.
Flake Accent Nail
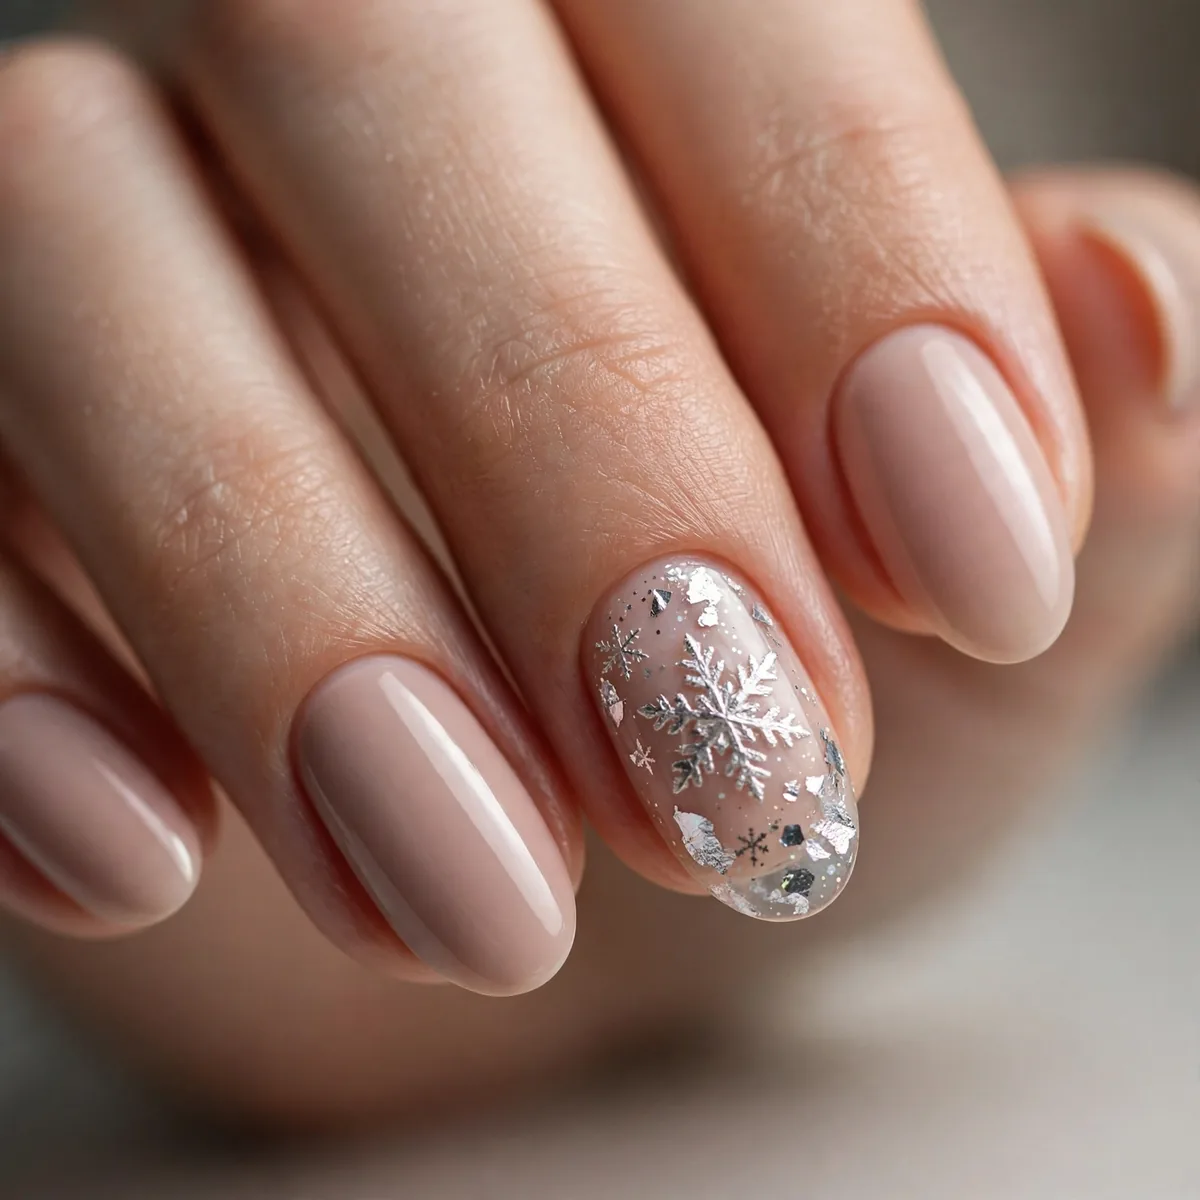
One flake accent among solid winter shades — restrained magic.
Best for: the subtle. A single accent keeps winter chic.
Composition matters: put the flake accent on the ring finger and keep the other four nails in alternating solids — midnight and icy blue, for example. This rhythm lets the eye travel instead of landing awkwardly. Keep the accent flake slightly larger than you think; a too-small motif disappears against bold solids.
The accent-nail formula is the most versatile winter manicure — swap the flake finger for a plain solid and the set becomes office-neutral in seconds. Solids wear longer than art, so the four plain nails carry the manicure while the accent does the talking. A smart choice for a two-week holiday stretch with mixed dress codes.
Gradient Flake Fade
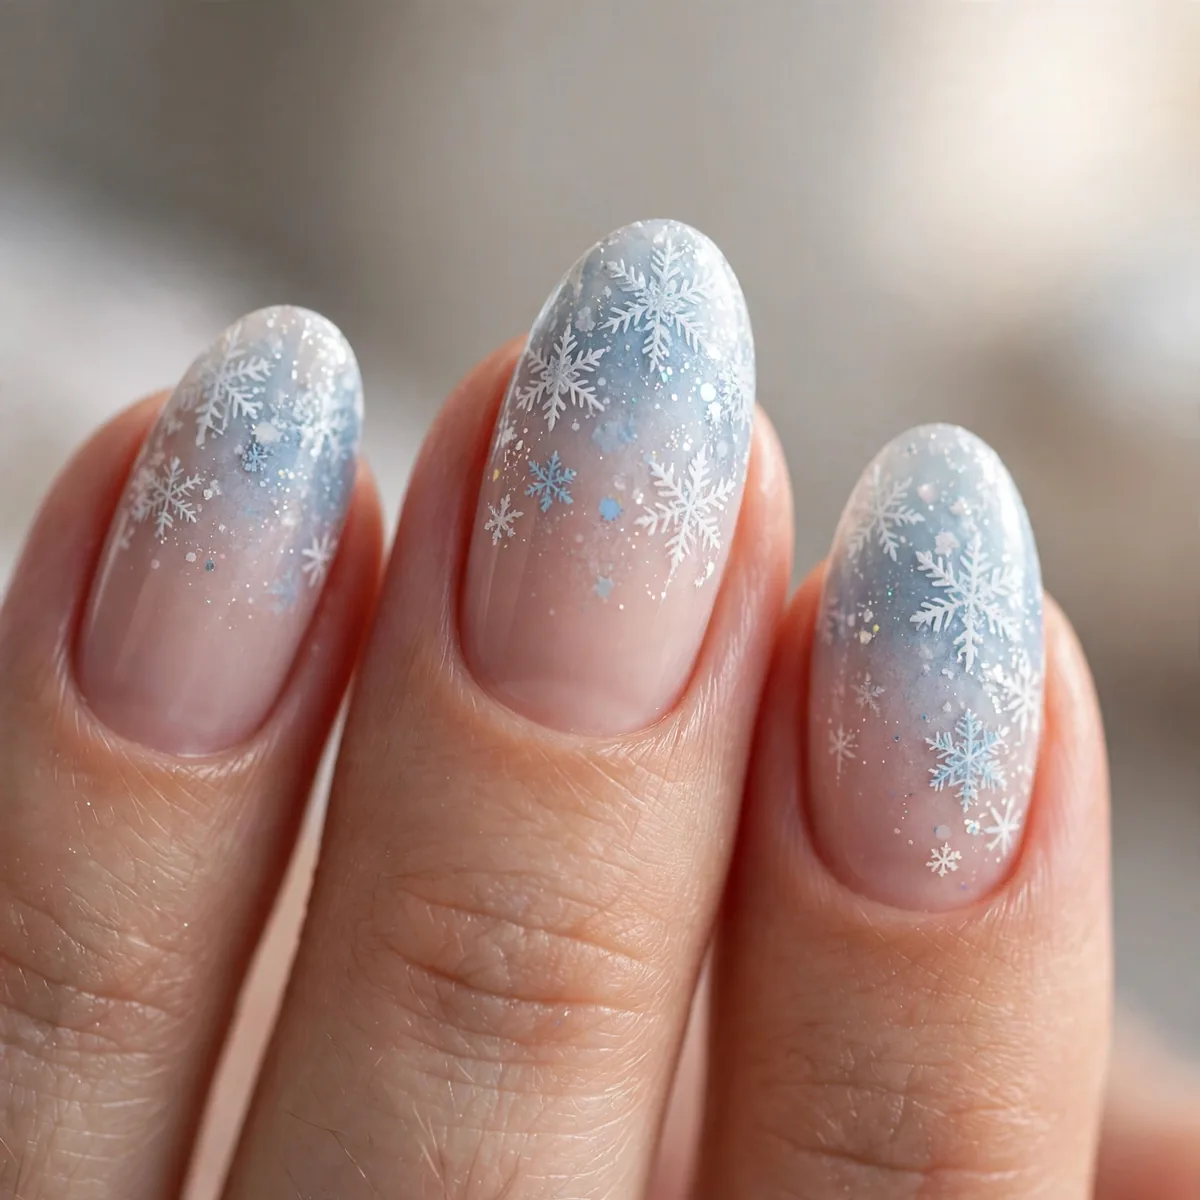
Flakes fading down the nail — the falling snow.
Best for: the dynamic. Fading flakes suggest motion.
Create the falling-snow fade by stamping one full flake near the cuticle, then a smaller partial flake mid-nail, and just two or three tiny dots near the tip — descending size mimics distance. Use a sheer blue base so the smaller motifs stay visible. Clean the stamp between impressions so each flake prints crisply.
This design needs length to tell its story — medium almond or longer lets the fade breathe, while short nails crowd the sequence. The downward motion elongates fingers visually, a flattering trick for wider nail beds. Pair with a high-shine top coat; gloss amplifies the sense of snow catching light as it falls.
The Wonderland Capsule
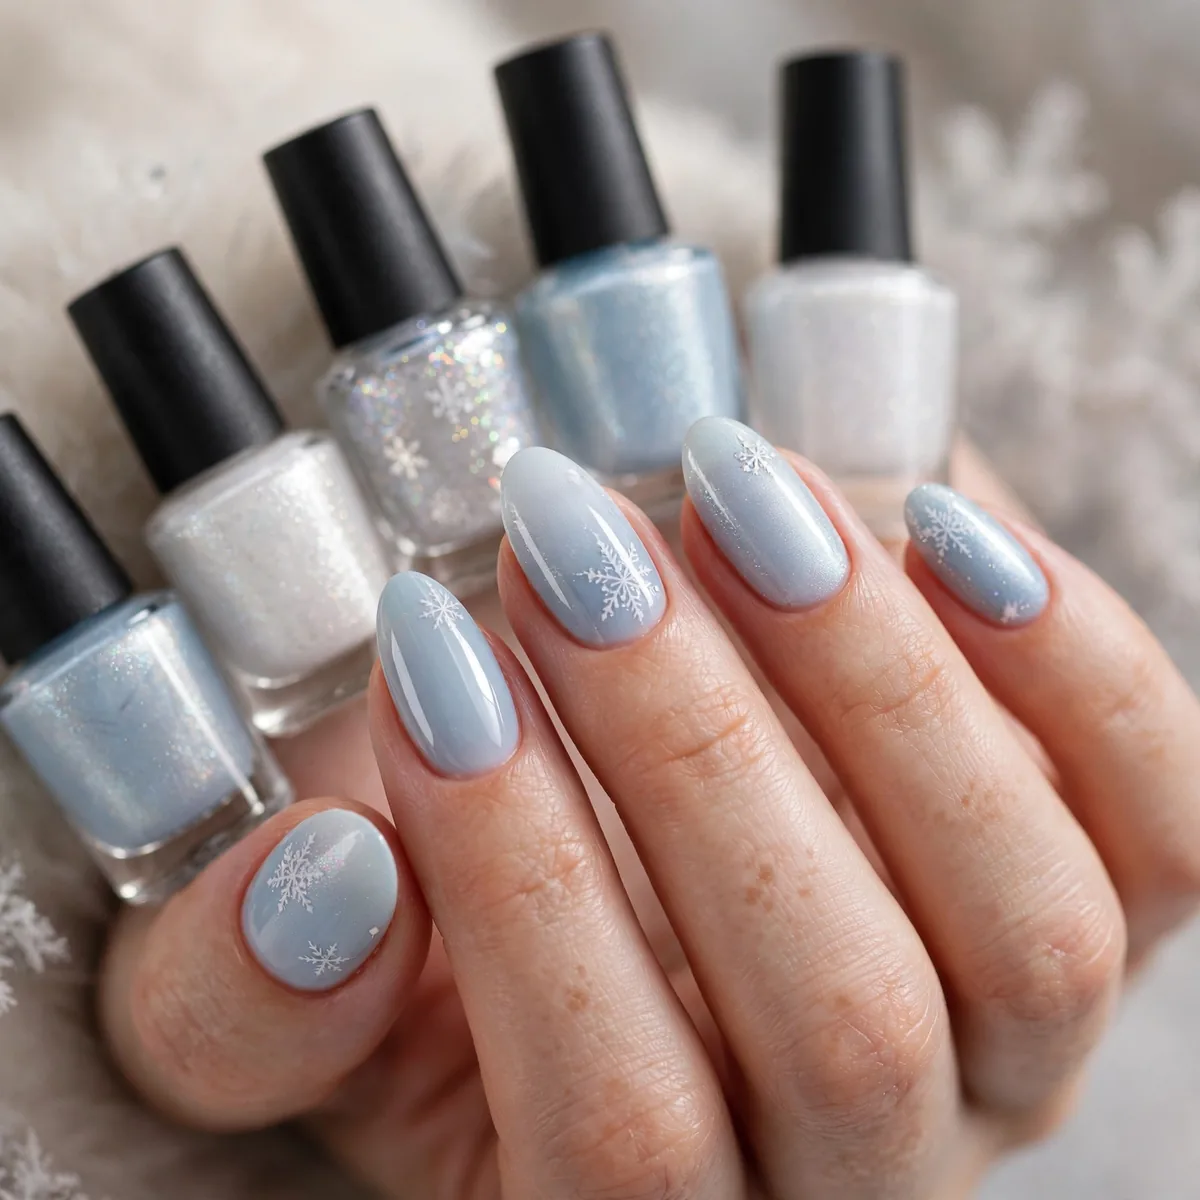
Midnight blue, icy blue, white, silver — the four-bottle winter.
Best for: the season. Four shades, endless wonderland.
Four bottles genuinely cover the whole article: midnight for contrast sets, icy blue for soft looks, white for every flake motif, and silver for glitter accents. Choose the white in a one-coat opaque formula — flake detail needs full coverage. Buy minis of the seasonal blues and a full-size white, which you will use year-round.
A capsule approach saves money and drawer space — these four shades mix into dozens of winter combinations without single-use bottles. The palette carries through January and February too, long after Christmas reds feel dated. Store polishes upright in a cool drawer and they will stay fresh for next winter’s wonderland.
Let it snow. Save your winter wonderland — and for more frosty ideas, see our ice blue nails and winter ideas.