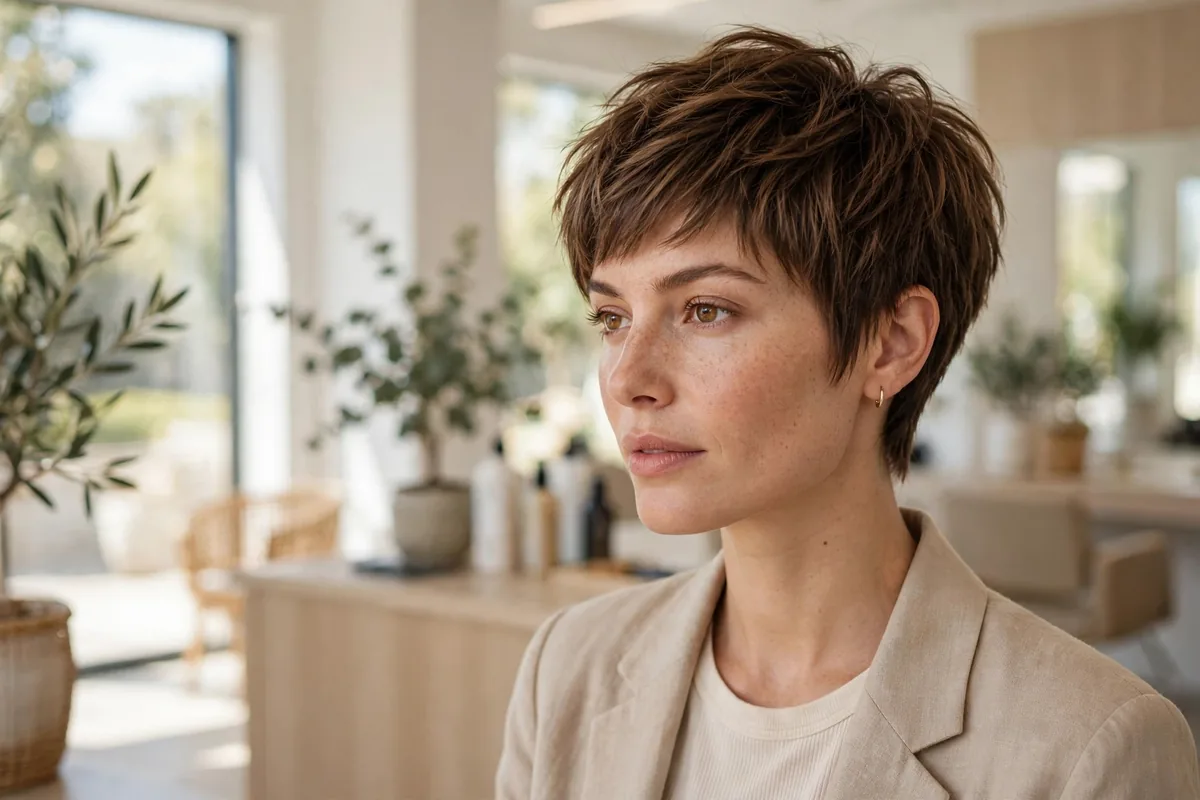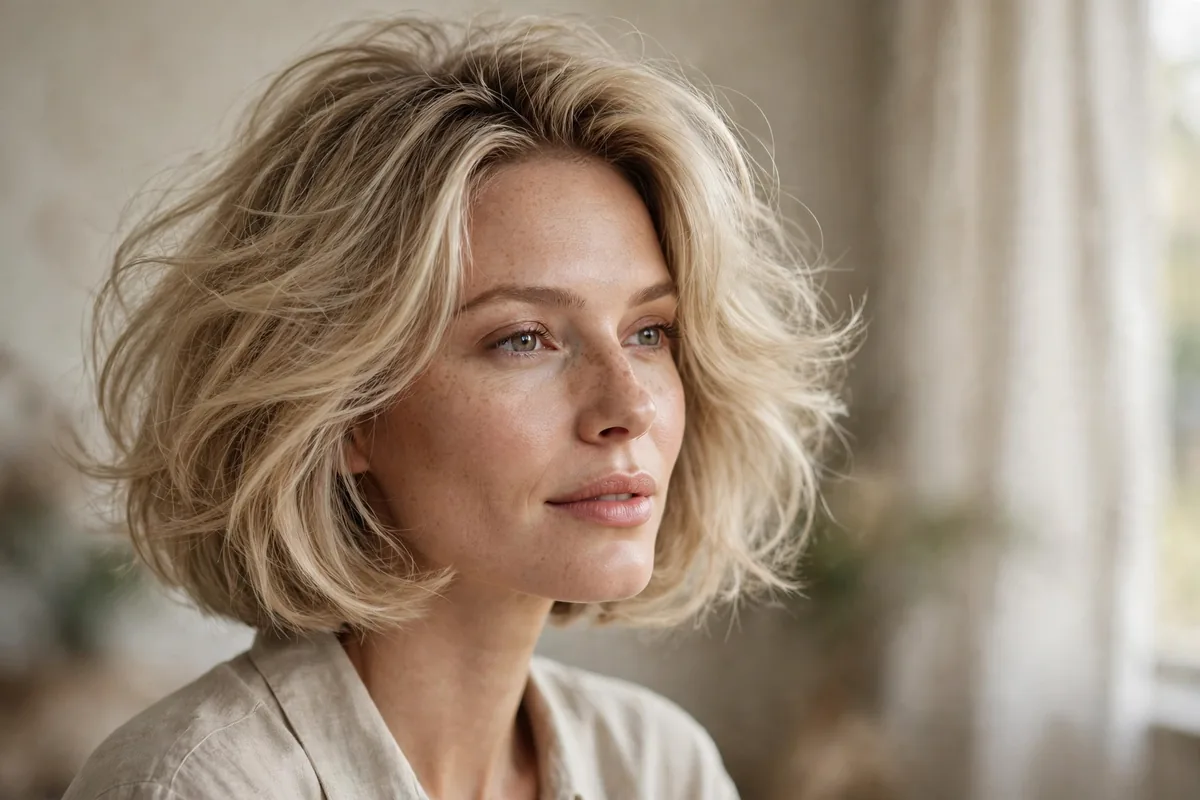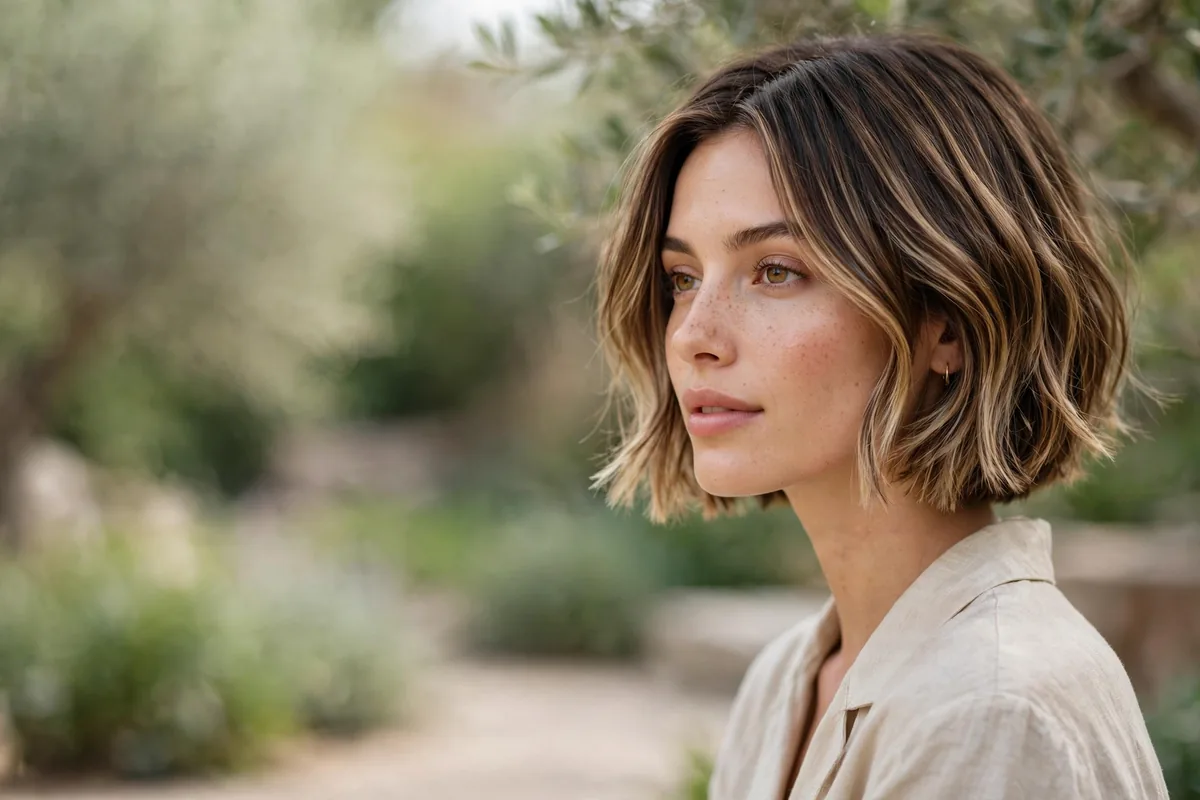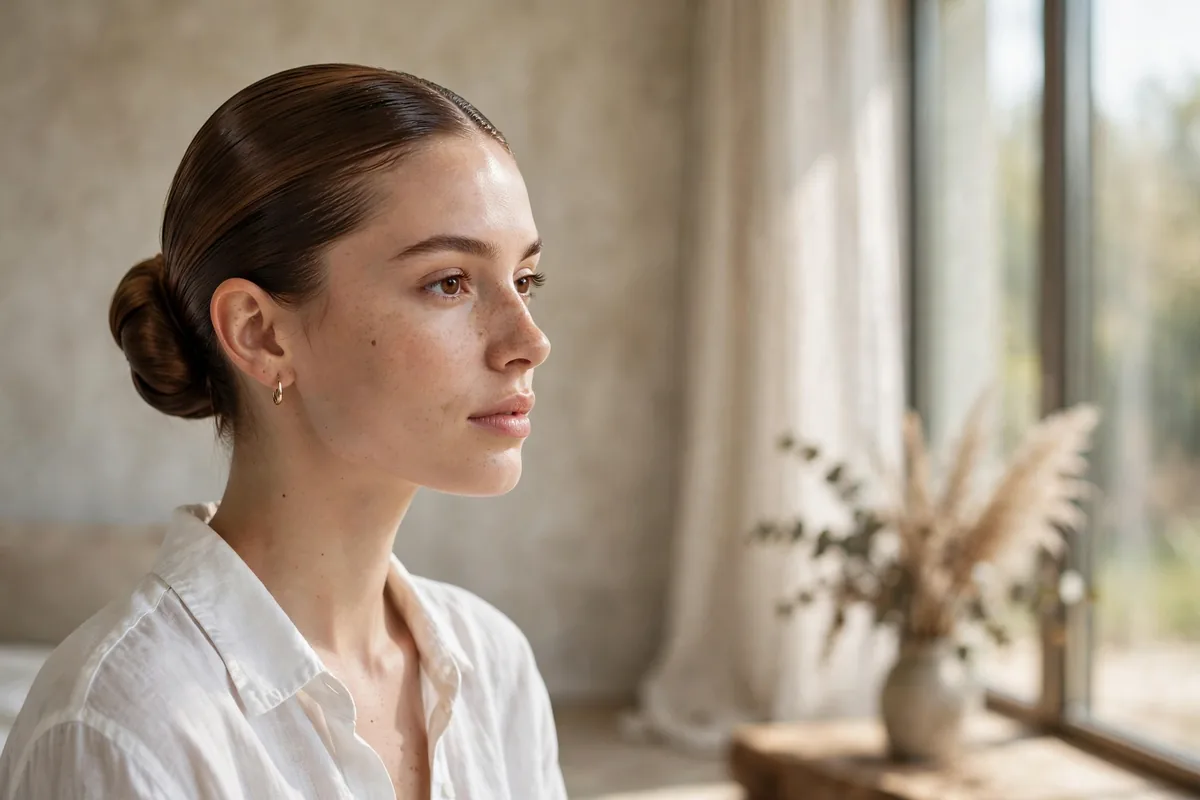
We’ve all been there — you wake up, the roots are oily, and there’s no time for a full wash and style.
Here’s the good news: slightly greasy hair is actually easier to style than freshly washed hair. The natural oils give grip, hold, and sleekness that clean hair can’t match.
Dry shampoo helps, but the real rescue is choosing styles that work with the oil instead of fighting it — slicked backs, textured buns, and braids that thrive on second-day texture.
Here are 20 styles that save the day. Let’s get into it.
The High Messy Bun
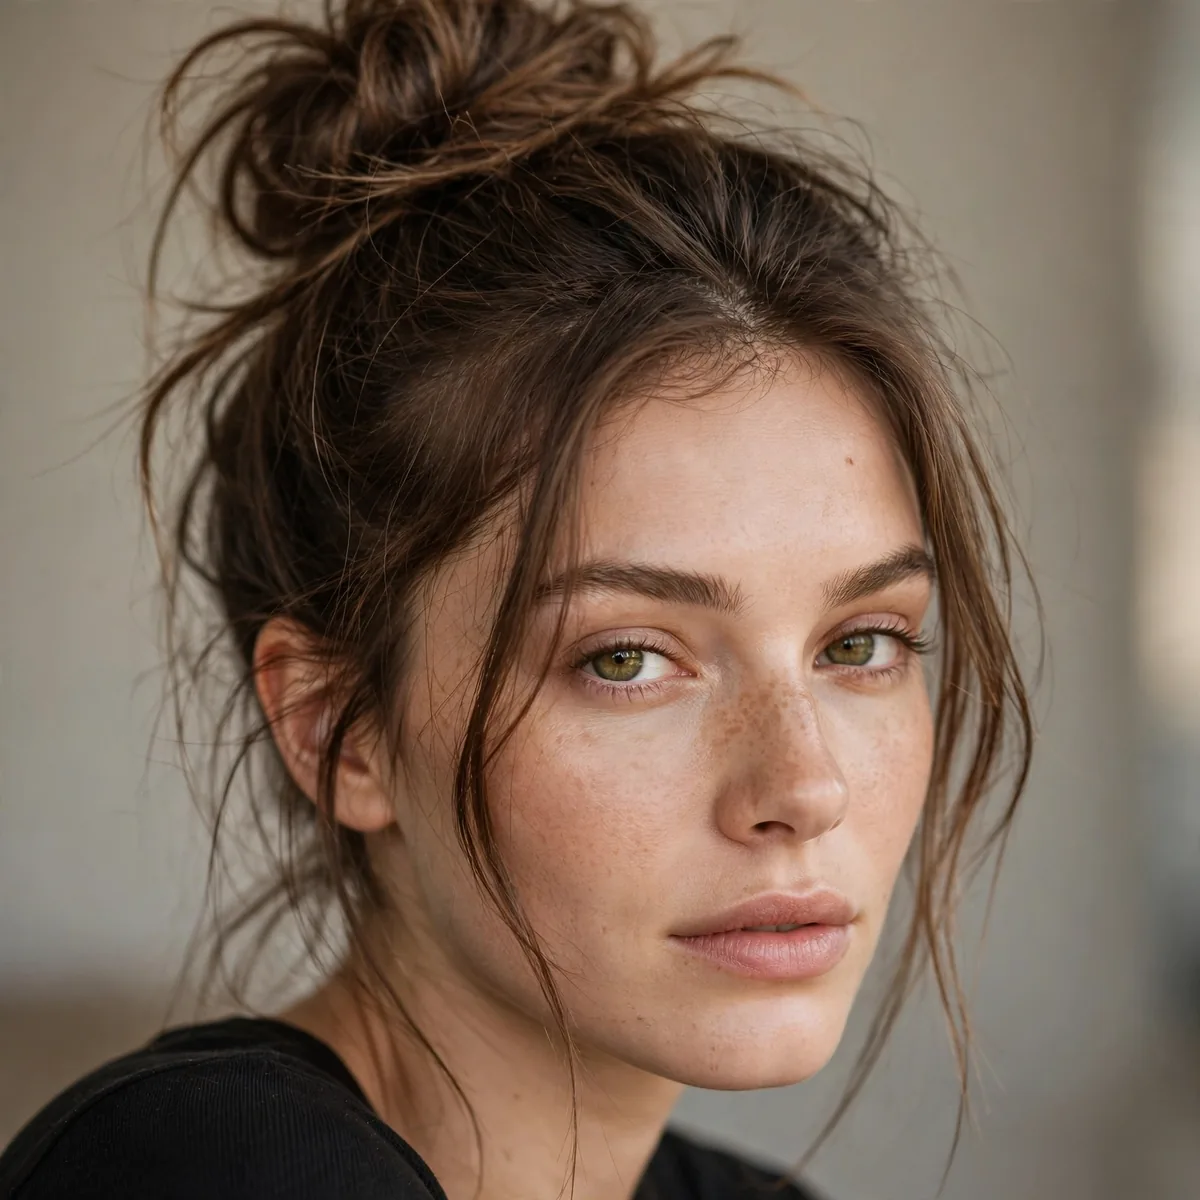
Greasy hair’s best friend. The oils slick the bun smooth while the messy texture on top hides everything. Tease the crown before twisting for extra camouflage.
Best for: day-two or day-three hair. A few face-framing pieces pulled loose make it look intentional, not desperate.
Consider the high messy bun your secret weapon for job interviews. It photographs beautifully from every angle, holds up through long events, and looks intentional without seeming overdone. Prep with flexible-hold hairspray for extra staying power when you cannot sneak away for touch-ups, and stash two bobby pins in your bag for insurance. A style you do not have to think about is a style that lets you enjoy the occasion.
Layer the high messy bun with complementary details for extra dimension. Face-framing layers, a softened hairline, or a contrasting texture at the ends all add interest without complicating the style. A microfiber towel refines these details, while smoothing serum keeps them defined through the day. Think of the base style as the canvas and these small additions as the brushstrokes that make it personal.
Slicked-Back Low Ponytail
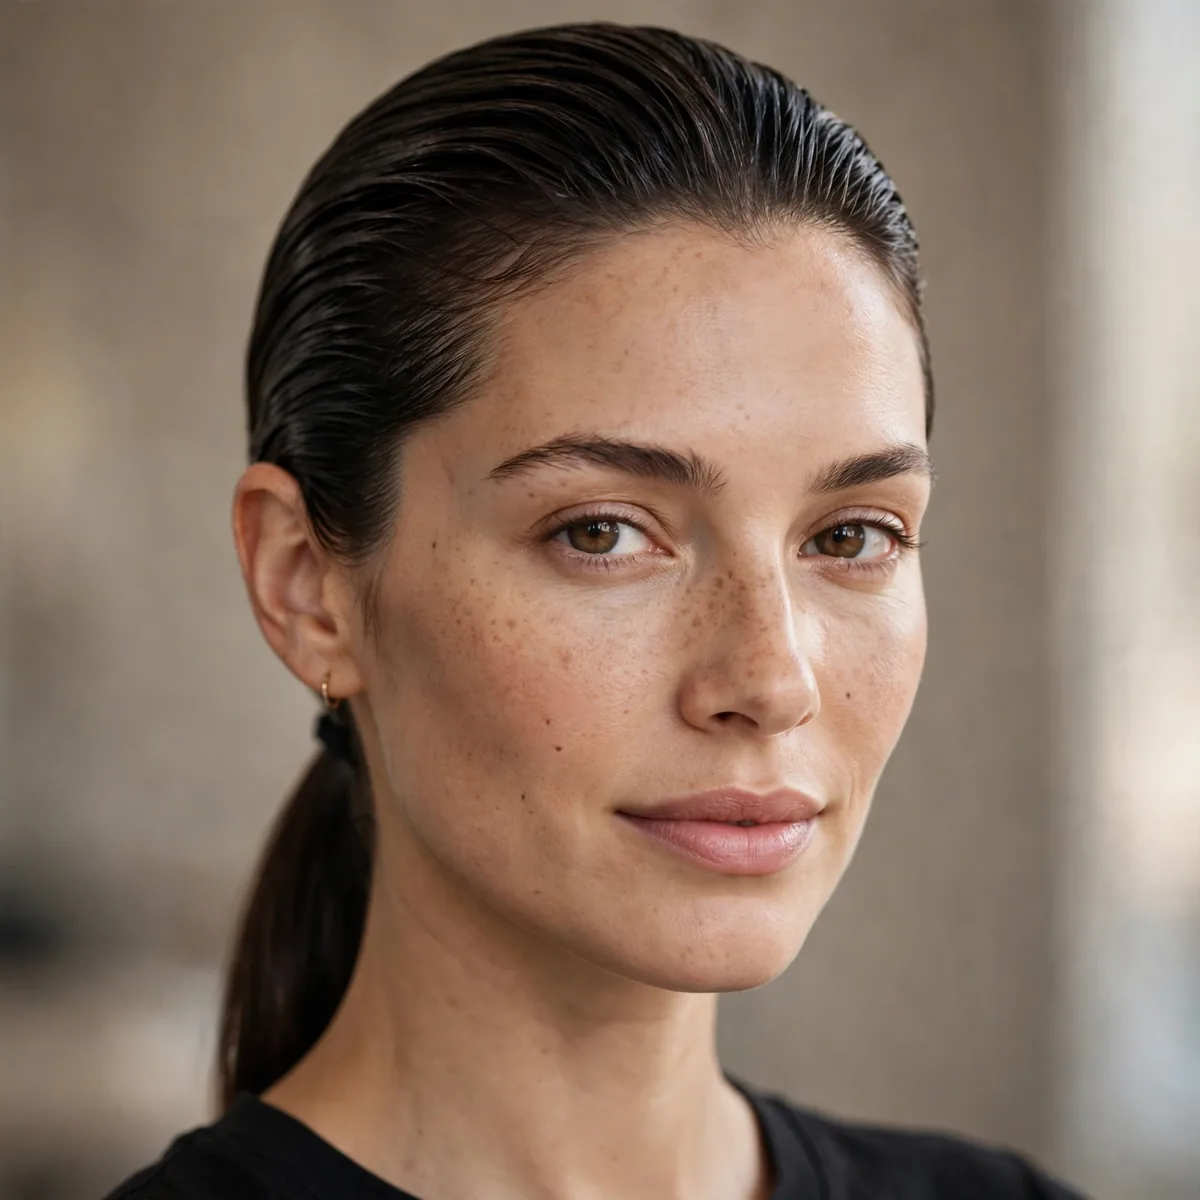
Lean into the oil — brush everything straight back with a little gel for a sleek, editorial low pony. Greasy roots become glossy roots.
Best for: the oiliest days. What looks dirty loose looks deliberate slicked.
If your slicked-back low ponytail looks great from the front but messy from behind, you are not checking your blind spots. A hand mirror is as essential as a round brush for this style — the back is where sections go rogue. Build in a quick all-angles check before you leave, and keep argan oil in your bag for smoothing the nape area later. Styles are three-dimensional; styling them one-dimensionally is how the back gets neglected.
Balance is the key to wearing a slicked-back low ponytail well. If the style has a lot of volume, keep the front relatively calm; if the silhouette is sleek, a little texture around the face prevents severity. oval faces particularly benefit from this push-and-pull approach. Finish the hairline with styling cream on a round brush for a polished edge that still looks touchable. Proportion awareness turns a good style into a great one.
Double Dutch Braids
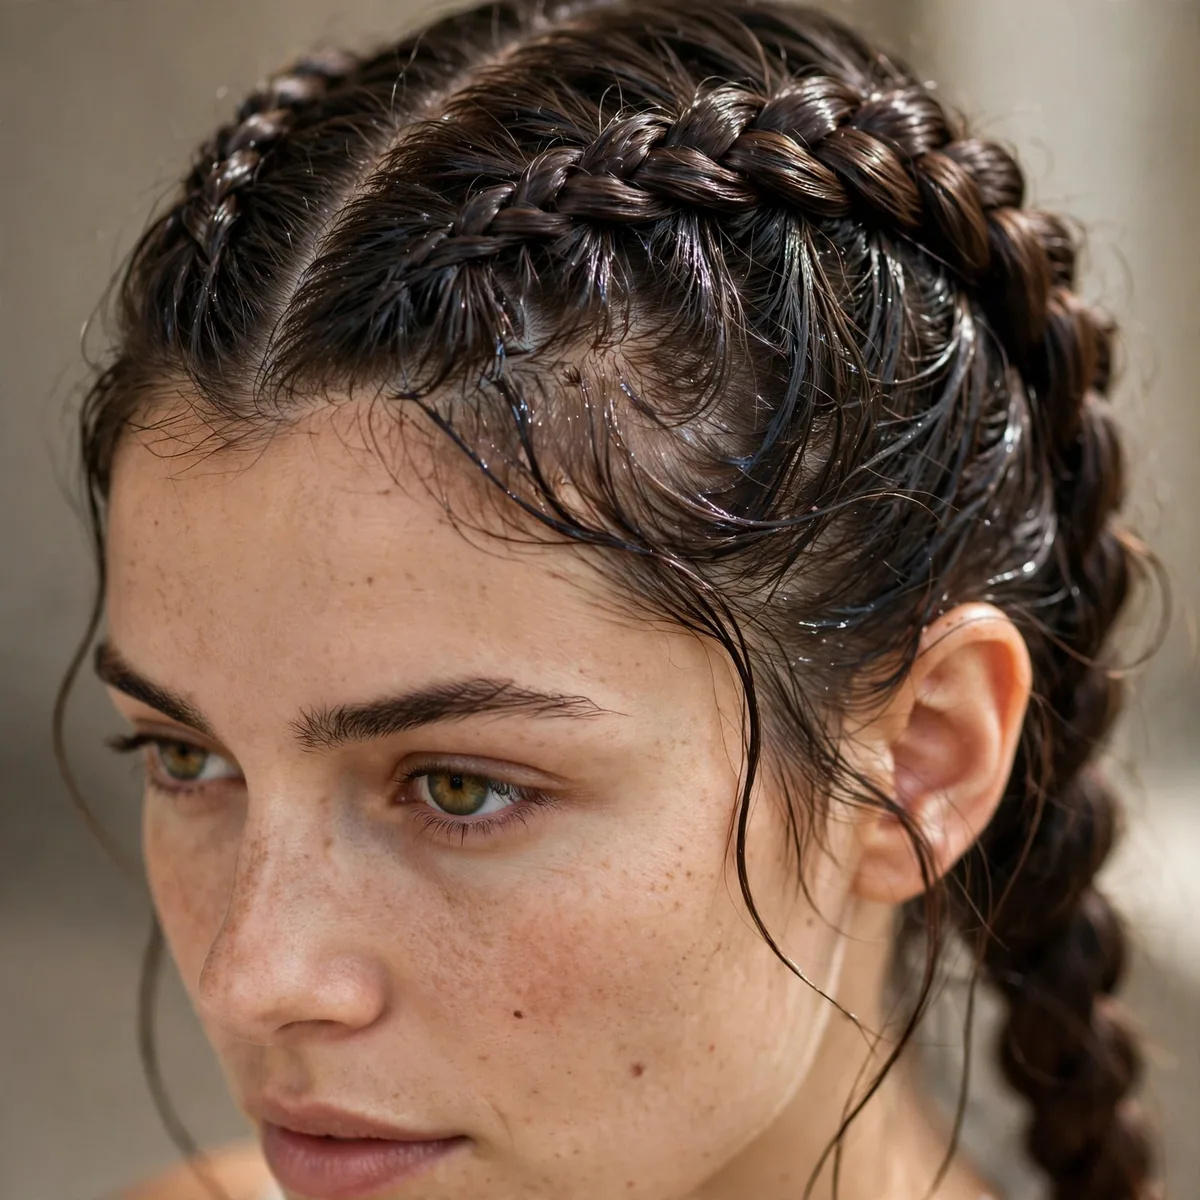
Braids grip better on unwashed hair, and the tight partings hide oily roots completely. They also keep everything secure for the whole day.
Best for: workouts on no-wash days. Check our gym hairstyles that stay put for more secure options.
Do not skip the setup when creating a double dutch braids — it determines everything. Detangle thoroughly with a rattail comb, then section the hair according to where the style needs the most structure. A light layer of edge control adds workable grip, especially on fine hair that tends to slip or puff. Taking five extra minutes at this stage saves twenty minutes of fixing and re-pinning later in the day.
The right products make a double dutch braids dramatically easier to execute. A leave-in conditioner is the real workhorse — it adds grip, calms frizz, and helps the style hold for hours without visible residue. Work it through before you begin styling rather than layering it on at the end, so it supports the hair's structure from the inside. A light mist to finish keeps everything touchable instead of crunchy.
Sleek Low Bun
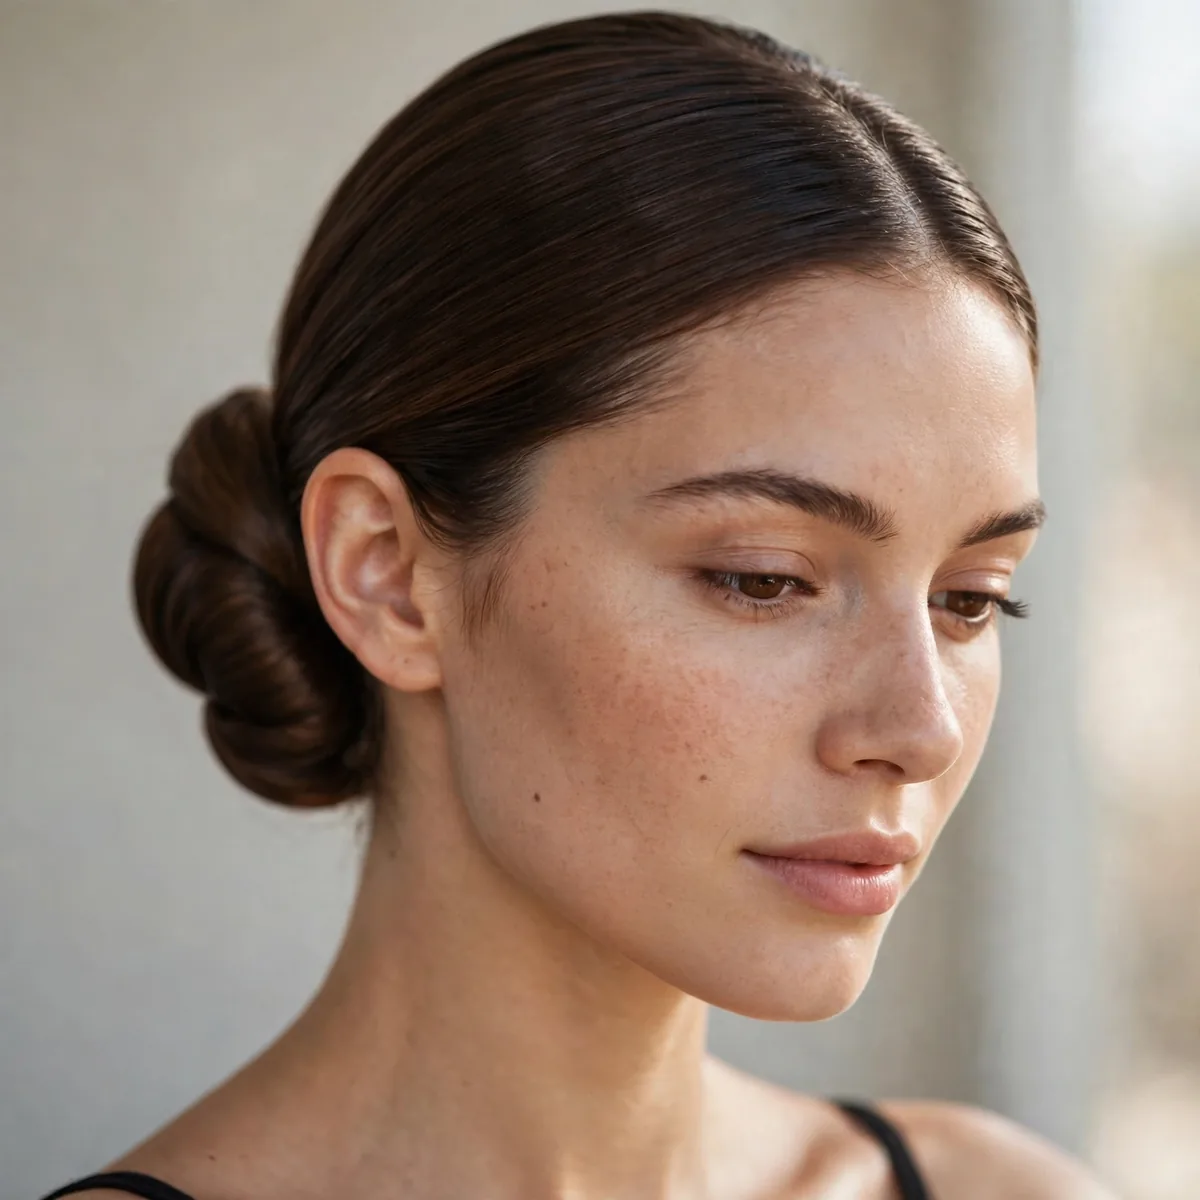
A smooth, low bun at the nape — ballerina-polished and completely oil-proof. The sleekness reads as elegant, never greasy.
Best for: work meetings on wash-day-eve. A center part and smoothing serum complete the look.
Your density changes how a sleek low bun behaves, so calibrate the approach. Thick hair needs more numerous, smaller sections to stay controlled, while fine hair does better with fewer sections plus smoothing serum at the roots for the illusion of fullness. Naturally wavy hair often holds the style longest since the bend grips itself. Whatever your density, step back and check the balance — the silhouette should feel even, never heavy on one side.
Refresh rather than redo when your sleek low bun starts to tire. A light mist of water followed by dry shampoo reactivates the shape without a full restyle, and a rattail comb can neaten partings in seconds. Focus revival efforts on the hairline and crown — that is where styles visibly age first. Tucking one loose piece behind the ear or adding an accessory can disguise day-two softness while looking completely intentional.
Claw Clip Twist
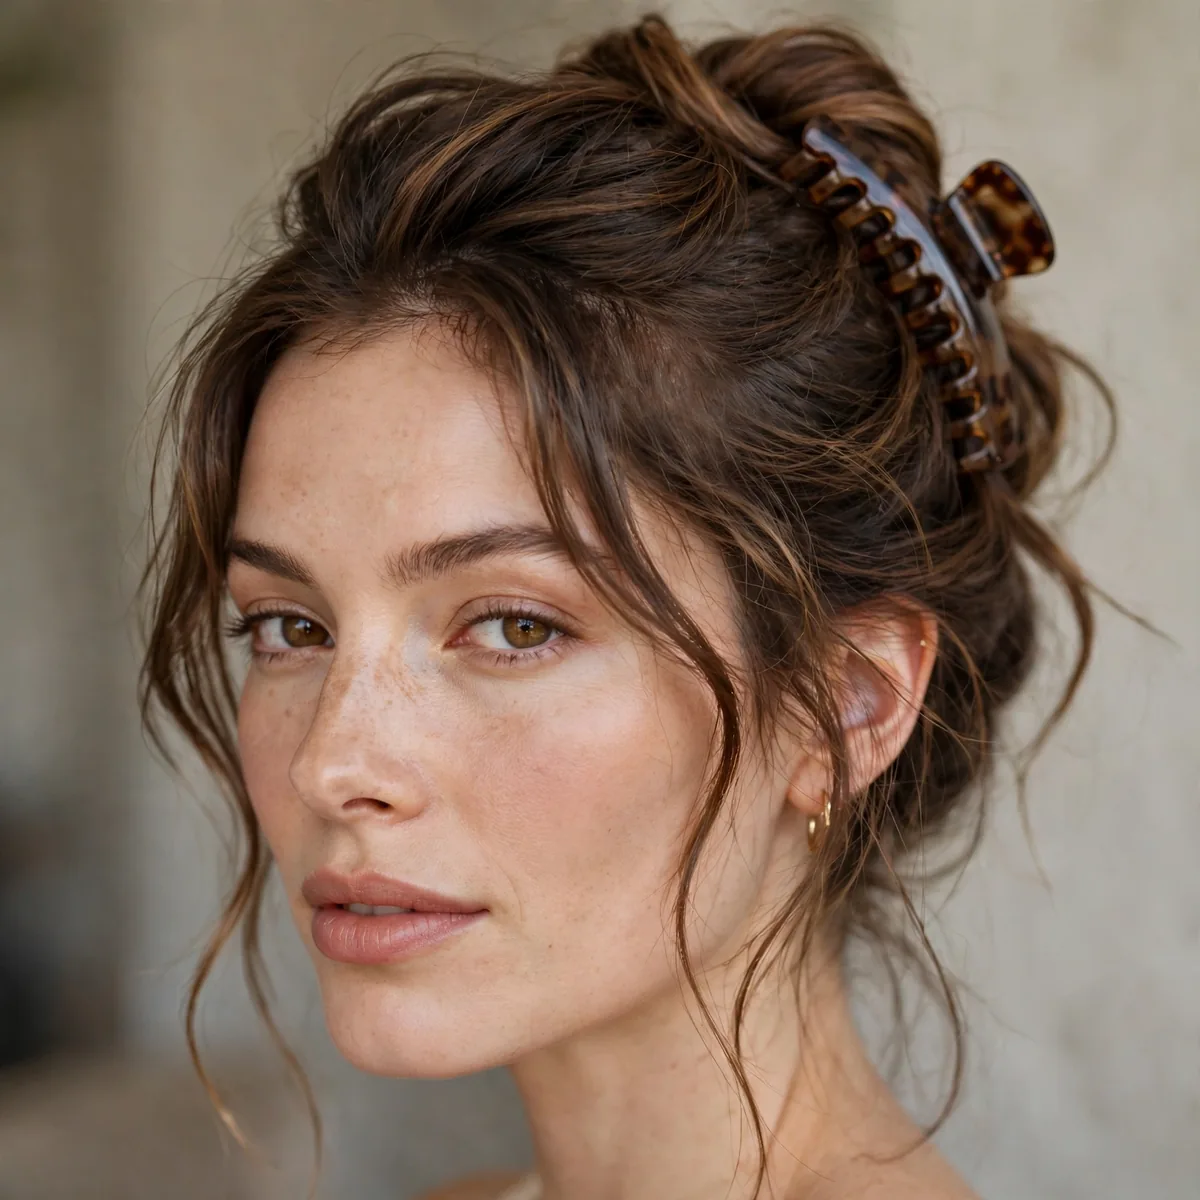
Twist everything up and clamp with a claw clip. The twist hides the roots, the clip adds polish, and the whole thing takes forty seconds.
Best for: the ultimate lazy-day rescue. Bigger clips hold thick or long hair better.
Consider the claw clip twist your secret weapon for weddings. It photographs beautifully from every angle, holds up through long events, and looks intentional without seeming overdone. Prep with heat protectant for extra staying power when you cannot sneak away for touch-ups, and stash two bobby pins in your bag for insurance. A style you do not have to think about is a style that lets you enjoy the occasion.
The claw clip twist is a template, not a rule — customize it. Adding a subtle accessory, changing the height or placement, or combining it with a second technique (a twist here, a braid there) makes it yours. A rattail comb helps you experiment with precision, and styling cream keeps experimental versions wearable rather than messy. Some of the best variations happen by accident, so give yourself permission to improvise.
Braided Headband
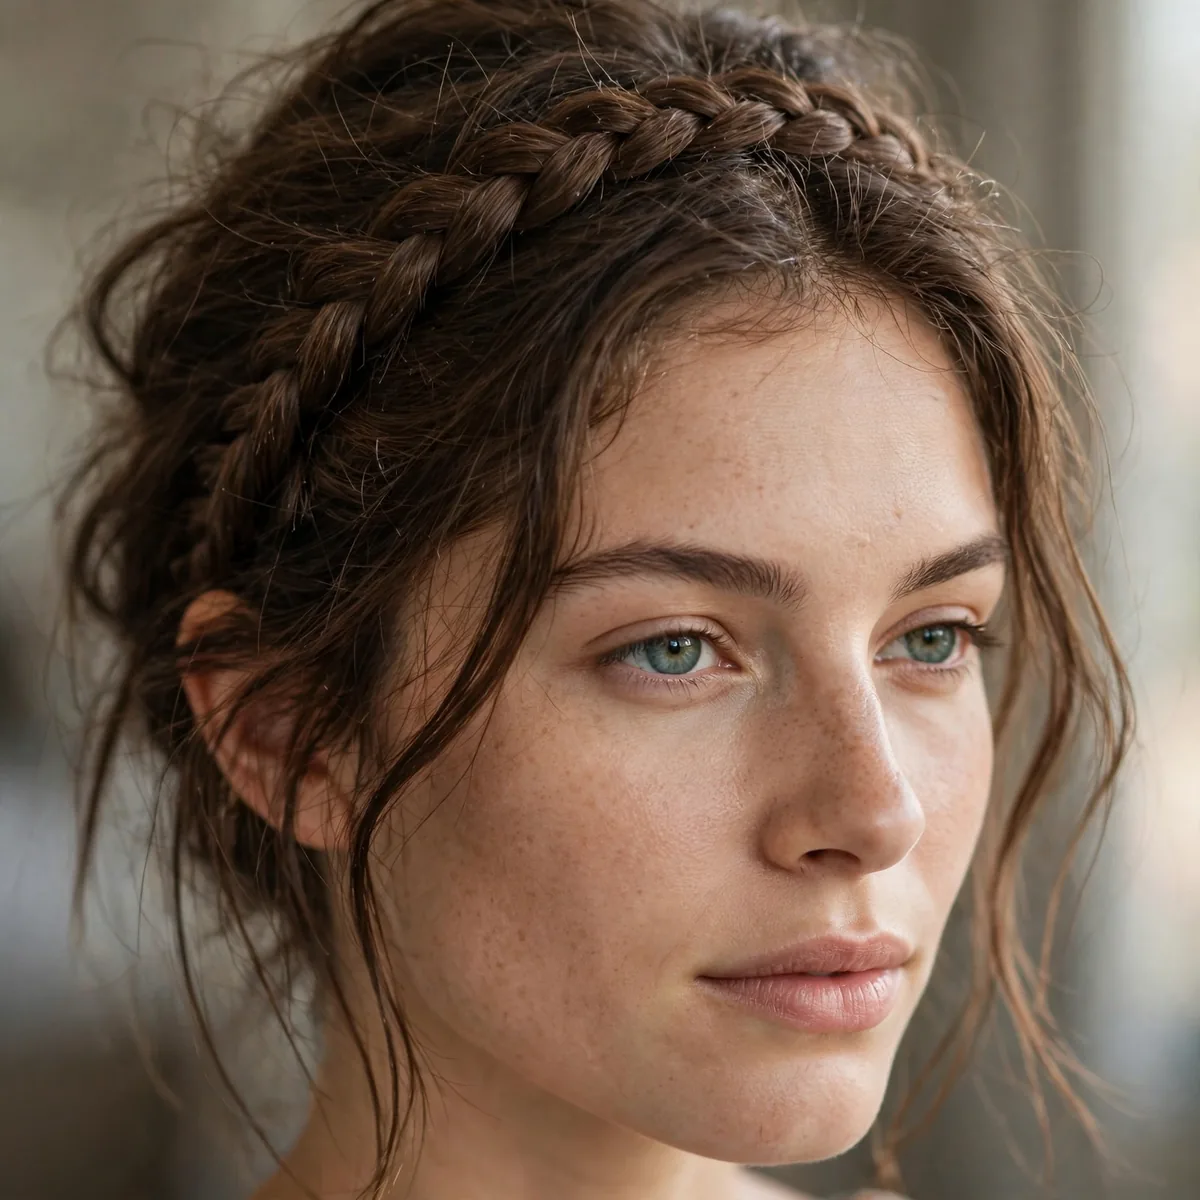
A braid worked along the hairline pulls oily front sections back and disguises the greasiest zone — the hairline and part.
Best for: when the front is oily but the lengths are fine. Leave the rest down and wavy.
When a braided headband falls flat within hours, the culprit is almost always skipped prep or overloaded product. Strip it back: clean sections, a modest amount of sea-salt spray, and a spray bottle for precision. Another frequent issue is building the style on the wrong foundation — too-clean hair slips, too-dirty hair looks dull. Day-old hair is the sweet spot for most versions of this look.
Balance is the key to wearing a braided headband well. If the style has a lot of volume, keep the front relatively calm; if the silhouette is sleek, a little texture around the face prevents severity. square faces particularly benefit from this push-and-pull approach. Finish the hairline with styling cream on a wide-tooth comb for a polished edge that still looks touchable. Proportion awareness turns a good style into a great one.
Top Knot
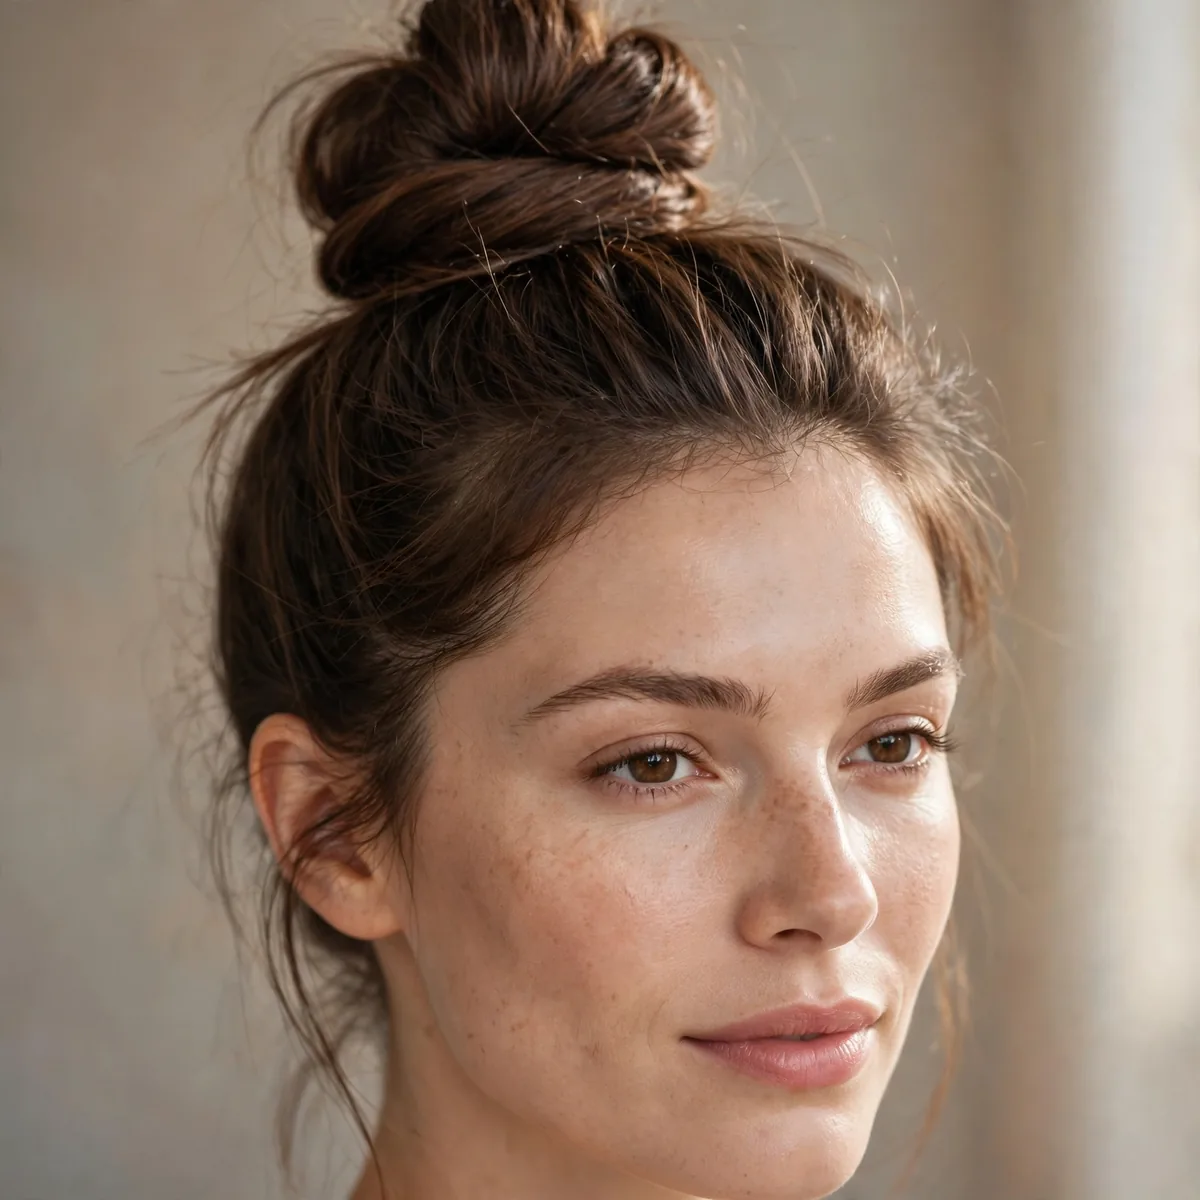
The highest bun you can manage, slightly messy on top and sleek at the sides. Gets every oily strand off your face and neck.
Best for: hot days and busy schedules. It’s the “I have my life together” illusion.
The foundation of a lasting top knot is laid before the styling even starts. Rough-dry or air-dry the hair first, then use a diffuser attachment to map out clean sections so every part of the style has a defined place to live. Work a touch of argan oil through the mid-lengths to control flyaways without stiffness. Checking the back with a hand mirror as you go catches the uneven spots you would otherwise discover in photos.
The right products make a top knot dramatically easier to execute. A volumizing powder is the real workhorse — it adds grip, calms frizz, and helps the style hold for hours without visible residue. Work it through before you begin styling rather than layering it on at the end, so it supports the hair's structure from the inside. A light mist to finish keeps everything touchable instead of crunchy.
Side Braid
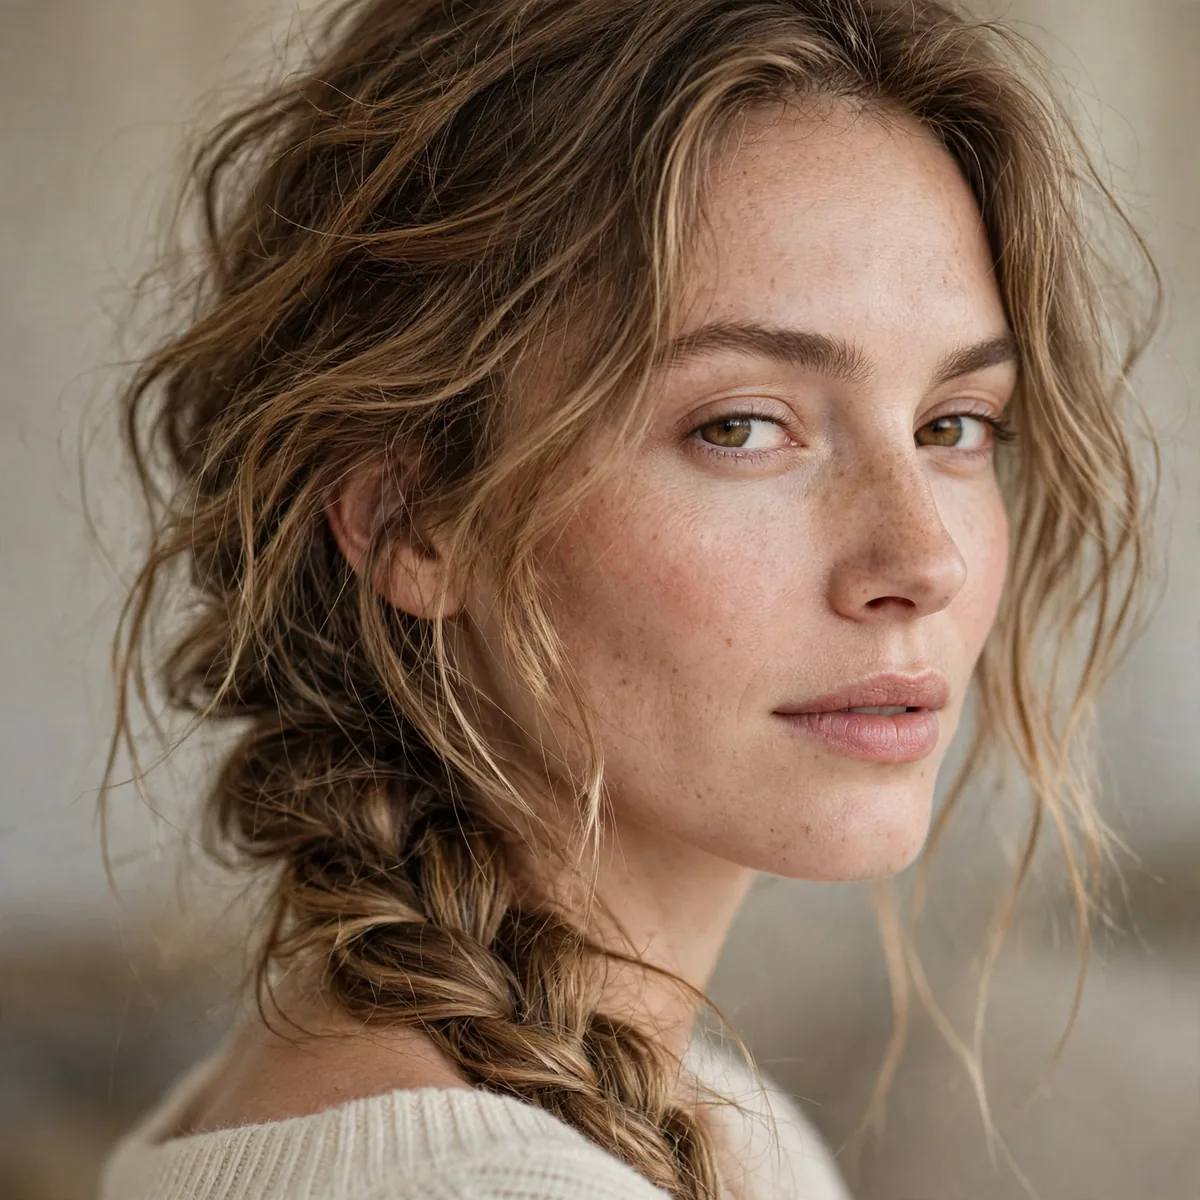
Sweep everything over one shoulder into a loose braid. Side placement keeps oily roots less visible than a centered style.
Best for: casual days. Pancake the braid for volume that distracts from the roots.
Your density changes how a side braid behaves, so calibrate the approach. Thick hair needs more numerous, smaller sections to stay controlled, while fine hair does better with fewer sections plus argan oil at the roots for the illusion of fullness. Naturally curly hair often holds the style longest since the bend grips itself. Whatever your density, step back and check the balance — the silhouette should feel even, never heavy on one side.
To make your side braid last beyond day one, nighttime protection is everything. Pineapple the hair or wrap it in a silk scarf before bed, and sleep on a satin pillowcase to cut down on friction that roughs up the style. In the morning, revive the roots with a burst of volumizing powder and smooth the surface with your palms. Most versions of this style look even better on day two once the pieces have relaxed naturally.
Half-Up Top Knot
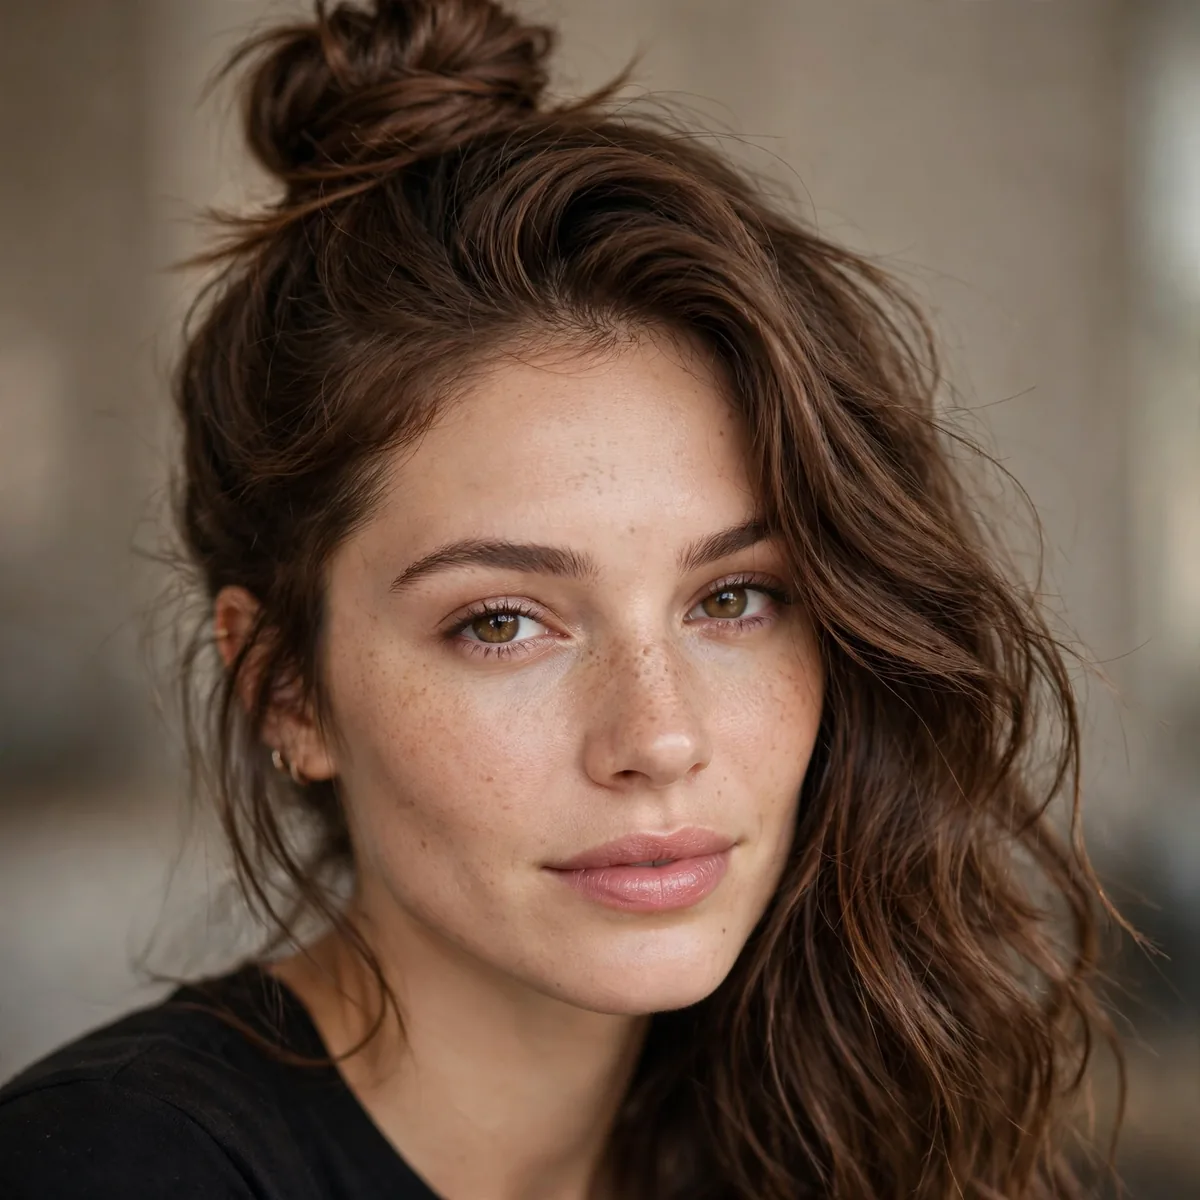
Only the greasy top section goes into the knot; the cleaner lengths stay down. Strategic and cute — the top knot hides the worst of it.
Best for: when roots are oily but ends still look fresh.
The half-up top knot earns its place as a go-to for job interviews because it balances polish with personality. For daytime versions, keep the finish soft and touchable; for evening, sharpen the details — sleeker roots, more defined pieces, a glossier finish. A leave-in conditioner helps the style transition from desk to dinner without a full redo. It is the kind of versatile look that justifies the ten minutes it takes to perfect.
If the standard half-up top knot feels too expected, push one element further. More volume at the crown, a sleeker finish through the lengths, an asymmetrical placement — exaggerating a single feature creates a signature version. Use flexible-hold hairspray to support whichever direction you take it, since bolder shapes need more structural help. The goal is not a different style; it is your unmistakable take on this one.
Low Chignon
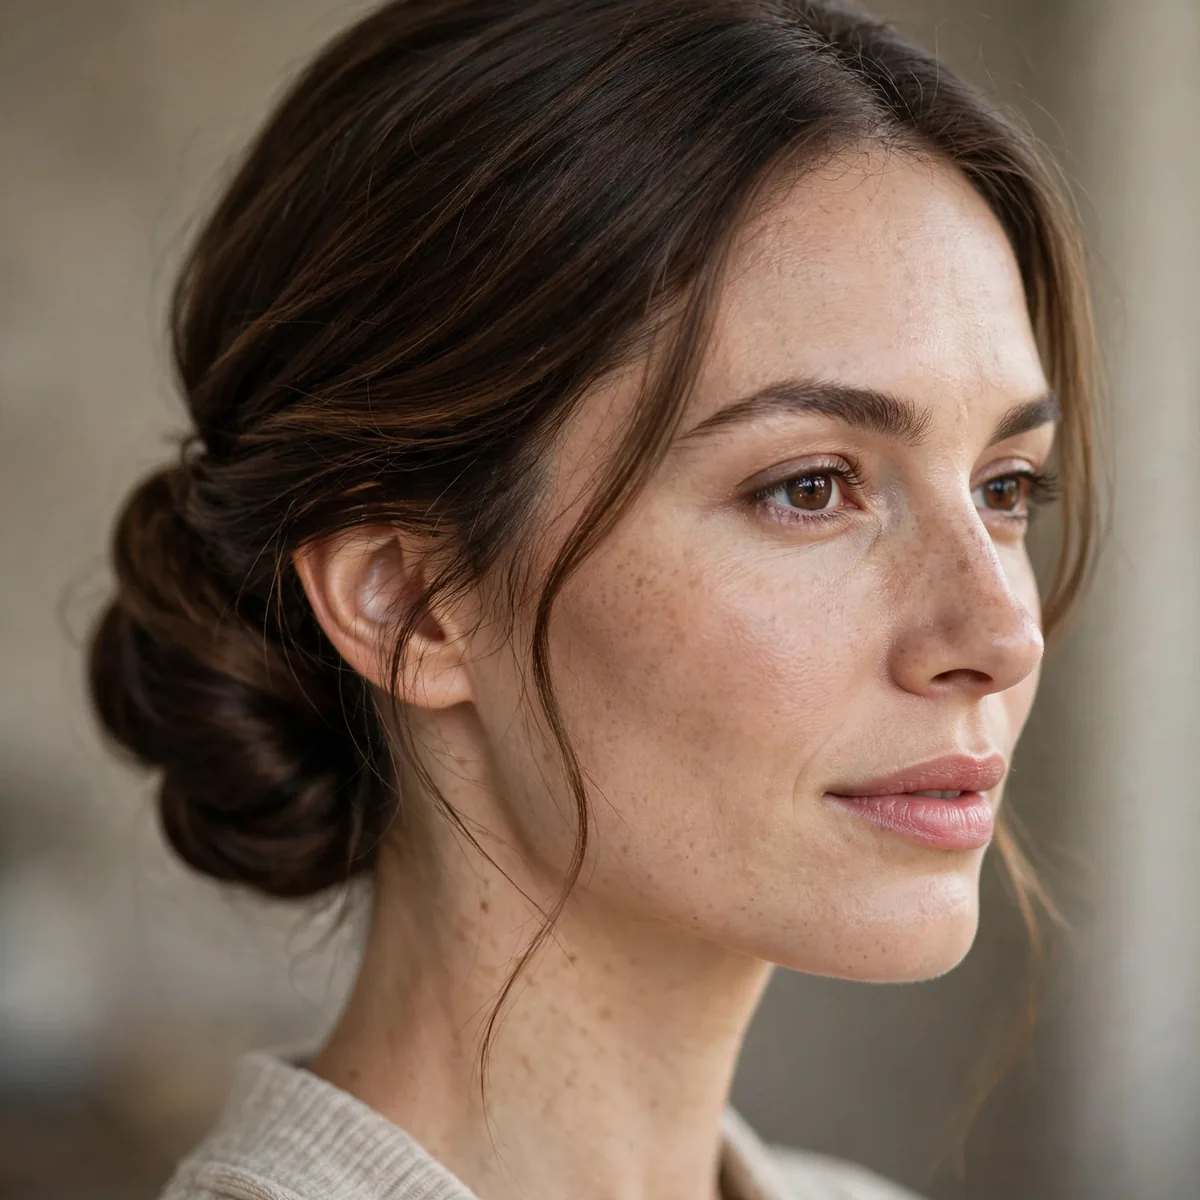
Twist hair into a low, slightly messy chignon at the nape. The rolled shape tucks oily roots away while looking effortlessly French.
Best for: dinners and events. A few bobby pins and you’re done.
The most common low chignon mistake is working against the hair instead of with it — forcing sleekness on air-dried texture or volume on pin-straight lengths without prep. If the style fights you, stop and add flexible-hold hairspray or switch tools; a round brush often solves what fingers cannot. Tension issues cause most failures: too tight looks severe and causes breakage, too loose unravels. Aim for secure but comfortable, and the style will cooperate.
A Low chignon becomes truly flattering when it is tuned to your face shape. Softer, round faces benefit from height at the crown and pieces that fall vertically, while longer faces look best with width at the sides. Use a spray bottle to direct the front sections intentionally rather than letting them fall randomly. These small directional choices separate a style that suits you from one that just sits on you.
Space Buns
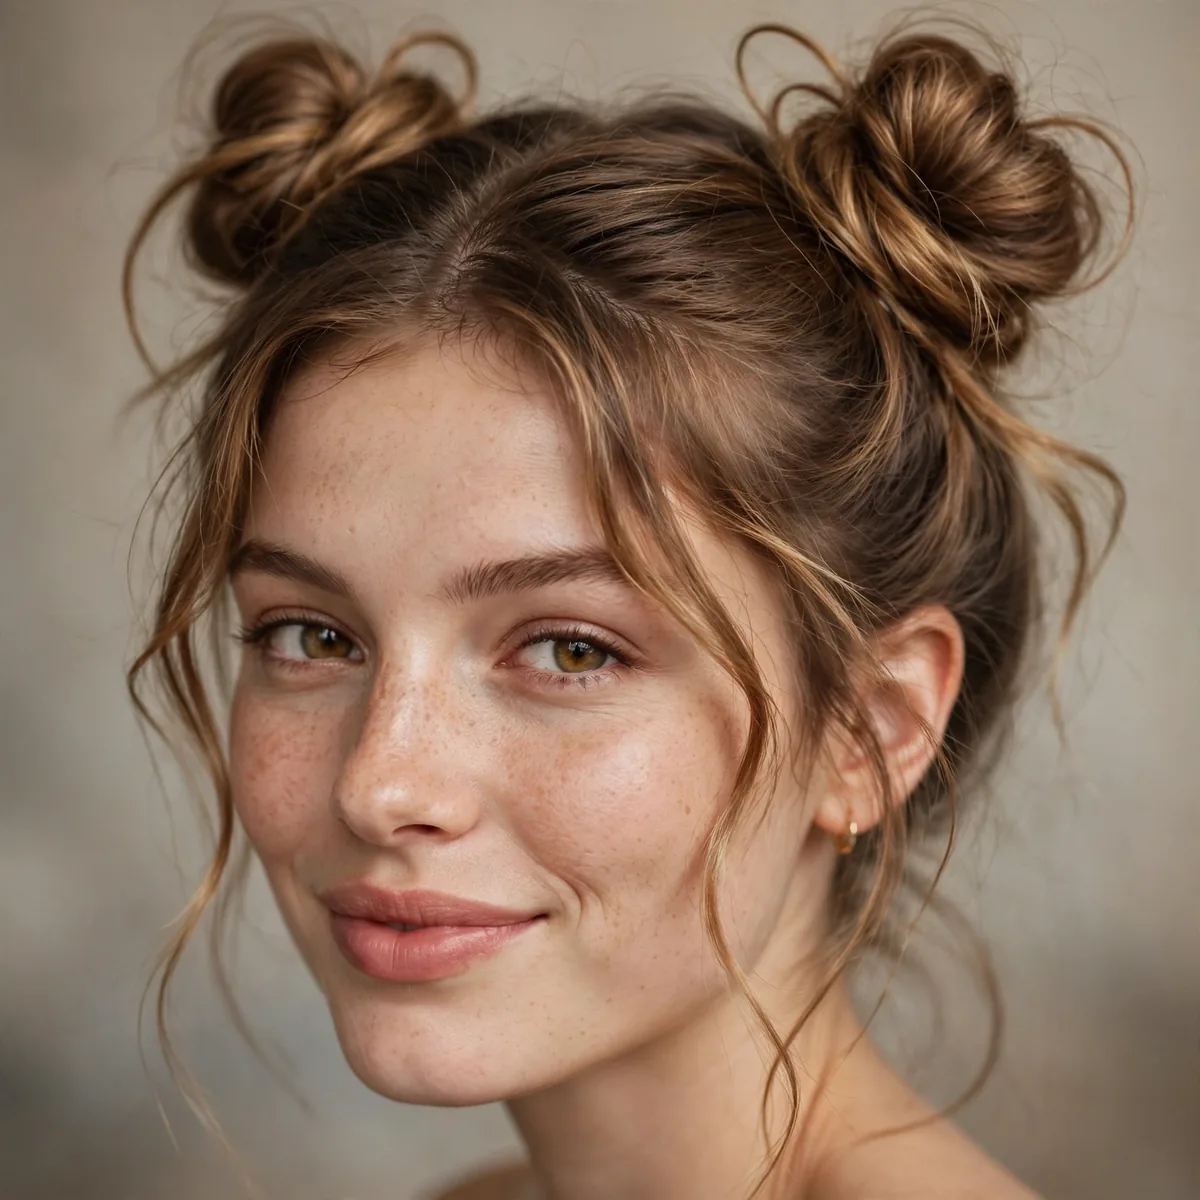
Two high buns that use up all the hair and hide all the roots. Playful enough that nobody’s inspecting your scalp.
Best for: weekends and festivals. Slightly messy buns look better than perfect ones here.
The foundation of a lasting space buns is laid before the styling even starts. Rough-dry or air-dry the hair first, then use a duckbill clip to map out clean sections so every part of the style has a defined place to live. Work a touch of dry shampoo through the mid-lengths to control flyaways without stiffness. Checking the back with a hand mirror as you go catches the uneven spots you would otherwise discover in photos.
Invest in the tools and your space buns gets twice as good with half the effort. A paddle brush gives you the control that fingers alone cannot, especially for crisp partings and smooth roots. Pair it with a sea-salt spray suited to your curly texture — fine hair needs featherweight formulas while thicker hair can handle richer creams. Using products matched to your density is the difference between a style that holds and one that collapses.
French Twist
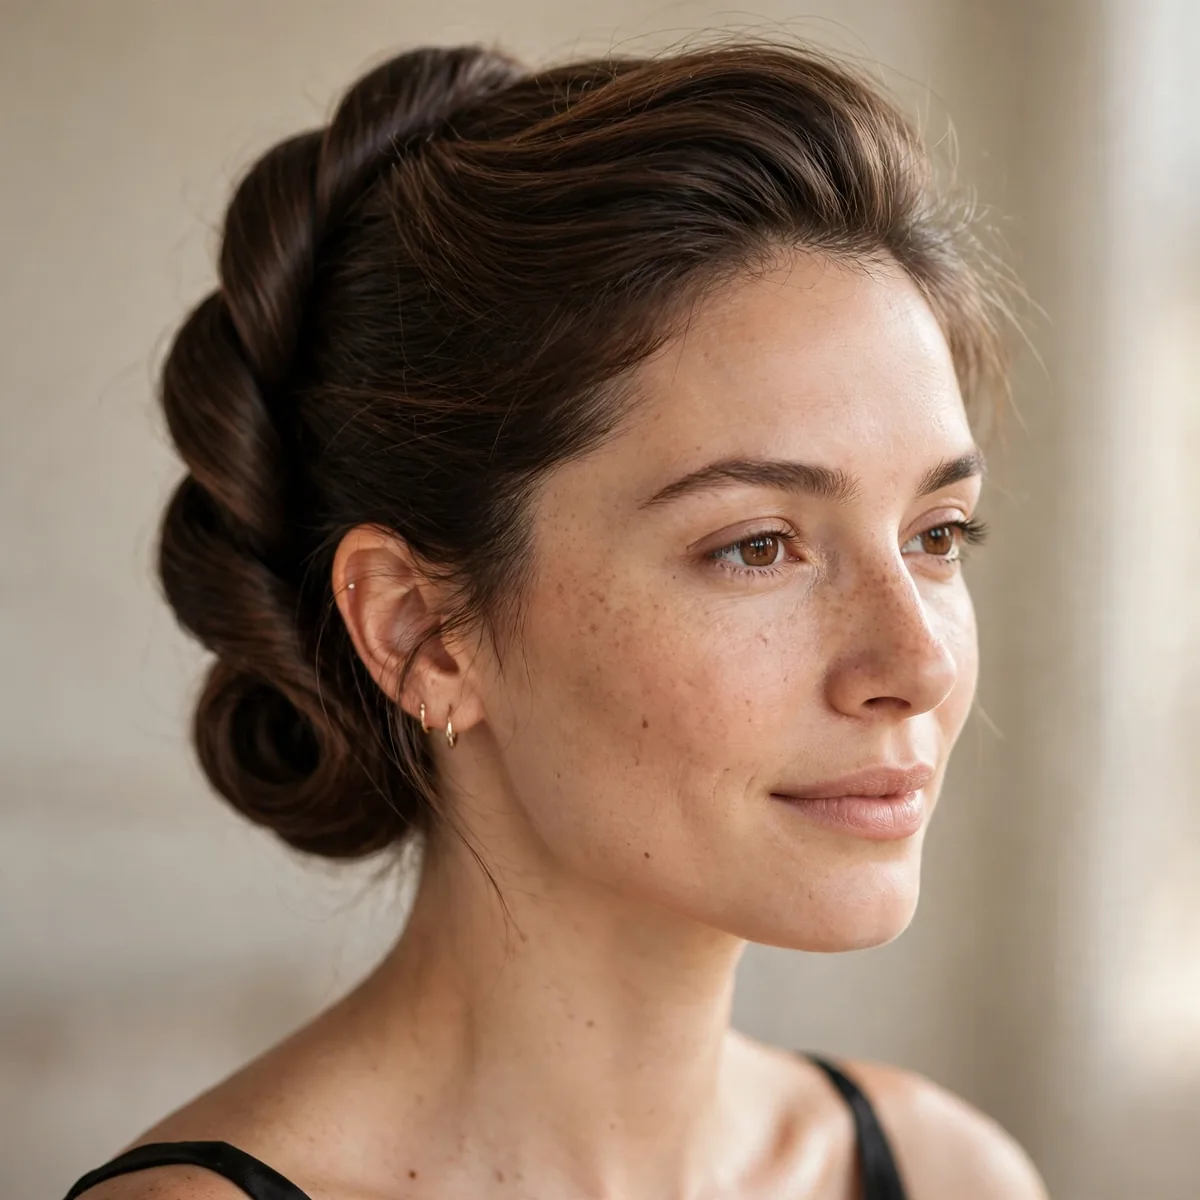
The vintage classic rolls all the hair up into a sleek vertical twist. Every oily root disappears inside the roll.
Best for: formal occasions. It’s the most elegant way to fake freshly washed hair.
Length and texture together determine how a french twist falls. Longer, medium-density lengths give the style beautiful movement, while shorter lengths create a perkier, more graphic version — both are valid. If your hair is very silky, edge control is non-negotiable for hold; if it is prone to frizz, smooth a serum over the surface as the final step. The same style can look soft or structured depending on these small prep choices.
Extend the life of your french twist with smart day-two tactics. Sleep with the hair loosely secured rather than tight, which prevents dents and kinks from setting in. In the morning, spot-fix only the sections that actually need it using a wide-tooth comb, and revive flat roots with dry shampoo massaged in at the scalp. Knowing which parts of a style age fastest — usually the front — lets you refresh strategically instead of starting over.
Scarf-Wrapped Ponytail
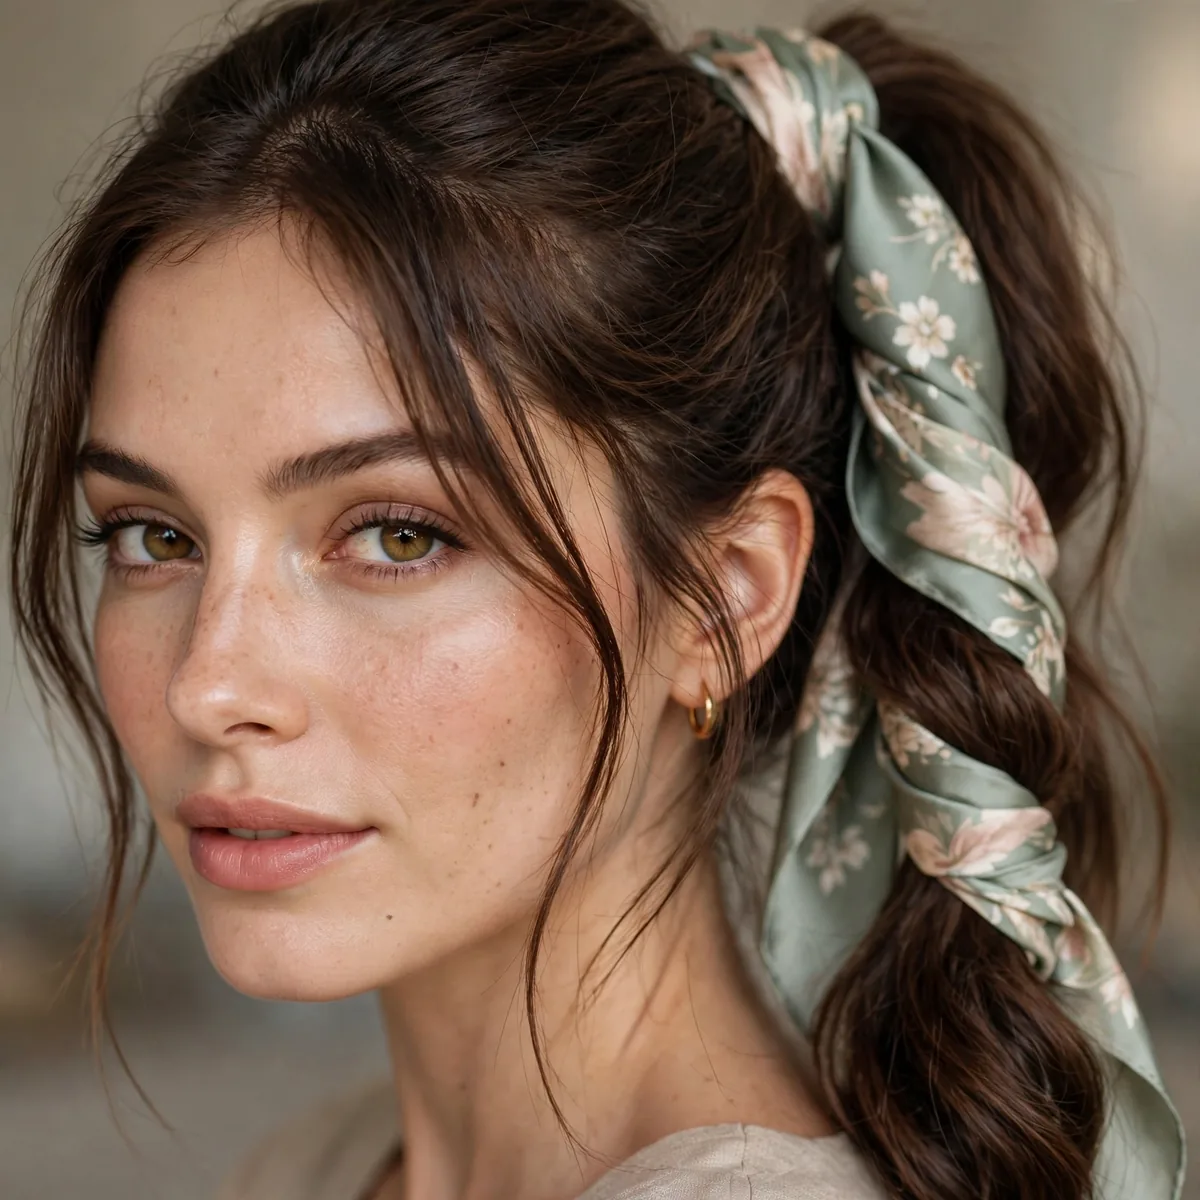
Tie a silk scarf around a ponytail base or as a headband. The scarf covers the oiliest areas while adding a chic accessory moment.
Best for: when dry shampoo isn’t cutting it. The scarf does the hiding and the styling at once.
Dress the scarf-wrapped ponytail up or down with small finishing choices. For casual weddings, leave the texture a little undone and skip the strong-hold products; for formal moments, smooth everything with a paddle brush and lock it with texturizing spray. Accessories — a silk scarf, minimal pins, a headband — shift the mood instantly without changing the base style. One good foundation, endless interpretations.
Layer the scarf-wrapped ponytail with complementary details for extra dimension. Face-framing layers, a softened hairline, or a contrasting texture at the ends all add interest without complicating the style. A curling wand refines these details, while styling cream keeps them defined through the day. Think of the base style as the canvas and these small additions as the brushstrokes that make it personal.
Bandana Updo
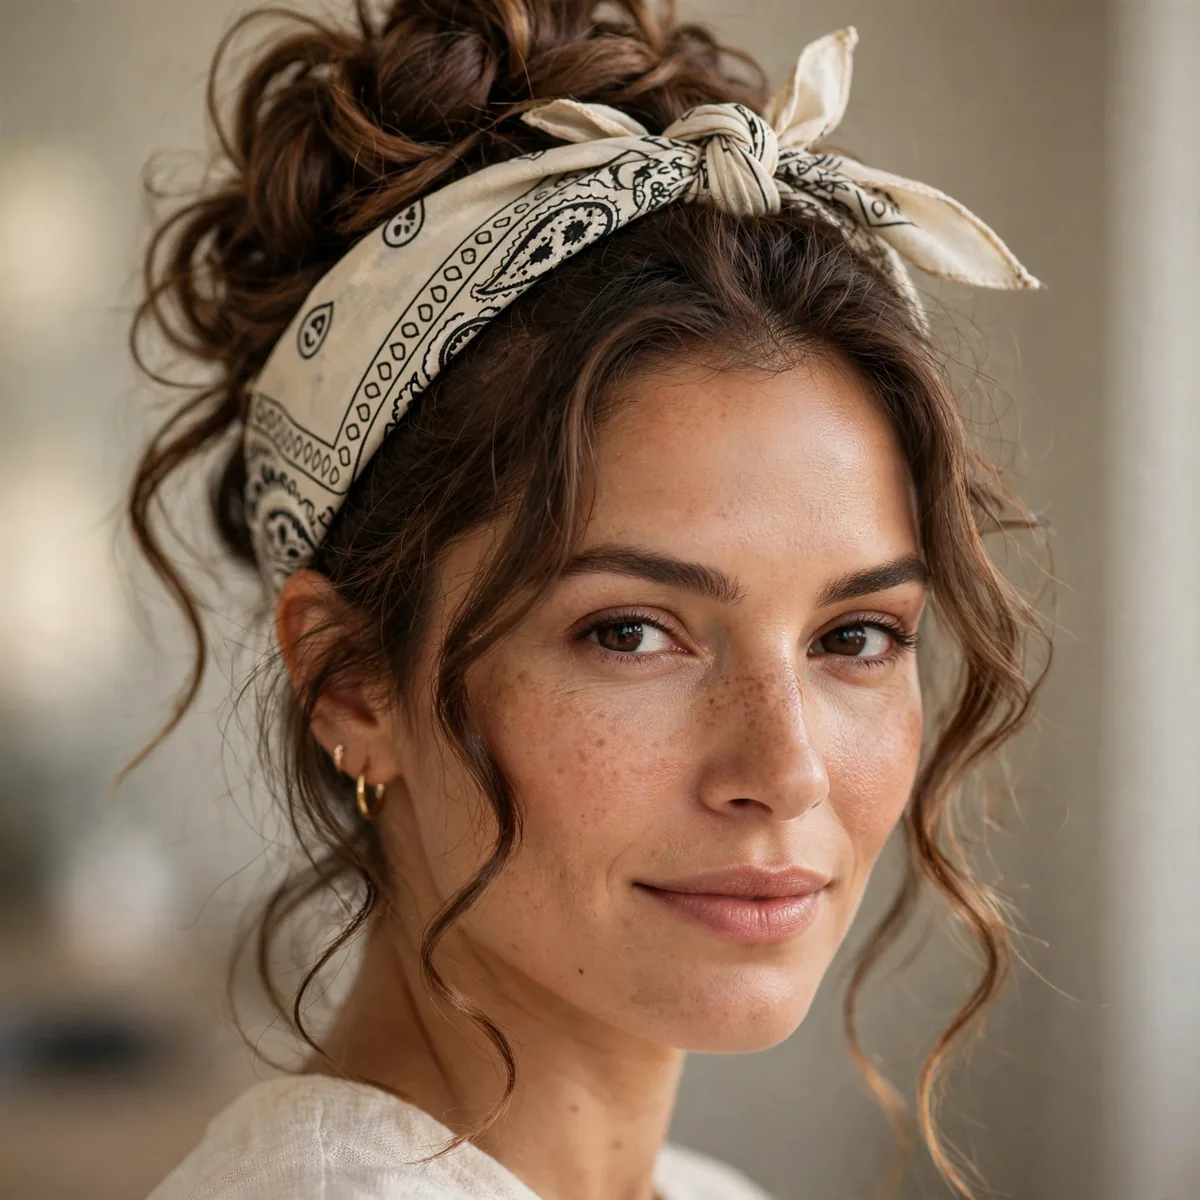
Fold a bandana into a band and tie it around your head, tucking hair up into it. Retro, cute, and total root camouflage.
Best for: bad-hair-day emergencies. It’s basically a cute hat you can wear indoors.
Frizz ambushing your bandana updo usually means the hair needed more moisture before styling, not more hold afterward. Next time, layer a hydrating base under your texturizing spray and smooth the cuticle with a round brush while the hair is still slightly damp. If flyaways appear midday, do not pile on more product — smooth them with barely-damp palms instead. Adding product on top of frizz just creates buildup that attracts more frizz.
A Bandana updo becomes truly flattering when it is tuned to your face shape. Softer, round faces benefit from height at the crown and pieces that fall vertically, while longer faces look best with width at the sides. Use a rattail comb to direct the front sections intentionally rather than letting them fall randomly. These small directional choices separate a style that suits you from one that just sits on you.
Zigzag Part with Low Pony
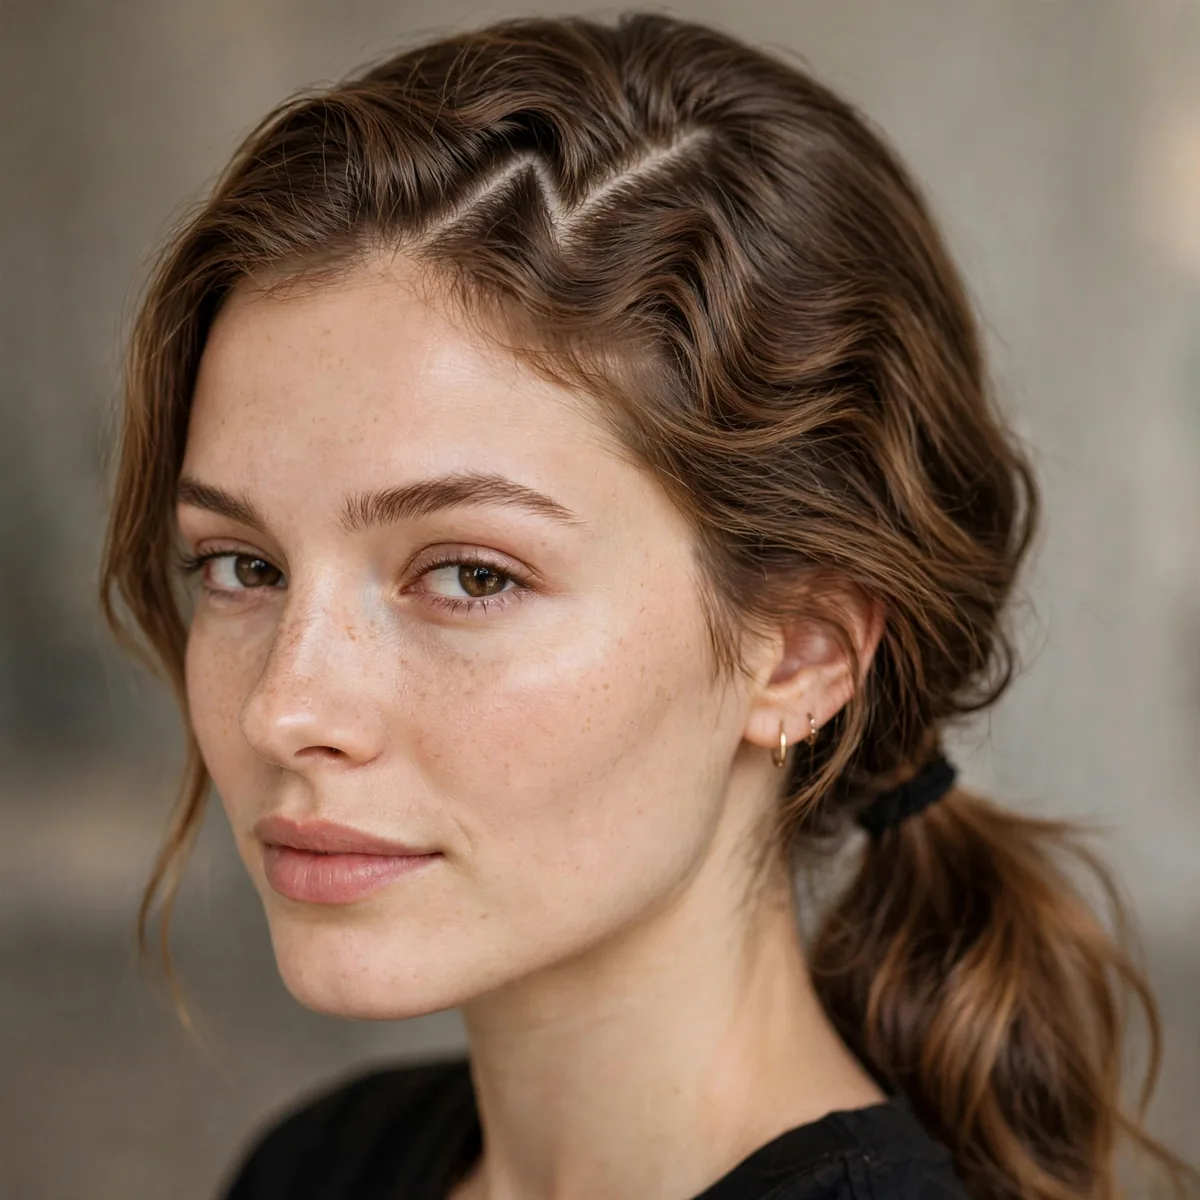
A zigzag part breaks up the oily-root line that a straight part reveals, and the low pony keeps everything neat. Simple optical illusion, big payoff.
Best for: straight hair where oily parts show most. Use the tail of a comb for a crisp zigzag.
Clean sectioning is what separates a polished zigzag part with low pony from one that gives up by lunch. Clip the crown away with a boar-bristle brush and build from the bottom layers upward, keeping partings crisp and tension even from roots to ends. A little smoothing serum smoothed through the lengths beforehand gives freshly washed or slippery hair the grip it needs. This unglamorous prep is exactly why salon work outlasts most DIY attempts.
If your zigzag part with low pony never looks quite like the inspiration photo, the missing piece is usually product. Start with a leave-in conditioner on damp or dry hair to create a workable base, then reach for a spray bottle to refine the details. Less is more with styling products; you can always add another pea-sized amount, but overloading leads to buildup that dulls shine. Build gradually and assess in natural light before deciding you need more.
Teased Crown Ponytail
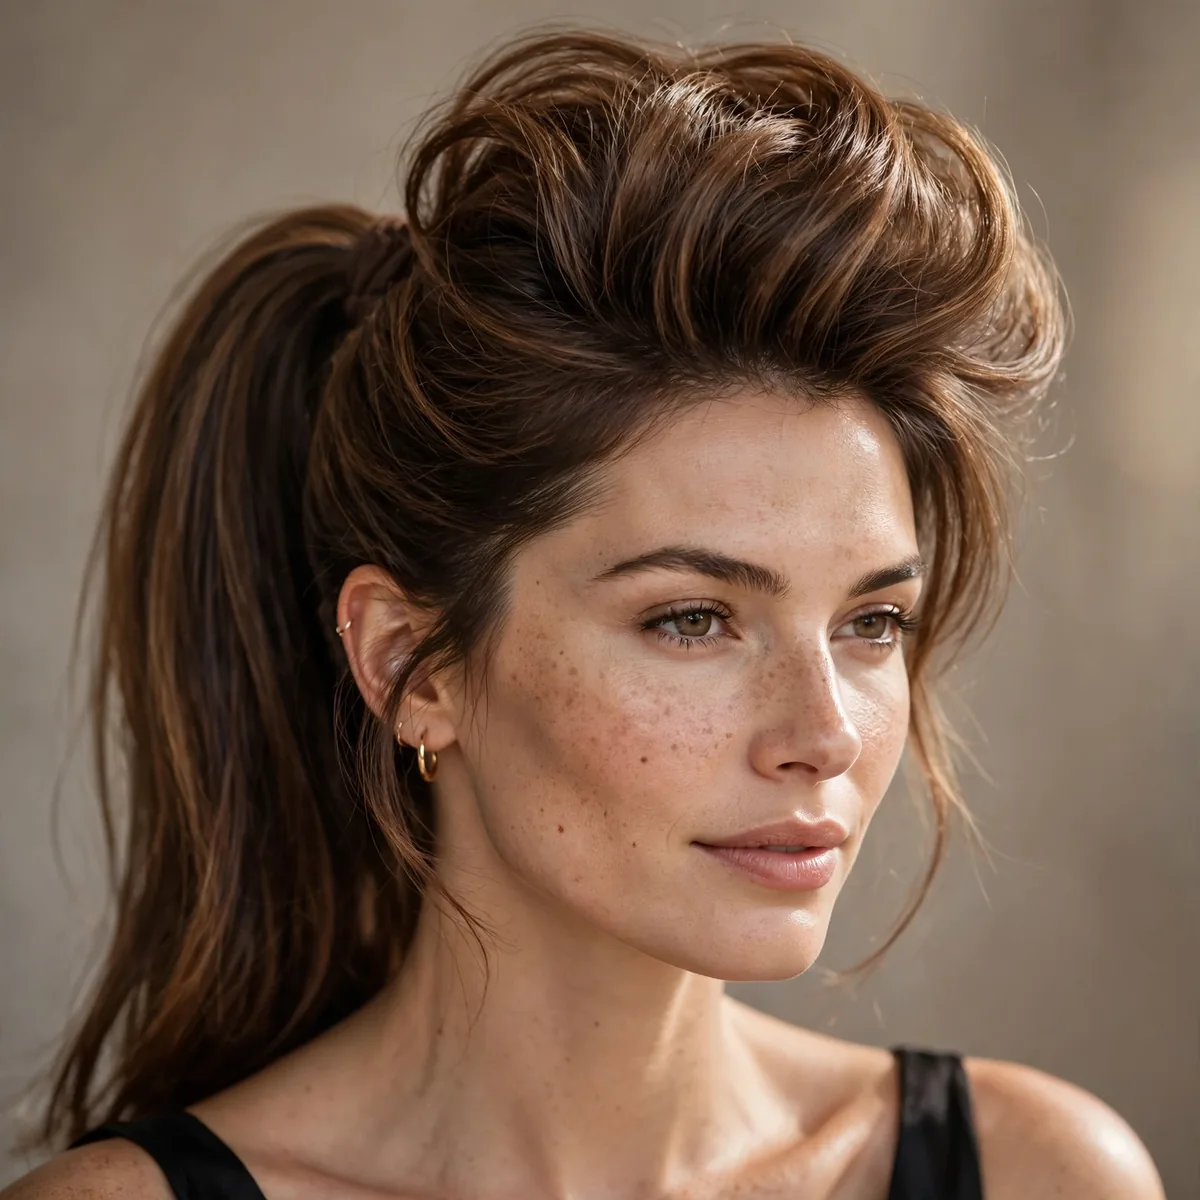
Tease the crown for lift, then smooth the top layer over and secure a pony. Volume disguises oil better than anything.
Best for: fine hair that goes flat and oily fast. The teasing creates a full day of coverage.
For straight hair, the teased crown ponytail is a natural fit — the style was practically designed around how this texture moves and holds. If your hair is straighter or curlier, prep is what bridges the gap: lightweight mousse adds the right kind of grip, and ten minutes with the appropriate heat tool rewrites the texture temporarily. Do not fight your natural pattern; instead, use prep to nudge it toward what the style needs.
To make your teased crown ponytail last beyond day one, nighttime protection is everything. Pineapple the hair or wrap it in a silk scarf before bed, and sleep on a satin pillowcase to cut down on friction that roughs up the style. In the morning, revive the roots with a burst of edge control and smooth the surface with your palms. Most versions of this style look even better on day two once the pieces have relaxed naturally.
Fishtail Side Braid
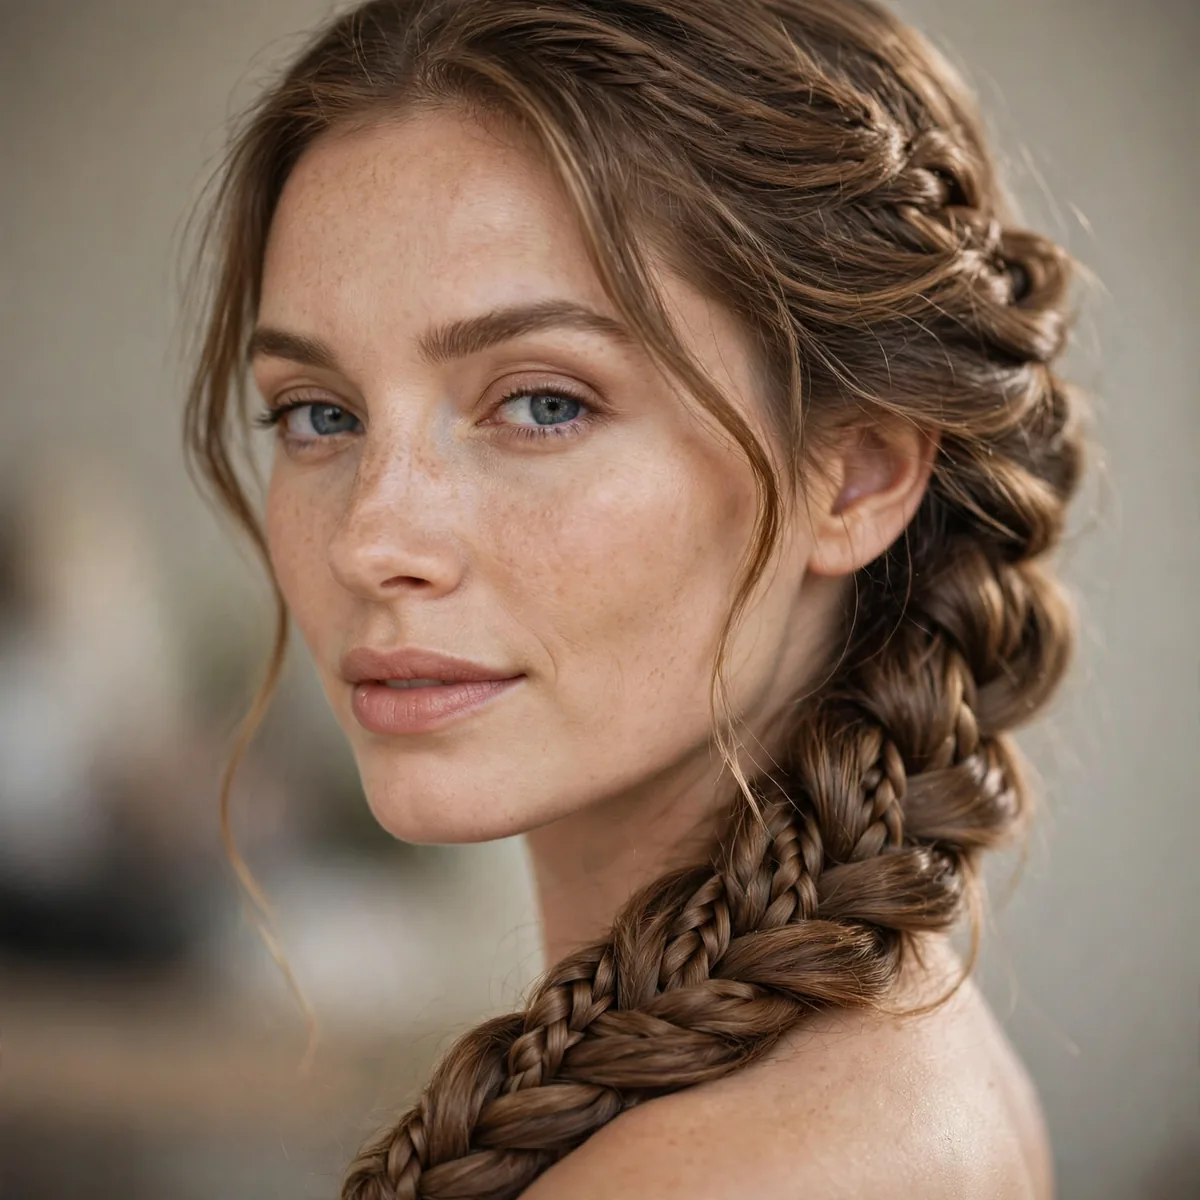
A textured fishtail over one shoulder — the intricate stitching hides roots while looking deliberately detailed. Learn the technique in our fishtail braid hairstyles for beginners.
Best for: when you have ten minutes and want to look like you tried.
Consider the fishtail side braid your secret weapon for holiday parties. It photographs beautifully from every angle, holds up through long events, and looks intentional without seeming overdone. Prep with styling cream for extra staying power when you cannot sneak away for touch-ups, and stash two bobby pins in your bag for insurance. A style you do not have to think about is a style that lets you enjoy the occasion.
The fishtail side braid is a template, not a rule — customize it. Adding a subtle accessory, changing the height or placement, or combining it with a second technique (a twist here, a braid there) makes it yours. A wide-tooth comb helps you experiment with precision, and leave-in conditioner keeps experimental versions wearable rather than messy. Some of the best variations happen by accident, so give yourself permission to improvise.
Braided Crown
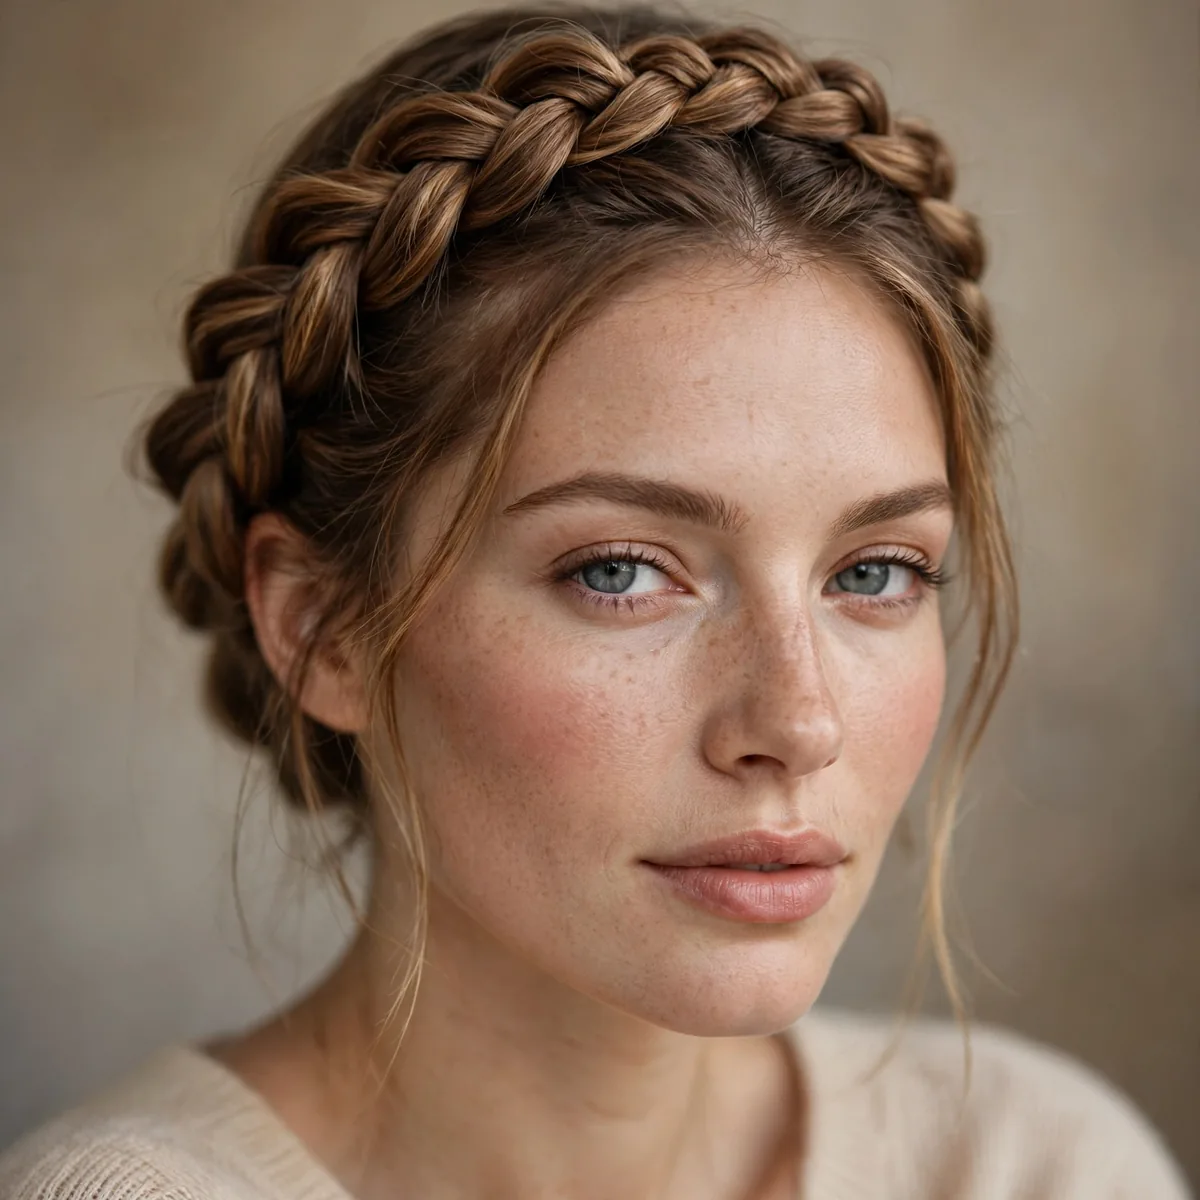
A braid wrapped around the head like a crown uses up the oiliest front sections and leaves the rest artfully tucked. Nothing escapes, nothing shows.
Best for: all-day events. Once pinned, it doesn’t move.
Frizz ambushing your braided crown usually means the hair needed more moisture before styling, not more hold afterward. Next time, layer a hydrating base under your dry shampoo and smooth the cuticle with a teasing comb while the hair is still slightly damp. If flyaways appear midday, do not pile on more product — smooth them with barely-damp palms instead. Adding product on top of frizz just creates buildup that attracts more frizz.
Personalize the braided crown at the hairline and watch it transform. Baby hairs laid with sea-salt spray, a softly undone front, or a crisp center part each tell a different story on square face shapes. There is no single right answer — the best choice is the one that makes you feel like yourself. Experiment in front of the mirror with a microfiber towel handy, and photograph each version; the camera reveals what the mirror hides.
Low Bubble Ponytail
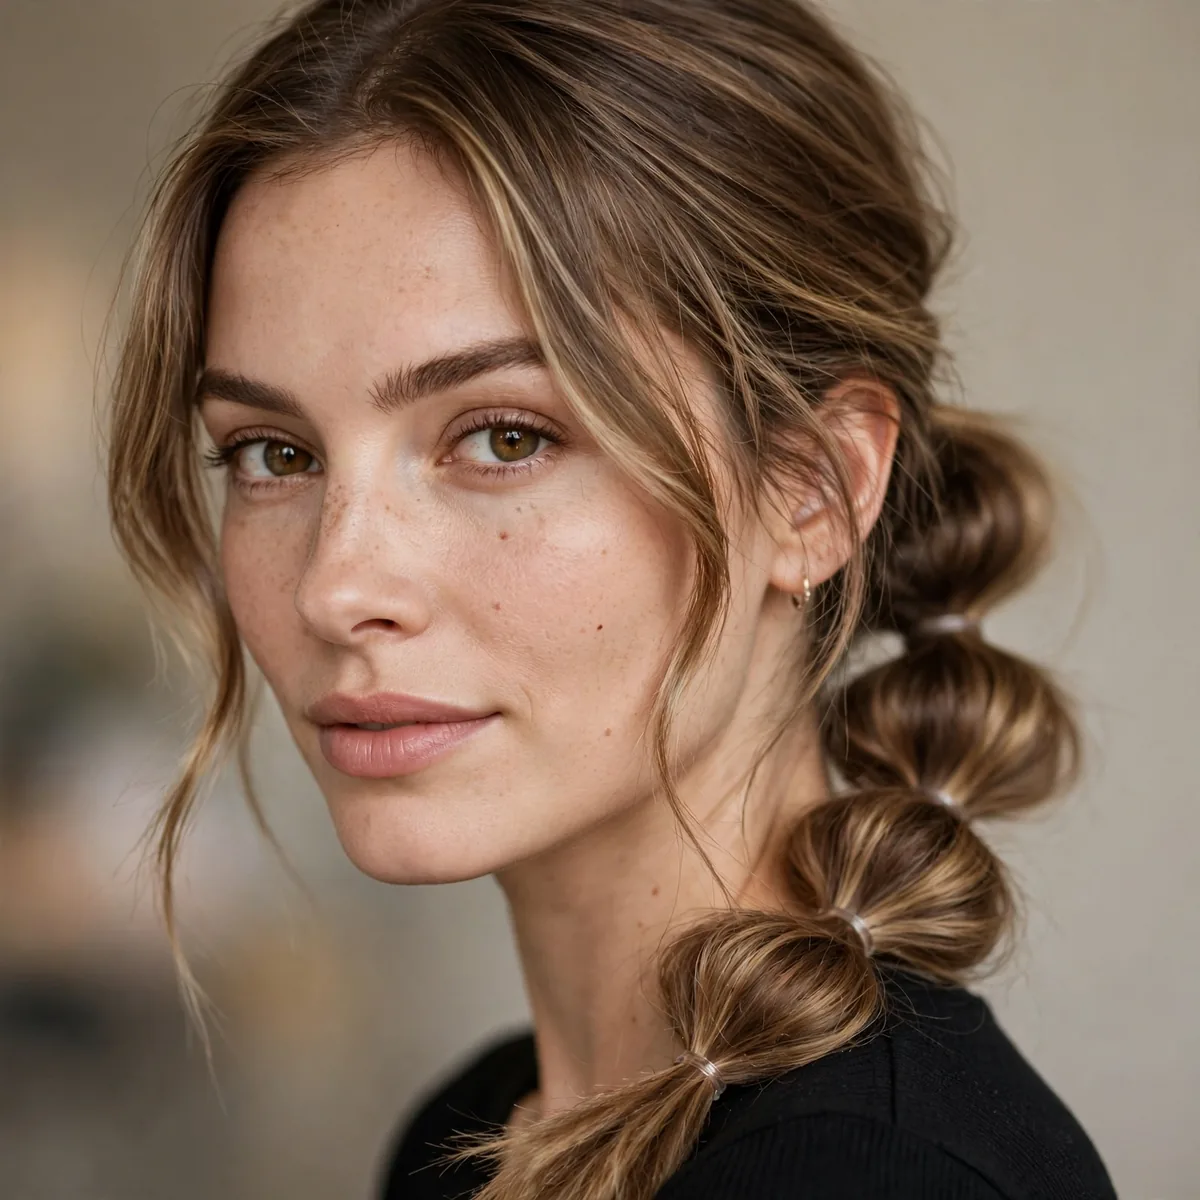
A low pony with bubble sections — the bubbles add playful volume that draws the eye down and away from the roots.
Best for: casual days when a plain pony feels too “gave up.” The bubbles say otherwise.
Do not skip the setup when creating a low bubble ponytail — it determines everything. Detangle thoroughly with a spray bottle, then section the hair according to where the style needs the most structure. A light layer of smoothing serum adds workable grip, especially on straight hair that tends to slip or puff. Taking five extra minutes at this stage saves twenty minutes of fixing and re-pinning later in the day.
If your low bubble ponytail never looks quite like the inspiration photo, the missing piece is usually product. Start with an edge control on damp or dry hair to create a workable base, then reach for a rattail comb to refine the details. Less is more with styling products; you can always add another pea-sized amount, but overloading leads to buildup that dulls shine. Build gradually and assess in natural light before deciding you need more.
Slicked-Back with Headband
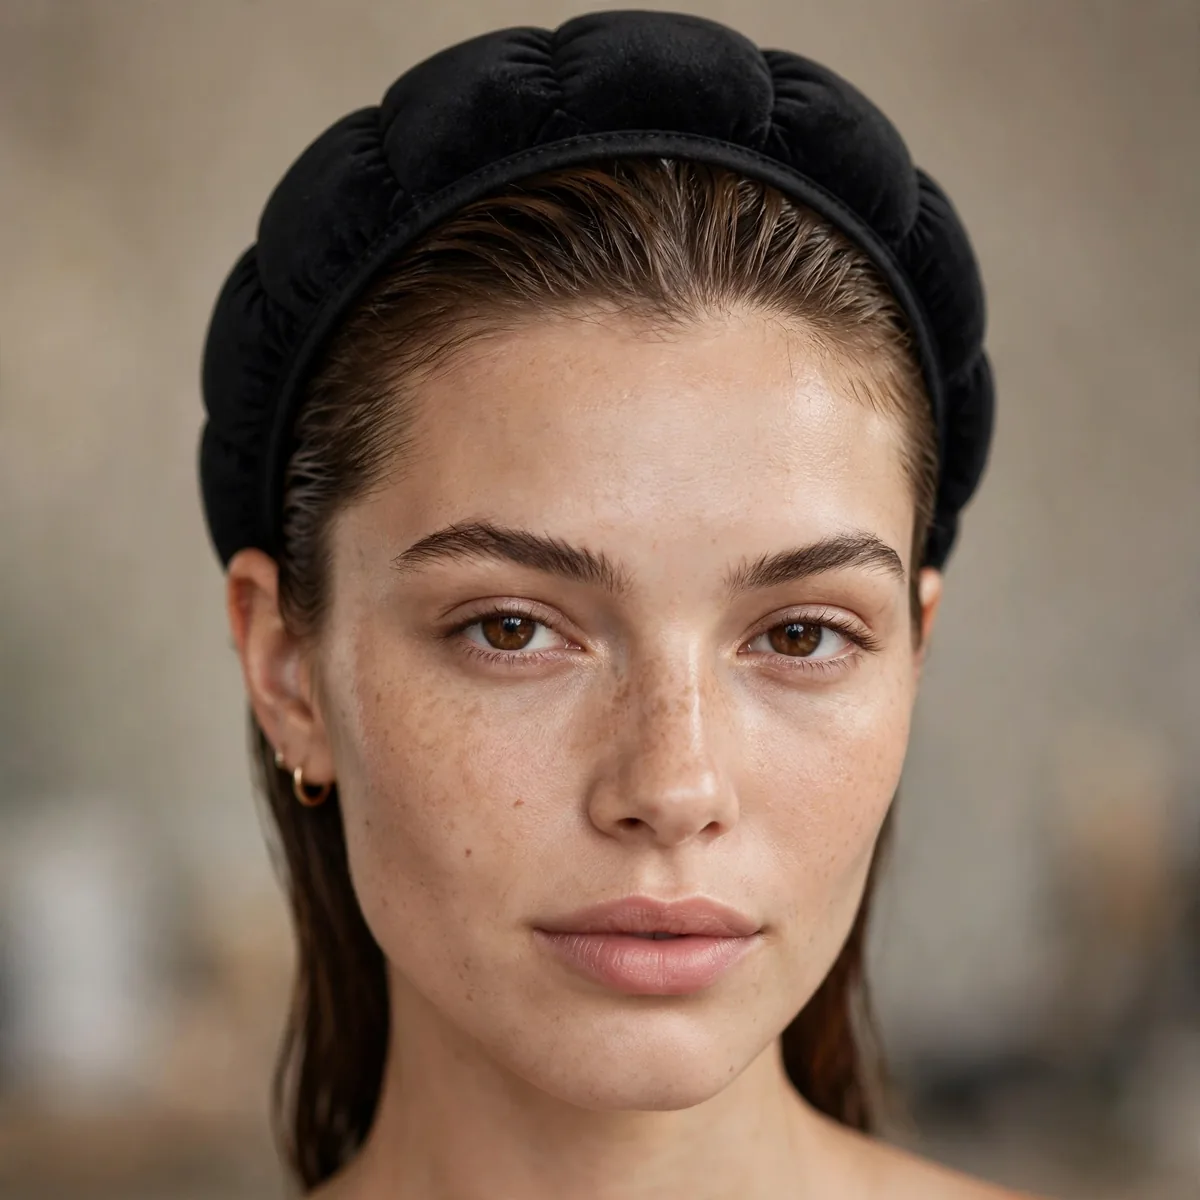
Brush everything back sleek and add a padded headband. The headband covers the hairline — the oiliest real estate — while the sleek look feels intentional.
Best for: the oiliest day-three hair. Velvet or satin headbands look most expensive.
For fine hair, the slicked-back with headband is a natural fit — the style was practically designed around how this texture moves and holds. If your hair is straighter or curlier, prep is what bridges the gap: heat protectant adds the right kind of grip, and ten minutes with the appropriate heat tool rewrites the texture temporarily. Do not fight your natural pattern; instead, use prep to nudge it toward what the style needs.
Refresh rather than redo when your slicked-back with headband starts to tire. A light mist of water followed by sea-salt spray reactivates the shape without a full restyle, and a spray bottle can neaten partings in seconds. Focus revival efforts on the hairline and crown — that is where styles visibly age first. Tucking one loose piece behind the ear or adding an accessory can disguise day-two softness while looking completely intentional.
Wash day is officially optional. Pin your favorite rescues — and for styles that keep you covered at the gym too, see our gym hairstyles that stay put.